|
PHOTO-of-the-MONTH
An ongoing series featuring a recent photo, together with a brief essay on its making.
Click on any image to download a full-resolution jpg.
|
https://parkerlab.bio.uci.edu/teaching/teaching_funct
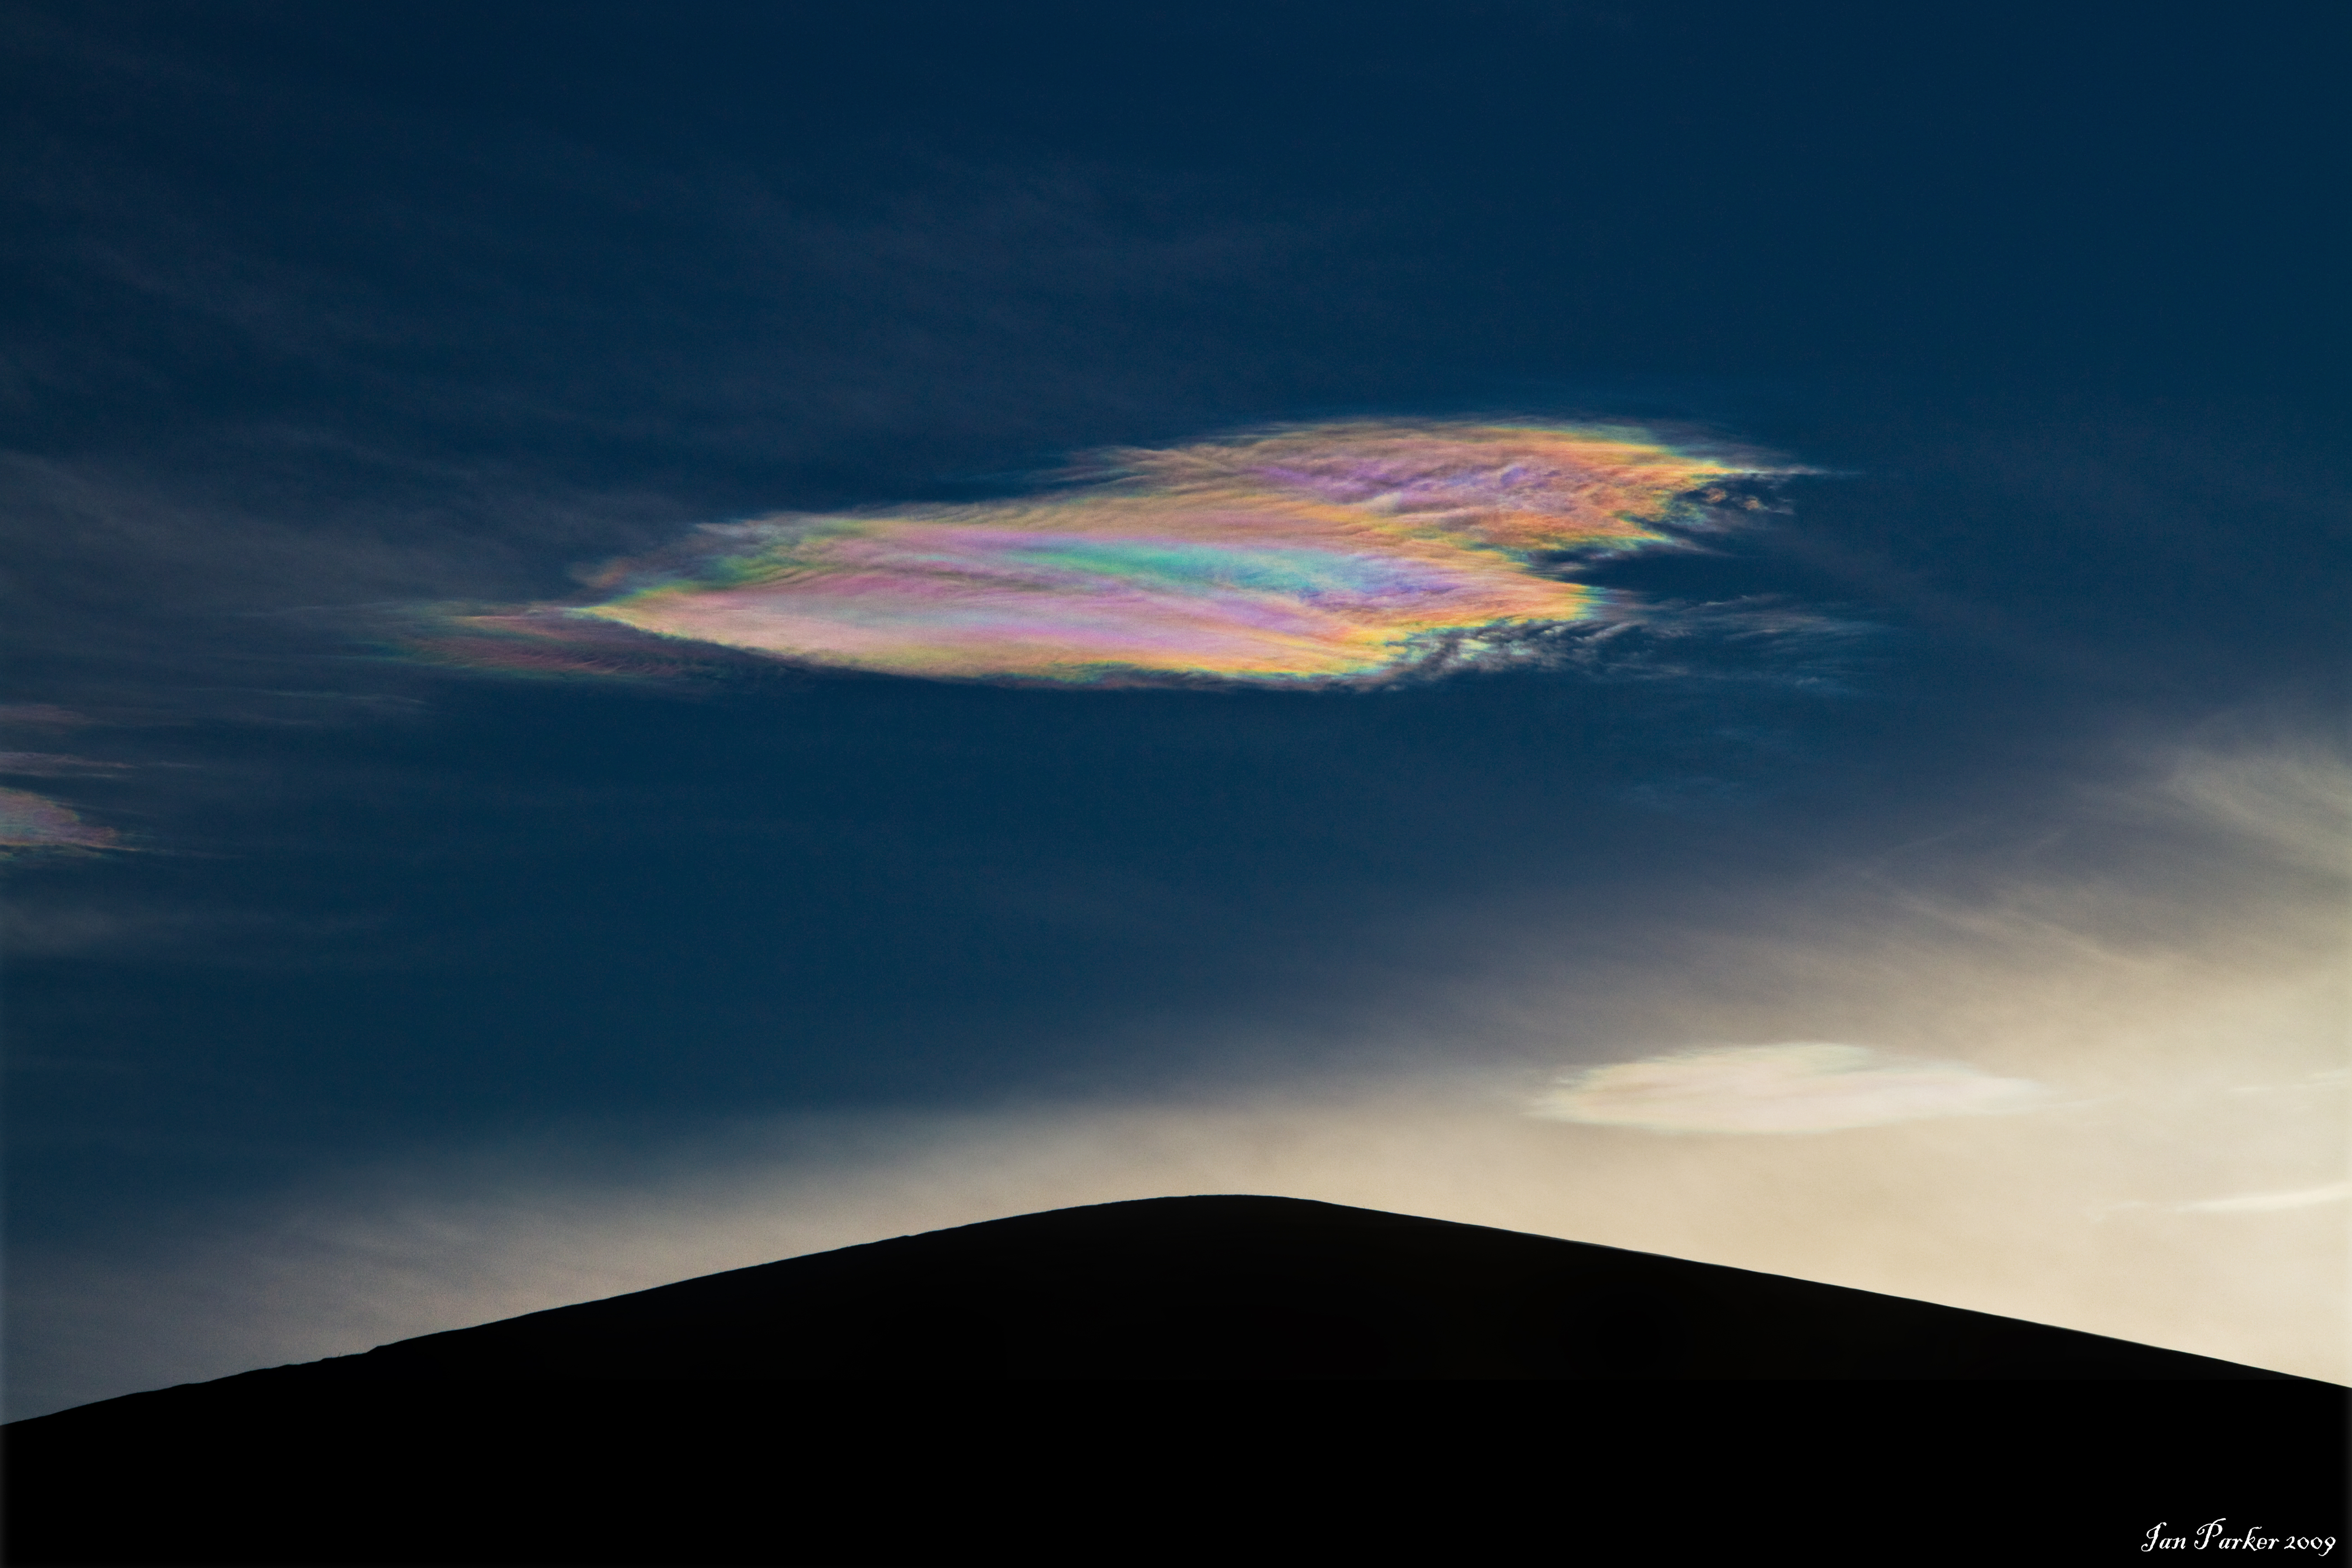
#181- March 2024
"Locomotive #93 - Night Photoshoot" |
 Locomotive #93 - Night Photoshoot at the Northern Nevada Railway. Ely NV Locomotive #93 - Night Photoshoot at the Northern Nevada Railway. Ely NV
This month’s photo features a new subject for me. Last summer we had rented a cottage in England situated next to the line of the North Yorkshire heritage railway. Steam trains would pass by, right at the end of the garden! That piqued Anne’s interest in steam railroading, and after we returned home she discovered that the Northern Nevada Railway organized winter photoshoots from their museum/depot in Ely.
“World-class photographic opportunities, steam locomotives pulling vintage freight and passenger cars that are original to the railroad… Billowing white clouds of steam plus plumes of black & gray smoke towering above the canyons and valleys. A photo shoot is an opportunity to photograph the original Nevada Northern Railway equipment as it was during the day. Our photo shoots have the original equipment operating on their original rails and in their original context.”
That sounded fun, so Anne booked a ticket for me and we set off in February on a long road trip to Ely through the basin and range of Nevada, with bonus opportunities for landscape photography along the way. The photoshoot began with an orientation/safety briefing then, along with about 30 photographers, videographers and railroad enthusiasts, we had the afternoon to shoot locomotives and rolling stock in action around the depot. Locomotive 93 was the star of the show; a black behemoth built in 1906 rumbling down the tracks emitting clouds of steam and vast plumes of dark smoke. Not an ecologically friendly mode of transport, but visually much more engaging than its diesel-electric companion. Photos from this daytime photoshoot are HERE
.
That evening, a special aspect of the photoshoot was an opportunity for night photography. The railroad staff set up a scene, driving locomotive 93 down the track alongside a small depot and arranged strobe lights for controlled illumination. The procedure was that the strobes would be fired at regular intervals once or twice a minute, with a three-two-one countdown announced before each flash. To capture photos I set my camera on a solid tripod, adjusted composition and used bulb exposure mode, opening the shutter in advance of each flash. It took me several tries to figure out an appropriate combination of aperture and ISO settings. But once I had got a good exposure the opportunities to experiment further with framing and lighting seemed rather limited as the locomotive and strobe lights were in fixed positions and, with 30 tripods in a rather tight space, it was difficult to find new angles. With the temperature dropping well below freezing at an altitude over 6000ft it was tempting to head back to the hotel! However, this was a one-off opportunity, so I persevered and discovered nuances by slightly changing the composition, and by varying the time between opening the shutter and the flash to balance illumination from lights around the depot with the strobe. For the photo here, I stopped down the aperture and anticipated the flash by about 20 seconds so the shutter would be open long enough to create a ‘sunstar’ effect from the locomotive headlamp.
My photos of the railroad were, of course, photographed in color (there are very few monochrome digital cameras available). However, the locomotive was built long before the era of color photography. For such historic subjects a black and white treatment more effectively portrays a 'period' feel, and the tonal range in B/W can be pushed further to create a more dramatic impression whereas this would appear unnatural in a color photograph. And, the locomotive is pure black to begin with! |
#180- February 2024
"Two trees in mist" |
 Bosque del Apache, November 22, 2023 Bosque del Apache, November 22, 2023
 Yellowstone National Park, January 31, 2024 Yellowstone National Park, January 31, 2024
Solitary trees always make an attractive and popular subject for photographs and Instagrams (e.g. here and here): and if the trees are veiled by mist that always adds a sense of mystery. So, for this month I selected two recent photos from my travels this winter, featuring isolated trees in mist. But, the trees are not the sole or even primary focus of the images. In both cases I framed them to complement the main foreground subject.
TOP. A sunrise photo from a to Bosque del Apache Wildlife Refuge taken in early winter, when the migrating sandhill cranes had already begun to arrive while the trees still retained fall colors. The best place to find the cranes for sunrise photos used to be at the Flight Deck, but in recent years they have tended to roost for the night in the roadside pond near the Refuge entrance. On our second morning at the Refuge a low mist hung over the pond, alternately thickening and clearing to reveal cranes settled on the water in front of a lone tree at the southern end of the pond. Among the numerous shots I took that morning this is my favorite, just catching first light from the rising sun while the mist obscured the distant mountains and isolated the tree and cranes, forming a uniform background to create a simplified composition.
BOTTOM. Another early morning photo, taken on Geyser Hill in the Old Faithful area of Yellowstone National Park. My main subject here was the thermal Doublet Pools, with their deep blue water and yellow-fringed edges - but I further wanted a composition to place the pools within the surrounding environment and in particular to feature the surrounding ice-frosted trees. The possibilities to find different viewpoints are restricted In the thermal areas of Yellowstone as it is illegal (and likely lethal!) to step off the boardwalks. However, I found a position where the serrated conjunction between the pools conveniently lined up to create a leading line toward a prominent frosted tree in the background. Steam rising from the hot pools and blown by fitful light winds veiled and then revealed the tree and distant snow-covered hills, so I again took many shots from the same viewpoint. For my final selection here, I chose a shot where the steam rose in an inverted V pattern behind the tree, mirroring its shape and isolating the single tree while encompassing a clear view of the wider landscape behind. |
#179- January 2024
"Aequoria - The jellyfish that won a Nobel Prize" |
%20imaging.
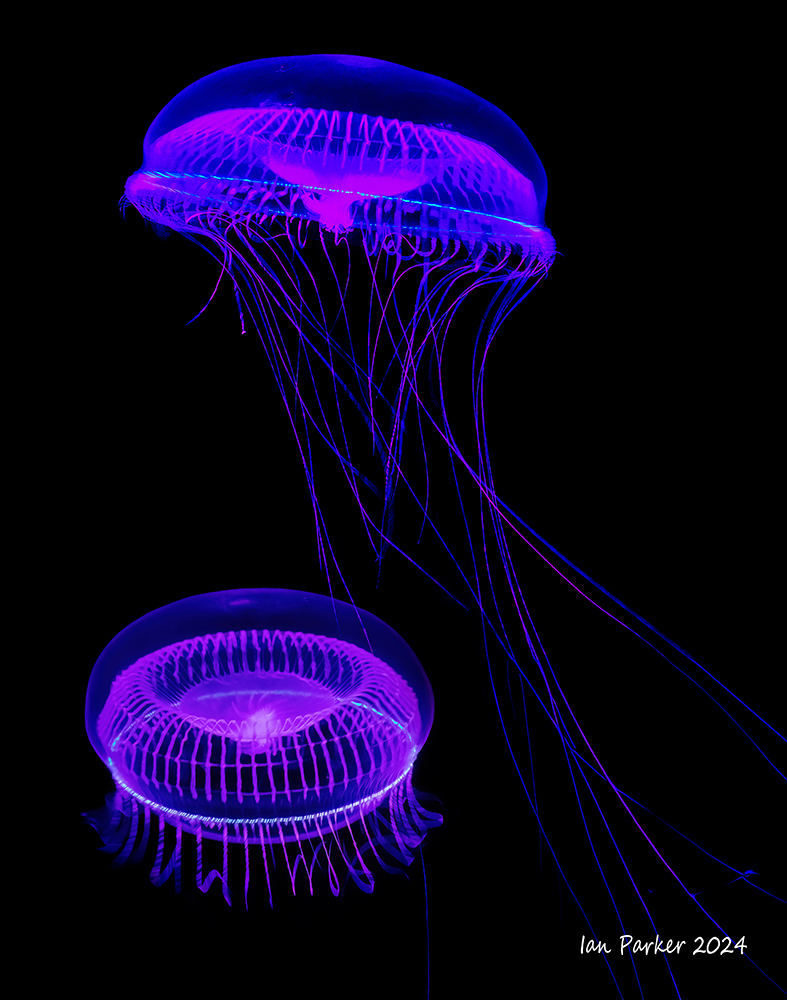
Aequorea victoria (Crystal jellyfish) ; Long Beach Acquarium
This month’s photo features crystal jellyfish from a visit to the Long Beach aquarium. They make an attractive subject, with the vivid colors in the photo coming largely from the blue/purple lighting used to illuminate the jellies. But something else is also visible. The thin ring of light around the rim of the jellyfish is actually being generated by the jellyfish itself – a glow in the dark, that would persist even if the lights were extinguished. This is an example of bioluminescence, a phenomenon analogous to the glow of fireflies, but arising through a very different mechanism. The elucidation of that mechanism over several decades is the basis of one of biotechnologies most indispensable tools; one which I use in my own research studies. So this month, instead of discussing the photograph, I thought I would digress and give a brief account of how the crystal jellyfish led to the award of a Nobel Prize.
The story began in 1960 when a young Japanese biologist, Osamu Shimumura came to the USA on a research fellowship without any defined research project in mind. The head of the laboratory he joined had been fascinated by the bright luminescence of the crystal jellyfish found in abundance around the marine biology lab at Friday Harbor, and suggested to Shimorura that he should try to figure out how the jellyfish glowed. Collecting thousands of jellyfish, Shimomura prepared a “squeezate” from the luminescent rim of the jellies. After months of work he succeeded in extracting a protein – which he named aequorin after the Latin name of the jellyfish, aequoria victoria – that glowed green when added to water containing calcium.
Shimomura’s discovery and purification of aequorin proved to be a very useful research tool. Every cell in our body uses tiny changes in level of calcium in the cytosol to control crucial functions such as contraction of heart and skeletal muscle and transmission between nerve cells. By injecting aequorin into cells it became possible to record these calcium signals by the tiny flashes of light they produced. Shimomura was thus soon bombarded with letters from scientists around the world requesting precious samples of aequorin, which he gracefully fulfilled by going to Friday Harbor every summer to collect and process literally tons of the highly abundant jellyfish.
A second chapter in the story of the jellyfish arose from Shimomura’s observation that although the jellyfish glow green, his purified aequorin glowed a deep blue,. He found an answer to this conundrum in a second protein he was able to isolate from the jellyfish along with aequorin; a green fluorescent protein (GFP) that was excited by light energy from the aequorin causing it to emit a green fluorescence. For many years the GFP remained a mere footnote in Shimomura’s paper describing aequorin, and all the excitement among scientists lay with aequorin. However, that changed as the techniques of molecular biology developed to enabling the isolation, cloning and sequencing of the gene for the jellyfish GFP. In crucial experiments Martin Chalfie injected cells with DNA encoding GFP and showed that they would fluoresce without needing any other factor from the jellyfish. Beyond individual cells it soon became possible to express GFP even in live animals (glow in the dark mice and pigs!). These were not mere scientific playthings, because the GFP could be genetically targeted to specific cell types or tagged to specific proteins; for example, to aid study of cancer in mice by making the tumors glow and to study the movement of individual immune cells in the spinal cord during multiple sclerosis.
The final chapter of the jellyfish story belongs to Roger Tsien, who took the GFP from the jellyfish as a starting point to engineer fluorescent proteins with improved properties. The native jellyfish GFP has a relatively weak fluorescence, and is only a single color. Employing molecular genetic tools, Tsien systematically mutated GFP to make it brighter; and produced variants (colorfully named for vegetables and fruits; tomato, cherry…) that glowed in different colors, so different cell types or proteins could be visualized at the same time. And, circling back to the beginning of the story, Tsien engineered GFP to become calcium sensitive, creating a better tool to study cellular calcium signaling and supplanting the use of aequorin.
The Nobel Prize in Chemistry 2008 was awarded jointly to Osamu Shimomura, Martin Chalfie and Roger Y. Tsien "for the discovery and development of the green fluorescent protein, GFP". But, of course, none of this would have been possible without the jellyfish…
|
h
#178- December 2023
"Caddo Lake" |

Caddo Lake, Texas; November 18 2023
On our voyage this summer to the pack ice of Svalbard one of the participants, Susan Smith, showed me her photos of Caddo Lake, a cypress bayou on the Texas-Louisiana border. This was a location I had never heard of before, but her atmospheric pictures of cypress trees draped in moss convinced me that it was somewhere we needed to go.
Looking online after we returned home, it became clear that Caddo Lake was not as obscure a destination as I had thought, and several organizations offered group photo tours that included accommodations, guides and instruction. However, these were generally quite expensive whereas it seemed there should be no problem arranging a private individual trip. We were fortunate to contact a guide, Paul Keith, who had a cancellation in November at the time of peak fall colors in the cypress trees. Paul has lived all his life on the shore of the lake and, although his primary business is guiding anglers, he is an expert photographer with a gallery attached to the restaurant he owns in the nearby town of Jefferson. For sunrise and sunset sessions over two days he took me out on his boat, which was ideally set up for a single photographer, with a swiveling seat on the back deck providing an uninterrupted 360 degree view. Moreover, as well as being equipped with a powerful outboard motor, an electrically driven trolling motor at the bow allowed Paul to slowly and quietly maneuver us into optimal positions. Paul brought his own camera, and essentially used these sessions as his own photo shoot. Given his vast knowledge of the lake I was happy to tag along and share the locations he chose according to the different light conditions. Overall, I think this arrangement was much preferable to organized group tours we encountered on the lake, with six or eight photographers packed into larger pontoon boats with limited maneuverability
.For accommodation, we booked three nights in a charming, newly renovated cottage along the lakeshore in the curiously named hamlet of Uncertain, Texas. With a private pier, it was only a short walk to meet Paul each morning and evening.
My photo here is an iconic, high-saturation shot of cypress trees displaying their full red fall foliage. The trick to isolating them was to find a lone group of trees well out in the lake from the shore (thanks, Paul!), so that the early sunrise light would catch them while those on the shore were still in shadow. To keep a dark background behind the tree tops and exclude the sky we positioned a good distance out in the lake and framed with a medium telephoto lens.
Beyond such ‘hero’ shots, Caddo lake lends itself to many types of photography from broad scenic to intimate details. Unless there are spectacular clouds, it is generally best to exclude the sky from the frame so the trees are not rendered dark. With sunlight, the hanging Spanish moss makes for great backlighting, whereas on a cloudy day the diffuse light makes for nuanced studies of the bulbous trunks of the cypress trees and the fall colors of their branches. The one condition I was disappointed not to encounter was low mist on the water. But, we will be back again to try next fall…
|
#177- November 2023
"Minimalist Steller's Sea Eagle Portrait" |

Steller's Sea Eagle; Hokkaido, Japan, February 2023
Originally espoused by Ansel Adams, a theme among landscape photographers is that of “pre-visualization”. The idea is that photographer envisages in advance exactly how the final image should look, and accordingly figures out all the details of how to get the shot; where to place the tripod, how to frame the composition, what lighting and weather conditions are needed and so on... That obviously does not work well for wildlife photography where, with limited exceptions, the subject does what it wants, not what the photographer wants. Thus, this month’s photo is more an example of “post-visualization” - the identification and composition a final image from within an extensive sequence of chaotic individual frames.
The photo portrays a Seller’s sea eagle, one of the largest raptors in the world, taken just offshore of Hokkaido’s Shiretoko Peninsula across from Russia’s claimed Kuril Islands. We had cruised out on a small boat from Rausu harbor for about 30 min to find drifting pack ice that would provide a good background to photograph eagles as they swooped down onto the ice to catch fish thrown by the crew. After a little practice I found it easy to lock on to an eagle in the viewfinder and, using eye-detect autofocus, follow it down onto the ice while acquiring a rapid burst of shots. The captain positioned our boat close alongside the ice, so there was no need for a long telephoto lens. Instead, my little Canon 100-400mm RF lens served well. Despite its low cost as a ‘consumer’ lens this gives sharp images and, together with my R7 camera, made a very light combination that was effortless to hold singlehanded. I usually framed wide (about 300mm), both for ease of keeping the eagle within the frame, and to avoid clipping outstretched wings or another eagle that might come in to fight for the fish.
Given the 30 frames per second burst mode of the R7, I acquired nearly 2000 frames in the hour we were with the eagles. Back home, my task was then to select the keepers. Quickly scanning through the images in FastRawViewer it was easy to identify good poses and action shots of eagles squabbling, but I nearly passed over the RAW shot that provided this month’s photo. At first glance it was yet another among hundreds of rather cluttered shots of an eagle flying across the ice; but then I noticed the possibility of extracting a “picture within a picture”, isolating just the head and prominent orange beak of the eagle centered and silhouetted against the black underwing feathers. Having framed wide, I needed to apply some strong cropping to isolate the subject, but with a sharp 35 Mpixels to start with, and with some enhancement from Topax Gigapixel, there was plenty of resolution left.
My aim was to create a simple graphic image, in a minimalist Japanese style. Cropping alone largely accomplished that. The only post processing I then needed to apply was to adjust the highlight levels, so that the background appeared an almost uniform, non-distracting negative space, while retaining just enough detail to separate the white upper wing feathers and place the eagle in the context of the ice background.. |
#176- October 2023
"Baily's Beads" |
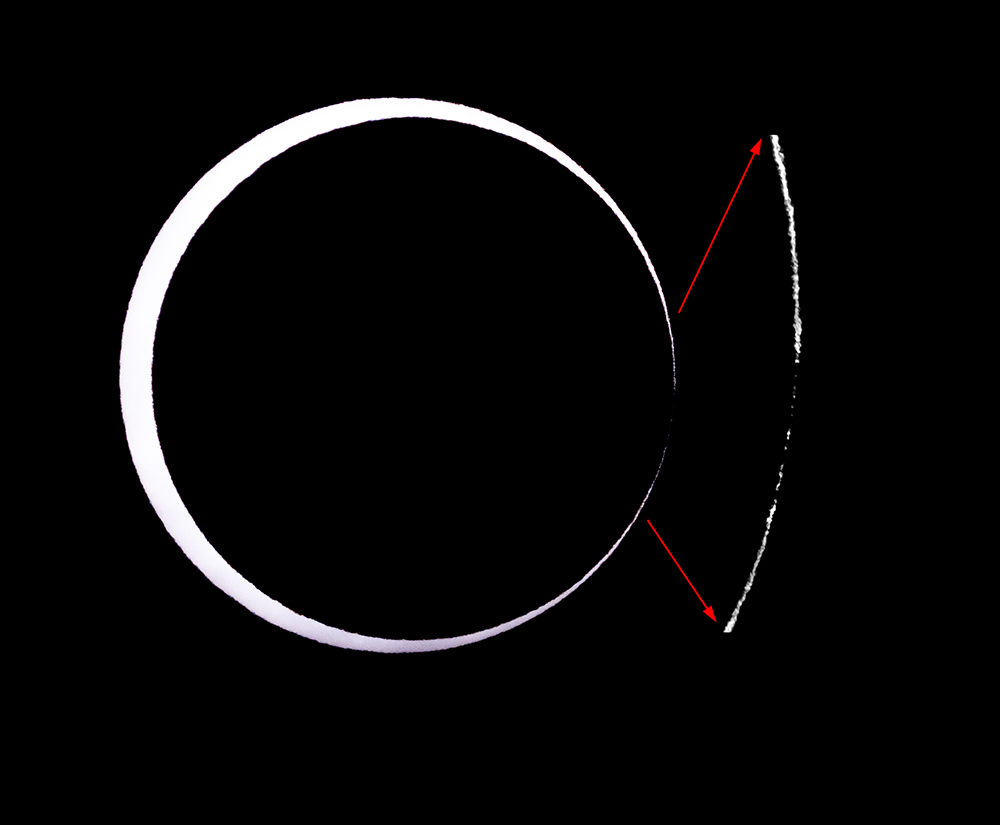
Black Rock Desert, Northern Nevada; October 14th 2023, 9:21 am
I am very late again to post a new photo-of-the month – but this time I have an excuse, as my featured photo was taken only a few days ago during the annular solar eclipse of October 14.
Anne and I had already planned a trip that week driving along the eastern Sierras to photograph fall colors. Given the timing of the rare annular eclipe we decided to add on a northern extension into Nevada to intersect the eclipse path.
During an annular solar eclipse the moon appears slightly smaller than the sun, so it fails to block the entire disk resulting in a "ring of fire." Although an unusual phenomenon, this pales in comparison to a total eclipse when the sun is fully obscured, as the solar corona is not seen due to the brightness of the annulus. On a 1 to ten scale if a total eclipse is a 10, I would rate an annular eclipse as only a 2! Nevertheless, well worth viewing and photographing. However,
beyond the ring of fire,a most interesting aspect of an annular eclipse is the appearance of Baily’s beads. These are beads of sunlight either disappearing or reappearing through deep lunar valleys along the limb of the Moon. Although named for Francis Baily, a founder and President of the Royal Astronomical Society, he was by no means the first to see this phenomenon; but he provided the first detailed description. “. . . a row of lucid points, like a string of beads, irregular in size, and distance from each other, suddenly formed round that part of the circumference of the Moon that was about to enter on the Sun's disc.”
It’s possible to see Baily’s beads at the centerline of the eclipse path, but only for a few seconds. In contrast, at the edge of the path is it possible to see the beads speed up and slow down for a few minutes before and after peak obscuration. This is the so-called “grazing zone”. Whereas eclipse maps show straight lines representing the edges of a path, it is actually an irregular shape defined by the Moon's bumpy terrain. High-resolution data from NASA’s Lunar Reconnaissance Orbiter (LRO) now make it possible to plot the “grazing zone” on Earth, a region roughly 3 km wide. I used Xavier Jubier’s wonderful interactive Google eclipse maps to figure out where I needed to be. Clicking on any location on the map brings up the timing and duration of the eclipse predicted both assuming a perfectly circular profile of the moon, and a lunar limb corrected duration taking into account the actual lunar terrain. Within the grazing zone the first of these durations is several to a few tens of seconds and the second duration zero.
From Xavier’s map I chose a location in the Black Rock desert about 3 miles north of Fly Gyser, a site I had long wanted to photograph and which was conveniently accessible later on the same day through a tour organized by the Friends of the Black Rock Desert. The eclipse would peak at 9.31 am, but the prospects of seeing it seemed poor when we crawled out from our tent at dawn to find the sky completely overcast. Over a few hours, however, the clouds started to thin. With only ten minutes to go we began to make out the largely eclipsed sun through the cloud, and a patch of blue sky drifted in the right direction to give a clear view at exactly the right time.
To photograph the eclipse I used my Canon R5 and 800 mm f11 lens with solar filter, mounted on a gimbal head. Not knowing quite how fast things would change, I set the camera in burst mode to continuously shot at 3 frames per second, starting about one minute before the predicted time of annularity. That ended up generating a lot of RAW files - one frame per second would have been plenty to capture a full sequence. My image here is a single frame of the annular eclipse, selected when moon’s shadow just grazed the edge of the sun’s disc. I had set an exposure so as not to overexpose the unobstructed, wider part of the annular ring but, in retrospect, I should have used a higher setting, or exposure bracketing, as the beads are much fainter. To compensate, the enlarged edge segment on the right shows a clearer view of Baily’s beads, with the brightness of the dimmer beads enhanced in post processing.
|
#175- September 2023
"Capturing a Polar Bear Leap with a Cheap Lens" |

Svalbard, July 2023
Capturing a Polar Bear Leap – In praise of cheap lenses.
A week on a ship in the pack ice watching polar bears confirmed my initial impression that they are rather laid-back creatures. The bears wander around slowly, often settling down for a nap. That makes sense, given that they never know where their next meal might be coming from. They need to conserve energy. However, this generally languid behavior gives a misleading impression. Polar bears are, of course, immensely powerful animals, but they only occasionally display that power. To photograph rare instants of dynamic action you need to be ready, with the camera already to your eye, tracking the bear and ready to press the shutter button. In that regard it helps to have the right lens on the camera – but not necessarily the most expensive, optically perfect lens the camera manufacturer would like to sell you. A mundane, but important factor is simply weight. Optical perfection goes along with more and bigger glass elements in a robust metal body. A perfect lens is perfectly useless if it is so heavy you had to put it down to rest tired arm muscles when the decisive moment occurred!
This month’s photo offers a counter example. A polar bear captured at the instant of leaping between two ice floes using an inexpensive, light, plastic-bodied lens.
When developing lenses for their new ‘mirrorless’ cameras Canon took an interesting approach, introducing several inexpensive ‘consumer’ lenses in addition to a family of superb, but extremely expensive “L” series lenses. My choice in making the transition to mirrorless cameras, and specifically in deciding which lenses to bring on a once-in-a-lifetime trip to the pack ice, was to go with the consumer lenses. Almost all of my polar bear photos were taken with either the Canon RF 100-400mm or RF 800mm lenses. One rational was price; my two lenses, purchased during frequent sales, cost a total of $1,300. For comparison, the combined cost of equivalent L series lenses (RF 100-500mm and RF800mm) is almost $20,000! But, beyond that, I thought I might actually do better with the cheap lenses.
Clearly the L lenses are superior (or why would people spend so much money!). However, by employing some innovative technologies (including moulded aspheric lenses and diffractive optics) the Canon consumer lenses achieve surprisingly good optical characteristics. A main drawback is that their much smaller apertures let in less light; but that is mitigated by the high sensitivity of modern cameras, the stabilization built into the lenses, and new developments in AI noise reduction software. Indeed, given the bright 24hr light in the high Arctic I had no problems getting a shutter speeds of 1/1000s or better to freeze the motion and water drops of my polar bear. And, any deficit in ultimate sharpness could be fixed by judicious application of AI sharpening software. So, not too much of a deficit with the consumer lenses, whereas a big advantage is their size and weight. For comparison with the equivalent L lenses, my little zoom weighs 18 vs. 42 oz; and the 800 mm 36 vs. 93 oz. Both are much easier to transport and carry with no worry about airline carry-on baggage allowances. Most importantly, both lenses proved almost effortless to handhold while shooting.
My leaping bear photo was taken using my Canon R7 camera with the 100-400mm zoom (giving an equivalent focal length of around 500mm); a combination so light I could easily hold it one handed. Looking through the viewfinder I had followed the bear for several minutes as it slowly approached the ship, and was ready to fire off a burst of shots as it reached the tip of the ice floe. I doubt whether the final image quality is much inferior to what could have been achieved with a 500mm prime lens costing >$10,000 more (you can download the image at full resolution to judge for yourself), and the overall experience was certainly more pleasant with lightweight gear. Perhaps the only negative was having to overcome an inferiority complex setting down my little plastic lenses next to the behemoth ‘big guns’ glass wielded by most of the other photographers on the voyage. |
#174- August 2023
"Star trails, meteors and T Rex" |

Borrego Springs, California; August 13, 2023
After two years of being washed out by a bright moon the Perseid meteor shower this month coincided a nearly new moon, so we went off to the desert for a couple of nights watching and photographing meteors at Borrego Springs. This is the only designated Dark Sky community in California and, while not fully as dark as some mountain sites, has advantages of an almost guaranteed clear sky, relatively short driving time from our home and pleasantly warm nights. On the other hand, daytime temperatures over 100 F precluded camping at our usual site in the badlands, and we rented an apartment so we could sleep and rest in air-conditioned comfort during the day, and wake at around midnight to watch the metor show.
Moreover, the numerous metal sculptures of fantastical creatures created by Ricardo Breceda at sites around outskirts of the town make a unique foreground against which to photograph the night sky. From a previous visit to photograph the Milky Way I remembered a pair of giant T. Rex sculptures that serve well for meteors. Moreover, as well as forming intriguing silhouettes, the dinosaurs are located half a mile down a rough dirt trail, where I thought there would be a better chance of having them to myself during the well-advertised meteor shower.
On the first night I set up my camera with an ultra-wide (11mm, f4) lens, pointed toward the north east to frame the meteor radiant (their apparent ‘source’) together with the the two dinosaurs. I manually focused on a bright star, set the interval timer to take repeating 30s exposures, and left the camera to run by itself while I lay out on the sand to watch the meteor show. After about 3 hours the camera had accumulated some 300 shots and the first glimmer of dawn started to brighten the sky. Viewing the camera screen in the dark it was hard to hard to tell whether I had caught many meteors, and after downloading to my computer the results were disappointing. Although the stars and Milky Way showed up bright, there were only a few frames with meteors, and they were faint even at times where I remembered seeing a bright streak.
However, as we were there for two days, I could try something different the next night. Because meteor streaks typically last less than a second, shorter than the exposure time, the light captured by the camera depends only on the lens aperture. I thus thought a wide aperture (f1.8) 50mm lens might work better, even though the narrower field of view would catch fewer meteors. And, to avoid images of the stars becoming too bright I planned shorten the exposure to 15 s. However, a hitch in my plan became apparent as we drove out along the dirt trail, finding vehicles and a several people already at the T Rex sculptures. To avoid disturbing them, and to avoid their lights disturbing my photos, we stopped at an isolated patch of desert so I could acquire undisturbed shots of the night sky, even if lacking foreground dinosaurs.
My plan B was to create a composite photo, with meteors superimposed on star trails. Shooting directly toward the north star on a fixed tripod I again let the camera run for about 3 hours, now accumulating some 600 shots. Once back home I started to stack all the individual frames in Photoshop to generate a composite, discovering that around 60 were sufficient to produce an effective star trail image. On the other hand, meteors appeared only sporadically; but with 600 frames to look through I could find a good number. For each meteor I selected and clipped out the streak, and added progressively added streaks to the star trail image as a separate layers using the ‘lighten’ blend mode in Photoshop. Because the camera was fixed and not on a tracking mount, the radiant of the meteors rotated along with the stars through a 45 degree arc during the 3 hr exposure, so the superimposed meteor trails no longer appeared to originate from the same point. To fix that, I manually adjusted the angle of each trail so that all now appeared to arise from a fixed radiant beyond the top right of the star trail image. Finally, I wanted my dinosaurs back, so after flattening the star trails plus meteors image stack I blended this with an earlier shot of the dinosaurs silhouetted against the faint light of a dawn sky. |
#173- July 2023
"Down Low with a Polar Bear" |

Polar Bear (Ursus maritimus); Pack ice off Nordaustlanded, Svalbard
I am very late posting a photo for July, but that is because we only recently returned from a voyage run by Joe van Os Photo Safaris to photograph polar bears in the pack ice around Svalbard. With over 300GB of images to edit and process I have only begun to work on my images from this trip, but here is a sample from our first clear day in the ice.
A general rule in photographing wildlife is to get down low at eye level to achieve a greater feeling of intimacy and remove background distractions. However, with polar bears that obviously would not be a good idea! Also, when photographing from a ship the height of the deck is a limiting factor. Our vessel, the Polar Pioneer, was quite good in that regard. Although the bow curved high, the aft deck was low, providing a good platform – as long as a polar bear happened to walk round to the back of the ship. My chosen stance was to lie flat on the deck and photograph through the scuppers. This gave the lowest possible viewpoint, yet still resulted in images looking down on, rather than directly across to the subject.
My photo here is of a bear that approached close to the ship, attracted perhaps by the aroma of our breakfast bacon frying in the galley, and posed on an isolated ice floe by the stern. My thought when taking the shot was simply that it made a very nice portrait, with a clear reflection in water undisturbed by the windless morning. Subsequently, after opening the image in Photoshop I cropped out the wide expanse of distant ice at the top of the frame, and was struck by how the water beyond the ice the bear was standing on then appeared indistinguishable from clear blue sky. Indeed, this crop made it seem that the horizon line lay hidden behind the hummocks of ice on the floe – rather than above the top of the frame as was actually the case. The net result was to create an illusion that the photograph had been taken from a much lower vantage point; an effect I enhanced by darkening and saturating the foreground water to better differentiate it from the ‘sky’. Thus, a neat, if inadvertent trick to safely obtain an apparently eye-level photo of a polar bear…
|
#172- June 2023
"Pair of Ezo Red Foxes" |

Ezo red foxes (Vulpes vulpes schrencki) ; Notsuke Peninsula, Hokkaido
On our recent tour of Japan the last location we visited in Hokkaido was the coastal town of Rausu, close to the northern tip of the island. Our main objective there was to photograph sea eagles fishing at sea and on pack ice, but as the two scheduled boat excursions were only in the mornings we drove during the afternoons along the Notsuke peninsula; a curious question mark-shaped narrow spit of land extending into the Nemuro Strait between Hokkaido and the Kuril Islands. The spit curves around a large expanse of wetlands, forming an extensive wildlife refuge where we hoped to find ezo red fox and sika deer. The ezo red fox is a subspecies red fox that thrives in Hokkaido, as well as the Kuril islands and Sakhalin. They are majestic creatures, with lustrous, meticulously groomed coats contrasting with the snowy winter landscape.
Our first encounter was with a fox right by the side of the road as we were driving past. With sparse traffic our driver could safely pull up alongside, and I scrambled to figure out how to open the window to photograph the fox using the minibus as a blind. I eventually got photo; but not a good one, looking down at a high angle on the fox which had then wandered off the snow onto the edge of the road.
Our bus drove a hundred yards down the road we got out and walked slowly back toward the fox, which appeared unperturbed by our presence. Indeed, there are concerns that tourists may be feeding them to get a snapshot. We stayed a good distance away, where an 800mm lens on a crop-frame camera nicely filled the frame. But, our fox that afternoon had a rather mangy looking tail, and I was unable to get photos with a good background. The following afternoon we did better, finding two pristine foxes on a snowbank between the road and the beach. My photo this month shows the foxes amicably settled down on a snow-covered pile of fishing nets. Standing on the road I was at eye level with them for a nice perspective, with the sea behind as a blue background to contrast with the red fur. Even with an 800 mm lens this pair were rather far away so the image quality is not perfect, but I very much like the elegance of the pose, the colors and the simplicity of the photo. |
#171- May 2023
"Looking up into a Forest of Desert Candles" |

Desert candles (Caulanthus inflatus). April 22nd 2023, Photographed in Carrizo Plain National Monument, a good place to find these unique flowers, but only after strong winter rains have produced a ‘superbloom’.
Following a succession of drenching winter ‘atmospheric river’ storms, online predictions were for an exceptional superbloom this spring. Anne and I first travelled out to Carrizo Plain near the end of March, which had been near the peak of the spectacular blooming seasons in 2017 and 2019. But this year the flowers were much delayed. Temperatures had remained cold into springtime - well below freezing at our usual campsite in the Caliente Mountains - and there was little color to be found. A second visit a week later also proved to be too early, though yellows of hillside daisies were appearing on the mountains at the northern end of the plain along highway 58. Mostly, though, I spent my time doing macro shots of individual flowers, as grand colorful scenics were lacking.
On our final visit on April 22nd everything had changed; a true superbloom was probably near its peak. Most spectacularly, the slopes of the Temblor Range stretched as an artist’s palette of yellow, orange, blue and purple for over 30 miles bordering the Elkhorn plain. Although individual areas had been as vivid in 2017 and 2019, I had never seen the entire range carpeted so uniformly. Flowers were everywhere; but so were visitors, attracted to this usually remote region by news articles reporting that the flowers could be seen from space. Not at all a quiet and serene experience along the main Soda Lake road, so we escaped to find solitude by driving up the rugged 4wd trail leading up to the southern end of the Temblors. Once on the switchback ridge we encountered only one other vehicle and gained expansive views down the canyons dropping on each side. Indeed, we were privileged to find fields of flowers at least as vivid as those down in the plains, but would be seen by only a handful among the tens of thousands of visitors to the more accessible parts of the Monument. Our 15 year old Xterra with 250k miles on it proved again an enduring resource for exploration and photography!
High on the steep slopes of the Temblors I was surprised to find dense growths of desert candles - unique flowering plants growing to 2 or 3 feet high with a thick swollen stem that looks like a yellow candle. They are native to the Mojave Desert and surrounding mountain ranges in southern California and Nevada, occurring at elevations from about 500 to 4000ft. I had seen and photographed them during previous superblooms, and on our earlier visits this year, but only in small groups restricted along the edge of washes where I had assumed they were restricted to well-watered sites. But here were veritable forests of desert candles, extending hundreds of feet across steep, open slopes.
I wanted to find a way to photographically convey the extent and density of this rare phenomenon. My initial compositions photographing over the tops of the candles with the plains and mountains in the background looked as if they would provide only straight ‘record’ shots, without capturing the feel of being immersed in a forest of flowers. To attempt something different, I next tried photographing with a wide angle lens pointed straight down, like a low level drone shot, raising and extending the camera on a tripod to avoid getting my feet in the frame. I suspect that those images might work as a large print, but the density of flower and leaf detail just appears as a muddled mess at sizes for online presentation.
Finally, I thought to turn that approach upside down – photographing with the camera on the ground looking up, a viewpoint that has worked well for me in forests (of trees!) and even groups of people. So, tiptoeing carefully to the heart of a desert candle forest to avoid crushing the flowers, I set a ten second timer, placed my camera face up in the dirt and retreated a little way to be out of the frame. I took care to ensure that the lens was shielded from direct sunlight by the shadow of a leaf and chose locations with a good density of candles that would still leave an open window of sky above. Nevertheless, it was difficult to predict the outcome before seeing what appeared on the viewfinder screen, so I took several shots from which I could later make a selection.
Creating the final image then took a bit more finagling in Photoshop. This sort of ‘looking to the heavens’ perspective works best using a very wide or fish-eye lens, but the widest lens I had with me was Canon’s recent 16 mm, f2.8. This is a neat lens, very small, very light and surprisingly inexpensive. However, to combine those attributes the designers abandoned any attempt at correcting the lens for inherent distortions. As focused on the sensor in the camera the image is stretched, straight lines appear curved, and the corners are clipped to black. Normally, all these defects are taken care of during digital processing by the camera or computer, but in this case I took advantage of the wider field of view of the raw, unprocessed image by turning off the software corrections in Photoshop. There are no straight lines, and the distortions resulting from the unusual perspective are a large part of what makes the image interesting. Applying more distortion by stretching the corners to remove the vignetting only helped increase the effect. The end result is thus not strictly photorealistic, but better conveys the experience of a desert mouse running among the towering candles. |
#170- April 2023
"Red-crowned Cranes on White and Black" |
Red-crowned cranes, Tsurui-Ito Tancho Sanctuary, Hokkaido
The red-crowned crane (Grus japonensis; Tancho in Japanese) is a potent icon, symbolic of Japan almost as much as images of Mt. Fuji, and is regarded as the bird of happiness, fidelity and long life. Paradoxically, however, the species was almost annihilated by hunting and erosion of its breeding grounds. At a time when its population was on the verge of extinction, more than 10 Japanese Cranes were discovered in the marshlands of Kushiro in 1924. Since that time, efforts have been made to protect and increase their population. The Japanese Crane was officially recognized as a natural monument in 1952, and in 1958 the first Japanese Crane Reserve was established. My photos here of these elegant birds were taken in February at the Tsurui-Ito Tancho Sanctuary, where the cranes are protected and fed during the Winter.
My aim in the two photos featured this month was to produce close-up portraits of the cranes, presenting them in two different ways as abstracted from their environment to capture the ‘essence’ of the birds in a Zen-like, perhaps more Japanese, style.
As a starting point to capture initial ‘raw’ images to work from my 800 mm F11 lens proved very useful, as visitors to the crane reserve are restrained at a distance by fences around the fields where the cranes gather. I had hoped for some fresh snowfall during our three days at the reserves, but we had unfailingly ‘good’ weather with clear skies and sunshine. Although there was deep snow on the ground this was heavily trampled by the cranes, making for a highly textured, unattractive background. To obviate this distraction and create the photo on the left, I cropped a shot that featured a nice side-on portrait of a crane to isolate just the head and neck, and adjusted the exposure slider in Photoshop so that the luminance of both the background snow and the white feathers of the crane saturated at pure white. What is left is thus only the bill, red crown and dark feathers; but enough to be an icon of the crane, set off within a generous white negative space.
Because of the distractingly textured snow background I concentrated most of my efforts at the reserve on cranes landing on a small rise that gave a more eye-level perspective against a background of trees. Early on the frosty mornings the sun rose directly behind the cranes, back-lighting them against the dark, shadowed trees in the distance. To produce the photo on the right I again tightly cropped to isolate the head and neck of a single crane, but this time adjusted the black-level slider to render the dark feathers and background trees as pure black (with extra touch-up of patches where the sky showed through trees). The result is effectively a negative of the high-key photo on the left; now highlighting the white feathers and, key to making the image work, with rim-lighting from the sun outlining the black neck and head. Finally, what really makes the photo, is the light catching the condensed breath as the crane exhaled while calling to its mate.
|
#169- March 2023
"Burrowing Owls" |

Burrowing owls, Salton Sea, California
Another pair of birds for this month's photo, but much closer to home; just a few hours' drive away to the agricultural lands around the east side of the Salton Sea.
Burrowing owls are small, cute and slightly comical birds, that I had long hoped to photograph. The area around the Salton Sea is one of the most reliable places to find them, where they occupy convenient nesting sites burrowed into the soft soil embankments of irrigation troughs bordering agricultural fields. The owls generally use existing holes dug by small mammals, but are happy also to use artificial burrows constructed by local farmers by embedding lengths of irrigation pipe into the ground. Unlike most owls, burrowing owls are active during daytime. Although primarily hunting around dawn and sunset, they can often be seen posing around their burrows throughout the day. We were thus disappointed on our first visit last year to see exactly zero owls, despite scanning the embankments for many hours. However, we had good success on a recent return visit, aided by advice from a birder friend (thanks, Eric), and favored by much better weather.
To photograph the owls without spooking them we used our SUV as a mobile blind, driving slowly along the dirt roads with the passenger side facing the embankments of the irrigation channels so I could photograph through the open car window. We spotted several owls, sometimes with just their heads poking above the top of a burrow, and sometimes in the open beside their burrow or on top of the embankment. They seemed oblivious to the vehicle, so we could get quite close, obviating any need for an exceptionally long telephoto lens. After spotting owls at a distance we would inch forward, stopping when it looked like I would have a good angle, and turn off the engine to kill vibrations that might blur the photo.
This month’s image features a pair of owls we found perched in full view beside their burrow. Unfortunately, however, we had stopped at a position where one owl partially blocked a view of the other and, constrained by the car window, I could not find an angle that gave enough clearance. Having earlier scared off an owl by starting the engine we did not want to move the car forward (a Tesla would have an advantage here…), so it was a matter of waiting to see if the birds would reposition themselves.
Wildlife photography is as much a matter of patience as skill, and after many minutes the owl in front did move enough to give a clear view of the head of its partner. That made a nice composition, but then I needed both birds to be looking at me, at the same time, with their eyes fully open. More waiting - which gave me time to come up with a solution to a technical problem. The spacing between the two owls was such that only one would be in sharp focus, and I didn’t want to use an aperture smaller than f8 to get a greater depth of field for fear of needing a shutter speed that might blur any motion. My solution was to focus bracket; taking two shots in fast succession, each focused on a different owl. I initially focused on the eye of the rear owl, locked that focus by holding the shutter button half-pressed, and recomposed so the focus box in the viewfinder was now on the eye of the front owl. Then, more waiting, while trying to keep the camera steady and shutter half-pressed until all four eyes were open and looking at me. As soon as that happened I full-pressed the shutter to capture a shot with the rear bird in focus; then briefly released and immediately full-pressed the shutter again to get a second shot with the foremost owl now in focus.
A little work in Photoshop to blend the two shots than gave the final image with both owls in sharp focus, yet essentially capturing a single moment in time.
|
#168- February 2023
"Red-crowned Crane Dance" |

Red-crowned cranes, Tsurui Ito Crane Reserve, Hokkaido, Japan
A first highlight on our recent February trip to Japan with Joe Van Os Photo Safaris was the opportunity to photograph red-crowned cranes in snow-covered Hokkaido. The crane (Grus japonensis; Tancho in Japanese) is a potent icon, symbolic of Japan almost as much as images of Mt. Fuji, and is regarded as the bird of happiness, fidelity and long life. Paradoxically, however, the species was almost annihilated by hunting and erosion of its breeding grounds. At a time when its population was on the verge of extinction, more than 10 Japanese Cranes were discovered in the marshlands of Kushiro in 1924. Since that time, efforts have been made to protect and increase their population. The Japanese Crane was officially recognized as a natural monument in 1952, and in 1958 the first Japanese Crane Reserve was established. We visited two reserves, where the cranes are protected and fed during the Winter.
Visitors to the crane reserves are restricted by fences around the fields where the cranes gather, so my 800 mm F11 lens proved very useful to capture the birds at long distance. I had hoped for some fresh snowfall during our three days at the reserves, but we had unfailingly ‘good’ weather with clear skies and sunshine. Although there was a good depth of snow on the ground, this was heavily trampled by the cranes, making for a highly textured, distracting background across the main part of the fields, which lay below the viewing areas. Instead, I concentrated on birds that landed on a small rise that gave a more eye-level perspective against a background of trees. In the morning the view lay almost directly into the sun, backlighting the crane’s feathers and rim-lighting their outlines against the dark, shadowed trees in the distance.
The red-crowned cranes are named for the patch of red bare skin on the crown, which becomes brighter during the mating season. They must be among the most elegant of all birds, as much as 5 ft tall, snow white in color with black on the wing secondaries, which can appear almost like a black tail when they are standing. As illustrated here, the cranes exhibit an endearing and exceptionally photogenic behavior by dancing in duets that are thought to help form and maintain monogamous pair bonds. The main part of the duet begins with a long male call. The pair moves rhythmically until they are standing close, throwing their heads back and letting out a fluting call in unison, often triggering other pairs to start duetting, as well. |
#167- January 2023
"Royal Spoonbill Greeting" |

Royal Spoonbills at the Whataroa White Heron Sanctuary
On our recent campervan tour of the South Island of New Zealand I had mapped out a route starting from Queenstown, looping along the west coast then crossing Arthur’s Pass to the east coast and finally returning to Queenstown over the mountains. One objective was to try to add to our tally of penguin species, visiting Monroe beach on the west coast for fjordland penguins, and Timaru on the east for little blue (fairy) penguins. Another highlight was to visit the Whataroa White Heron Sanctuary on the west coast, to see the only nesting site of Australasian white herons (kotuku) in New Zealand.
The nesting site can only be visited via a tour. Lacking internet access we could not book this in advance, but luckily two places were open for that afternoon when we arrived at the tour office. Getting to the nesting site first involved a 45 min ride in a minibus through agricultural fields, ending at the edge of a rainforest. Some years ago, this journey was by a much more exciting jet boat ride, but floods and diversion of the river channel has made that infeasible. From the end of the road, a pleasant 10 minute walk along a path and boardwalk through the prehistoric Kahikatea rainforest brought us to a two-level wooden hide. Up to that point the way ahead had been hidden, and the windows of the hide suddenly revealed a spectacular view, with white birds nesting densely through a semi-circular weep of dense trees around a shallow lagoon.
There were several tens of pairs of elegant white herons in clear sight, with chicks at various stages of development in each nest. In addition, I had not anticipated that many of the white birds were actually royal spoonbills; not quite as elegant and refined a bird as the herons, and maybe a little comical with their enormous black spoonbill beaks, but attractive in their own right. Moreover, in contrast to the more sedate herons, the spoonbills would erupt in a frenzied dance when one returned to the nest to join its partner, with the lush crest of feathers on their heads erupting into a spectacular white crown.
We had only about 45 minutes at the hide, so I had a hard decisions on how to divide my time between the different birds. The distance from the hide to the nests was such that I could nicely frame individual birds (the herons and spoonbills are of similar size) with an 800 mm lens on a crop-frame camera (Canon R7), but this extreme magnification made it difficult to quickly find and move to a new subject. Most of my time I spent with the herons, while listening for the cacophony of an approaching spoonbill as a signal to switch to a nest whose location I had previously noted. My framing of the birds was all over the place as the pair danced around, but by using the high-speed 30fps burst mode of the R7 I was able to get a few shots without clipping their wings or feet.. |
#166 - December 2022
"Pereira Windows at Dusk" |

Gateway Commons (now renamed the GatewayStudy Center), University of California, Irvine
An early posting of my photo for December, as I will be away for a month traveling to New Zealand and the sub-Antarctic islands. Check back in January for new photos of penguins and albatross.
My subject this month continues the theme of last month’s photo – architectural forms in the natural landscape – but now featuring a building designed by the renowned architect William Pereira that incorporates a similar patterns of arched columns. This is one of the original buildings on the UCI campus, the Gateway Commons, dating from the founding of the campus in 1965. Pereira set out a bold master plan for the new campus, envisaging floating white concrete platforms suspended over the ground on pedestals to present the buildings like individual sculptures in a giant museum sculpture garden. Each building was constructed in the 'brutalist' style, characterized by minimalist constructions that showcase the bare building materials and structural elements over decorative design, making use of exposed concrete, angular geometric shapes and a monochromatic color palette. Pereira's buildings were indeed brutalist, but functional, with fins and sunshades (‘eyebrows’) over the windows acting as passive solar elements to capture the sea breeze and keep the buildings cool without air-conditioning.
By comparison with more recent architectural designs on the campus, many of Pereira’s buildings now appear rather overbearing (especially the four-story Social Science Lab which lacks ANY windows). The Gateway Commons building is a notable exception, featuring full-height windows along each facade, framed by his characteristic precast ‘eyebrows’. At night the interior lights illuminate the concrete surrounds, so the whole building appears to glow with a welcoming warmth, in marked contrast the monochrome grey of daytime.
My photo this month was taken at dusk, soon after a clearing rainstorm had soaked the surrounding elevated walkway, bringing out the color in the red colored tiles. To best capture the columnar design, and exclude direct light shining through the windows, I moved to a corner of the walkway to get a head-on view, like the prow of a ship. A problem, though, was that I could not get back far enough. Even scrunched back against the balustrade I could not frame the entire building with my widest (14mm) lens, and if I dropped down to ground level the edge of the walkway would have blocked the view. To fit everything in I took two shots, with the camera in portrait orientation; one of the left and and one of the right halves of the building, carefully lining up the end column so I could then stitch the two frames together in Photoshop..
|
#165 - November 2022
"Medieval Cloisters at Lake Crowley" |

Lake Crowley, California
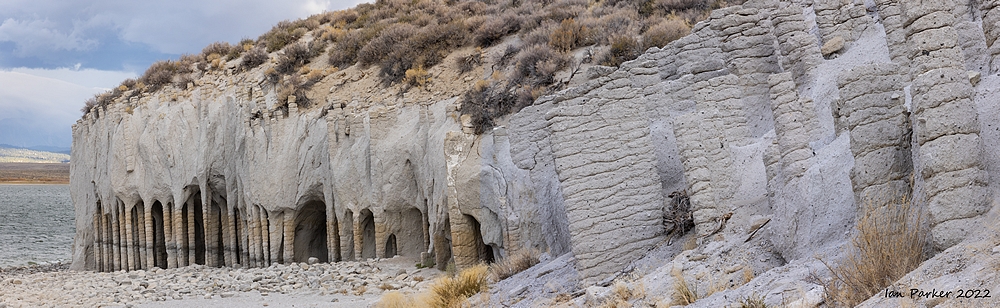
On our way up through Owens Valley to view fall colors in the eastern Sierras last month we took a short detour to a location I had wanted to visit for several years - the curious columns on the eastern shore of Lake Crowley.
The columns were discovered only after California’s Crowley Lake reservoir was completed in 1941, when strange formations were spotted on the eastern shore. They must have been buried and undiscovered for eons until the reservoir’s pounding waves began carving out the softer material at the base of cliffs of pumice and ash. Their origin was a mystery, but has been at least partly explained in a paper ("Evenly spaced columns in the Bishop Tuff as relicts of hydrothermal cooling") published by UC Berkely geologists. They hypothesize that the columns were created by cold water percolating down into — and steam rising up out of — hot volcanic ash spewed by a cataclysmic explosion 760,000 years ago. The blast, 2,000 times larger than the 1980 eruption of Mt. St. Helens, created the Long Valley Caldera, a massive 10-by-2-mile sink that includes the Mammoth Lakes area. It also covered much of the eastern Sierra Nevada range with a coarse volcanic tuff, or ash fall. The columns began forming as snowmelt seeped into the still-hot tuff. The water boiled, creating evenly spaced convection cells similar to heat pipes. Tiny spaces in these convection pipes were cemented into place by erosion-resistant minerals.
Driving to the columns was a little adventure in itself. We followed the excellent online directions online HERE, which involve climbing a steep, very eroded hill that absolutely required 4WD. In a regular passenger car it would be a two mile walk, but we were able to drive all the way to a wide turnaround on a bluff directly overlooking the columns, where we set up our tent. Great views, but a rather exposed site and we were awakened during the night by strong winds that snapped a tent pole. By dawn the wind had dropped, and I set off at first light down a sandy path to the beach and followed the shoreline to the main expanse of columns. During summer the beach and columns are usually submerged, but when we were there in October, they were exposed by low water level in the lake (reservoir). The photo below gives an overview from the beach.
The columns are around 15 ft high and are spaced about an outstretched arm’s length apart so there was plenty of space to wander between them. In some places they extend four or five columns deep into the cliff, and my impression was of being in a medieval cloisters, heightened by the arched roof line.
That aspect is what I hope is conveyed by my photo this month. To get the shot, I found a viewpoint where a series of columns receded into the distance and overlapped to block any direct view out to the lake, and used an ultrawide (11mm) lens to capture the full height of the adjacent columns that were only a few feet in front of the camera..
.
|
#164 - October 2022
"Zen and the art of flower photography" |

Nature reserve near Brasstown, North Carolina
Anne and I recently returned after a week at the John C. Campbell Folk School in the Appalachian Mountains of North Carolina. I attended a class on ‘Photography for the Zen of it’, and embraced the spirit of this theme by looking for compositions with simplicity and tranquility. This was facilitated by the location of the school campus in a bucolic environment among wooded hills and open grasslands, making a remarkably serene and pleasant place to spend time away from the hustle of the world.
My photo this month was taken on an excursion to a nearby private nature preserve. Most of the reserve comprised woodland not very different from that around the school, but a unique feature was where a small stream created a boggy area covered in small white flowers (Parnassia palustris). Confusingly known as grass of parnassus these are not a grass at all, but actually a showy flowering forb. The peculiar common name comes from ancient Greece where cattle grazed this species on Mount Parnassus. So, an obvious and attractive subject to photograph, but extracting a simple and elegant composition was not going to be simple as the flowers were densely scattered among grasses and fallen leaves on the muddy ground. Sacrificing dry feet in the cause of enhanced mobility across the bog I decided the best opportunities lay with flowers along the edge of the stream, where I could position them against a dark background of the water.
The parnassus flowers were mostly growing in tight clumps, which looked too cluttered, so I continued searching for individuals along the stream bank. However, after framing a nice example in the viewfinder I decided that the composition was now too simple! Although the flowers are striking, with five creamy white distinctively veined petals, a single flower would not be enough to raise a photograph above the ordinary. I needed some additional element as a complement. As I had initially moved a fern to the side to obtain a clear view I tried letting it return to its original position alongside the flower – but that just resulted in an oddly asymmetrical composition. Then I had the key idea of gently hooking the flower within a branch of the fern, visually fusing the two as a single graphical element.
That looked good, and by trying a few camera angles I framed my entire subject against dark blue reflections of the sky from the stream. But then I needed to deal with a remaining technical issue, arising because we had travelled by air with only carry-on luggage and I had not brought a tripod. The lighting under the trees was dim, so to get a shutter speed fast enough to deal with camera shake I needed to set a wide aperture on the lens, with a resulting depth of field too narrow to encompass the curvature of the curving fern and keep it in sharp focus. Modern camera technology solved that problem, and I set my Canon R5 to acquire a sequence of 12 focus-shifted exposures that I could later merge in Photoshop.
A final, aesthetic consideration was which way up to present the final image. Because of the way I was holding the camera, the picture on the computer screen initially came out upside down - so I flipped it right way up. I thought that looked fine, but when our class instructor Rick was reviewing our work, he suggested the composition might look better inverted – so, a reverse flip as you now see! On balance I agree with him that this inverted orientation works better, creating more Zen-like extra level of abstraction.
And, although my description of the making of this image may read as rather mechanical, I was completely absorbed during the ten or fifteen minute process in narrowing down from a cluttered landscape to elegant simplicity. Perhaps in a way of Zen. (“Simply observe. Become completely absorbed into the location that you are at. Be there and actually be there, not somewhere else in your mind thinking about something very insignificant.”) |
#163 - September 2022
"Gannet in flight with puffin wingmen" |

Rauðinúpur Cape, North Iceland
During our recent trip to Iceland our original plan was to circle clockwise around the ring road, cutting inland across to Egilsstaðir. However, inspired by a captivating VIDEO we decided instead to take a long detour to the very tip of Iceland at Rauðinúpur Cape where the northernmost colony of gannets can be found. That turned out to be one of the most rewarding days on our trip, both for the birds and our discovery of a remote, tranquil part of Iceland, far from the masses of tourists that have taken over much of the island.
To reach Rauðinúpur we followed coast along road 85 and turned due north on road 870, which becomes ia gravel road just outside Raufarhöfn village and continues to end at the farm Núpskatla. An interesting feature along the way is a sign warning not to get out of the car until one reaches the farm. (The arctic terns here are fierce!). From the farm a path crosses a gravel bar and ascends steeply onto the top of the cape, where two isolated sea stacks come into view. From a distance the flat top of the eastern stack appeared completely white, but coming closer this resolved into a dense mass of hundreds of nesting gannets. The edge of the cape falls off to steep cliffs, and while providing a level view across, the closest safe [position is still about 100 meters from the gannets. Even with an 800 mm lens, I could not closely frame individual gannets, so my final photos usually needed some heavy cropping.
My photo above is of birds, a gannet and two of the puffins that nest along the cliff edge, that flew a little closer to the camera. A strong wind was blowing from the east (right), and the gannet carrying nesting material was hovering effortlessly with wings outstretched. On the other hand, puffins are denser birds, with small wings, and this pair were having to work hard to make progress into the wind. I like the transient composition here, where the puffins happened to line up behind the gannet, bringing back memories from having watched the second Top Gun movie. |
#162 - August 2022
"Puffins with bokeh balls" |

Grimsey Island, Iceland; June 17th 2022.
Anne and I returned last month from a trip to Iceland, our first foreign venture since the start of the covid pandemic. Iceland is high among our favorite places to visit, with the amazing volcanic landscapes and waterfalls fulfilling my photographic aspirations. But this time my motivation was to photograph birds - in particular, the puffins that come to nest in the summer. To that end we had booked three nights on Grimsey, a tiny island just off the north coast of Iceland; the only part of Iceland to lie within the Arctic circle; and a 'puffin paradise', summer home to literally hundreds of thousands of sea birds.
On our first night on the island the sky was clear and, as we were within a few days of the solstice, there was a rare opportunity to photograph puffins by the light of the midnight sun. The island is long and thin, oriented in a roughly NNE/SSW direction, and small enough that any part is within easy walking distance. I set off in the late evening toward the cliffs on the NE side of the island, which would catch the sun as it dipped toward the sea.
Much of the art in bird photography lies in finding a good background. Although action shots of birds in flight or displaying interesting behaviors might stand by themselves with only a uniform sky as background, static ‘posed’ portraits need something extra. One of my initial objectives here was to photograph puffins silhouetted against the sun, which was still a little way above the ocean even though it was close to midnight. After finding a nice group of puffins isolated on a protruding rock near the top of the cliff face I tried to line them up with the sun. That did not work as, other than rappelling down the cliff face, I had no way to get lower than the birds. However, I could line them up with sunlight reflecting from the sea, and that produced an interesting effect as glints of light as the sun caught wave crests. Looking in my viewfinder myriad orange circles flickered on and off. I could control the number and frequency of these events by moving slightly so my puffins lined up with the edge of the sun’s reflection, or were more directly aligned. For the photo above I chose an orientation that nicely filled in the background with bokeh balls, without saturating and intermingling the patterns together.
The term bokeh originated in Japan, referring to the aesthetic quality of the blur produced in out-of-focus parts of an image or the way a lens renders out-of-focus points of light. It is most prominent with long telephoto lenses (in this case, 800mm) when focused on a relatively close foreground subject with a distant background. The effect is frequently used to pleasingly blur out the background and draw attention to the foreground subject; but with specular reflections like the glints of sunlight from wave crests the bright point sources of light become enlarged into circles defined by the lens aperture. |
#161 - July 2022
"Jökulsárlón ice shard" |
 Diamond Beach
, Jökulsárlón, Iceland.
After more than two years of covid isolation, Anne and I made a first international trip to Iceland last month. It is always wonderful to get back to Iceland, and this time I had a new motivation – to photograph birds rather than landscapes. The highlight of our trip was a three-night stay on the small island of Grimsey off the north coast of Iceland, the summer home of as many as a million photogenic puffins. As usual I am late posting this month’s photo-of-the-month, this time because I initially had a hard time deciding on my favorite puffin photo. But in the end, I decided to feature something completely different - a serendipitous discovery while editing thousands of shots from around Iceland. Maybe puffins next moth...
To get to Grimsey we had driven around the entire circumference of Iceland following the ring road, and on the last day when returning to Reykjavik we stopped off for a few hours at the Jökulsárlón glacier lagoon on the south coast. Anticipating hoards of tourists we arrived at about 6:00am, and I headed down to the famous diamond beach where small icebergs and ice fragments wash up on the black sand beach. The beach was indeed deserted at that early hour yet, although I had photographed there many times before, I had trouble finding inspiration. The sky was depressively overcast with intermittent rain; and the tide was low, leaving the ice stranded above the waves to preclude classical long-exposure shots with receding trails of water flowing past the bergs. Switching gear, I thought detail shots within the ice might work better, with the diffuse lighting and the ice washed squeaky clean and shining by the rain.
Even then, I had the feeling that although I was working hard to come up with something I was taking photos just because we had come 6000 miles to be there. I did not expect anything comparable with my photos taken under better conditions on previous visits, but spent a long time on a composition trying to center one small berg within a frame formed by a hole in another berg. Indeed, after trying to composite focus-bracketed shots of the two bergs on the computer screen two weeks later I had given up and was almost ready to discard the files when I noticed that the ice forming a small part of the rim of the ‘frame’ held intricate details and colors. Zooming in confirmed the existence of a wonderful inner world within that little fragment of ice just a few inches long – a picture within a picture vastly more valuable than the larger composition I had envisaged.
So, a nice example of serendipity. In this case though, I can’t even claim credit for recognizing an unexpected possibility while photographing out in the field, only for spotting the potential hidden within what initially seemed a mundane archival shot.
If I had spotted the potential at the time, I would have focused close and explored various angles. As it was I had only one, wide perspective image file to work with. To produce the final image therefore necessitated a very tight crop, but a payback from buying an expensive camera is that the 45 Mpixel sensor provided enough resolution to work with. My aim in processing was to create an abstract artwork, so I enhanced the contrast and colors by judicious manipulation of sliders in Photoshop ACR, but all the details are exactly as frozen into this sliver of ice at that moment in time. An ephemeral and unique image as the little iceberg will long since have washed out to sea and melted. |
#160 - June 2022
"A triptych of landscape abstracts" |


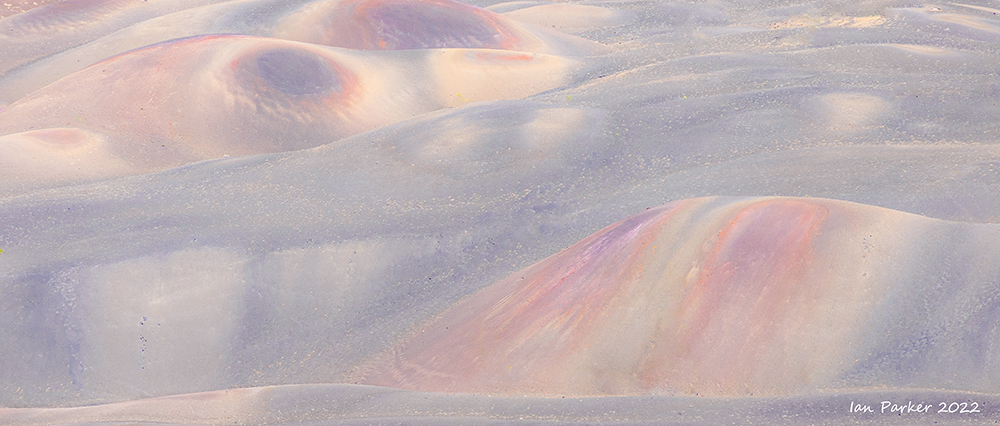
Since acquiring my first digital camera some twenty years ago, my approach to landscape photography has evolved along a path likely common to many photographers whose enthusiasm for the genre is maintained for so long. At first, it's all about capturing dramatic shots of the classic icon locations. But that gradually becomes stale. Unless you are blessed with exceptional light or weather conditions, or with exceptional inspiration for a new approach, you are not going to get a photo any better than the millions already posted on the Web. Instead, my direction has moved to lesser-known locations that offer more chance of originality; are free of the crowds thronging the popular National Parks; and being less spectacular, present a more interesting challenge to photograph. My selection this month features three examples from recent road trips, where my aim was to isolate small segments of landscape that can be appreciated simply as abstract patterns of color and shape that are largely divorced from their wider setting in their real environment.
Top. An abstraction of part of the 'bathtub ring' currently around Lake Shasta. During the current drought in California the water level in the lake (reservoir) has fallen about 120 ft below full-pool, leaving a shoreline of exposed bare earth. In situ this looks rather ugly but, using a telephoto lens, I was able to isolate sections with interesting patterns and colors.
Middle. The slopes of an eroded escarpment in a volcanic area in Fishlake Valley, Nevada - a location that seem not yet to have been discovered by photographers. I identified this promising site by searching on Google Earth for areas of colorful exposed rock and was pleased to find that when we were finally able to there after two years of covid it offered both excellent photographic potential and solitude.
Bottom. A more iconic location, the Painted Dunes in Lassen National Volcanic Park. Again, however, I wanted to abstract just a small part of the scene, showing just the patterns and colors of this expanse of volcanic ash.
I shot all these images as RAW files and processed them in Photoshop Camera Raw, making atypical use of a tool called the 'clarity' slider. This allows settings from -100% to +100%, with the starting default in the middle at 0%. Moving the slider to more positive values adds increasing ‘pop’ to an image, by increasing local contrast and color saturation. There is always a temptation to be heavy handed with this setting, but taken too far the result becomes be garish and neon-colored (viz. most photos posted on Instagram!). For the images here I wanted the opposite effect and nudged the slider in the negative direction to create a more subtle appearance while muting fine details. That, together with judicious use of the spotting and clone tools to remove rocks, branches and other distractions gave the final abstract look I was seeking.
|
#159 - May 2022
"Osprey aerial confrontation" |

Mono Lake, May 15 2022
There was a total lunar elclipse early during the night of May 15, which we had taken as a good excuse for a photography trip to Mono Lake and, along the way, to explore a new, 'undiscovered' area across the border in Nevada (likely the subject of next month's photo). We sett out early in the morning and although our drive across the vast expanses of Nevada was interrupted by a photogenic herd of wild horses we arrived at the South Tufa area of Mono Lake by mid afternoon, still with many hours before sunset and the start of the eclipse.
Although Mono Lake is a world-class location for atmospheric, 'out-of-this-world', landscape photography, it does not show its best face during the harsh daylight hours. I thus had a few hours to kill, and looking for an alternative subject for my camera I headed down to the lakeshore hoping to find birds. In sumer the lake teems with myriad gulls and migratng phalaropes, all feeding on the dense swarms of alkali flies that form black clouds along the waterline. However, we were too early in the season. No phalaropes to be seen and only a few gulls. One the other hand one species that makes its home and nests at Mono Lake does not depend on the flies; the osprey. These magnificent birds utilize the tufa towers around the lake edge for their nests, and despite having to fly long distances to catch fish (of which there are none in the alkaline lake), they must find this an acceptable trade-off for the security of the isolated towers. The first pair of osprey arrived at Mono Lake in the mid 1980s, but were unsuccessful in hatching chicks until five years later. Nowadays there are around a dozen pairs at the lake, and their numbers have gradually risen, although recent declines in lake level that have left tufa towers on newly dry land maybe a deterrent.
Beyond the tip of the South Tufa there is a prominent, much photographed, tufa island with several towers. When I arrived, two ospreys were perched on a nest atop one of the towers and a third osprey perched on another tower. In total I saw four ospreys at the same time. They were coming and going, taking off, circling and returning to land, so I lost track of who was who. By eye the birds appeared small, as the tufa island lies about 100 yards from the shore, but my new Canon 800mm DO lens gave enough reach to get good images - and the bright overcast light meant I could get a good shutter speed despite the limiting f11 aperture of the lens. With electronic shutter and 20 fps I quickly aquired many hendreds of shots of the osprey's behavior. The photo above was my favorite,freezing two ospreys in a mid air tussle, helpfully with both facing the camera and in the same plane of focus. The image sequence showed the right-hand bird settling briefly on the nest, then being startled by the bird approachig from the left and turning mid-air to confront it. My guess is the nest belonged to the right-hand bird, and the one on the left was an intruder.
|
V
#158 - April 2022
"The Rotunda at Penn Station" |

The Rotunda at Penn Station, Pittsburgh. 6:00am, March 24th, 2022
In late March Anne and I set off for a week to respectively bike and hike a section of the Great Allegheny Passage; a rail-to-trail path traversing the Allegheny mountains from Cumberland MD to Pittsburgh OH. Our journey began with a flight to Pittsburgh, then an Amtrak train ride to Cumberland from where we would be shuttled -together with a rental bike for Anne - to our starting point at Meyersdale. The train (the Amtrak Capitol Limitedl) was scheduled to leave Pittsburgh at the early hour of 5:30 am; but was announced to be running 4 hours late. Instead of waiting for hours, I took the unexpected opportunity to walk with my camera around Pittsburgh.
The current Amtrack station comprises a rather austere waiting room, constructed in 1979 on the site of the baggage room in the basement of the original station. Above it is a much grander structure, Penn Station, built at the turn of the 19th century in the heyday of rail travel to a design by the Chicago architect Daniel Burnham. Although the main station building has now been converted into luxury apartments, its most extraordinary feature, the entrance rotunda, survives intact and remains publicly accessible. The rotunda, constructed from brown terra cotta, has three wide, low, sweeping arches and corner turrets, capped by a dome that originally sheltered turning spaces for carriages. At night the arches are lit with electric light bulbs, a novel innovation at the time of construction that still provides a dramatic effect. The rotunda is listed on the National Register of Historic Places and has been described as "one of the great pieces of Beaux-Arts architecture in America”.
When I emerged from the Amtrak waiting room at six o’clock in the morning, the sky was only just beginning to lighten and the electric lights arrayed along the arches cast a wonderful warm glow inside the rotunda. Because the rotunda is elevated above street level with only a narrow walkway on each side it is difficult to photograph in its entirety, requiring a very wide wide-angle lens. Fortunately, I had included a 9mm lens in the lightweight hiking kit for my little Canon M5 camera. Another piece of luck was that a heavy overnight storm had left copious puddles on the walkway. The architecture of the rotunda already lent itself to symmetrical, repeating compositions, and a puddle reflection offered a chance to double up on the symmetry.
|
#157 - March 2022
"Orion nebula - a first try at astrophotography" |

The Orion nebula, photographed in December 2021 from the KOFA National Wildlife Refuge
[I am late this month in posting a new photo - part procrastination, but also to leave Sir Ernest pinned at the top for longer, especially in light of the recent finding of his sunken ship, the Endurance.]
My photo here of the nebula, of course hardly compares with images captured by numerous amateur astronomers using even small 'real' telesopes, let alone the big terrestrial observatories and the Hubble. But, it's a satisfying first for me, achieved using the camera and lens I use for bird and wildlife photography.
I took the photo during a 4WD camping trip to the KOFA reserve in southern Arizona, a remote 'dark sky' location. The weather was mild and the sky cloudless, so we slept out comfortably on the ground with just a camping mat and sleeping bag. After a thin crescent moon set during twilight we could fall asleep looking up to vivid stars, galaxies, meteors and satellites. The next evening I stayed up later to see what my camera might be able to capture beyond what was visible to the naked eye. The Orion constellation is one of the very few landmarks I can identify in the night sky, and I knew the nebula was close to the three stars of Orion's belt,.so that was an obvious target.
Some technical details of the gear I used: Canon R5 at ISO 1600, 30s exposure; Canon 800 mm f11 lens, necessarily used at f11; mounted on an iOptron equatorial tracker with a RRS BH 40 ball head, The weight of the camera plus lens was a bit much for the small tracker, and all a bit wobbly, but by using electronic shutter and the built-in intervalometer I could get exposures after the vibrations had died away. A useful trick I had learned was to align the tracker on the north star during twilight, when it is the only bright star in the vicinity. Otherwise, it is difficult to identify during full darkness in relation to numerous surrounding stars that appear almost equally bright through the alignmet 'scope. Looking at my first trial image on the camera screen it seemed I had achieved a good alignment, as the stars were sharp without noticable trailing.Satisfied that all was well I set the camera to capture multiple shots, which I could later stack to improve the signal-to-noise ratio of the final image. However, something went wrong. It seemed the tracker partially seized up, and in the end I found only two acceptably sharp frames to stack.
Anyhow, I was happy with the final result. My aim was to end up with an artistic photo rather than a strictly scientific representation. I thus accentuated the colors and brought down the wide dynamic range to encompass the intense core of the nebula while retaining faint outer whisps. |
#156 - February 2022
"Commemorating Sir Ernest Shackleton" |
This year marks the 100th anniversery of the death of the great Antarct explorer Sir Ernest Shackleton; two years to the month since we visited the hut from which he narrowly failed to be the first to reach the South Pole; and a search to locate the wreck of his ship, the Endurance, which was crushed in the ice of the Weddel Sea,. To commemorate, here are a few photos from our visits to some of notable places along the three Antarctic expeditions that Shackleton commanded.
UPDATE, 03/10/2022. The Endurance has been found and photographed, remarkably preserved at a depth of 10,000 ft.
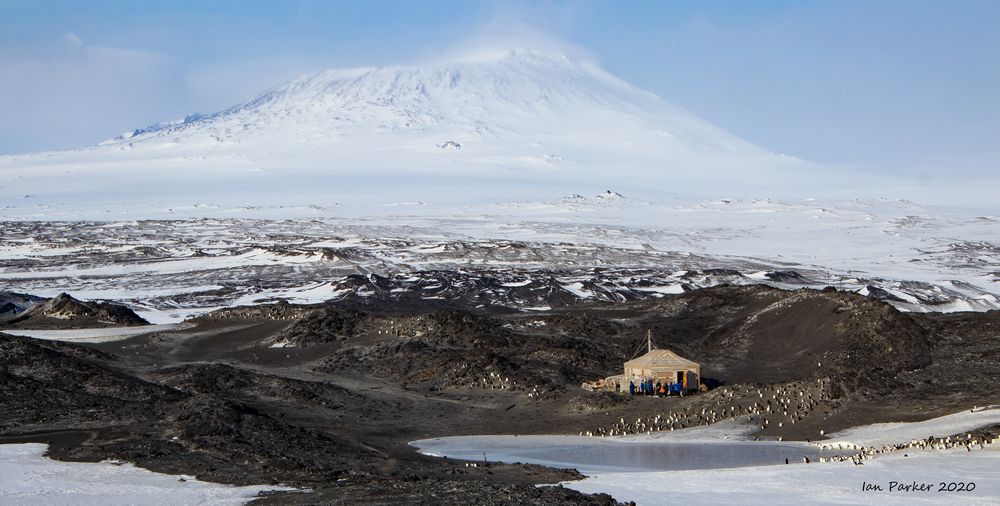
Shackleton's hut on Ross Island at the base of Mt. Erebus, sheltered in a hollow that hosts the World's largest colony of Adelie penguins. From here, in 1908, he began the 'Great Southern Journey' that took him and three companions to within 97 mies of the South Pole before being forced to retreat for lack of provisions. ("...'a live donkey is better than a dead lion." )
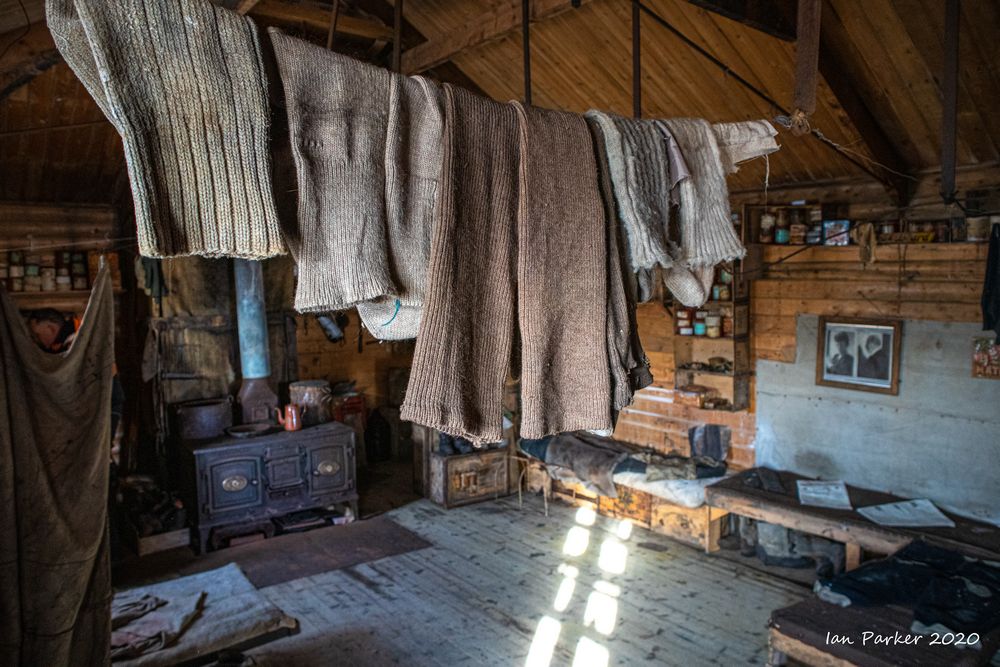
The open-plan interior of Shackleton's hut still has a warm, inviting ambiance; contrasting with the stark coldness of Scott's Discovery hut, and the partitioned layout of Scott's Cape Evans Hut.

Elephant Island - conditions were too rough for us to attempt a landing
Forestalled in his ambition to be the first to the South Pole by the success of Roald Amundsen in 1912, Shackleton's mind turned to a continental crossing, from a landing in the Weddell Sea, via the South Pole to McMurdo Sound. This venture was thwarted when his ship, the Endurance, became entrapped in the ice pack of the Weddel Sea, eventually sinking in November 2015. Aafter months spent drifting on ice floes and a harrowing crossing of the open ocean in small lifeboats.Shackleton's party reached the desolate Elephant Island.
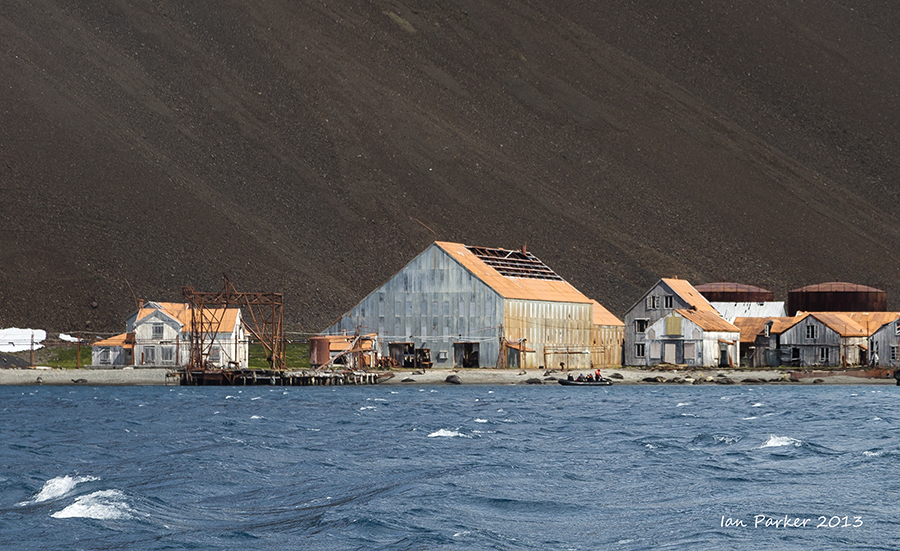
Stromness whaling station on the northern coast of South Georgia. The 'Villa' is the building on the left.
Levaing most of his men on Elephant Island, Shackleton and a small crew embarked on a perilous 800 mile open boat volyage, eventually landed on the unpopulated southern coast of South Georgia at King Haakon Bay. Shackleton Shackleton realised that his boat was not capable of making a further voyage to reach the whaling stations on the opposite coast, and set out with two men, Worsley and Crean, to cross the island on foot, aiming for the station at Stromness. They arrived "a terrible trio of scarecrows",dark with exposure, wind, frostbite and accumulated blubber soot".at the administration centre, which also was the home of the Norwegian whaling station's manager. The building pictured at left above - dubbed the "Villa" because it represents relative luxury compared to its surroundings - has historically been thought to be where Shackleton was made welcome; but recent research promps a reevaluation. .
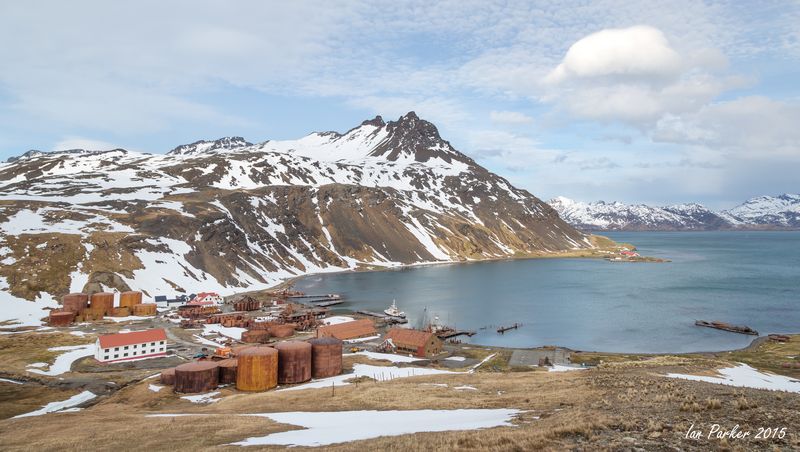
Grytviken whaling station, South Georgia. The ship on which we travelled, the Hans Hansson, is moored at the dock, close to where Shackletons vessel, the Quest, was likely moored at the time of his death.
In 1921 Shackleton set out on his final expedition on the Quest, a small ship "in no way are we shipshape or fitted to ignore even the mildest storm." . Leaving London through Tower Bridge, and hailed by a large crowd, his intention was to map still uncharted coastal regions of the White Continent. After an arduous journey south, marked by storms and breakdowns, the Quest eventually reached South Georgia. On the evening of her arrival in Grytviken, Shackleton was full of jokes and announced as they retired that they would celebrate Christmas the next day. In the early hours of 5 January Shackleton summoned the expedition’s surgeon to his cabin. Moments later Shackleton suffered a fatal heart attack and died. He was 47. Shackleton's wife requested that he be burried on South Georgia, where he lies in the simple graveyard at Grytviken, facing South, rather than the traditional East, in recognition of his lifelong Antarctic aspirations.,
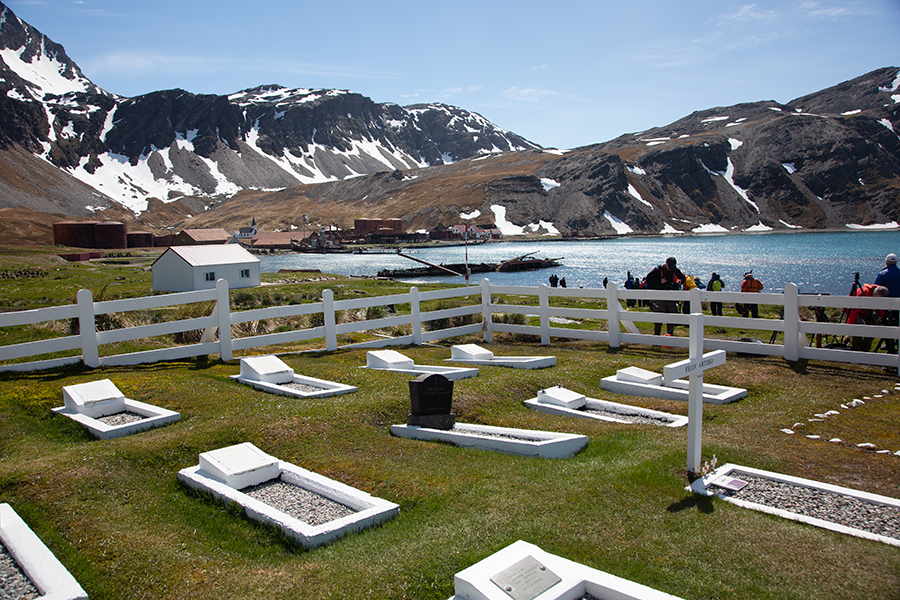
The graveyard at Grytviken

Shackleton's grave - where his momory is toasted by visitors to this remote island. |
#155 - January 2022
"Squabbling Cranes" |
Ladd S. Gordon Waterfowl Complex, New Mexico, December 30, 2021
Anne and I took a long drive between Christmas and New Year to visit the wildlife refuges along the Rio Grande river in New Mexico. The our main objective was Bosque del Apache National Wildlife Refuge, which attracts tens of thousands of wintering sandhill cranes and geese. This year, however, we found disappointingly fewer birds than on several previous visits. A chance meeting with another photographer provided an answer. The reserve is managed by arrangement with local farmers to grow corn for the wildlife, and a recent storm had decimated many of the fields at Bosque. But the birds quickly pass on among themselves information about where food is to be found, and we were told that many had moved up to the Ladd Gordon Waterfowl Complex, about 40 miles further north along the river.
On our last day we drove to this smaller reserve, which consists of a 4 mile visitor loop around irrigated fields, with a large pond at the southern end where the cranes and geese roost overnight. The birds had indeed come to the right place, and we were greeted by the highest density of cranes I have ever seen, all gathered together in a single field and overflowing onto the dirt road. From a photographic perspective this was maybe too much of a good thing, as the sheer number of cranes formed a solid grey background that largely precluded any hope of isolating individuals. An exception was when a pair of cranes would take umbrage and leap into the air above the crowd for a beak-to-beak confrontation. These incidents never seemed to result in injury or even bodily contact but entailed some wonderful gestures of aggression before one of the pair backed down.
Squabbles usually lasted only a few seconds, making it difficult to get a lens focused on them before they ended, but the vast number of cranes packed together without social distancing provided lots of opportunities. To get the right perspective I needed to be photographing down low, to highlight the squabbling pair against a distant, blurred backdrop, rather than having them merge into the mass of birds below. Lying on your tummy in the dirt quickly gets uncomfortable, so here I was grateful to take advantage of a dry, concrete-lined irrigation channel next to the field. Settling down in this, with my head and camera just above the rim and level with the field I was able to photograph in comfort for a couple of hours before the light began to fade. |
#154 - December 2021
"Grytviken Abstracts" |
Grytviken, South Georgia Island, December 2017
Grytviken is a former whaling station on the remote island of South Georgia. It was founded in 1904 as it had the best harbour on this storm-wracked island, with flat ice-free terrain and a fresh water supply and became South Georgia's principal station and settlement. However, by mid-century the whale populations had been destroyed and Grytviken was abandoned in 1966. It now has no resident population, but a few staff stay here in summer to manage visitors who embark from expedition cruise ships en route to Antarctica.
Whales were hunted for their high-value oil, which was used around the world for oil lamps and to make soap, as well as for their bones and meat. The industrial scale machinery at Grytviken for processing the whale oil, blubber, meat and bones remains in a state of rusting decay - protected from vandalism by the remoteness of South Georgia, but not from the ravages of the extreme climate. Originally the machines were enclosed in corrugated metal-sided buildings, which still remain largely intact at other whaling stations on South Georgia. Dangers from collapsing and wind-blown flying sheet metal and asbestos exposure led to those stations being declared off-limits to visitors. Grytviken is the exception, having been cleaned-up and sanitized for the safety of tourists in 2005 by the removal of buildings, asbestos and fuel oil. What remains is an eerie memorial, with the processing plant now open to the elements froming a 'rustscape' dear to the heart of any photographer.
Visitors arriving on cruise ships have to be ferried ashore in Zodiacs, leaving them only a few hours to explore the settlement. Voyaging on a much smaller vessel, the twelve-passenger Hans Hansson, we were able to moor at the dock in the heart of Grytviken. That greatly enhanced our time ashore, most especially by enabling a unique opportunity for nighttime photography. Waking to an alarm set for 2:00am I carefully passed my camera bag and and tripod over the forbidding gap between boat and dockside, jumped across, and set out to explore the landscape of industrial archeology by flashlight.
My photos from that visit in 2017 are HERE. Four years later, and during a second year of being largely confined to home by covid-19, I was looking for photographic inspiration while being unable to travel to new inspiring locations. Continuing a theme of creating abstract compositions by post-processing photos from my archive (see P-o-t-M #157, 147, 142 below) I returning to my nighttime light-painted shots from Grytviken as a promising starting point with their vivid colors and intricate patterns. I feature two examples above, and more can be seen HERE.
|
of in
#153 - November 2021
"Beam me up Scotty" |

Happy Canyon, Utah. May 2012
Back to the archives for this month’s selection. A photo from a remote, difficult to access slot canyon, comparable in beauty to Antelope Canyon, but without the crowds. On my visit I had the entire canyon to myself.
Getting to Happy Canyon is half the fun. There are two approaches: a long hike, including a rappel; or a short hike after driving a rough high-clearance 4x4 trail. I took the latter route, driving along Poison Spring Canyon, then branching left along track 12020, a ledge road cut into the side of the cliff during the 1950’s uranium mining boom and untouched since. After about 16 miles a fallen boulder - literally the size of a house - blocks the way, but I found an excellent campsite shortly before, with a wonderful view down to the Dirty Devil river. The next morning, I continued hiking along the old road until directly opposite where Happy Canyon exits into the main canyon of the Dirty Devil. At this point a few cairns marked a faint but easy trail switchbacking down to the river. The water was running low and warm, making for a pleasant barefoot crossing on a flat sandy bottom that took me within a few yards of the canyon opening. [A detailed route description is HERE].
Once in Happy Canyon it slotted-up and became fantastic about 5-10 minutes from the river, with no major obstacles. Although not very narrow – in most places wider than outstretched arms – the high walls of the canyon filtered the sunlight through multiple reflections leaving only a dim red glow. In a few spots however, meanders in the canyon allowed direct shafts of sunlight to penetrate. One of these sunshafts enabled the trick to create my ‘selfie’ as a ghostly apparition.
Because the direct sunlight is enormously brighter than the reflected, diffused light reaching the canyon bottom, a camera exposure set to correctly expose the canyon walls will ‘blow-out’ highlights exposed by the sunshaft so they appear a uniform bright white. This is normally something to be avoided, and when photographing in slot canyons I usually frame my composition to avoid such hot-spots. But here I wanted to deliberately create an overexposed self-portrait, and after finding a sunshaft set up my camera on a tripod to frame a wide view of the sinuous canyon walls. Using a 10second timer to trigger the shutter I had a little time to move into position and adopt a suitable pose. Something of a hit and miss procedure, but I could check the result on the camera screen and go back for a few other tries before the Earth’s rotation cut off the sunshaft.
Being alone in a remote canyon is really what enabled this photo. Although Upper Antelope Canyon is famous for its light shafts, the density of visitors nowadays would preclude even setting up a tripod, let alone getting a clear view of the canyon without crowds of people.
|
#152 - October 2021
"Steelscape: UCI Continuing Education Building" |

Courtyard of the Continuing Education Building, University of California, Irvine
During the covid-19 pandemic my day-to-day universe has shrunk to walking distance from home. However, we are fortunate to live of the campus of UCI, which has given me many new photographic subject and ideas. The campus is new – founded only in 1965 – so the architecture cannot rival that of old institutions such as Cambridge. Nevertheless, there is much to be found. The original campus buildings were constructed in a uniform ‘brutalist’ style; a description that has a specific meaning in architecture, but does well describe them in an everyday sense of the word (scroll down to P-o-t-M #148). After about 1975 however, that uniformity was abandoned, and subsequent buildings display more individuality, and sometimes a little quirkiness.
A recent (2016) addition - the extension building for Continuing Education, designed by LMN Architects - is a nice exemplar. The building itself is arranged in a U-shaped configuration, but the visual highlight is a broad courtyard within the center of the U. From the architect’s description “An expansive 6,150-square-foot central courtyard organizes the design, resulting in an outdoor living room that instills a sense of connectivity for the program as a whole, as well as for the larger campus” Notably, "The courtyard soaks up sunlight from the west, while mitigating the impact of glare and heat through a large brise-soleil patterned with 25-kW photovoltaic panels, which in the first month of operation produced 18% of the building's energy needs. The spatial configuration of the courtyard and the solar panel trellis were carefully calibrated to achieve a comfortable, inviting combination of shade and filtered sunlight at all times of day."
The courtyard is indeed an impressive and inviting space, with the massive overhead brise-soleil grid forming a porous roof to give a semi-enclosed, indoor/outdoor feel. To capture a photograph encompassing this vast space I was going to need a super-wide lens, and a viewpoint from one corner. Moreover, I would need to be at half-height, to keep the cameral level while including both the ground and the roof grid within the frame. A staircase leading up from the outer edge of the courtyard looked as if it would get me exactly where I wanted to be. From the first floor I was too low, on the second floor still just a little low, whereas a few steps higher gave the perfect viewpoint. But, from the second floor upward, the stairway was enclosed by a stout steel wire mesh with a grid too fine to allow taking a photo between the wires. (A similar mesh encloses the staircase on the contemporary Learning Pavilion building – I don’t know the function, whether for safety reasons or merely decorative.) What to do? From the second floor I would have to tilt the camera so much the perspective would be distorted beyond the capability of Photoshop to correct. Well, the wire mesh was structured in vertical sheets, with a gap of only an inch between. That was too narrow to photograph through, but by pushing and pulling on adjacent sheets I could enlarge the gap just enough to insert through the (narrow) 9mm lens on my little Canon M5 camera. Once situated the lens was jammed in place by the taught wires. No need for a tripod! But leveling the camera rotated the focus ring, so it took a few goes to get everything set up with the composition framed and focused correctly. As a serendipitous bonus from this unconventional arrangement, the camera screen showed that the extreme field of view of the lens included the edge of the wire mesh. Thinking that this would provide a strong framing motif to complement the steel grid of the brise-soleil I stopped down the aperture to keep focus from the depth of the courtyard to the wire mesh only inches from the lens. |
#151 - September 2021
"A kalaidoscope of Fractured Peace" |

An abstract interpretation of Fractured Peace - Newport Beach Civic Center sculpture park, September 2021
Another colorful kaleidoscope this month - returning to the same subject as P-o-t-M #144, but with a very different interpretation. In both instances the reference is a sculpture in the garden at Newport Beach Civic Center called 'Fractured Peace', which consists of a series of interlocking, brightly painted arches. To create a more interesting, non-representational image I wanted to abstract the arches from their surroundings; in particular to find a way to remove the intervening wide areas of blank blue sky and create a solid block of color and patterns. Last time around I accomplished this by stepping back far from the sculpture and using a long telephoto lens to compress the perspective. That solved the 'gaps' problem, but still resulted in a photograph where you could identify what it was you were looking at.
This time I wanted to generate a purely abstract pattern with a rotational symmetry looking up into the arches, rather than across at them. That would obviously include a lot of sky, so I figured to fill in the gaps by taking several shots with the camera pointing straight up, rotating by about 10 degrees between each so the arches would overlap from frame to frame. I used my little Canon M5 camera with an ultrawide 9 mm lens, set the camera on a spare lens cap as a pedestal to keep it level as it rotated, and triggered the shutter via a ten second timer so I had time to get out of the way. Given the difficulty in anticipating how this would work out I captured several sequences positioned underneath different arches, always using the shadow of an arch to shade the lens from the midday sun.
The harder part, then, was the Photoshop work of selecting and assembling the individual frames into a final composition. To create the composite, I desaturated and brightened the sky in each frame so the arches became the darkest feature, and then added frames as layers with the overlay function set to ‘Darken’. Thus, with successive additions the blank areas of sky progressively filled in. But, even after my ninth and final layer there was still a gap in the center. To complete that, I composited another sequence taken from a slightly different viewpoint and used that to fill the middle. The end result was a gap-free composite, but looking rather dark and gloomy as it was formed from the darkest parts of each frame. I added back the sunshine using global curve and saturation adjustments, and with a transparency brush hand-painted through areas where a dark part of one arch had overlain the brighter part of an adjacent arch.
Well, that was rather a lot of explaining, but I hope you like the final result. Truly unique, as I could never recreate exactly this composition even starting from the saved camera files let alone re-photographing the sculpture. |
#150 - August 2021
"God-rays and haboob at Badwater" |

Badwater Basin, Death Valley, July 19, 2021
The Badwater ultramarathon - the 'World's toughest footrace' - begins each July at Badwater Basin, the lowest poin in the western hemisphere. From the start line runners progress through Death Valley (the hottest place on earth) and over three mountain ranges for 135 non-stop miles to the finish at the trailhead for Mt. Whitney, the highest peak in the contiguous US. For many years I ran/walked the race, but more recently I have been returning in the capacity of race photographer. I have found this highly rewarding, foremost for the opportunity to reunite with the family of wonderful, but slightly crazy people who subject themselves to this torture - and with their dedicated support crews. Photographically, the race is also a chance to get back into the austere, beautiful landscapes of Death Valley and the Sierras.
For many years the race started in the early morning, so for the first 40 miles the competitors ran below sea level through the bottom of Death Valley during the hottest time of the day. That made for some great photos, with the endless salt flats and 11,000 ft Telescope Peak as bacground. But, a few years ago the National Park service undertook a safety review, and decided that it was too dangerous to have people running in 125 degree heat - despite the fact that that there had been no problems in races over the previous two decades. Now the race starts in the evening, with three 'waves' at 8:00, 9:30 and 11:pm.. The first wave of runners set off around sunset, and of course it is completely dark for the other two waves. Not great for photography! By first light the next morning most of the runners are beginning the climb out of Death Valley, gaining altitude and with it cooler air, but entering territory not quite as spectacular as Death Valley itself.
This month's photo features the start line shortly before the 8:00 pm wave, The race begins on the boardwalk and platform that gives access to the salt flats, and the spring-fed saline pools that give Badwater its name. This is almost the lowest point (the sign says 282 ft below sea level), but the true low point lies a couple of miles out across the dry lake bed. When I arrived the temperature was about 116 F (realatively cool!) and the air was clear, with the sun casting long shadows as it dipped toward the mountains. But in the distance to the north something ominous was blocking the view up the valley; a sandstorm, a haboob.. The wall of dust gradually came closer and started to engulf us. But it was a very gentle haboob - no strong winds just a gradual decrease in visibility. The sun was casting nice God rays into the sky, but because the sun was still just above the mountains, these were difficult to photograph because of sunlight shining strainght into the lens. The haboob took care of that, with the low sand cloud conveniently blocking the direct light. |
#149 - July 2021
"A Medley of Fireworks" |
| |

Newport Dunes 4th of July fireworks display photographed from the UCI Ecological Preserve
A short walk from our home gets me to the top of the Ecological Preserve on the UCI campus - providing an expansive view of the various fourth of July firework displays in Orange County. There were no fireworks last year owing to covid, and I was happy to go up and see what I could photograph.
Given the random unpredictability of when and what will go off next during a display, I took a simplified approach by locking my camera on the tripod, after selecting a focal length wide enough to capture the entirity of the fireworks at nesrby Newport Dunes. By the time the display started it was fully dark, so I knew I could set and leave an exposure (f 5.6 at ISO 100) and shutter speed (4s) long enough to captured the trails of even the brightest fireworks without saturation. Then I just locked the shutter release to the on position and let the camera do its thing while I watched at leisure. Some 20 minutes later the display ended with a crescendo of explosions, and the camera had stored nearly 300 shots on the memory card.
From past experience I had found that a big problem with photographing fireworks arises from the progressive accumulation of smoke during a display, which both obscures and reflects a distracting background glow. Thus, only the first few shots worked well as 'straight', representational photos.Having now accumulatedt a collection of hundreds of shots I thought to try something different. With so many to choose from, I could go through and select interesting aeriel patterns (did you kow there are at least 25 diverse types of effects, all with their own names) that were relatively free of smoke artifacts. These I clipped out in Photoshop, and individually 'cleaned up' using curves and clarity adjustments to remove any residual smoke background and bring out the glowing colors . To create the final montage I created a black canvas and placed each firework as an individual layer with 'lighten' blending so I could freely move them around to arrive at a pleasing, but random arrangement.
|
|
|
#148 - June 2021
"Quadrant Reflection: Social Science Tower, UCI" |
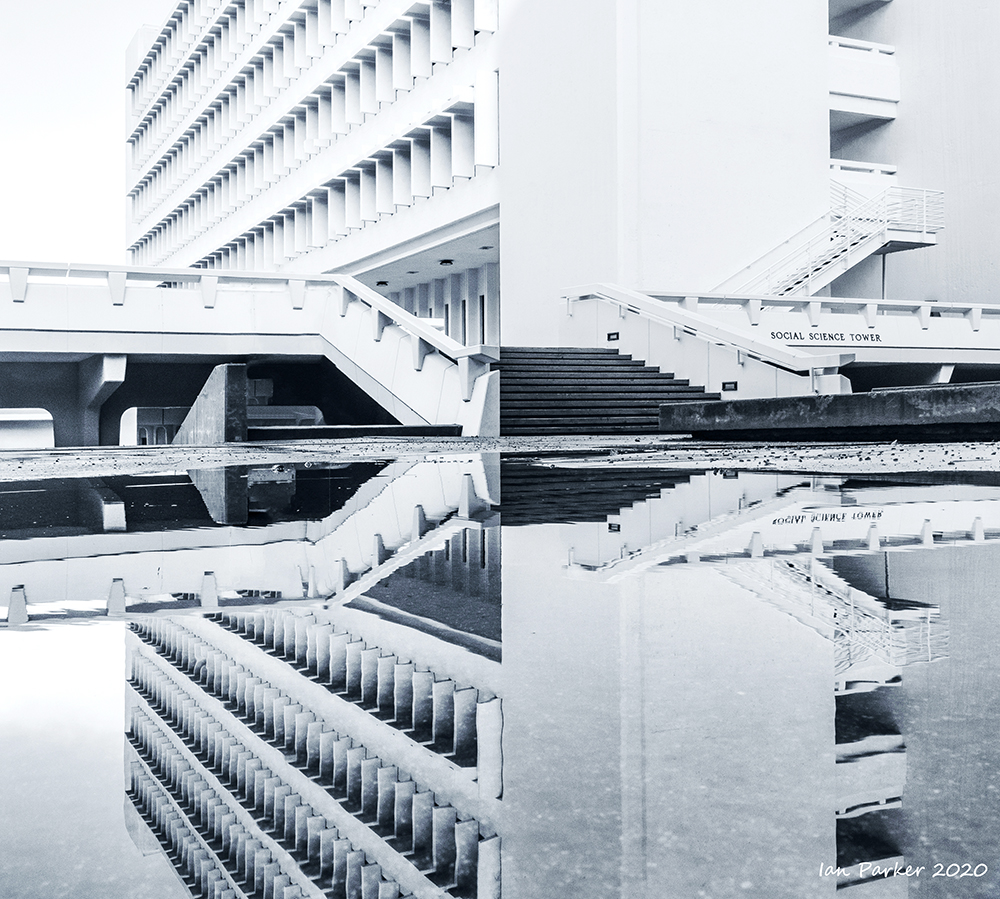
UCI Social Science Tower reflected in a rain puddle.
Some of my recent photos-of-the-month (#147, 142) have featured abstract 'kalaidoscope' images, created in Photoshop by reflecting a starting image around horizontal and vertical axes to create a symmetrical quadriptych. This month I show a four-panel polyptych created not by artifice, but in-camera, as a single exposure.
The subject is the Social Science tower, one of the original buildings dating from the founding of the UCI campus in 1965. The master plan for the campus was designed by the famous architech William Pereira . His was a bold plan at the time, envisaging floating white concrete platforms suspended over the ground on pedestals to present the buildings like individual sculptures in a giant museum sculpture garden. Each building was constructed in the 'brutalist' style, characterized by minimalist constructions that showcase the bare building materials and structural elements over decorative design; making use of exposed concrete, angular geometric shapes and a monochromatic color palette. Pereira's buildings were indeed brutalist, but functional, with fins and sunshades acting as passive solar elements to capture the sea breeze and keep the buildings cool without air-conditioning. These stark features provided a fitting location for the filming of the original Planet of the Apes!
Nowadays it is impossible to visualize Pereira's buildings as they were in the 1960's, standing alone and isolated on all sides. Photographs by Ansel Adams, comissioned in 1968 to commemorate the 100th annivesary of the University of Caifornia, are our best record from that time. The campus is now a leafy arboretum, with innumerable trees and new buildings blocking the sightlines. However, this view of the Social Science tower remains exactly as it would have looked in 1965: I Photoshopped out only a couple of modern signs.
During the covid pandemic, with international and even domestic travel curtailed, my home campus of UCI became my main photographic interest. I took many walks with a camera around my neck looking for interesting perspectives on the architecture and landscape. Occasional rainy days (this is Southern California) were a big incentive to get out and find reflecting puddles. Poor drainage in Social Science plaza reliably resulted in accumulation of a particularly big puddle, creating a wonderfully large and still mirror to create symmetrically reflected images by positioning the camera just above (but not immersed in!) the water. For this month's photo I saw the opportunity to go beyond merely a reflected diptych and create a four-panel image by carefullyaligning the edge of the conctete stairs with a prominent edge on the tower. The result is not horizontally symmetrical, but makes a nice left-right textural contrast between Pereira's characteristic 'eyebrow' windows and the blank wall on the opposite face of the building. Looked at more as an abstract depiction than an objective representation the image has, to me, something of an Escher feel. |
#147 - May 2021
"Color Rock Kaleidoscope" |

Color Rock Quarry, Buffington Pockets, Nevada, April 27, 2021
Now fully immunized, Anne and I escaped from covid home-isolation for a long-weekend camping trip. Our destination was Buffington Pockets, a remote backcountry area about 50 miles past Las Vegas. I had not previously visited, but I was attracted by photos on the internet (here and here) illustrating intriguing sandstone features and colors. The pockets lie within the Muddy Mountains, a range of grey limestone peaks interspersed by enormous outcroppings of fossilized sand dunes. The sandstone is part of the same Aztec formation as at the nearby Valley of Fire state park and, although not quite as spectacular as the popular Valley of Fire, a great attraction for us was the remarkably low level of visitation. We encountered only two other people over three days and, found some wonderful camping sites.
We drove along the rough Bitter Springs OHV trail through the mountains, passing through Buffington Pockets, and explored several side trails heading off into canyons and giving access to other sandstone areas with features that very surprisingly between the different outcrops. We first visited the north east area, where the rock is pockmarked by vast numbers of little caves and hollows, featuring many small arches. My favorite, though, was Color Rock Quarry which, as the name suggests, was the site of a small-scale quarrying operation. Unlike the deep red sandstone of the other canyons, the rock here is lighter in shade, often even white, but intricately striped with sinuous bands of pastel colors from yellow to purple. Little remains of the quarrying operation beyond a spectacularly graffitied hut, but along the track at the base of the quarried face several flat rock panels are exposed, displaying the colored striations to best effect.
An overcast sky provided good, diffused lighting for me to photograph these panels, which would otherwise have been exposed to the harsh glare of morning sunshine. My aim in composing shots was to isolate pure abstract patterns by tilting the frame to exclude as much extraneous detail (pebbles, small plants etc.) and ensuring that all would be in sharp focus. Looking at the images on the computer screen back home I resisted the temptation to zap up the color saturation and contrast, preferring a low-key approach that more closely resembled what I had seen by eye. With some further judicious cropping and content-aware fill to get rid of extraneous distractions these indeed made striking abstract compositions. But then I thought I could go a little further. Our visual system is captivated by symmetry and reflections, so to create this month’s photo I replicated a ‘straight’ image with four-fold symmetry – like a Rorschach inkblot, but reflected along both axes.
|
#146 - April 2021
"Solar Eclipse Sequence" |

Malheur National Forest, Oregon, August 21 2017
44 33 18N 119 18 50 W; 17:23UT;
eclipse at Alt 43.2, Azi 121.9
It is not often that a total solar eclipse can be viewed from somewhere that is relatively easy to reach, and has a good likelyhood of good weather. The eclipse of 2017 cut a path across much of the northern US, and from our home in southern California a swath from the Oregon coast across Idaho lay within about about a thousand mile driving distance. Eastern Oregon looked the best bet for clear skies, and searching on Xavier Jubier's wonderful interactive eclipse map I found a promising forestry road following the center line of the eclipse. Anne and I arrived there two days after leaving home, camping (and photographing) along the way at Mono Lake and Steen's Mountain. Many of the best clearings along the forest road were already occupied by eclipse watchers, but we eventually found an excellent wide open area, with even a pond to try for reflection shots of the eclipse.
My plan to photograph the eclipse was to set up two cameras; one with a long telephoto lens to capture details of the suns' corona (see Photo-of-theMonth #103, and a second with a wide angle lens to generate a time lapse composite of the progression of the rising sun and its eclipse. Anticipating the possibility of a reflection shot I had done a bit of research to compare the elevation of the sun at the time of eclipse with the angle of view of my wide angle lenses. I had a couple of possibilities, a 14 mm lens on full-frame, or a 10 mm lens on a crop frame camera. The 14mm lens would have provided a wider view, but with a bulbous front element it would have been difficult to fit the filter necessary to attenuate the sun's light before it became eclipsed. A little calculation indicated that the 10mm lens on a my Canon 7D Mk2 would work with a little room to spare, and I was happy to confirm this by checking the sun's path the day before. The lens was just wide enough in portrait orientation to encompass both the eclipsed sun, quite high in the sky, and its reflection in the pond.
To create the composite image above I took a shot just before sunrise to use as background, then mounted a pair of stacked ND filters as a solar filter, and programmed the camera to take shots every 10 min. At the time of total eclipse I carefully removed the filter stack to expose for the corona, then replaced it at the end of totality with just enough room left at the top and bottom of the frame to capture one more image as the sun emerged from behind the moon,
|
#145 - March 2021
"Squabbling Snares Penguins" |
Snares Island, March 2020
My photo for this month was taken almost exactly a year ago, at the last place we visited on our Heritage Expeditions volyage to the Southern Ocean, before returning home to find a world changed by the covid-19 virus.
The Snares islands lie 125m south-southwest of the southernmost tip of the South Island of New Zealand, and were originally named simply ‘The Snares’ by Captain George Vancouver when he discovered them in November 1791. Vancouver considered the islands to be a hazard to shipping, hence the sinister name. But, in fair weather, the two main islands appear not at all sinister, being covered with tree-daisy forest and tussock grassland. Moreover, as the islands have never suffered from introduced mammals, the native wildlife is both abundant and approachable.
The most famous bird species on the islands is the Snares crested penguin, a close relation of the New Zealand fiordland penguin, but unique to the Snares Islands. The Snares penguins spend most of their life at sea, but come ashore to breed and moult, establishing inland colonies under the forest canopy or in shrubland. Because access to the Snares is tightly regulated to prevent the introduction of predators visitors are not permitted to land, and we were able only to cruise the coastline in Zodiacs. Fortunately, however, some penguins nest and gather on exposed rocky sites above the shoreline, where we were able to get clear views. For the most part, penguin colonies are a confused mess of squabbling birds, rocks and penguin poop, but here two penguins isolated themselves on a rocky ridge - apparently to have a good set-to argument - allowing me to frame a 'clean' composition without distractions. |
#144 - February 2021
"Fractured Peace - Rainbow Sculpture at Newport Beach Sculpture Garden" |

A bright, cheerful photo this month, marking 12 years of photo-of-the-month, and perhaps the beginning of the end of covid isolation, as we recently received first vaccinations.
On Saturday mornings I often take a longer morning walk down to Newport Beach and the Pacific Coast Highway. Close to PCH the citizens of Newport Beach decided a few years ago to treat themselves to an upscale Civic Center, incorporating a park designed by the same company that landscaped Marina Bay Sands and Changi airport in Singapore . The park features a growing cast of sculptures, including many white rabbits that are a children’s favorite. My photo derives from Fractured Peace by Nancy Mooslin : “Fractured Peace" consists of six arches which, if put together, form three twelve foot diameter circles. The size and colors of the inviting wooden arches were inspired by the rhythms and pitches of music, a way of “seeing” a melody in three dimensions, inspired by a quote from the poet Robert Browning; "On the earth, the broken arcs; in the heaven, a perfect round. The arches also represent six pieces of music composed by Darrel Dorr.“
For my two-dimensional photo, however, I wanted to fuse the arches together, creating a more abstract representation that would still communicate a sense of depth. To achieve that I walked some distance from the installation and focused in with a telephoto lens to compress the perspective; then waited for an interlude when there no kids running in between the arches… I didn’t want to leave any gaps between the arches that would reveal the surrounding trees and buildings and destroy the abstract illusion, so I moved around to find an optimal composition. The best I could manage still left a couple of small gaps, which I filled in later in Photoshop. See if you can find the added segments! |
#143 - January 2021
"LA sunrise reflections" |

View of downtown LA skyscrapers from UCI
From our house on the UC Irvine campus a 15 min walk will take me to a lookout point at the top of the campus Ecological Preserve that commands extensive views over the ocean to Catalina Island, across the flatlands of Orange and LA counties to the San Gabriel Mountains, and to Saddleback Mountain in the west. For the past ten months of covid isolation that has been my entire visual horizon, and physically I have been confined within about a five-mile walking radius of home. Constrained within that small circle, my task for the month of January is to complete 267 miles on foot, having entered the Badwater 267VR race - a virtual race for the time of covid, combining the total milage of the three ultramarathons organized by Adventure Corps.
Completing the race entails averaging nearly nine miles a day, so I set off early every morning to walk off the distance. A few days ago, I happened to reach the lookout point exactly at sunrise and noticed a bright red glint far in the distance – actually, a glint so bright as hard as not to notice. I wondered if the light might be reflecting from the skyscrapers in downtown LA, though that seemed improbable as they are 40 miles away. Some research with the Photographers Ephemeris nevertheless confirmed that origin, revealing that the alignment of the buildings along the SW/NE street axis was exactly right to mirror the rising sun at this time of year. Thus, a fleeting phenomenon likely to be seen at this location for only a few days around mid January and early December, and dependent on clear visibility when Santa Ana winds sweep away the LA smog.
Returning this morning I took my camera and long lens (400 mm + 1.4x teleconverter) to capture the distant reflection. That was easy to photograph, but more difficult to process and display the image. The problem was that the high towers brightly reflect the red of the sun as it rises just above the horizon, while everywhere else was still in deep shade. Our eyes can deal with this extreme contrast range in real life, but a print or even computer screen lacks the dynamic range. When I tried to match the true red color of the reflections they looked too dim – both photographic prints and current lcd screen work by color subtraction so a pure red must always be dimmer than white. To create the illusion of brightness I thus had to crank up the exposure slider so that the brightest reflections became white; a common trick that we become so accustomed to that we fail to notice that yellow and white highlights in sunset photographs do not correspond to the true colors.
|
#142 - December 2020
"Middle Earth Windows Kaleidoscope" |
Middle Earth Towers, UCI
And now for something completely different... For this month I present an image distinct from my usual styles of landscape and wildlife photos: an idea prompted by an accidental discovery in Photoshop, by frustrations in trying to find something new after nine months of covid isolation, and an extension of my project to photograph the buildings of the UCI campus.
Among the more interesting campus buildings the recently constructed Middle Earth student housing complex stands out. On a recent sunny morning the glass facades of the two towers were gleaming in the harsh light, offering tempting photographic possibilities when deep shadows precluded most toer subjects. I already had some good shots of the building itself, so equipped with a long telephoto lens I set out to isolate small sections among the windows to create semi-abstract patterns. Aiding this, the architect had incorporated playful diversity in the design: placing metal mesh screens above some windows; framing some with a yellow surround; and, unusual for a modern building allowing the windows to open, so according to random student preference some were open and some shut. Together with reflections of the sky and the opposite side of the facing tower this all made for some colorful compositions, that already were part way between recognizable reality and pure abstraction (two photos on the left below).
Because the photos were taken looking up at a slanted angle, vertical lines appeared as converging. To straighten them out, I used the ‘perspective’ tool in Photoshop. Normally this is applied in fine increments with careful judgement, but after an accidental jog of the mouse I discovered that the perspective could be completely flipped, with the image appearing to converge to a point, and then diverge on the far side of infinity! (third photo below). That was a neat and quite striking effect, but it left two black triangular segments on the sides. To fill in the blank spaces I took my second photo and applied the same treatment, but now on the horizontal rather than vertical axis (fourth photo below), and finally merged the two to create my final composition.
The result, I think, is truly abstract; without knowing the origin it would be very hard to identify the initial subject. It might be viewed simply as a colorful, kaleidoscopic pattern, but I imagine walking down an endless corridor with floor to ceiling windows on each side and strange tracks running along the floor.
Bonus December Photo
The same treatment applied to photos of the mirrored panels on the Social Science Stairway.

|
#141 - November 2020
"Science Library fisheye with Milky Way" |
Science Library, UCI
Trapped at home in self-imposed covid-19 lockdown I have given myself a photographic project. We live on the Irvine campus of the University of California (UCI), and I am setting out to make a comprehensive architectural photo shoot of the campus buildings. UCI was founded just over 50 years ago, so all the buildings are relatively modern, but there is a wide range of styles from Pereira’s ‘brutalist’ original buildings to more recent post-modern extravaganzas. Perhaps the most interesting and unique building on campus is the Science Library: designed by the renowned British architect James Stirling this was completed in 1994, and its shape is reputed to have been inspired by the Starship Enterprise. Whether that is true or not, the building does have a curious layout, comprising an entryway between two tower blocks, a central, circular ‘drum’ around an open courtyard, and a terminal ‘bar’.
Even though the library has been closed for months following the onset of covid restrictions the lights have remained on 24/7, providing good opportunities for nighttime photography. In particular, the floor- to-ceiling windows around the second floor of the drum brightly illuminate the central courtyard. Given the unusual circular layout of the drum I thought this would be an excellent subject to play with a fisheye lens. Fisheye lenses provide an exceptionally wide field of view, but in the process project the image in a way that appears highly distorted to the human eye. Straight lines become wildly curved; but, provided the camera is centered, circles remain circular! To take this month’s photo I thus placed my camera on the ground in the exact center of the drum, the location of which is conveniently marked by a small drain. My new Canon R5 facilitated composition, as the flip-out screen (lacking on my previous cameras) let me view the image with the camera pointing straight up. Once arranged I set a 10 second timer and moved well out of the way as the lens ‘sees’ sideways with a 180 degree field of view. My Rokinon 8 mm fisheye lens yields a circular image that fits within the long axis of the camera sensor, but clips along the short axis. To produce the final image, I needed to take two shots, rotating the camera through 90 degrees, so these could be combined later in Photoshop to complete the circle.
The end result was quite impressive – somewhere intriguingly between an architectural photograph and an abstract kaleidoscope. But the uniform black night sky in the middle bugged me, and I wondered about replacing it with something more interesting. Although I do not normally composite images from two or more shots taken at completely different times and places and disavow the trend (and even recent software) to ‘swap-in’ different skies, this seemed like an acceptable compromise in this instance. The only way it would be possible to see the heavens from within the library would be during a power cut encompassing not only the building but the entire LA basin. So, to add an extra sense of mystery, I swapped-in a photo of the milky way taken from a dark sky environment at 11,000 ft altitude in the White Mountains. |
#140 - October 2020
"In a covid spider web" |
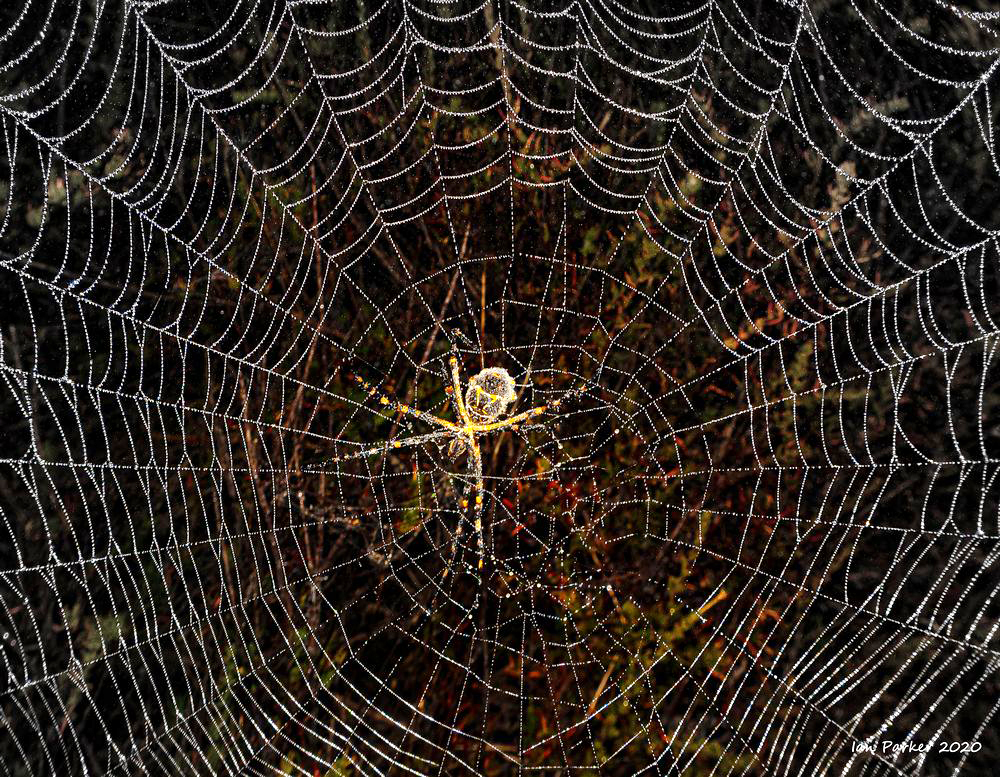
UCI Ecological Preserve
At the time of writing it is over 200 days since Anne and I began a self-imposed lockdown following the onset of covid pandemic restrictions. In may respects we are in a fortunate situation, and it has actually been quite a pleasant time - but rather devoid of photo opportunities. No more penguins for a while!
The inability to travel to wild and exotic places had rather dampened my motivation to get out and take photographs. However, we live on a very ‘green’ university campus with lots of open spaces and potential photographic subjects within easy walking distance. Notably, the campus encompasses an ecological preserve; a modest 60 acres yet comprising a series of hills, ridgetop vistas, and a valley bottom that create a range of microclimates supporting rich species diversity. I usually include the preserve in my morning walk – the hills give good exercise – and some recent unusual weather induced me to take a camera along. This summer in Southern California has brought two extreme heatwaves, but between them we had some cool days, with an early morning dense marine cloud layer and sometimes a heavy, damp mist. On one such misty day I took a little camera (Canon M5) out on my morning walk to see what I might encounter. Across the ecological preserve the ground was draped with glistening spider webs. I am sure the webs are always present, just not so strikingly visible without the silk threads being outlined by myriad dew drops. So, something interesting and a little unusual to rekindle enthusiasm for taking photos.
I settled down to see what I could make of a nicely symmetrical web that was suspended across bushes about a foot above the ground. My first attempts were unsuccessful. The web did not stand out clearly against the confused background vegetation, and the ‘kit’ lens I had with me did not have a wide enough aperture to blur the background, despite focusing as close as it would go. Then I had the idea of using the pop-up flash on the camera. That did the trick! The droplets on the web caught the flash beautifully, whereas the darker and more distant background vegetation faded to black. Moreover, because I now had a bright light source to work with I could stop down the lens to gain a broader depth of field and keep almost all of the web and its spider in sharp focus. To produce the final image I did do some heavy-handed adjustments in Photoshop, sharpening and brightening the bejeweled web, and accentuating the already iridescent yellows of the orb spider.
|
#139 - September 2020
"King Penguin Sunrise Silhouettes" |

Saint Andrews Bay, South Georgia
What? Penguins again? A third consecutive penguin photo, and the fifth in the last seven months...
Well, I had a few reasons for choosing this photo. One is penguin deprivation. It is now half a year since we last visited with penguins; six months spent secluded at home in covid isolation. My thoughts wander back to the Southern Ocean on my morning walks. A second motivation is to celebrate my new penguins book, which features this photo on the front cover. Finally, it seems this is my most viewed photo. A couple of years ago I posted a dozen shots to Unsplash - a website dedicated to sharing stock photography under the free Unsplash license that claims over 207,000 contributing photographers and generates more than 17 billion photo impressions per month on their growing library of over 2 million photos. As I already make full-resolution images free to download from my own website I was not giving away copyright, and I was curious to see how many views these shots would receive. Over two years many of them have received over a million views, and my penguin sunrise photo is the favorite, passing ten million views this month; a surprising number as my website has logged only some 100,000 visitors since its inception 16 years ago. I guess there is some lesson there about getting high rankings in Google’s search algorithms.
Anyhow, about the photo itself. It was just a ‘grab-shot’. Nothing planned, just being in the right place at the right time and making use of the opportunity. We were on a month-long excursion to South Georgia aboard the Hans Hansson, a 12-passenger expedition ship. Among the many advantages of traveling on such a small vessel are that schedules can flexibly organized according to changing conditions and, being able to anchor close to shore, Zodiac landings are accomplished quickly. On a morning that promised fine weather we were thus able to land on the beach at Saint Andrews Bay right at sunrise, to be greeted by a huddle of king penguins guarding a creche of juveniles (‘oakum boys’). A slightly earlier arrival would have been even better, as a golden glow was beginning to spread below offshore clouds to the east, but I had time to walk around the penguins to compose a shot below the sunrise.
Oakum boys always make a nice subject for backlit compositions, as their fluffy down gives a rim-lit effect, and some of the adult kings obliged by calling with their heads thrown up to the sky as if heralding the start of a new day. The only technical difficulty was dealing with the great dynamic range in the scene. I exposed for the highlights to retain the reds and oranges in the sky, but that did mean the penguins would come out very dark. The king penguins against the sky looked fine left as black silhouettes, whereas I lightened the shadows on the oakum boys enough to bring out their rim-lighting while retaining a natural appearance..
UPDATE March 2024. This photo has now been viewed 20 million times on Unsplash
|
#138 - August 2020
"Gentoo Penguin Reflection" |

Seal Lion Island, Falkland Islands, December 2016
It has now been almost 5 months since my last photos from Snares island on our return voyage from Antarctica, with most of that time locked down in home isolation sheltering from the covid virus. So with nothing new to show I went looking back through my archives for this month's selection.
Why another gentoo penguin portrait? Well, it is one of my favorites, and makes an interesting comparison with the penguin photo from last month. The appeal of that shot does not lie in the portrayal of the subject per se, but rather in its deliberate framing by a massively blurred and strikingly aberrated image of a second penguin. By contrast, when I was composing this month’s photo, I took the opportunity to isolate my subject by almost completely removing any background detail in camera, without needing to resort to Photoshop trickery.
My photo was taken near the elephant seal beach on the Falkland’s Sea Lion Island. Gentoo penguins come ashore here and walk (waddle) in a procession up the beach and across dunes and grassland to reach their colony. Along the way they pass by a small freshwater pond. While sitting to watch the procession I noticed one gentoo take a diversion and wade into the shallows to drink. The air was completely still that morning, and once the ripples subsided after the penguin settled at its chosen place the water stilled to a perfect mirrored surface. For the best perspective I carefully moved around to get an exact side-on angle, at a height where I could frame to exclude vegetation on the far bank with the background only a uniform reflection of the overcast sky.
Waiting for the decisive moment as my gentoo stooped down to drink I was lucky to press the shutter just as a muddy droplet fell from its beak and reflected in the center of ripples spreading from a previous drop. A tiny detail, but one that elevates the photo from merely a nice reflection shot of a penguin. Mike Johnson describes the importance of this ‘something extra’ better than I could: “…to make a photograph work there needs to be something in it; it needs to have something. Something that gives it a point, something that draws in the eye, something that you can connect with, something to make you pause and think, something about it that has some measure of beauty, something, anything, that helps an exposure rise above the common mass…” .
|
#137 - July 2020
"Gentoo Penguin in a Bokeh Frame" |
Sea Lion Island, Falkland Islands,October 2015
Returning from our recent voyage
to Antarctica with photos from three new (to us) species of penguins in my cameras, I set about updating my photo-book of penguins. While looking back through the previous edition I was struck by this photo from five years ago. Having not previously featured it, I thought it would make a good subject for this month - illustrating both aesthetic and technical aspects.
The shot was taken on a beach on Sea Lion Island. a small island off the coast of East Falkland. We visited with a small group organised by Cheesmans Ecology Safaris, and stayed for two nights at the island lodge after flying from Port Stanley on a light aricraft of the Falklands Government Air Service. This arrangement allowed complete freedom to explore the island, and generous time, without the pressure to get back for the last Zodiac as on ship-based tours, On a warm, sunny afternoon I could thus settle down comfortably on the sand to enjoy watching gentoo penguins landing from the ocean and waited to see what photographic possibilities might arise. As a sucker for dramatic backlighting, I trained a long (400mm) telephoto lens on gentoos as they emerged from a strong surf with the sun above and directly behind them. That alone produced some nice images, but then a fortuitous alignment of two penguins, one far down on the beach and another close by, suggested the possibility of framing the distant penguin within the curve of the beak of the near penguin. I obviously chose to focus on the distant penguin as being the subject of the photo, and anticipated that both the surf and the near penguin would be far out of focus, providing a non-distracting, almost abstract background that yet still communicated a sense of the environment.
What I did not anticipate at the time, and did not appreciate until later when viewing the image on a computer screen, was the wonderflul,'swirly' effect around the blurred beak and head of the closer penguin that really makes this photo distinctive.
As a technical aside, and an introduction for non photographers, this effect arises from a phenomenon known as bokeh (暈け), a Japanese-derived term for the aesthetic quality of the blur produced in the out-of-focus parts of an image produced by a lens. In out-of-focus areas, each point of light becomes an image of the lens aperture, generally a more or less round disc. This is visible in the photo above, where backlit droplets of spray from the surf - although themselves completely out of focus - are rendered as sharp white circles. Strikingly, the bokeh circles then become 'sliced off' where the light is blocked around the edge of the nearby penguin, creating a rim of semicircles and finer segments that appear sharp even though their source and blocking object are completely blurred. |
#136 - June 2020
"A Pair of Pairs" |
 Sandhill cranes - Bosque del Apache - Jan. 1st, 2020 Sandhill cranes - Bosque del Apache - Jan. 1st, 2020
 Royal albatross - Campbell Island - Feb. 11th, 2020 Royal albatross - Campbell Island - Feb. 11th, 2020
In wildlife photography two is often better than one - particularly if the subjects are showing some mutual behavior. Beyond that, my selections this month have a pleasing visual symmetry. And, although the photos were shot within a space of five weeks there is also a geographic symmetry; they are from diffeent hemispheres, at locations near to being diametrically opposite on the globe.
The top photo features two sandhill cranes on a cold New Year's day morning at Bosque del Apache, having just taken off after roosting for the night in the safety of a pond. Cranes quite often launch and fly together in pairs, but I was especially happy to get this shot when a pair were so perfectly aligned with symmetrical wings-up and wings-down positions. Of course, that was mostly a mater of luck rather than pressing the shutter at the deccisive moment. I had my camera set on fast motor drive, and fired off a long burst starting from when the cranes began their take off run acoss the water and following them into the air.
The lower photo captures two Southern Royal Albatross on sub-antarctic Campbell Island, which we reached following 7000 miles in the air from California and a rough day at sea after leaving from the southernmost port in New Zealand. The Royal Albatross nest on the high, windswept slopes of the island,where the juvenile birds fly into the colony in the late afternoon and form groups who advertise for a partner using a complex repertoire of signals and displays known as 'gaming'. Gaming behaviors include bill yapping; bill clapping; head shakes and wing stretches. A wonderful experience to behold, and something that few people will ever get to see. However, in the context of trying to compose a coherent photograph it can all get rather chaotic:- more so when several birds are in a group. To simplify,I selected a a lone pair and settled down on comfortable tussock at a discrete distance that still allowed me to fill the frame using a 100-400mm lens with 1.4x teleconverter. That lens is light enough to hand-hold for prolonged periods, so I just kept watching through the viewfinder for this peaceful interlude when both birds posed identically with heads down and bills open. |
#135 - May 2020
"A sea full of penguins" |

Subantarctic Maquarie Island, March 1st, 2020
After a rough 5 days sailing from Antarctica the Spirit of Enderby anchored on the sheltered east side of Macquarie island (Macca), a remote Australian territory roughly midway between Tasmania and Antarctica. The big penguin attraction on Macca is the Royal penguins, a species that breeds only on this one tiny island. But there are also dense colonies of King penguins, and our arrival was greeted by a flotilla of Kings, porpoising along our wake as we arrived and continuing to bob around the ship after we had dropped anchored. The next morning we boarded Zodiacs to cruise among them at a more intimate level. That was a remarkably touching experience, surrounded by hundreds of gorgeous penguins curious to investigate us, pecking on the side of the Zodiac to see what it might be made of, and sometimes trying to jump inside. This photo is my best attempt to communicate the experience, though only a faint representation of actually being there.
Among the many problems that beset photography from a crowded, unstable Zodiac is that the viwepoint is very close to the water. Shooting from this low angle the carpet of penguins appeared compressed, without a sense of scale or conveying their sheer numbers. However, I found a solution in the ocean swell that we still experienced, even on the lee side of the island. This is the Southern Ocean after all! Looking across to an adjacent Zodiac, it would rise up on an approaching swell while we sank down into the trough. A photo timed for the peak thus caught the Zodiac as if on top of a hill, with the penguins arrayed down the hilside, rather than on a flat plain. |
#134 - April 2020
"Ghosts of Captain Scott's Discovery Hut" |

Hut Point peninsula, Ross Island,Antarctica, 21st February, 2020
During our recent voyage to the Ross Sea Anne and I were privileged to visit the three huts built by British expeditions during the 'heroic age' of Antarctic exploration: the Discovery hut of Scott's first expedition in 1901; Shackleton's 1907 hut at Cape Royds; and Scott's 1910 hut at Cape Evans. Excepting staff at scientific bases, only some 400 visitors reach this region during a brief two month ice-free window each summer, and even then access to the huts is by no means guaranteed. Ice conditions, weather and high surf often preclude landings, and we were indeed fortunate to be able to visit all three.
Each of the huts has a powerful, though distinct ‘feel’ to it. Memories of the expedition members, their histories, triumphs and tragedies linger in each, and I got the shivers walking in through the doors. This was most pronounced with the Discovery hut. As the first to be built, and because of its location at Hut Point on the tip of Ross island that provides direct access to the ice shelf and the Antarctic continent beyond, the Discovery hut encompasses multiple layers of history, having been used by all subsequent expeditions.
A brief account [abstracted from the Antarctic Heritage Trust website]:
Scott’s Discovery Hut is a framed structure made of Douglas fir and Scots pine. Prefabricated in Sydney, its origins as a dwelling designed for the Australian outback are evident in the open verandah surrounding three sides. The hut proved too hard to heat and was described as more like a summer house. Consequently, it was never used as a base during Scott’s first expedition and the men lived on their ship, using the hut for scientific observations, drying equipment, repairs and as an entertainment house.
The Discovery hut was later used by three other heroic-era expeditions, all of which left their mark on the hut and its contents – most notably Shackleton’s Ross Sea Party. That group had ventured to McMurdo Sound on board the Aurora in order to lay supply depots for Shackleton, who was attempting the first traverse of Antarctica from the Weddell Sea on the other side of the continent, via the Pole, to Ross Island. The party made extensive use of the Discovery hut by sledging parties as they vainly laid depots for Shackleton’s team who had not even been able to start their journey when their ship, Endurance, was caught in sea-ice.
Their final, epic journey to establish the furthest south depot concluded with the return to Hut Point on 11 March 1916, by Richards, Wild and Joyce, with Hayward who was ill with scurvy. Two days previously, Spencer-Smith had died and been buried on the ice shelf, only a few miles from safety. The leader, Mackintosh, also ill with scurvy, had been left in a tent as his men dashed for safety. After caring for Hayward, the others then left on 14 March to collect Mackintosh. By 17 March, the four men were safely back at the hut, but were now trapped with little fuel or provisions until the sea-ice thickened sufficiently to enable the 15 mile crossing to their comfortable base at Cape Evans. Seals were killed for food and fuel, seal meat was cooked on a blubber stove, and Mackintosh and Hayward recuperated gradually. Everything was black with greasy soot… what a state of dirt and grease”. By 7 May Mackintosh and Hayward had had enough of this cold, troglodyte existence and against the advice of the others left for Cape Evans as a blizzard was starting, never to be seen again. The remaining men eked out a grim existence, making clothes from penguin skins and chopping up part of the hut for fuel, before finally making a safe crossing to Cape Evans on 15 July when the ice was strong enough to bear their weight. The Discovery hut was not to be visited again for some 30 years.
Today, Scott’s first expedition base at Hut Point remains a testament not only to scientific endeavor but also to the hardships endured by its later occupants. Prior to our visit I had hoped to create an image that - more than a merely ‘straight’ photographic record - would communicate something of the intangible ‘feel’ of this history. How exactly I might achieve this remained a mystery until we were in the hut, when inspiration came as I looked at the screen of my camera to review the shots I had just taken. Because the light inside the hut was dim, I had set a slow shutter speed and stabilized the camera against a table or pillar while holding down the shutter button to take multiple shots from which to later select whichever came out sharpest. Often, I would take away the camera while the last exposure was still in progress. That created blurry images with ghostly streaks, giving me the idea that I might later selectively combine sharp and streaked frames in Photoshop to create the effect I was looking for. As a final touch, I converted the resulting image to monochrome, and applied a gentle sepia toning to resemble period photographs of that time.
My photo this month features the blubber-burning stove constructed during Scott’s second expedition by Oates and Mears out of two oil cans in which bricks are placed and connected to the old stove flue. “Flames would roar fiercely through the flue while melted blubber dribbled out and ran down the front of the range. At the same time black, oily smoke would permeate every nook and cranny in the hut. As the months passed everything became covered with this black deposit … the absence of soap was felt most acutely.” [R.W. Richards]

Dimitri and Mears around the blubber stove, November 1911
|
#133 - March 2020
"Royal Penguin Stampede" |

Sub-Antarctic Maquarie Island, February 29, 2020
This month's photo is rather delayed, as Anne and I only recently returned from a spectacular month-long voyage to the Ross Sea and the sub-Antarctic Islands of New Zealand and Australia. We flew back from New Zealand only days before travel restrictions came into force in response to the coronavirus pandemic, and we are now self-isolated at home. Quite a change from travelling to some of the most remote and least visited places on the planet to being hunkered down in our house! I do at least have >10,000 photos from the trip to edit and keep me occupied.
When venturing outside to walk our dogs we adhere to the 6 feet rule, keeping that distance from other humans to avoid airborne viral spread. In Antarctic regions a 15 feet rule applies, not to avoid fellow travellers, but to avoid disturbing the wildlife. But that applies only to you. The wildlife - penguins in particular - don't know about it, and if you sit quietly will often come up to investigate and even gently peck at you.
My photo this month features royal penguins, a near-threatened species whose only home is Maquarie Island, a World Heritage Site located about mid-way between New Zealand and Antarctica. We visited the island en route back from the Ross Sea and landed by Zodiac on a black sand beach, close to a royal penguin colony higher up on the hillside. As they returning from feeding in the the ocean the penguins walked (waddled!) along the beach to access a creek leading up to their colony. I hiked up to the colony, but this did not look promising for photography being densely packed and very messy with penguin poop, so I returned to the beach and sat down alongside a huddle of penguins preening on their way back to their creek-bed highway. The royals were not as inquisitive as the king penguins with which they shared the beach, but seemed quite oblivious to my presence.
Other inhabitants on the beach included a harem of female southern elephant seals at the edge of the tussak grass slope, guarded by an enormous bull elephant seal. I kept a wary eye on him, as these two ton mounds of blubber can move deceptively quickly, without regard for what may be in their path. All was quiet in the harem until a second bull heaved out of the surf, and headed up the beach with the clear intent of challenging for dominance. I grabbed my camera bag with one hand ready to flee, although I guessed I was well out of his path. On the other hand the royal penguins (though, curiously not a lone king penguin in their midst) clearly though otherwise, and stampeded madly around me. I take it as some indication that I am a true photographer that I retained enough composure to take several shots with the camera clutched in my other hand. |
#132 - February 2020
"Down and dirty with Sandhill Cranes" |

Bosque del Apache National Wildlife Refuge; January 2nd 2020
Camera height is often a critical aspect in composing a picture; particularly for determining the relationship between close foreground objects and distant background. Probably >99% of all photos taken (including smart phone shots!) are shot with the camera at eye level while standing. That obviously imparts a certain sameness, as the photographs replicate what you would ordinarily see. Changing that perspective can have a dramatic effectt.
Wildlife photography is a good example, where shooting from near ground level has multiple advantages. For small birds and animals it puts the viewpoint at their eye level, giving more intimacy and drama -; like a toddler among adults. Moreover it is a good way to cut out foreground clutter and simplify composition, making the subject stands out against the background.
Often, however, there are obstacles to achieving a really low viewpoint. Access in wildlife refuges is tightly regulated, being restricted to defined roads and trails that are often elevated above the level of the surrounding fields and ponds. That is generally the case at Bosque del Apache where this month's photo was taken. Although a workaround is to use a long lens with distant subjects to achieve a fairly low angle of view, the result is never quite satisfying. One exception is by the 'Flight Deck' pond - not on the elevated Flight Deck platform itself, but further around where the birds often congregate at the northern, shallow end of the pond. There it is possible to approach close to the edge of the water.
I took the photo above about half an hour before sunset while waiting for flocks of snow geese to fly in to spend the night on the water safe from terrestrial predators. Although the pond was largely empty, two sandhill cranes were feeding in shallow water, making excellent potential subjects to frame against the trees at the far side of the pond that were catching warm light from the low sun. An eye-level view was marred by vegetation, and the from that angle the birds were silhouetted in front of ugly mudflats, rather against than the glowing trees. The solution was to get down very low - indeed, with the camera and lens hood resting on the ground. That viewpoint completely eliminated the messy distractions and placed the cranes directly before a clean, colorful background, which was rendered well out of focus by the long (400 mm plus 1.4x TC) lens I was using. Because the cranes were in shadow they appeared quite dark in contrast to the brght trees. A bit of fill flash would have helped, but I did not have one with me, and some judicious shadow lightening in Photoshop did the trick instead.
A camera with a flip-up live-view screen would also have been nice, but Canon don't see fit to put these these on their 'pro' models, so I had to lay down flat on the wet shoreline to squint through the viewfinder. As a result I had a wet, cold, and muddy bottom, but that was a minor discomfort to capture a nice image, and easily rectified when we got back to our motel. By contrast, one of my favorite low angle shots of penguins in Antarctica involved lying down in penguin poo. Given the lack of laundry facilities on our boat to wash my smelly, green-striped parka and the small cabin shared with my wife, I was not popular for several days after... |
#131 - January 2020
"Sequoia Snowfall" |

Sequoia National Park; December 25th, 2019
Anne was working again at the children's hospital in Fresno, so I drove up to spend a few days over Christmas with her. My timing was good, as the day after I arrived a strong winter storm passed through Southern California, dumping snow on the Tejone pass and closing the interstate freeway I had just travelled. Although more concentrated to the south, the storm also brought snow to the Sierra Nevada mountains, within day-trip distance from Fresno.
My photo this month was taken on Christmas day in Sequoia National Park, close to the General Sherman tree; the largest known living tree on earth. Even though I was there two days after the storm the trees were still heavily draped with snow. Driving up into the mountains was indeed like entering a winter wonderland. With 4wd and snow tires I could happily pass the chain-up pullouts on the icy road, and for traction on my feet my Arctic Muckboots made it easy to explore the sequoia groves away from cleared or trodden paths and find solitude away from the surprisingly busy crowds near the parking lot. The weather conditions rapidly fluctuated, sometimes blue sky and sunshine then overcast as low clouds enveloped the trees, making for an interesting variety of photographic opportunities.
The periods of sunshine sometimes caused enough melting that a tree - infrequently a sequoia but more often a smaller conifer - would shed its accumulated load of snow, creating a small avalanche. I hoped to capture this happening behind one of the sequoias, to make a photo with more drama and where the deep red trunk would be better isolated as the main subject against a white background. Helpfully, the onset of each snow-shedding was accompanied by a loud thump, giving a second or two advance notice to look around and point my camera before the snow hit the gound. In anticipation I had preset the exposure compensation to +1.5 stops to adjust for a white background, and set high speed motor drive mode. Of course, with such random events there was no way to predict where to stand for a good composition. I ended with many shots of snow falling among the nondescript conifers, and once directly on my head! But perseverence paid off, and after a few hopeful hours I was able to get the shot pictured above. This is selected from a continuous sequence, chosen when snow was still falling, but had hit the ground to billow up around the trunk of the sequoia. By eye, and in the unprocessed image file, the falling snow appeared almost uniformly white. However, I found the 'dehaze' slider in Photoshop was very effective to selectively reveal details of the embedded swirls. The trunk almost obscured by the snow is that of the General Sherman tree: my subject is it smaller (unnamed?) neighbor. |
#130 -December 2019
"Jelly!" |

Pacific sea nettle jelly (Chrysaora fuscescens). Aquarium of the Pacific, Long Beach. November 22nd 2019
Our son and daughter-in-law were in town for a few days, and we took a trip with them to the aquarium at Long Beach.
From previous visits I remembered they had nice displays of jellyfish, so decided to take a camera. Which one, and what lens might be best for jellies? I took my new Canon M5 not wanting the weight and bulk of an SLR, and fitted the little 22mm 'pancake' lens, anticipating that its relatively wide aperture would be better for photographing in dim light than the kit zom lens.
The aquarium has several circular tanks for jellyfish (circular so the jellies can't get stuck incorners), each containg a different, single species. All are beautifully illuminated, with lights at the top to side-light the jellies so they stand out against pure blue or black backgrounds. Nevertheless, the lighting is fairly dim, andI found I was having to carefully balance shutter speed, lens aperture and ISO settings to get good shots. The jellies are constantly moving, necessitating a shutter speed of at least 1/100 sec, and I did not want to push the ISO beyond 1600 to minimize noise. That meant using the lens wide open (f2) to get a good exposure, but then the depth of field was rather narrow. My solution was just to take a lot of shots, trying to time them when a jelly was relatively stationary, and oriented so its body and tail lay within the plane of sharp focus, and positioned without any other jellies to obscure the background. Another issue was avoiding reflections from the walls of the tanks. The jellyfish exhibits are in darkened rooms, which greatly mitigates the problem, but I did have trouble with reflections from illuminated tanks on the opposite side. Usually I could block these by positioning my body behind the camera, but an idea for a future visit would be to cut out a black cardboard mask to fit as a giant lens hood.
The sea nettle jellies were my favorites among the species in the aquarium, with their long, diphanous tails catching the light to look very much like smoke trails. My subject here excelled by doing a slow back-flip while staying in sharp focus and centered in the camera frame. |
#129 - November 2019
"Sahara Camel Ride" |

October 29, 2019. Sahara Desert near Erfoud, Morocco
I am very late in posting this month, while catching up on photos I took on a recent trip to Morocco. So, for this month a simple picture that is instantly recognizable as 'Morocco', while being a simple composition that does not take many words to describe.
As part of our tour, Anne and I spent a night in a luxury encampment at the edge of the Sahara sand dunes at Erg Chebbi. To get to the camp we took a camel ride. Not strictly necessary as the only possible means of transportation to cross the sands as we returned the next day in a 4x4 landcruiser; but quite fun and the usual touristy thing to do. Our camel driver took a deliberately circuitous route, heading into the higher dunes so for most of the way we were away from any other tracks and with a nice feeling of being isolated inthe wilderness. Indeed, our guide frequently checked his GPS to make sure of our direction.
Our itinerary was timed to arrive at the camp shortly before dark, so the sun was low and casting long shadows against the warmly glowing sand. From the surprisingly high viewpoint on top of a camel's hump the shadows were quite impressive and, though hardly an original subject, certainly worth a shot. I had recently bought a small Canon M5 camera and decided to take that on the ride rather than my big SLR; a wise choice as camels have a very jerky gait and the heavy camera woud have been incessantly banging against my chest and difficult to shoot one-handed while clinging on the the saddle handlebars with the other hand. To get a clean photo I waited until we had moved into pristine, untrammeled areas of sand. The issue then was that the long shadows showed a distorted perspective, with the camel legs tapering down to a small body. My solution for that was to look for places, as in this month's photo, where the shadows cast on a rising dune to our side. |
#128 - October 2019
"Blue Berg on Black" |

August 30th, 2019. Scoresby Sund, Greenland.
A key theme to keep in mind when shooting a photo is that of subject isolation. What is the photo about, and how do you keep the main subject clear from all the other clutter that may be in the scene? Careful composition is obviously part of the solution ('cut the clutter'), and other tricks include blurring the background and ensuring the subject contrasts with its surrounds. Having the subject the brightest thing in the frame is a great approach, as exemplified by the chiaroscuro paintings of Caravaggio. However, whereas it is easy for a painter to make the edges of the canvas go dark, that's not so simple for a photographer. For small scale subjects a black backcloth can be pressed into service, an approach I have had fun with for portraiture and flower photography. For landscapes on a grand scale that obviously isn't applicable, though with luck or patience a fortuitous shaft of sunlight might do the trick.
On our recent trip to Greenland I was struck by how much the appearance of the numerous icebergs varied under different lighting conditions. Under overcast skies and in mist the bergs almost melded in with the background, whereas in direct sunliht they were blindingly bright. Setting a camera to correctly expose the highlights thus resulted in a high contrast photo, further accentuated when a sunlit berg was positioned in front of a shaded mountainside. That was my aim in taking the shot above: Two bergs with interesting shapes, colors and textures were beautifully reflected in the still water of the fjord, and a shaded, ochre colored hillside formed a backdrop. Yet, I was not happy with the result. Even after further darkening the boulders and ugly, eroded gullies on the hillside were too much of a distraction. So, I thought I woud take an extreme approach and simply turn the background jet black. Given the already high contrast between the ice and the background that was quite easy. The magic wand selection tool in photoshop readily snipped out the berg and even dealt cleanly with the rippled edge of the reflection.
My photo this month is thus an abstraction, in the true sense of the term as defined for the the visual arts; "an object which has been distilled from the real world". Quite a striking effect, but perhaps one to be used only in moderation... |
#127 - September 2019
"Red Iceberg" |

August 26th, 2019. Scoresby Sund, Greenland.
A late posting of this month's photo as we only recently returned from a trip to Greenland organized by Jo van Os Photo Safaris. Joe's trip report and his own photos are HERE.
Our tour was based on the three-masted schooner Rembrandt von Rinj for a ten day cruise among the sheltered fjords branching from Scoresby Sund; the largest fjord system in the world. Avoiding the frequently rough sea crossing of the Denmark Strait from Iceland to Greenland we flew on a chartered Greenland Air flight from Keflavik to the dirt airstrip at Constable Point, and then walked a mile or so to a landing site for transfer via Zodiacs to board the Rembrandt. The Greenland Air flight was a reminder of how much more pleasant air travel was in pre 9-11 days. No formalities or security check boarding in Greenland, and the captain wandered out of the cockpit, coffee in hand, to chat to the passengers on the flight back.
This trip was not focused on wildlife, as the local Inuit hunt in the Sound making the animals very shy of people and cameras. Indeed, we saw only few musk ox galloping in the wrong direction at long distance. Instead, the icebergs calved from the glaciers descending from the Greenland icecap were the main highlight of the trip. We visited several 'graveyards' where currents and shallow watercause bergs to congregate at high density, and spent many hours weaving through these on our skillfully-captained ship and in Zodiacs. An aspect I had not anticipated was that almost all Greenland icebergs appeared white, whereas on previous visits to Antarctica we had seen many deep blue, and even emeral green bergs. The difference appears to lie in the coating of densely packed snow and frost which scatters the light, and because sparkling blue bergs form from particle-free seawater freezing underneath Antarctic ice sheets. Marine ice contains much less air than glacial ice, giving it gemstone clarity reflecting blue light that passes through ice more readily than longer wavelengths.
In Antarctica I was captivated by the deep and varied colors of the bergs, but here their white uniformity place an emphasis for daytime photography on their spectacular and strikingly diverse morphologies. Color differentiation only became apparent at the edges of the light, around sunrise and sunset when the faces of the bergs reflected the incident light - blue from a clear sky or warm from direct sunlight. For much of our voyage we cruised in narrow fjords with high mountain walls that blocked direct light while the sun was still to high in the sky to have taken on much color. However, early on our trip we were lucky to have clear skies for a sunset while we were
in an open area of the Sound with mountains in the far distance.
I nearly missed capturing the photo above owing to a technical hitch. I had a polarizing filter on the lens to darken reflections from the sea, and as we cruised by the vertical face of this berg it took me a while to realize that what I was seeing through the camera did not match what I was seeing by eye. The contrast between the red sunlight reflected from the ice face and the blue of the shadowed bergs was the obvious rationale of the image, but I was too engrossed on framing the composition in the viewfinder to initially register that the polarizer was blocking the red reflected light, so the camera was seeing the illuminated face only as white. A quick 90 degree rotation of the polarizer saved the shot while I still had a good angle on the berg as we sailed past. |
#126 - August 2019
"Badwater Switchback" |

July 17th, 2019. Mt. Whitney Portal Road.
The Badwater Ultramarathon is a road race that begins at Badwater Basin in Death Valley (the lowest place in the western hemisphere) and finishes at the trailhead to Mt. Whitney (the highest peak in the contiguous US). The distance from start to finish is 135 miles, with a cumulative height gain over three mountain ranges of nearly 15,000ft. To make it more interesting, the race is held every year in July so as to pass through the hottest place on Earth at the hottest time of the year. The last section of the course is among the most grueling. Having already completed 122 continuous miles, the runners are faced with an ascent of 4.500 ft over the final half-marathon (13 mile) stretch.
A welcome landmark on this section is the switchback where a giant zig-zag of the road cut into the slope of the Sierras makes a 180 degree turn. From there it is only only three miles to the finish line, and the switchback marks a transition from desert to an cooler alpine environment shaded by pine trees. The view is tremendous, and a runner in need of a brief rest can take a moment to look out over the thousands of feet they have already climbed and trace the thirty miles of road they have covered through Owens Valley.
By climbing a rock pillar on the perimeter it is possible to get an overview of the switchback, from where I had previously photographed the runners. Indeed, my photo is presently featured as a banner on the race website. However, I was never quite satisfied with that shot. My widest lens at the time was too short to encompass the entire curve, and the photo was taken in the morning when the rock cast a dark shadow across the road. This year I was keen to try out my new 11mm superwide lens, and returned in the afternoon of the final day of the race when the lighting would be even. Clambering up the pillar made me realize how long it had been since I last did any rock climbing, but there are some reassuring hand jams, and it is only a short, easy scramble. Once on top a quick look through the viewfinder revealed that even an 11 mm lens was not quite wide enough, and a big drop at the back of the pinnacle precluded any more distant perspective. To solve that problem I took ovelapping shots to later stitch into a wider panorama. The final image above is thus a composite of thee shots, a main central frame captured as the runners passed, and two widely overlapping shots for the edges. Combining them took a fair bit of fiddling in Photoshop owing to the extreme peripheral distortion from using a wide lens tilted downward, but using the warp tool I was able to get everything aligned.
For next year my plan is to try for a long exposure photo of the switchback, capturing the light trails of crew vehicles along the road at dusk or dawn while there is just enough light to fill in the landscape details. To highlight the runners my thought is to use a remote control flash mouned down on the roadside barrier - a complication that will probably take some experimentation to get right. |
Jt 2
#125 - July 2019
"Baby Blue Eyes" |

April 2919, Carrizo Plain National Monument
During a superbloom the slopes of the hill overlooking Soda Lake become carpeted in bright blue flowers - baby blue eyes. Although not at all as extensive as the vast swaths of yellow and purple flowers spreading over the plains and mountains of Carrizo Plain, this patch stands out for its startingly blue blueness. [Interestingly, blue pigments are rare and hard to find or make, and only a few species of flowers have evolved the knack.]
My first thought was to photograph the baby blue eyes placing them within a landscape composition, by featuring individual flowers large in the foreground and receding to the distant Soda Lake. Accordingly, I set off up the hill from the parking lot with a 17 mm tilt/shift lens that would let me get an extensive depth of field. But after a few tries it was apparent that approach was not going to work. Harsh mid-afternoon sunlight made the flowers too contrasty, and the dried out lakebed made an unattractive background. Instead, close-ups of individual or groups of flowers looked the better way to go. Feeling a bit lazy - it was a hot afternoon - I didn't have the motivation to go back to the car to get a macro lens, and decided to see what I coud do with the sole lens I had with me. At 17 mm it was too wide for individual flowers, so I went searching for interestingly patterns and found the nice circular arrangement that forms this month's photo. Using my body as a sunshade I could just shadow these flowers for a diffuse, even illumination. To then fill the frame I had to bring the camera close to the ground, so that the distortion induced by thewide angle lens accentuated the ring of flowers whereas my telecentric 100 mm macro lens would have flattened the perspective.
Its always a good idea to take several shots when you you have found a good subject. That paid off here as, despite carefully trying to keep the camera level to the ground, none of my shots had all the flowers in sharp focus. However, I had lots to work with, so I could blend frames to produce a sharp composite. Finally, I added some vignetting and desaturated and darkened the greens to minimize distraction from the leaves and grass, allowing the baby blue eyes to appear as vivid on the computer screen or print as they do in real life. |
#124 - June 2019
"Carrizo Plain Layers" |

April 2919, Carrizo Plain National Monument
A bit of a head-scratcher this month. At first glance (and without the title to give a hint) it would be hard to say what this photo is. Clearly a layered patterning of different colors and textures; but what is the scale? It might be a macro shot of some subject only inches across, or a sweeping landscape vista.
The latter, in fact. A photo looking across the Carrizo Plain to the Elkhorn escarpment and the distant Temblor range, taken with a mild telephoto lens to compress and flatten the perspective. The original photo included the sky, which gave the game away, but for the version above I cropped out this clue, leaving the subject matter a puzzle for the viewer, givinng a chance to view the landscape simply as patterns, without context.
Some unusual features of the Carrizo Plain landscape facilitated this abstraction. First, the area is remote and arid - largely lacking trees, buildings, roads and suchlike objects that would otherwise immediately provide a sense of scale and place. Second, we visited the plain during a superbloom, when the normally barren, brown land was transformed by vivid swaths of yellow daisys and purple phacalia. Finally, the unique geology of the area has resulted in the complex structuring of the hills. In particular, the lighter, chevron striped band, the Elkhorn escarpent, was formed by the San Andreas fault which runs directly underneath; and the Temblor hills are aptly named.
Unusually for a landscape photograph there are no leading lines here, no primary point of focus, no foreground/background structure; just a deliberately flat, linear composition but with enough color and detail to keep the eye interested. For inspiration I must credit Andreas Gursky's famous 'Rhine II" (supposedly the most expensive photograph to be sold at auction). Whereas he needed to Photoshop out intrusive details to achieve a result that was bleak enough to satisfy him, I had a pristine subject to begin with. Moreover, my colors are more cheerful than Gursky's 'sludgy' image and my patterns are more enticing. Nevertheless, I doubt that my photo, even printed 9ft wide on acrylic glass, will ever sell for millions of dollars... |
#123 - May 2019
"Chia (Salvia columbariae) : macrophotography" |

March 22nd, Anza Borrego State Park - First experients with macrophotography
For my Christmas present last year Anne had suggested getting me a new lens. Given that we would be shortly be going with Joe van Os Photosafaris on a trip entitled 'Incredible Faces of India' my first thought was to add a portrait lens to my collection. However, classic portrait lenses like the Canon 85 mm f1.4 are big and heavy, and since I already had that focal length covered (albeit at f4) I had reservations about the considerable expense to add a wider-aperture lens with specific and limited utility. A better idea came from reading an article by Zach Sutton extolling the virtues of the Canon 100 mm macro lens for portraiture; a dual-purpose lens which indeed served me very well in India.
The following month, back home in California, we took a trip in search of wildflower superblooms triggered by an unusually wet winter. Our first stop was in Anza Borrego State Park, where the desert floor and hillsides were carpeted in golds and purples. The wide vistas made for fine landscape photography, but Anne was always encouraging me to look for 'little things', so now equipped with a proper macro lens I wandered around, head down, searching for tiny floral subjects hidden among the more extravagant displays.
One species that caught my attention were chia (Salvia columbariae); thin stalks about a foot high, with spiky globules about a half inch in diameter at their tips. By eye chia look brown and not very imposing, but I was intrigued by the tiny blue flowers protruding from the globules, and plucked one to photograph. To protect my little subject from the wind and to shadow it from bright sunlight I set it up on the back bumper of our SUV, with the stalk held by a bulldog clip. Next, I wanted a dark backdrop to remove any distracting background, and searching our box of camping clothes I came up with a pair of (unused!) black underpants that served nicely. Now I was ready to photograph, but immediately realized that the rasor thin depth of field of a macro lens at close focus was nowhere near enough, even fully stopped down to f32, to keep the whole globule in focus. This was clearly a case for focus stacking. My approach was rather rough and ready, but thanks to Photoshop turned out well. With a fixed focus on the lens and hand-holding the camera, I simply took a series of about ten shots, successively moving closer to capture a sequence encompassing everything from the nearest to most distant spines in good focus.
Beause I was too lazy to use a tripod the alignment of successive frames varied a lot, but the 'load files into stack' Photoshop script did a surprisingly good job of matching things up. I was further impressed by how well the Photoshop 'auto blend layers' function worked to produce the final image, as I had envisaged that I might need to purchase dedicated focus stack software.
As a beginner to macrophotgraphy I was delighted at how well this image came out. What seemed just a fuzzy brown blob by eye was revealed as an intricate structure of hairy spines in vivid red and purple colors with interspersed delicate blue flowers. A nice introduction to the beauty and surprise to be found at the macro scale! |
#122 - April 2019
" Elderly Dhaneta Jat tribeswoman" |

February 8th, Rann of Kutch, India
During our time in the Rann of Kutch we had a very special opportunity to visit the Dhaneta Jat, one of the most reclusive tribes of Gujarat.
The Dhanetas are described as protective, traditional and almost impossible to photograph. ("If there is any project that has come close to risking my equipment and life, it was photographing the Dhaneta Jats"). Our access was possible only through the close rapport our local guide had built with the tribe over several years. We allowed some time to introduce ourselves and let the women and children grow accustomed to us before bringing our cameras out, but even then our photography time was curtailed and were restricted to shooting within their thatched hut. The women and children (no men) sat along one side with sunlight falling on the wall behind them, and sitting on the opposite side we were photographing into the light, with sunrays passing through gaps in the thatch. Not optimal conditions, and we had hoped to switch places; but that was not to be. Nevertheless, I was able to get some good shots, of which my favorite is this one of an elderly lady wearing the large gold nose ring characteristic of married Dhaneta Jat. Looking back, I don't actually remember taking this shot, but I must have subconciously spotted something at the time as I particularly like the framing of her face around the children and clasped hands in the foreground.women.
From Indiainframes: The Dhanetas are Sunni Muslims. The men herd cattle and search for greener pastures through the day and women take care of the houses, children and chores. Aggressive and protective, they do not appreciate pictures being taken of their women. The women of this tribe wear a fist sized complicated nose ring called ‘ Nathli’. This lends an unmistakable identity to the Dhaneta women. The enormous size of this gold nose ring weighs heavy and is held up by strands of black threads tied to their hair. This gold nose ring is the sign of married women and they continue wearing this at all times. Any attempt to photograph the women evokes a strong reaction from men as well as women, who promptly cover their faces making it extremely difficult to capture their lives and lifestyle on camera. The Dhaneta Jats earn their living by selling cattle milk and other related products. They live in huts made of sticks and old tarps covered with hay. The water shortage and the drought in the area is having an impact on their only possession – their cattle. Greener pastures are rare, far and few. |
#121 -March 2019
"Fakirani Jat tribespeople around campfire" |

February 8th, Rann of Kutch, India
Anne and I returned a few weeks ago from a phototour to India organized by Joe van Os Photo Safaris. The theme was "Faces of India", and much of our tour was occupied with people photography in the chaotic alleys of Old Deli, the bustling riverbank ghats of Veranasi, and the utter bedlam of the Kumbh Mela festival at Allahbad. The latter, in particular, was a case of sensory overload, threading through an estimated 30 million visitors with visibility and lung function severely impaired by horrendous air pollution. An incredible experience and wonderful photographic opportunity; but it was a relief to leave for the last part of our voyage to the relative solitude and clean air of the Rann of Kutch, a saline desert region in the far western corner of India.
Our three days at the Rann were focused on photographing the indigenous tribespeople from the surrounding Kutch area. With the help of some great local connections, we met and got to know several colorful groups at our camp for formal portrait sessions. Our sessions included both indoor settings with studio lighting as well as outdoors with natural light and backdrops. We also took several field trips to visit some of the tribespeople in their villages and camps. My selected photo this month features a family group of nomadic Fakirani Jat tribespeople, gathered before dawn around their campfire for warmth and to prepare breakfast.
After rising at 4:00am for a wake-up coffee at our Safari Resort, a 30- minute drive took our tour group to a pre-arranged rendezvous with the tribe at their desert campsite. The sky was still completely dark, with the only light coming from several wood campfires that beautifully illuminated the people sitting around them. That made a wonderful opportunity for candid portrait photography, with warm light on the faces contrasting with a perfect black background. Yet, the time was short before dawn, and the dim firelight presented technical challenges. I shot using my Canon 5D Mk IV camera, with a 'nifty fifty' 50mm f1.4 lens to capture as much light as possible. That gave a shutter speed of 1/100s at ISO 800 when the fire was burning bright - fast enough to hand hold so I didn't need to be hindered by a tripod, and enough to mostly freeze any subject motion. There wasn't enough time to carefully compose and wait for interesting gestures and expressions, so I just moved around, trying to keep at eye level, and firing off repeated bursts of frames to later select the most appealing shots with best focus. |
|
#120 -March 2019
"Death Valley Superblooms a Decade Apart" |

Death Valley Superbloom: 2005 |
 Death Valley Superbloom: 2016
 |
Death Valley - March 14th, 2005; March 3rd, 2016
This marks my 120th Photo-of-the-Month; a series now stretching back slightly more than ten years, given ocasional bouts of procrastination when I made one photo suffice for two months. For the most part the sequence is roughly chronological, as I usually chose a recent photo to present each month. Thus it forms a sort of retrospective, from which it might be possible to glean some progression in my photographic techniques and discernment - or maybe not!
With that thought in mind, I went back fourteen years to select a favorite photo taken with my first digital camera; a 4 Mpixel Canon Elph. The location is Death Valley, after an unusually wet winter that led to a rare 'superbloom' when the desert floor became carpeted in wildflowers. Prompted by articles and images in the LA Times I took a weekend trip to see what I could find. Mostly not a lot - just isolated patches of flowers and narrow strips of color along the road verge - but driving out of the south end of the valley I came across a vast expanse of desert gold where the Badwater road curves around to climb to Jubilee Pass. I was beginning the long drive home in the evening, and the low sun angle accentuated the colors of the flowers and the background Funeral Mountains.
To capture the full scene I knew I needed a panorama, and my little camera had a dedicated mode to do just that!. Not at all the way a modern iPhone takes panoramas, but a function using the postage-sized screen to display a minute image of the last shot you took along with a minute live image. The idea was that, by squinting enough, you could line up a sequence of shots with enough overlap to later stitch them together in the computer. That got around the problem of only having 4 Mpixels, and my final image, composited from half a dozen individual shots, has plenty enough resolution to make a 3ft wide print. Another 'feature' of my little Elph -, one that I did not appreciate until much later - was that its tiny sensor and narrow aperture lens gave enormous depth of field. I had wanted my photo to span the range from individual flowers to the distant mountains, and crouched down to emphasize foreground flowers. Unwittingly, the wide depth of field kept everything in sharp focus. Nowadays, with a full-frame DSLR, I would have to fiddle around with a tilt/shift lens to get the same result.
A big print of this photo (the upper of the pair above) has hung on our bedroom wall for many years, and remains a fond memory of a special place and time. The photographer with his large format view camera set up on a tripod amidst the flowers adds that something extra. I often wonder whether his photo came out better than mine...
We had to wait eleven years until the next Death Valley superbloom, when I took the second of the two photos above. My camera now was an expensive DSLR with a multitude of megapixels, and the composition is more interesting, with flowers curving over sinusoidal hills. But I think I still prefer my original shot. |
#119 - January 2019
"Thirteen Moons Petroglyph" |
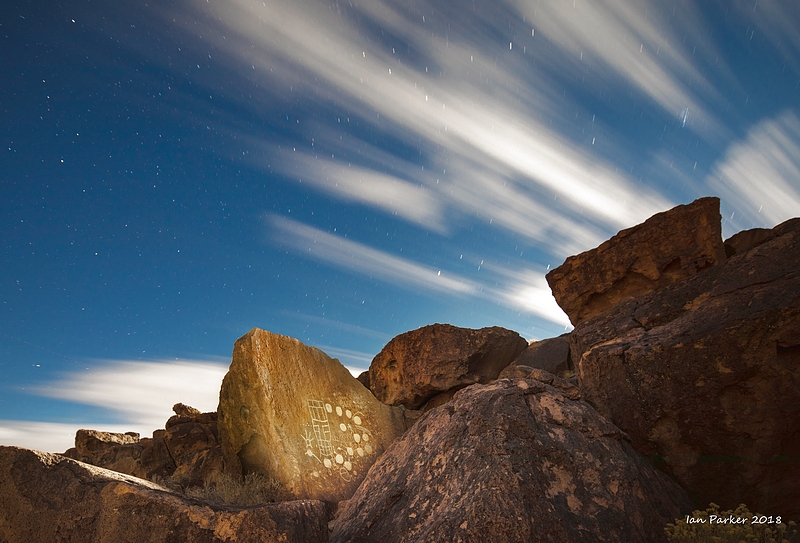
Volcanic Tablelands, Bishop, California. November 24, 2018
The volcanic tuff of the Tableland above Bishop, California has served for thousands of years as a canvas on which native Americans have drawn striking petroglyphs. Numerous petroglyphs can be viewed at several. well-known, sites along Fish Slough road at the eastern edge of the tableland. But the best petroglyphs are hidden a few miles away deep in the heart of the tableland itself. To date these remain 'secret'. They are not publicized, but although there have been active efforts to stop information about their whereabouts spreading on the Web, it can only be a matter of time before their locations become widely known. Whatever, I am not telling where they are!
I had photographed Sky Rock petroglyph several years ago, but at the time was unaware it had a close neighbor, named the "Thirteen Moons" petroglyph. On a recent visit, Thirteen Moons was my main objective. I knew it was quite close to Sky Rock and quickly found it after searching in fading light after sunset. The small photo below at left is a quick snapshot, showing where the name originates. Beyond a large anthropomorphic figure, the main features are thirteen large circles - interpreted as representing the moons during a lunar year, but as there are also two smaller circles it depends on how you count...
Photographing petroglyphs has been likened to photographing wallpaper. I beg to differ, as there is the possibility to add something extra beyond a straight documentary shot of the original artist's work. As it happened, we arrived on the night of a full moon, so I had hopes of somehow creating an image that would somehow convey a lunar aspect along with the petroglyph itself.
A problem lay in the orientation of the flat rock face on which the petroglyph Is inscribed. This faceS due south, while the rising moon to the east was shadowed by a cliff of tumbled volcanic boulders. Using direct moonlight as illumination was not going to work, and in any case would have given a harsh, flat lighting. Selective lightpainting with a small flashlight to highlight the petroglyph was an obvious solution, and the middle photo below shows my first effort. Better than a snapshot, but too harsh and even, and the LED flashlight I was using gave an excessively blue/white illumination. To fix that I tried reflecting the flashlight beam from my tan colored T shirt, and by forming a tunnel with my dark pile jacket I could steer a narrow beam to spotlight the petroglyph. That gave much better results (photo below on right). And, fortutiously, a few clouds started to drift across, catching the moonlight while the surrounding rocks were in shadow, and creating dramatic diagonal streaks over the sky during the long exposure for lightpainting. Not something I had planned, but serendipitous, so now I had a way to incorporate a lunar element into my shots of the petroglyph.
Looking at the camera screen I was quite happy with the photo shown below, but I did wonder whether it was too abstracted, comprising just the petroglyph rock and sky and failing to convey a sense of environment. Walking back to our campsite I turned around and realized that maybe a wider shot would work better to place the petroglyph in context of the scattered boulders in the cliff and the wide night sky. To capture my photo above then required a little gymnastics. After aligning my camera on the tripod I set it to begin a two minute exposure following a 10 second delay. To illuminate the petroglyph I needed to clambered up the rocks after pressing the shutter button, and get in place within an alcove between the boulders from where I could lightpaint while remaining out of sight of the camera lens. |
#118 - December 2018
"Flamingos at sunset" |
Chacabuco Valley, Parque Patagonia, Chile; November 1st 2018.
The essential elements of a photograph are the subject and the light. You can make a good photograph with an interesting subject in mediocre light, and vice versa, but a great photograph really needs both to be exceptional. In the case of this month’s photo I began with superb subjects, a flock of threatened Chilean flamingos that make their home in a shallow lake in the Chacabuco Velley of Patagonia.
The trouble was that the flamingos were too far away. I had anticipated that photography on this trip to Chile would be mostly landscapes, rather than wildlife, and the longest lens I brought (400 mm) wasn’t giving enough reach on a full-frame body. Compounding this, flamingos are timid birds, and my previous attempts to get close had resulted in them slowly, but purposefully moving away. The best I could manage was to walk toward the lake while hidden behind a low ridge, then crouch and crawl down to the muddy shore without causing any disturbance. Even then the closest flamingos were far away, feeding by the opposite shore; too distant for shots of individuals, although the flock just nicely filled the width of the camera frame.
Initially the light was rather flat, but because of the unusual alignment of the Chabuco Valley that cuts east-west through the Andes, the setting sun began to cast a shaft of light between the mountains and across the lake. The background lakeshore and hills went into deep shade, while the light became progressively warmer, highlighting glowing red feathers on the flamingos. They looked spectacular through the viewfinder, yet I knew the resulting image would marred because the flock of flamingos constituted only a thin horizontal strip, with almost black expanses above and below. A solution occurred to me when I noticed reflections of the birds in the calm water. Maybe I could make the photograph as much about the reflections as the birds themselves? An immediate problem, though, was that I was lying down on the shore, both to avoid startling the flamingos, and to get a low angle on them. Usually being at the level of the subject gives a better perspective for wildlife photos, but in this case it meant that the reflections were short and attenuated. I needed to get higher. Standing up with creaky knees on a muddy beach, while avoiding any abrupt moves was a little painful, but I managed it without disturbing the flamingos, and moved back a little to further reassure them and to gain more height. That did the trick. The elongated reflections now filled in the blank area of the frame and provided their own interest.
That left one remaining issue to deal with. Flamingos largely spend their lives filter feeding through their upside-down beaks. At any given time most or all of the birds in my flock were heads-down in the water – not presenting their most attractive portrait. Thus, I took several shots when a flamingo did look up to, and blended a few instances of ‘heads-up’ birds within the final image you see here.
|
#117 - November 2018
"Sparring guanacos" |
Parque Patagonia, Chile, November 1st 2018
While journeying along the southern section of the Carretera Austral in Patagonian Chile, Anne and I detoured to spend two days in Parque Patagonia. This was established as a national park only in January this year, formed by incorporating two exising nature reserves together with a cattle and sheep esrtancia in the Chacabuco Valley purchased by Kris Tompkins and gifted to the Chilean government. Parque Patagonia must rank among the World's top national parks, with an area exceeding that of Yellowstone and Yosemite combined. Yet, during our stay - off season and in the infancy of the park before it has become internationally known - the park was entrancingly devoid of visitors. We stayed in two campgrounds, including the one at the park headquarters, and had these entirely to ourselves. Quite literally, we saw a hundred-times more guanacos than people.
Kris Tompkins recounts that "When I drove through the Chacabuco Valley for the first time, I saw the extra-high ‘guanaco fences’ designed to keep these first-rate jumpers out of the best bottom grasslands, which were reserved for the cattle on the estancia. My eyes glazed over looking out on the tens of thousands of sheep grazing the bunch grasses up and down the valley. The grasses looked patchy and dead. Nothing left for wildlife. Previously one of the most biologically rich areas of Patagonia, the Chacabuco Valley was a sea of sheep and cattle. Not a guanaco to be found among them." In 2004, Conservacion Patagonica purchased the 174,500-acre Estancia Valle Chacabuco and set about improving the odds for wildlife through selling off livestock, taking down fences, restoring grasslands and forests, and developing species-specific restoration programs. The success of that program is now evident. To my eye the vast valley looked pristine, with guanaco grazing everywhere.
For much of the time guanacos seem to live a sedate life, grazing alone or in small herds, or lying among the grasses to languidly chew the cud. But, we were there at the start of the mating season, when things sometimes got a lot more frisky. Males become territorial at 4 to 6 years old, and thereafter they engage in violent competition to establish residence in feeding territories and control of family groups. Although guanacos are not sexually dimorphic in body size, males have significantly enlarged canines, which they use in intense, frequently injurious male–male fights that include include spitting; threatening displays; chasing and fleeing; biting at the legs, hindquarters, and necks of their opponents; ramming chests; and neck wrestling. [Click HERE for a BBC video] The members of one particular herd with territory near the park entrance were particularly prone to engage in fights. I was able to photograph many examples of these behaviors over two days, usually positioning myself in a small depression to try to catch the guanacos on ridgelines so they would stand out against a clear or well-blurred background.
Some bonus frisky guanoco shots. Those in the rightmost photo looked to be showing affection, not agressive behavior. Maybe a male-female pair? |
#116 - October 2018
"Auroral greeter" |
Å, Lofoten Islands, Norway; September 6th
A fun photo of the aurora borealis above a fishing village in the Lofoten Islands.
Prospects for auroral displays weren't great during our recent visit to the Lofoten Islands. The Kp solar activity index was holding steady at a mere 2 ('low'), the moon was up for much of the night, and in September at a latitude north of the Arctic circle there is technically no 'night', just astronomical twighlight. But we were there, and it's always worth trying, so I set my iPod alarm to 2:00am each morning. If I could see stars through the window, that was enough encouragement to get dressed and head out of the door of our rorbu. I took my camera fitted with 11mm super-wide lens to capture a full sweep of the sky, and used it to decide whether to go back to bed or stay out until the first light of dawn. Although it could be difficult to discern faint auroral displays by eye against lights from the surrounding rorbu and the moon, a 30s exposure with the camera pointed straight up quickly revealed any band of green across the sky.
My aim in photographing aurorae is to place them as backdrop against an interesting foreground. My camera screen showed a nice green glow on our third night on the islands, so I passed up the temptation of a warm bed and wandered out in search of good auroral alignments with terrestrial subjects. My first choice was the nearby lake at Sørvågen. I scrambled down to the beach by flashlight, and set my tripod low down, hoping to maximize reflections of the aurora in the still water. But no luck: the skies remained quiet during an hour waiting by the lake. There is always a question of how long to wait at a location or try somewhere new when getting a good photo depends on unpredictable phenomena like aurorae. In this case I was getting chilled (though the temperature was actually much milder than might be expected in the middle of the night north of the Arctic circlel) and a brisk walk seemed like a good idea. From Sørvågen it was only a mile to walk down to the very end of the road through the Lofoten islands at the tiny fishing village of Å (appropriately named as the last letter of the Norwegian alphabet). With reflections still in mind I walked round the harbour and just as the sky came to life I found this guy - the village greeter bearing dried stockfish on each arm. Thinking that aurora was likely to be transitory I was in a hurry to set up for a long exposure shot, a fiddly task in this instance because with a really wide lens the foreground subject needs to be surprisingly close to the camera and movements of only an inch make a big difference in the composition. My lightweight travel tripod offered only just enough extension to frame the shot as I wanted, with the greeter positioned against the aurora and without obscuring the harbour buildings; and with a stockfish conveniently placed to block direct light from the recently risen crescent moon. |
#115 - September 2018
"Lofoten Rainbow" |

Tind, Lofoten Islands, Arctic Norway; September 4th
This month's photo continues a geometric theme of semicircles from last month; but now an aetherial rainbow rather than the solid brickwork of a canal tunnel.
Anne and I travelled to the Lofoten Islands via a rather circuitous route through Chicago, Helsinki, Oslo, and Tromso before arriving at the small airport on the islands at Lekness. The weather was bad on the approach to Lekness, with clouds down to ground level, and the pilot needed two attempts to get our little turboprop safely down on the runway. Then we had a 60km drive through pouring rain to our rented rorbu (fisherman's cabin), almost at the end of the road along the islands. We arrived late in the evening, after 5 flight legs (with which our baggage failed to keep up), having left home at 5:00 am the previous day.
Our main occupation the next day involved sleep, but the following morning jet-lag woke me early and I set off with my camera to explore the area around our rorbu (situated in front of the big mountain in the photo). To get a better feel of the geography I walked around to the neighboring village of Sørvågen, which lies on a peninsula on the opposite side of the bay. By then the sun had risen, and was casting nice light on the mountains, contrasting with lingering clouds from the storm that was finally clearing. A faint rainbow started to appear, and anticipating that it would be fleeting I ran down through the houses to get a clear view by the water's edge. In fact there was no need to hurry, as the original fragment grew into a full arc, forming a perfect semicircle with the sun just over the horizon. Even better, from my position the semicircle perfectly framed the succession of mountains
I had brought only a 24-105mm lens with me, and at the wide end this was barely enough to encompass the entire rainbow. To create a more expansive photo I took several overlapping panoramic shots in portrait orientation to stitch together to produce the final image. I regretted not having thought to bring a polarizing filter to accentuate the colors of the rainbow, but it was bright enough by itself to not need artifactual enhancement.
Thus, another one of those 'keeper' photos that involve a little planning, but mostly just being in the right place at the right time. |
#114 - August 2018
"Through the Harecastle Tunnel" |
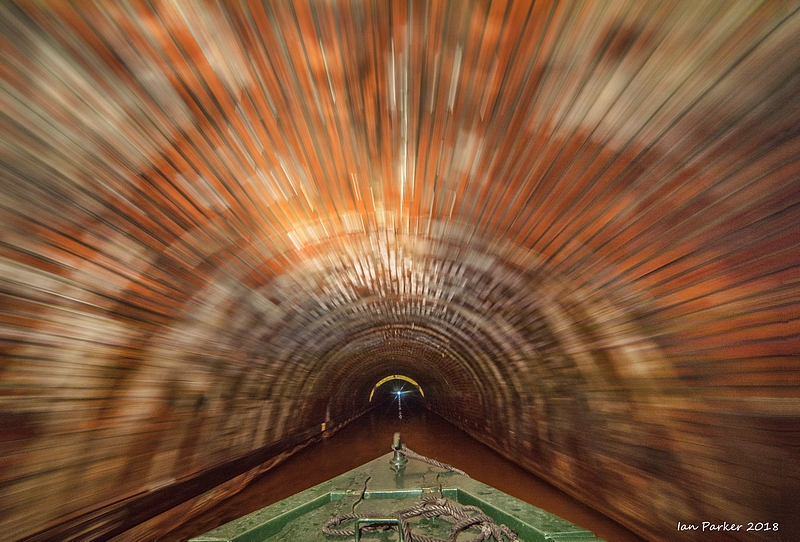
England, July, 2018
The Harecastle tunnel is a canal tunnel on the Trent and Mersey canal in Staffordshire between Kidsgrove and Tunstall. It comprises two separate and parallel tunnels described as "Brindley" and the later "Telford" after the engineers who constructed them, but only the Telford tunnel remains in use. The tunnel was built to transport coal to heat the kilns in theStaffordshire Potteries. At 1.5 miles it was once one of the longest canal tunnels in Britain. Commercial use declined in the 1960s and the tunnel was closed during the 1970s as a result of subsidence, but following the growth of recreational use of the British canal systems was repaired and reopened.
On a recent family vacation we rented a narrowboat for a week from Andersen Boats at Middlewich, and set out on an out-and-back journey along the Trent & Mersey and Caldon canals. That itinerary took us on passages in each direction through the Harecastle tunnel; a somewhat spooky experience ( the "scarecastle" tunnel) and indeed not without danger, with a fatality in recent years. The tunnel is completely dark and dripping wet in places, and excitement mounts as you venture deeper into the tunnel as its diameter decreases to the point that the skipper, standing at the tiller, barely clears the roof.
With two passages through the tunnel I had time to plan and refine how I might photograph within the tunnel. My original thought was that it would be very dark, so I would need the widest aperture lens I had (a 50 mm, f1.4) to get a shutter speed fast enough to freeze motion - even though the top speed of the boat was only about 3 mph. However, reviewing my shots after we emeerged at the far end of the tunnel I found that did not work very well. One problem was that the only light came from the headlamp at the front of the boat. I had expected that this would illuminate the way ahead, like the headlights of a car. Instead, the light was deliberately aimed upward at the roof immediately in front of the bow to provide an aiming spot for the skipper steering from the stern 70 ft behind. Given the relatively small field of view of a 50mm lens I was photographing this bright spot, and although I got some sharp shots of dripping brickwork and little stalagtites, the results were not very interesting.
On the return journey I decided to try a different approach; to use a superwide 14 mm lens to encompass the a wide sweep, and to turn its more limited (f 2.8) light-gathering power to advantage by taking longer exposure photos creating a motion-blur effect. I set my camera on a low tripod to get a sharp image of the prow of the boat and distant parts of the tunnel, while letting the closer walls blur out with a shutter speeds around 1/4s as we gently passed by. I was surprised at how much the lining of the tunnel varies along its length, with sections of brickwork, dark rock and white-streaked sediments, so I just kept taking shots without knowing at the time what might come out.
My final selection is a shot from part of the tunnel lined with alternating patches of clean red and white brickwork. This smeared out with motion blur to give powerful leading lines converging to the literal 'light at the end of the tunnel'. To generate the final image I needed to do some heavy-handed processing in Photoshop (with black level and shadows sliders maxed out) to bring up the very dim sides of the tunnel and balance them with the much brigher overhead spot illuminated by the headlight. |
#113 - July 2018
"Icescape illusion" |

Svalbard, June, 2018
Anne and I returned a few weeks ago from a trip to Svalbard with NozoMojo: at 80 degrees north and only about 700 miles from the Pole, this was our new furthest north (excepting an Emirates flight from Dubai to LA that crossed almost exactly over the North Pole, but that does not really count). My first impressions of Svalbard were of a rather barren landscape, in marked contrast to Antarctica and sub-Antarctic islands. Rather than being greeted by thousands of penguins and elephant seals, the wildlife took a lot more finding. Nevertheless, diligent binocular scanning by our leaders, Morten and Nozomi found us the classic fauna of the far north; polar bears, walrus, whales, reindeer, seals... But, wildlife photos can wait to be featured another month. For this month's selection I chose a small-scale image abstracted from the side of a little iceberg.
During almost our entire voyage we had 100% cloud cover at the level of the mountain tops, so there was no dramatic light. Instead, I was on the lookout for interesting shapes and compositions, and for splashes of color in a largely monochrome grey landscape. Icebergs calved from glaciers in several of the fjords we visited ticked those boxes, and I was particularly taken by the berg featured here, which had been eroded by wave action to create deep, dark blue caverns at sea level.
Photography from a Zodiac is problematic, with the flat-bottomed boat bouncing on the waves and swinging around so someone's head blocks the view just as you have the shot framed nicely. The image here, in fact, is a merge of two shots, each of which captured a different half of the composition I envisaged. The end result owes quite a lot to post-processing in Photoshop to enhance the contrast and color and emphasize the shapes and textures, but then I regard it as more an abstract creation than a depiction of reality. Indeed, I perceive an optical illusion when I look at the photo. Sometimes I see a three dimensional view of pillars of ice in front of dark caverns: other times the image flattens into two dimensions and I just see triangular and rounded shapes, with the dark areas reminding me of Anasazi pottery.
Do you also perceive this illusion??
|
#112 - June 2018
"Puffin commitment" |
Látrabjarg bird cliffs, Iceland. May 29, 2018
A photo that makes a nice contrast to my previous photo-of-the-month featuring jumping penguins. Puffins and penguins are both iconic birds with black and white bodies and colorful bills; both are better adapted for water than land or air; however, whereas they both inhabit circumpolar regions, they differ in living in opposite hemispheres.
With a possibly over-hectic schedule Anne and I have traveled to both sub-Antarctic and Arctic islands within the last year. Taking advantage of an IcelandAir stopover en-route to a recent trip to Svalbard we spent a few days detouring to the Westfjords, now our favorite wild region of Iceland, free of the throngs of tourists overrunning the Golden Circle and south coast. The weather was wet and overcast during the long drive from Reykjavik, and the forecast not much better for our first day at Patreksfjörður at the very tip of the Westfjords. But the morning showed a few patches of blue sky, and we drove off sploshing through puddles in the potholed gravel road to the Látrabjarg cliffs, the highest sea cliffs in Europe and summer home to millions of nesting birds. By the time we reached the parking area by the lighthouse the sun was shining, and I hiked up the trail that follows the cliff edge for 14 km, giving stupendous views as the cliffs gradually rise to a height of over 400 m.
Peering over the cliffs to see the birds is a precarious exercise, with signs warning of the danger of puffin burrows undermining the grassy lip. I followed the recommended practice of
wriggling gingerly forward on my tummy to better distribute my weight . The best spot I found was a serrated section of ridge about 1 km from the lighthouse that offered viewpoints where it was possible to look across to birds on the cliff face, rather than looking directly down on them. Kittiwakes and guillemots were present in vast numbers, but I had more trouble with puffins, who were only just beginning to arrive.
I found the subject of this month's photo hiding at the back of a small rock cave, a little below the cliff edge. I could get a good angle almost horizontally across, and the dark recess promised a good picture with a black background against which to highlight the puffin and show off its red bill and feet to good effect. For a long time it sat motionless, but a grassy hollow made a nice bed to lie on and a convienient tussock offered a stabilizing rest for the camera, so I could wait comfortably for some action and was ready to hit the motor drive when the puffin finally launched into space. This is my favorite frame from the sequence, capturing the instant of committment from land to air. This must be a moment of either teror or exilharation for puffins, as their small wings are better suited to swimming than flying, and their initial trajectory is a nose-dive free-fall until frantic flapping can gain some lift and airspeed.
|
#111 - May 2018
"Jumping Penguins" |

Saint Andrews Bay, South Georgia. October 5th, 2017.
Saint Andrews Bay is undoubtedly the 'Crown Jewel' of Soutrh Georgia, having perhaps the greatest concentration of wildlife on earth; vast colonies of king penguins stretching inland from the beach, around a glacial lagoon and up into the surrounding moraine hills, together with southern elephant seals packed onto every square inch of the beach itself. The bay is about two miles long and being open to the ocean is subject to high surf. For that reason, and because of the sheer density of elephant seals, Zodiac landing craft usually beach at the nothern corner of the bay, where the shoreline abruptly curves around to give more sheltered waters. The natural reaction of visitors is to head off from there toward the main panguin colonies. But there are some interesting secrets in the other direction, following the rocky shoreline to where a narrow cleft splitting the cliffs isolates what is almost a small island. Sooty albatross may be found nesting high up among the tussacks, and a low rock shelf above the ocean is used as a highway by the penguins.
All day long, processions of king penguins journey along this rock shelf, some venturing out from the colony to fish, and others returning home from the ocean. Arriving at the cleft where a narrow channel interrupts their highway the penguins appear surprisingly perplexed about what seems a minor difficulty. For creatures that are so elegant in their natural marine environment they are remarkably reluctant to jump down a few feet into the water and swim across the gap. The long, single file processions bunch up into a huddle of maybe a hundred penguins, with those at the edge peering nervously into the water. Maybe there is a leopard seal lurking down there?? This stasis can last several minutes, with a lot of pushing and shoving, advances and strategic retreats, until eventually one penguin jumps or is pushed off the edge. Once the pioneer is safely across, his compatriots quickly follow, and the channel bcomes a churning spray of flippers and oragge beaks. Penguins never seem to have learned any art of diving and whereas some take a controlled, feet-first leap, many simply do a belly flop of slither down the rock to make a face plant.
Getting to the penguin-jump cleft involves a sometimes perilous trek past aggressive fur seals (take your bodjer stick!), but once there some comfortable rocks away from the penguin highway provide a comfortable seat to watch the entertainment. From a photographic perspective though, the obvious view does not provide any background separation of the jumping penguins from the rocks. To get this photo I timed the swell to wade across the channel toward a vantage point againd the far rock wall. |
#110 - April 2018
"Horseshoe Bend" |
Page, Arizona:March 22nd, 2018
Horseshoe Bend is one of those iconic locations in the desert Southwest that I had thought never to visit again. Many years ago it felt like it was way out in the wilds, and there was a good chance of being the only person at the viewpoint. Now it is close by a new Walmart, and on a recent visit there were hundreds of selfie-taking tourists around the rim, and a hubbub of construction crews installing observation platforms and safety railings. Not at all a wilderness experience!. In fact, my reason to visit was just to kill some time while Anne used the wi-fi in Page McDonalds for a brief re-connection to the real world.
Yet, Horseshoe Bend is a spectacular feature, and I thought I might as well put some effort into getting a good shot; or rather, a good shot that did not look exactly like the many thousands already posted to the internet. That's not so easy to do. One problem is that it is only possible to capture the entire curve of the Colorado River around its meander from viewpoints along a narrow stretch of the rim, so all views look pretty much the same. Another is that the scene is so vast that a very wide angle lens is needed to 'get it all in'. Finally, the sky was overcast, so there was no dramatic light to be had; though the diffuse illumination did mean I wouldn't have to struggle with deep shadows and harsh contrast. So, equipped with my new Irix 11 mm super-wide lens I wandered along the rim, trying to keep out of the way of everyone's selfies, while looking for a vantage point with foreground features to complement the horeseshoe.
My photo here was taken within a small cleft in the canyon rim that had nice striations in the rock wall. What I wanted was to get the prominent white stripe linde up to match the curve of the river shore, creating a nice sinuous leading line into the picure. That took some wriggling to accomplish.With a very wide lens and close foreground, moving even half an inch produces a big change in alingment. Getting the camera in just the right position was further complicated because - in view of the abrupt 500 ft drop-off - I followed the National Park Service recommendation of gingerly approaching the rim lying flat on my face. I must have been engrossed for several minutes trying to get everything just right, as a passing i-Phone photographer, apparently not comprehending my intentions, remarked "Sir, there's a really nice view just over here". |
#109 - March 2018
"Star Trail Reflections" |
Saline Valley, California: February 17th, 2018
A recent weekend trip to Saline Valley presented a good opportunity for some nighttime photography. The thin crescent moon set soon after the sun, leaving a dark, completely cloudless sky. Best of all, we were camping close to the saline lake at the bottom of the valley, and I had long wanted to get a photo of both star trails in the sky and their reflections in water.
Achieving this is more difficult than it might seem. The key is that the water surface must be absolutely still, without riples or waves, to give sharp reflections. My previous attempts at Mono Lake had been stymied, because even on windless nights waves still lapped the shore. The saline lake looked more promising, as it is a smaller body of water, and the remains of the long-abandoned salt works trap shallow evaporation ponds by the shoreline. Another requirement to capture both the star circles around Polaris and their reflection is very wide-angle lens. In California the altitude of the north star, Polaris, is about 37 degrees, so allowing for some extra room in the final phot a vertical field of view of at least 90 degrees is needed. For a full-frame 35 mm camera in landscape orientation that corresponds to a focal length of 12mm. No problem, as I brought my new 11mm super-wide Irix lens!
After dinner I hiked by flashlight through the muddy goop around tha lake, and found perfect, crisp reflections, with not a breath of wind. I headed for a location I had scouted earlier in daylight; a long projection of low posts along a dyke that originally formed a boundary of an evaporation pond. It had looked as if this extended nearly due north. With Polaris visible a misalignment was now obvious, but it would have to do. I planted my tripod firmly, checked the lens was wide open at f4 and focused at infinity, and lined up my camera level with the horizon and pointed directly between the the line of posts. Selection of a shutter speed is a comromise - too long and the sky background becomes too bright, yet shorter exposures mean more work in layering numerous frames to produce the final image. In that regard my Canon 5D IV is a little frustrating. It has built-in long exposure ('bulb') and intervalometer settings, but you can't use both simultaneously. Here, I set a 4 minute exposure at ISO 1600, and stood by the camera, slowly sinking into the mud, presing the shutter button immediately after each exposure for a total of 12 shots.
To create the final image I stacked the 12 shots as layers in Photoshop, and blended them together in 'lighten' mode. An unanticipated problem came because I had aligned the camera on the foreground feature, not on Polaris, so the star circles were distorted into ellipses by the wide-angle perspective distortion of the lens. A little tweak with the warp tool took care of that. Finally, I did some some curves adjustments to get a pleasing look in the sky. By eye, the sky on a dark night appears completely black, but with long exposure the camera captures light from several sources; light pollution (minimal at this remote location, the distant lights are from campers at the hot springs), air glow, and scattered starlight from interstellar dust. We might expect the night sky to be blue, as it is in daylight, but that's not the case. This photo represents the true colors of the stars and of the sky background; the latter mostly greens and reds from airglow, generated by the same process that gives rise to the much brighter aurora. |
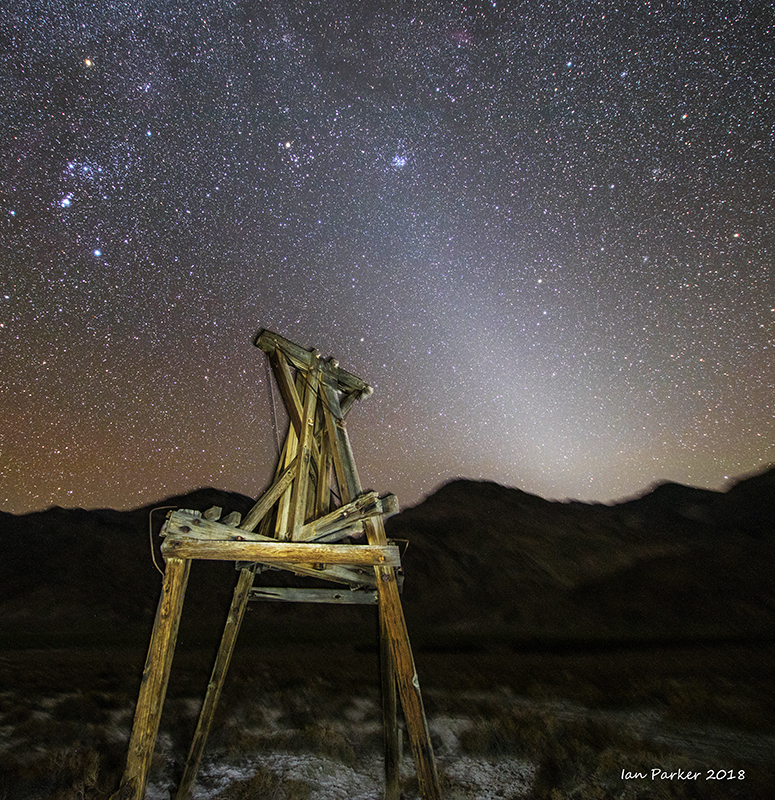 |
A bonus astrophotography shot from the same evening.
"Salt tram tower and zodiacal light" |
The wooden tower is a relic of the electric tramway constructed in 1911 to carry salt mined from the saline lake 14 miles over the Inyo Mountains to a terminus in the Owens Valley. It operated sporadically from 1913 to 1936, but ultimately proved to be too expensive to run. The tram, which was placed on the National Register of Historic Places in 1973, was the steepest ever constructed in the U.S. It rose from an elevation of 1100 feet in Saline Valley to 8500 feet over the mountains, and then down to 3600 feet. The route ran south from Salt Lake to Daisy Canyon, steeply up the canyon to the summit crossover station, then southwest to terminate at the (now abandoned) railroad alongside Owens lake.
The diagonal cone of light in the photo is Zodiacal light; a faint, diffuse, and roughly triangular white glow visible in the night sky that appears to extend from the vicinity of the Sun along the ecliptic. Sunlight scattered by interplanetary dust in the zodiacal cloud causes this phenomenon.
|
#108 - February 2018
"Sandhill Crane Blur" |
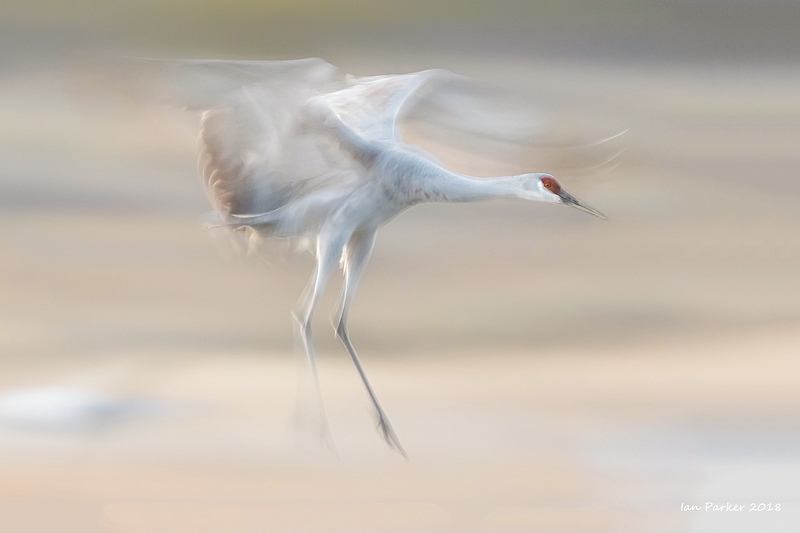 Bosque del Apache National Wildlife Refuge, January 14, 2018 Bosque del Apache National Wildlife Refuge, January 14, 2018
As a combined Christmas plus birthday present this year Annie generously gave me a new lens, the Canon 400 mm DOII. A true "big white" this features superbly sharp optics and relatively wide (f4) aperture in a remargably compact and light body. To try it out, I took a long weekend trip to Bosque del Apache in the middle of January to photograph the sandhill cranes and snow geese before they departed the Refuge at the end of winter. I came back with a memory card filled with several thousand shots. Looking through these my favorite, pardoxically, was a (deliberately) blurred photo taken with my new, super-sharp lens.
A common view is that a camera merely captures an objective view of the scene before it. Often that is the case, and the photographer's role in creating an interesting image then reduces to carefuly selecting the scene, deciding on the point of view, and hoping for interesting light. A sharp lens obviously does a better job of focusing a sharp image, and there is something of an obsession among photographers about cameras with more megapixels and lenses with better modulation transfer functions. But beyond this, another aspect is that a camera can 'see' things that the eye and brain directly cannot. One example is the freezing of fast motion; another, as illustrated here, is the use of long exposure to generate a blurred sensation of motion.
The center of crane activity during my visit to Bosque was at the ponds alongside the road into the Reserve. In the evening the birds would begin flying in from the fields to land and roost in the pond where they are safe from predation by coyotes duuring the night. They followed a predicable flight path with the prevailing wind, so it was easy to locate a distant bird, lock focus and track it as it descended and flew almost at a right-angle before me to land on the water. Most of the birds came in after sunset, when the light was fading badly. By then I was having to use a shutter speed as long as 1/10 second even at ISO 16000. No chance of getting sharp shots of the fast moving cranes, but a good opportunity to create motion blur photos. With my camera tripod-mounted I tried to smoothly track the path of a crane on its glide path while firing of a burst of motor-drive shots. Very much a hit and mostly miss procedure, as you have no idea at the time about what the camera is capturing. Out of nearly 2000 shots over two evenings I got only three 'keepers' where I had matched the motion of the crane well enough to have the head and eye sharp while the wings were in a position to give a pleasingly abstract blur. |
#107 - January 2018
"Nightscape - Grytviken" |
 Grytviken, South Georgia: October 4th 2017 Grytviken, South Georgia: October 4th 2017
The whaling station at Grytviken was founded in 1904 by the Norwegian captain Anton Larsen. At that time whales abounded in Cumberland Bay immediately adjacent to the station, and 195 were taken in the first year of operation without the whalecatcher boats ever needing to leave tha bay. However, over the next decades Grytviken together with the four other whaling stations established on South Georgia following its initial success were substantially responsible for decimating the southern hemisphere's stock of whales. Eventually the whale stocks became so low that continued exploitation was unviable, and the station at Grytviken finally closed in 1966 as the last operating station on the island, having processed 53,761 slaughtered whales into 455,000 tons of oil and 192,000 tons of meat..
The industrial scale machinery for processing the whale oil, blubber, meat and bones remains in a state of rusting decay - protected from vandalism by the remoteness of South Georgia, but not from the ravages of the extreme climate. Originally the machines were enclosed in corrugated metal-sided buildings, which remain largely intact at whaling stations other than Grytviken. However, dangers from collapsing and wind-blown flying sheet metal and asbestos exposure led to those stations being declared off-limits to visitors. Grytviken is the exception, having been cleaned-up and sanitized for the safety of tourists in 2005 by the removal of buildings, asbestos and fuel oil. What remains is an eerie memorial, with the vast extent of the processing plant now open to the elements.
For photographers who visit South Georgia with their minds focused on wildlife, Grytviken may seem something of a desert. But the abstract shapes and rust patterns of the whaling station do make an interesting interlude from penguins and seals. And, Gytviken is a compulsory stop for all vessels visiting South Georgia to clear immigration and customs (a wonderfully informal procedure, performed on our recent visit by two ladies in wooly jumpers, between them representing the entire government of the British Overseas Territory). Whereas cruise ships have to anchor out in the bay and ferry their passengers ashore in Zodiacs, in the much smaller Hans Hansson we were able to moor at the dock in the heart of Grytviken. That greatly enhanced our time ashore, most especially by allowing a unique opportunity for nighttime photography.
This Month's photo was taken at about 2:00am, on a cold, windy night with a light snowfall. The moon was near full, and its diffuse light through an overcast sky dimly illuminated the surrounding mountains as a scene-setting backdrop. To highlight the machinery I used a LED flashlight, walking around durng a 30s exposure to vary the angle so as to avoid any harsh shadows. Nightscapes portray a different emotional 'feel' to more straightforward representational daytime photographs, and I hope this image captures something of the ghosts of the thousands of whales who met their end as oil in the huge storage tanks. |
#106 - December 2017
"Saint Andrews Bay Sunrise" |

Saint Andrew's Bay, South Georgia: October 14th 2017
Saint Andrews Bay has good claim to be among the top - if not THE top- wildlife photography destination on the planet. From late spring in the southern hemisphere the beach becomes a writhing mass of thousands of elephant seals and, many more thousands of fur seals. But the true highlight lies at the back of the beach, among the moraines where the world's greatest concentration of king penguins gather; some 300,000 adults and juvenile oakum boys. It is not, however, the easiest place to get to, involving a usually rough 800 mile crossing of the South Atlantic from Ushuaia or the Falkland islands to South Georgia. And, when you get to Saint Andrews Bay, landings can be difficult. The bay is open to the ocean and strong winds can kick up suddenly, generating big surf that may preclude landing or prompt a hasty retreat back to the ship. The afternoon before I took this photo the conditions were wild, blowing a near blizzard . Dion, our captain, was confident that he could land us on the beach, but not so confident whether he could pick us up again if the wind showed any strengthening. In the event we had a great time photographing penguins in blowing snow, despite having a hard time to stay upright during stronger gusts. I would actually have rather enjoyed being stranded for the night as there is a well supplied emergency hut, but we were able to board the Zodiac without problem at the more sheltered northern end of the beach.
By daybreak the next morning the weather had changed dramatically, as it is apt to do at South Georgia. The wind had died, the sky was clear, and there was still a dusting of snow on the ground. Conditions looked good for a great morning of photography, and to get in position for good light we landed well before sunrise; one of the many advantages of being on a small boat with only twelve passengers, where schedules can be readily adapted to the conditions without the constraints of large cruise ships. I hiked up to a lake in the center of the penguin colony looking for reflections in the still water, and took this shot just as the first sunlight caught the penguins below the montains. The photo is largely a result of good fortune in being at the right place at the right time, but a matter of perseverence as well as luck. Anne and I have been privileged to have spent over a week in total at Saint Andrews Bay, and this was the only morning with such perfect conditions. |
#105 - November 2017
"Backlit Oakum Boys" |

Saint Andrew's Bay, South Georgia: October 6th 2017
This photo was taken only four weeks after my previous photo-of-the-month selection; but some 8000 miles and 120 degrees of latitude away. Anne and I had a crazy travel schedule, flying home to California from Iceland, then onward to the Falkland Islands via Santiago, and finally a four-day small boat crossing of the Southern Ocean to South Georgia. We joined a group of photographers and wildlife experts on a non-commercial charter organized by Chris Fallows, a South African photographe and leading authority on great white sharks. This opportunity came up at the last minute, and we had jumped at the chance to return to one of the top wildlife destinations on the planet, aboard our favorite boat, the Hans Hansson, crewed by Dion Poncet and Juliette Hennequin,
Chris had sheduled the trip very early in the season; early spring in the Southern Hemisphere. At this time huge numbers of elephant seals are hauled out on the beaches and fighting for their right to dominate the beach; albatross are present in good numbers; and penguins are everywhere. And, we were on the island well before any cruise ships begin to visit. Apart from the dozen or so scientists and staff overwintering at the King Edward Point research station our little group of 15 had South Georgia to ourselves, with complete freedom for all-day explorations from our landing beaches. It was wonderful to be utterly off-the-grid for a month, with hundreds of thousands of penguins for company; but it was then an unpleasant jolt to arrive back at LAX and face the traffic on the 405 freeway!
One of Chris' motivations for an early season visit was the expectation of lots of snow and dramatic weather conditions (following Marc Muench's maxim that "bad weather makes for good photographs"). Mostly, that did not come to pass. The South Georgia winter had been exceptionally mild, and beaches where we had found deep snow during a previous November visit were completely bare.We even had several days of warm sunshine. Nevertheless, although the light was often frustratingly flat through much of the day, the skies sometimes cooperated to give spectacular sunrise and sunset opportunities. This month's photo is one example, when the light from the setting sun passing through a window between a lenticular cloud formation and the Allardyce moutains back-illuminated vast numbers of oakum boys (juvenile king penguins).
Oakum boys were named by 19th century sailors for the resemblance of their brown fluffy plumage to the color of oakum (tarred fibre) used to caulk timbers on sailing ships.The year-old penguins in the photo will soon begin to shed their fluffy brown plumage, adopt the colors of an adult, and take to the ocean. Until then they mostly just bide their time huddled in crèches, waiting for their parents to come back and feed them. Although the dull brown of the oakum boys can't compete with the spectacular orange and yellow color palette of the adult king penguin, their plumage does make for great photographs when low sunlight outlines their silhouette with an orange glow.
I took many variations of this scene, mostly excluding the sky and shading the lens with my hand to avoid lens flare. However, the cloud was also part of what made the scene so special, so I also risked some shots straight into the sun. The results were indeed marred by flare artifacts caused by the direct sunlight reflecting between lens elements. So, a job for Photoshop to rescue! An hour's work with clone and content-aware fill tools fixed up the problem areas, and I was able to balance the extreme contrast between the bright sky and dark foreground to create the image featured here. |
#104 - October 2017
"Stranded in Iceland" |

Skápadalur Valley, Westfjords, Iceland: September 8th 2017
Anne and I were booked on a trip to Greenland, and had flown out to Iceland a few days in advance before joining the onward charter connecting flight. However, in our hotel room in Reykjavik we received an e-mail notifying us that the boat we were to join had mechanical problems, and that the Greenland trip was cancelled. So, we were stranded in Iceland! But that is not at all a bad place to be stuck, and with the wonders of the Internet and trip advisor we were quickly able to rebook our vacation. While visiting Iceland earlier in the year we had been dismayed by how the popular sites around the Golden Circle and south coast had become overrun with tourists, and this time determined to head out in search of solitude. Our destination was the Westfjords; a remote region to the northwest of Iceland connected only by a thin neck of land, far distant from Reyjavk, and traversed by largely unpaved roads twisting around fjords and over high mountain passes. Although lacking in the sort of iconic waterfalls and galciers popular in the rest of Iceland, the Westfords have a haunting, sparse beauty, and we found them mercifully free of tour busses and excursion superjeeps.
Our favorite stay among the fjords was at Patreksfjordur, in part because of our meals at Stukuhsid restaurant, which served the best salmon and rhubarb tart that Anne had ever eaten. After dinner each night we walked back to our guesthouse Stekkaból (also highly recommended) and looked up the aurora forcast from the Icelandic met office. On our second night the forecast looked good, with activity 4 on a 0-9 point scale and a clearing sky after midnight. When photographing the aurora I like to incorporate some terrestrial feature, and the head of Patreksfjord offered an attractive subject in the form of a beached ship, the Garðar. Originally known as the Globe IV, this large ship was built in Norway in 1912 as a state-of-the-art whaling vessel. She found an Icelandic owner following World War II and, once whaling restrictions became more widespread, the Garðar (a name she finally received in 1963) was used for fishing herring in the waters off of Iceland. After decades in faithful service the Garðar BA 64 was finally deemed unsafe in 1981. At that time most disused ships were scuttled, but instead the Garðar was run aground in Skápadalur Valley, where she now lies stranded and rusting on the beach.
Rising from our bed at 2:00 am there were streaks of green in the sky, clearly visible even though the moon was near full. We drove down to the Garðar and I set up my tripod to explore the use of my new, superwide 11 mm Irix lens for capturing vast swathes of the sky. For two hours the auroral displays flickered over the Garðar, alternating between one side and the other, so I found mysef dashing around with the camera mounted on my tripod to get good compositions. The moonlight was bright enough to give a good exposure of the land and the ship, and sometimes I supplemented this with lightpainting. Most of the time I stayed on the beach immediately next to the ship (things start to look very small with an 11mm lens when you move only a short distance away!), but then I thought to walk around a small lagoon in the hope of getting reflections of the aurora in the still water. This month's photo is the result, and the only shot I got of the reflections as the aurora faded immediately afterward, and the attractions of a warm bed overcame my patience before it might reappear.
The next night the aurora forcast was a level 9 (extreme!), and we set off back to the Garðar with high hopes and bright green glimmers behind high clouds. Arriving at the ship there were curtains of light in the clearing sky, but they faded before I even had time to set up my camera, and never reappeared... |
#103 - September 2017
"Total Eclipse" |
Malheur National Forest, Oregon, August 21 2017
44 33 18N 119 18 50 W; 17:23UT;
Alt 43.2, Azi 121.9
I have driven 1000 miles to photograph a shadow of one rock formation on another, so it definitely seemed worthwhile to drive a similar distance to view and photograph a much bigger shadow; that cast by the moon during a total solar eclipse.
Now, a problem is that only truly dedicated landscape photographers get excited about shadows on rocks, whereas millions of people get excited about a solar eclipse, particularly one that conveniently crosses the entire USA. An important part of my planning was thus to choose a location that might be reasonably secluded and free of traffic jams. From our home in southern California a swath of the eclipse path from the Oregon coast across Idaho lay within about the same driving distance. Eastern Oregon looked the best bet for clear skies, and searching on Xavier Jubier's wonderful interactive eclipse map I found a promising forestry road that lay almost exactly on, and paralleled the center line of the eclipse. Anne and I arrived there two days after leaving home, camping (and photographing) along the way at Mono Lake and Steen's Mountain. Many of the best clearings in the forest were already occupied, but we eventually found an excellent wide open area, with even a pond to try for reflection shots of the eclipse. A family with eight children were already there, but they had set up among the trees at the far side of the clearing, and the kids were remarkably well behaved, so we still had relative solitude.
I was using a tracking mount for telephoto shots of the eclipse, and had hoped to align it to Polaris the night before the eclipse. However, clouds moved over the sky, obscuring the stars and increasing worries as to whether the eclipse would be visible. Waking at about 2 am I could see the Milky Way (we were out in our sleeping bags on the gound) and wriggled out dressed only in boxer shorts to position the tripod. At dawn the sky remained clear, if a little hazy with smoke from the distant Sisters fire, so all looked good for the eclipse.
I was using two cameras; the first a Canon 7D Mk2 with 10 mm lens to create a wide-angle landscape view of a time-lapse series as the sun rose and became eclipsed. By checking the sun's path the day before I found the the lens was just wide enough in portrait orientation to capture both the eclipsed sun, quite high in the sky, and its reflection in the pond. I pre-programmed the camera to take shots every 10 min, with the exposure set appropriately for the pair of stacked ND filters I was using as a solar filter. My second camera was a 5D MkIV, with 400 mm lens, 1.4x teleconverter and solar filter, fitted to the now-aligned tracking mount. I had that one pre-programmed with three settings; 10 min interval timer with solar filter on, 1 second intervals with three exposure brackets to capture the diamond ring with the filter off, and 1 second exposures covering an enormous 10 stop range with the filter off to capture the solar corona during totality. A bit complicated, but it all worked, and once totality began the camera took care of itself so I could enjoy the experience.
It really is a remarkable coincidence that the diameters of the sun and moon, and the earth's and moons' orbits are such that the moon can exactly shadow the sun. If the moon were slightly smaller we could only get annular eclipses (which are nice, but nothing like a total eclipse). If it were much larger the sky would merely go black during totality - the corona would be greatly obscured, and the diamong ring effect lost.
But when the orbits are just so it is perfect, and quite something to behold. This was my first total eclipse, and I want to see more. Two minutes is too short. Photographs cannot fully encapsulatethe experience, but the montage above will serve as a visual memory, and indeed captures details that were not apparent by eye. |
#102 - August 2017
"Elegant tern shake-out" |

Bolsa Chica: July 2017.
I drove down to Bolsa Chica on Sunday morning for the first time in a couple of months. On my previous visit the lagoon was overrun with Forster's terns. I expected they would now be gone, but the air was still filled with noisy terns diving into the water and squabbling among themselves. Not the same terns though - these looked a little larger. The mystery was solved when I found an article on the internet. As described by Peter Knapp, elegant terns began nesting last summer at Bolsa Chica in numbers never seen before. This can be traced to the failure of their primary nesting site in the Gulf of California, Isla Rasa. This site previously supported 90% of the breeding population, but has had no nesting for the past three years. Therefore, the site at Bolsa Chica and the Salt Works in San Diego have accommodated a large proportion of the entire breeding population of this species.
So, a new species for me to photograph, and the sheer density of birds made this surprisingly easy. I had tried many times before to capture terns in the instant of diving into the water, but the Forster's were always too fast for my reaction time. The elegant terns seemed a little more deliberate, giving more notice of when they were about to dive. At one point a dozen or more terns engaged in a feeding frenzy conveniently near to the bridge, and it was just a matter of hitting the motor drive to capture them diving and emerging from the water.
Another behavior I had been trying, and failing to photograph was the mid-air 'shake' terns do a short while after they have dived for fish. By eye this is so fast as to be a blur, making it hard to discern quite what the bird is doing. Once again, the speed and erratic flight of the Forster's terns had defeated me, and I never succeeded in tracking a bird and keeping it in focus while it did its shake. To maximize my chances with the elegant terns I walked along the trail to where the tidal flow through a culvert connecting two lagoons churns up the water to create a rich fishing ground. Sure enough there were several terns busy circling and diving close to the path. I concentrated on on grabbing focus on the splash when they entered the water and then follow the bird with motor drive running as it flew off. It took a few hundred shots, but I finally got the photo I wanted. |
#101 - July 2017
"Gljúfrabúi Waterfall" |

South Iceland: February 2017.
Gljúfrabúi: I have no idea how to say it, but imagine that when pronounced by an Icelander the sound would convey something of the damp, gloomy atmosphere of this unique little waterfall.
Gljúfrabúi hides close to its much better-known neighbor Seljalandsfoss - the waterfall you can walk behind. During our recent midwinter visit we found Seljalandsfoss, along with most of the other classic destinations along the south coast of Iceland, to be overrun with tourists. Hoping for more solitude I walked the half-mile track along the base of the cliffs to find the outlet stream from Gljúfrabúi. From the path you can't see the waterfall. What makes it special is that it is set back in a narrow canyon, the entrance to which is blocked by a house-size fallen boulder. Getting to the fall involves either a slippery scramble over the boulder, or a wade in icy cold water through a tunnel formed by the boulder. Wearing knee-length muck boots I opted for the latter approach and emerged into a gloomy chamber, illuminated only by a narrow skylight between the boulder and canyon walls, and filled with dense spray from the fall. Very atmospheric, and very wet!
I faced two problems in getting a good photo. The first arose from the constrained space between the boulder and the waterfall - but I had anticipated this and brought a super-wide lens. By setting my tripod low down at the very back of a crevice in the boulder I could hide direct light from the sky behind an overhang, and get a wide view to place the fall in the context of its mossy grotto. Then, the issue was dealing with droplets of spray on the lens. I had a cloth to wipe off water, but even by using this to cover the lens until the very instant before opening the shutter I invariably ended up with a few droplets on the front element during the one second exposure I was using to create an 'angel hair' effect on the fall. As a safeguard I took several shots, and in post-processing blended two shots that were each marred by a single droplet, but in different places. |
#100 - June 2017
" Corkscrew Heron" |

Bolsa Chica Wetlands; May 13th, 2017
Great blue herons are easy birds to photograph. They are big; they move and fly slowly; and they are not unduly timid. But, most of the time they just don't do very much, although they will stay still and pose elegantly for a photographer. I found this month's subject at the northern end of the wetland preserve, where a channel connects two of the lagoons. A strong tidal flow was passing through the channel, churning up the water and creating a good fishing ground for several terns and pelicans that were busy diving. The heron was taking things in a more leisured manner, perched on a rock by the edge of the channel looking for any fish that might come within easy reach of its long neck. A feature making this particular bird attractive from a photographic perspective was that it was positioned in front of a dark, shaded concrete abutment, while the heron was diffusively, but more brightly illuminated. A white bird against a near black background would give a strong subject isolation and make the photo 'pop'.
I settled down on the bank of the lagoon to wait and see what might happen, soon wishing I had brought a tripod as I could not hand-hold my camera with 100-400 mm lens for more than a couple of minutes without resting. Luckily, I did have the camera to my eye the one instant during a half hour of watching when the heron made a move, transiently swiveling its head around to check out a fish on the opposite side to where it had been looking. It never made a dive for the fish, but the sinuous curve of the neck and back and the splayed feathers made a nice composition. It's always good to get a 'S' curve in a photo!
I did need to do a little Photoshop trickery on the original shot to create the final image, darkening and blurring the background to enhance the contrast. And, I had been positioned a little too low, so that a foreground rock obscured the lower part of the heron's legs. That problem was apparent when I looked at the image on the camera screen, so I took another shot from a higher vantage point immediately afterwards before the bird had moved position anticipating that I could then blend in the legs., |
#99 -May 2017
" Figures in a Painted Landscape" |

Temblor Range, Carrizo Plain National Monument; April 9th 2017
Living in Southern California we have been fortunate to have had 'superblooms' the last two winters, when the deserts came alive with carpets of flowers. I have been surprised, though, by how localized the areas of superblooms can be, and how varied they are in timing. In late January of 2016 the floor of Death Valley was already carpeted in yellow, but this year the Death Valley flowers were very modest. Instead, the most spectacular displays were in the hills above Carrizo Plain, but not peaking until mid April.
We made three visits this season to Carrizo Plain. On our first visit in March the tops of the Caliente range were covered in dense fields of hillside daisies, but there was not much other color to be seen apart from the bright yellow. And, we had peace and solitude - Carrizo was staying true to its reputation as the National Monument that nobody knows about. But then the TV news and newspapers started showing photos of spectacular blooms in the Temblor Hills to the east of Carrizo Plain... On our next visit there were people everywhere, driving slowly down the dirt Elkhorn road, kicking up great clouds of dust. Finding the best spots for flowers became the same procedure as searching for lions in Africa; just look for the greatest huddle of vehicles.
I took this photo from the roadside, next to a dense vehicle huddle which, indeed, marked the best display we found; a tricolor palletet of yellow hillside daisies, orange blazing stars and purple tansy phacelia. I used a 400 mm telephoto lens to compress the scene, aiming for a semi-abstract composition of color swatches. This was aided by shadowless light cast by the bright mid-day sun, but the hot sun also degraded the image sharpness owing to the heat haze rising from the hillsides. To provide a focal point and sense of scale I wanted to include some people in the picture, which was easy to do as a hiking trail ran along the top of the yellow ridge in the foreground, and there were lots of hikers. For the final image I cropped out the sky to enhance the abstraction, and compressed the horizontal axis to get a more pleasing angle on the diagonal ridge. |
#98 - April 2017
" Desert Lily" |

Font's Point, Anza Borrego State Park; March 24th, 2017
Anne and I took a few days off to look for wildflowers during the 'superbloom' resulting from an exceptionally wet winter in Southern California. Our first stop was Anza Borrego State Park, which was receiving a lot of publicity. Actually, we were a little disappointed; the carpet of yellow flowers on the desert floor paled in comparison to what we had seen in Carrizo Plain the week before, and in places the throngs of visitors seemed to almost outnumber the flowers! In search of somewhere quiet to camp for the night we drove up Font's Point wash and along the cut-across trail leading through high, arid badlands, settling on a barren patch of flat ground to set up our tent.
But, on closer inspection, not so barren. Beautiful white desert lilies (hesperocallis undulata) were flowering on the bare soils. My first attempts to photograph them looked terrible, with a distracting background of brown, dessicated earth strewn with rocks. To get a better subject isolation - indeed, to completely eliminate any background - I waited until after dark. A small flashlight, positioned by Anne behind and below the flowers illuminated the petals witha backlightmaking them glow while seemingly suspended in an inky void. |
#97 - March 2017
" Aurora over
Þingvellir Church" |

Þingvellir, Iceland. February 21st, 2017
It had been three years since Anne and I had last visited Iceland, and we had looked forward to returning in mid-winter when we could explore in solitude. But, what a change in such a short period of time. The country is experiencing a massive boom in tourism;, possibly underlying an economic bubble that might well be followed by a corresponding crash. The airport is expanding, numerous hotels are under construction, superjeeps clutter the parking lot at Jokulsarlon, and cars and tour buses are everywhere. Tourists visiting Iceland in 2016 outnumbers the population more the sixfold. We were saddened that locations that had previously felt remote and wild were now overrun, as evident in the contrasting photos below of the black beach at Reynisdrangar.
The penultimate night of our visit gave a welcome respite from the crowds. The Icelandic met office forecast was for low cloud cover and a moderate (2/3) level of solar activity, so we woke at 2:00am and set out from our hotel in Reykjavik in search of dark skies and interesting foreground to photograph the aurora.
Þingvellir seemed like a good choice, being far enough from Reykjavik to minimize light pollution, and with an attractive church, interesting rock formations, rivers and lakes to provide a counterpoint to the skies. There had been a light snowfall the previous day, and as I set off down the track from the parking area (now newly equipped with parking meters) I found few footprints in the snow, and was happy to realize that I had the entire National Park to myself for the night.
Once my eyes had adapted I could see a clear, green band of aurora; not spectacular, but bright enough to make good photos without needing a ridiculously high IOSO setting and overly long exposure time. My first destination was the iconic Icelandic church, which is located close to small buildings used as a summerhouse by the Icelandic Prime Minister (compare and contrast with Mar a Lago!). The summerhouse buildings are floodlit, but whereas the church is not, it is gently illuminated by spillover from the floodlights. By happy coincidence the lighting on the church balanced nicely with the brightness of the aurora - a good thing, as I had no control over either of these parameters. If the foreground had been in darkness I could have provided and balanced my own lighting using a flashgun or by 'lightpainting' with a hand-held flashlight, but these approaches tend to give a harsh illumination with distracting shadows. Here, diffuse light reflected from the white walls of the buildings gave a pleasingly even illumination. |
 February 2014
 |
 February 2017
 |
#96 - February 2017
Getting creative with penguins; Part #4
"Penguin in a motion-blurred lagoon" |

Volunteer Lagoon, Falkland Islands; December 2016
Tours to the Falkland Islands often make a visit to the penguin colonies at Volunteer Point on the penultimate day, before returning the short distance to Stanley for the once-a-week flight back to Santiago. On our recent circumnavigation of the Islands we were due to make a zodiac landing at Volunteer Point, but that was precluded by strong winds and high surf as the Point is exposed to the full force of the South Atlantic ocean. Instead, we motored toward the entrance to Volunteer Lagoon, where we landed on a sheltered beach. The tide was low, and from the landing site we could splash across sandbars in the shallow lagoon to find Gentoo, Magellanic and a few King penguins.
I liked the alternating layers of reflective blue water and yellow sand in the lagoon, and experimented using different patterns as backgrounds against which to photograph the penguins.That did not work well, as the sands were just too cluttered and distracting, strewn with clumps of seaweed and debris. My next thought was to use deliberate camera movement to blur the landscape into pelasing stripes by selecting a slow shutter speed and sweeping the camera horizontally during the exposure. After a few trials I seemed to be getting quite nice results as viewed on the camera screen. But, I wanted a penguin in the picture! I spent some time trying to find penguins moving at a good pace so I could pan the camera to keep them in good focus whilst blurring everything else. However, unless they are being chased by a sea lion, penguins don't move very fast on land, and the ones I found certainly were not cooperating by moving at a steady pace. After a while I gave up, and moved on to photographing penguins amidst blowing sand on the dunes.
Ansel Adams coined the term 'previsualization'; meaning to plan and conceptualize what a final photograph woud look like before he actually opened the shutter. In this instance my previsualization had failed. I knew what I wanted to achieve - a sharp image of a penguin against a background blurrred sufficiently to become an almost abstract pattern whilst still conveying an impression of the environment - but I could not capture that in a single shot. A month later, viewing my images on the computer screen, I was struck by a notion of 'postvisualization'. After all, I had nice motion-blurred images of the lagoon, and nice sharp images of penguins in the lagoon. Why not just combine two frames in Photoshop... |
#95 - January 2017
"Wet-dog-shake rockhopper penguin" |

Pebble Island, Falkland Islands; December 2016
Anne and I arrived home after Christmas after a return visit to the Falkland Islands - land of penguins and albatross - aboard the MV Hans Hansson. Our voyage was a clockwise circumnavigation of the Falklands, visiting many of the wildlife-rich outlying islands. Pebble Island was our penultimate destination, and on a first morning landing did not impress! We had hiked inland to a large pond in search of waterfowl, but the pond was dry. The Falklands are experiencing a six-year drought, and all that remained was a brown expanse of cracked mud, enlivend only by a dessicated sheep's skull.
The afternoon landing, however, was much more productive. We were dropped off by Zodiac at a different beach on the low side of the island, and hiked across to the opposite side where cliffs drop steeply to the ocean. Several colonies of rockhopper penguins are spaced over a few kilometers along the top of cliffs. I decided to stay at the first colony we found to maximize time with the penguins, whereas others in our small group continued onward. To get to their nesting site from the ocean the rockhoppers needed to first cross an extended rock tidal shelf and then find a way up the steep cliff face. I wanted to get down to the shelf, but at first look that seemed a daunting proposal as the convex slope appeared to steepen abruptly. But, after walking around to the side to get a better view I could see that the rockhoppers had created an elegant highway, switchbacking between ledges up the cliff face. This I decended carefully, with the main hindrance being the need to wait for little groups of penguins to pass by on their journeys to and from the ocean.
Once rockhoppers have acrobatically emerged from the ocean onto land, they seem strangely reluctant to continue on to their colony; stopping to preen or just staying motionless, and sometimes even backtracking. Here, the rock shelf offered a further distraction in the form of a large tidal pool, which they seemd to treat as a play-pool; splashing around, cavorting, sometimes fighting and seeming to thoroughly enjoy themselves. After climbing from the pool the rockoppers would stand at the edge and do a vigorous 'wet-dog' shake to dry themselves; something they do not usually do on emerging from the ocean itself.
So, an interesting and highly photogenic behavior, and some nice lighting by which to capture it. I am a sucker for backlit photos, which can convey a dramatic mood albeit at the expense of technical issues of controling the extreme contrast and likelyhood of lens flare. Large boulders cast most of the pool into shadow while providing a black backround behind rockhoppers standing in sunlight at the near edge. I positioned myself low down, facing directly into the sun aligned with a platform the penguins seemed to favor for drying out, and waited for the action. Once out of the pool,a rockhopper would usually wait a few seconds, then stretch its head up and stick out its flippers before beginning the shake. That gave me plenty of time to frame and focus before triggering a motor-drive burst of shots to capture the spray. This month's photo is taken from the second frame of a sequence, when the most dense spay had begun to fly. |
#94 - December 2016
"Ice sculpture:
Jökulsárlón" |

Jökulsárlón glacial lagoon, June 2011.
Continuing this month with an abstract (and Icelandic) theme. This is a photo I took during a night spent wandering along the shores of Jökulsárlónlagoon in the south of Iceland. We had arrived that afternoon, and my initial impression of the famous ice-filled lagoon was of dissappointment; tourists thronged the beach, waiting for noisy amphibious craft to take them out among the icebergs. By late evening though, the scene had changed. Everything was quiet and I had the place to myself as the sun briefly dipped below the horizon. A glacier from the vast Vatnajökull ice cap calves into the lagoon, which is filled with icebergs the size of houses jostling one another as they make their way down to the narrow channel leading to the sea. Close to the shore there are numerous smaller fragemts of ice that become sculpted into sinuous shapes as they melt and roll over so that different surfaces become immersed or exposed to the air. While there was still good light in the sky I concentrated on photographing the wider landscape and large bergs, but during the short arctic midsummer night the nearby ice shards provided subjects for lightpainting with my flashlight. |
#93 - November 2016
"Seaweed zoom abstract:
Djúpalónssandur " |

A request from Annie, my photographic elph, for an abstract Photo of the Month.
Iceland, in winter, can have some wonderful light. It can, and frequently does, also have atrocious weather, with gale force winds skimming snow or rain horizontally above the lava fields. This month's photo was taken on a gloomy December afternoon; not really bad weather, but a gentle rain at a temperature just above freezing under overcast skies. Quite appropriate, actually, for the location, a black volcanic pebble beach on the Snæfellsnes peninsula, but a challenge photographically to capture the mood of black lava agains dark grey cloud. I rather like color!
The only color I could find was in clumps of seaweed washed up on the beach, so I decided to concentrate on those. After sampling several clumps the one I ended up prefering was the least colorful, but I was taken by the bare white stalks contrasting against the blue/black pebbles. After taking several 'straight' shots, I hit on the idea that the spiraling symmetry of the stalks might work well with a zoom blur technique. I set up my tripod with the camera and zoom lens pointed directly downwards and centered on the root of the seaweed. Given the dim light and a polarizing filter to cut the glare off the wet pebbles, an aperture of f 8 gave a shutter speed of several seconds - plenty of time to play with the zoom during the exposure. For the photo above I left the lens at its widest setting for about two thirds of the exposure time, and then zoomed in smoothly, reaching the end of the lens travel just as the shutter closed. Thus, the end result is a sharp image superimposed on a blur of pebbles apparently converging to a vanishing point; imparting a three-dimensional appearance to a flat, two-dimensional subject.
_________________________________________________________
Although I had the beach to myself on a wet December day, during summer many tourists visit to see the famous 'lifting stones', as shown at the right. From Wikipedia;
"Djúpalónssandur was once home to sixty fishing boats and one of the most prolific fishing villages on the Snæfellsnes peninsula but today the bay is uninhabited. Four lifting stones are in Djúpalónssandur, used by fishermen to test their strength. They are Fullsterkur ("full strength") weighing 154 kg, Hálfsterkur ("half strength") at 100 kg, hálfdrættingur ("weakling") at 54 kg and Amlóði ("Useless") 23 kg. They were traditionally used to qualify men for work on fishing boats, with the Hálfdrættingur being the minimum weight a man would have to lift onto a ledge at hip-height to qualify."
Yes, I know; my photo shows five stones, not four. The fifth was probably added by a useless tourist... |
|
#92 - October 2016
"Chinstrap penguins, Weddell seal and icebergs" |

Hydrurga Rocks, Antarctica. December 2015
You have to go down to Antarctica to find chinstrap penguins in the wild; they don't live any further north than that. Chinstraps are entertaining creatures, and I was happy to get this photo that captures them in their environment. Penguins, a Weddell seal and icebergs: what more could you want for an iconic Antarctic photo!
It was the two blue, beached icebergs that first caught my attention, together with the Weddell seal that had conveniently settled for a sleep. Several chinstraps were wandering around from a nearby colony, so I positiond myself to line up the seal between the icebergs and sat down in the snow (waterproof pants are de rigeur in Antarctica!) to see if any might arrange themselves in a pleasing composition. Other than exercising a little patience I can't claim any particular skill for creating the final image.The penguins deserve the credit for arranging themselves in symmetrical pairs, looking toward the lone individual walking between the icebergs. My main contribution was merely to find a viewpoint that gave some clearance to isolate the seal against the snow, while staying low enough to keep a clean background by hiding intruding rocks on the beach below the snow crest. |
#91 - September 2016
"North Atlantic waves: Bøsdalafossur, Faroe Islands" |

Vagar, Faroe Islands: July 24, 2016
The island of Vagar is home to both the sole airport of the Faroe Islands and the Faroe's largest lake - the later confusingly known by several names: Letisvatn, Sørvágsvatn and Vatnið. In addition to its convoluted nomenclature, a unique feature of the lake is that its outflow plunges dramatically over a 150 ft basat cliff directly into the Atlantic Ocean. The falls, Bøsdalafossur, were on my list of 'must photograph' locations, but with bad weather on our arrival and pre-booked itinerary I did not get a chance before the last evening before our flight back to Edinburgh. From the airport hotel it was only a drive of a few km along the road running half way alongside the lake to the start of a muddy 45 minute walk along the shoreline to the falls.
Arriving at the end of the lake I could see the water flowing gently out over small cascades in a basalt shelf, before disappearing from view as it plunged vertically into the ocean. A problem, however, was that I coud find nowhere to actually get a view of the falls themselves. Despite climbing high up on the cliff edge on either side (and wading thigh deep through the icy water at the end of the lake), the sightline was always blocked by some rock outcrop.
Nevertheless, I was privileged to have this spectacular location all to myself, the evening light was improving, and we were going home the next day. Although frustrated in my original aim to photograph the waterfall, the thing to do was to come up with a Plan B. What else could I find? Landscape photography mostly seems to be like that. In a few instances I have been able to go to a location and successfully execute a 'pre-visualized' plan, but most often, and particularly when visiting somewhere for the first time, its just a matter of of actively looking around for serendipitous inspiration. My first try was to find a viewpoint where I could focus a small subsiduary fall. But that really was a trickle, not a waterfall, and despite my best efforts framing and zooming in it would never make a prominent main subject. On to Plan C; something that should have been more immediately obvious if I had not been so fixated on the waterfall itself. Every few minutes a larger than usual wave would break, with spray rising half way up the dark cliffs. Much more interesting!
I had carried a light pack with minimal gear - tripod, body and a single zom lens - but anticipating that I would want slow shutter speeds to blur the waterfall I did remember to pack a strong ND filter. That worked to give exposeures of a half or one second that, from viewing on the camera screen, looked to give a nice result on the waves breaking against the cliff. You never know quite how a wave is going to break, so I took many shots, timing the shutter release in advance of when I anticipated the spray would reach its peak, or at other times to catch the rivulets of water streaming down the cliff face following a wave. The photo here is a blend of two such shots. So, a 'made' image: not simply a snapshot of what I saw, but a fusion over two different timescales, blurring the water motion during each exposure and then superimposing a wave with its aftermath. |
#90 - August 2016
"Faroese girl among newly sheared sheepskins" |

Stremoy, Faroe Islands: July 23, 2016
Ull er Føroya gull - Wool is the gold of the Faroe Islands
"Before fishing became the main industry of the Faroes at the beginning of the twentieth century, sheep farming, and trade in home-knitted goods were the main sources of income for most families. The Faroese sheep has been selectively bred over the centuries as much for the quality of its wool as for its meat. It is a particularly hardy animal, able to survive on the bare slopes of the islands all year round. Its wool, when spun, is exceptionally warm and water-resistant - necessary qualities for a climate where it rains on the majority of days in the year. One notable feature of the Faroese sheep is the variety of natural colours that can be spun from the fleeces. Although the majority of the sheep are white or cream, there are also sheep with black, brown and grey wool, as well as two-coloured sheep: white and black, and white and brown.
Even today there are no large sheep farms on the Faroes. The normal pattern is for families to tend a small flock on the mountain pastures around and above the villages. These sheep farmers - who might also be teachers, doctors or fishermen - join together for the seasonal rituals of caring for new-born lambs in the spring, rounding up the sheep for shearing in early summer, haymaking in late summer, and, in autumn, selecting the best rams for breeding and slaughtering some sheep for the family dinner table.
Most Faroese sheep are still sheared by hand clippers in the traditional way. The fleeces are then sold to the three main yarn manufacturers, who grade them according to colour. The wool is then carded and spun - and dyed for the coloured yarns - to produce yarn ready for knitting ". [The Island Wool Company]
|
Family gatherings to tend their sheep are commemorated in a Faroese stamp, and remain a part of Faroese life to this day. Our visit to the Faroes in July coincided with the time when the sheep were beginning to shed, when the fleece can be easily parted from the body with clippers or merely by sliding a hand between the old and new fleece layers. Driving along the main road crossing Stremoy we passed by a cluster of cars pulled up on the verge by a farmhouse, with many people and even more sheep gathered in a adjacent field. We walked up the farm road to investigate and were greeted by a farmer who, while clipping identifying marks into sheep's ears, gave us an account (in perfect English) of what was going on.
From a photographer's perspective
this was a tough scene. Too chaotic, too much happening at once, and highly dynamic as the sheep objected strenuously to their manhandling. Sam Abel can famously create complex, discretely layered images of such subjects, but my attempts to synthesize the numerous elements failed. What did work, however, was a shot zooming in on just one element. Several shearing stations were set up with wooden frames to hold the sheep's head, but all the sheepskins were thrown onto one growing pile. A young Faroese girl was playing amongst this, and I was happy to capture her expression entagled in the mass of wool.
|
|
#89 - July 2016
"Flight path of blue-eyed shags" |
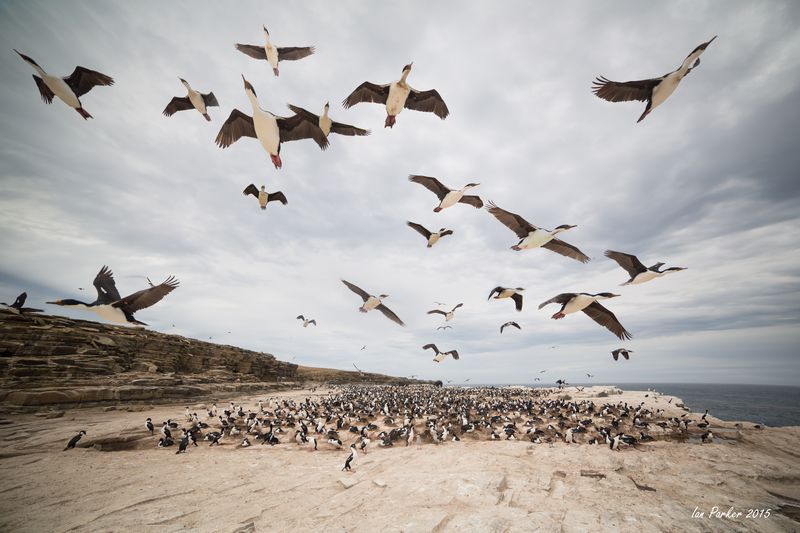
The Falklands, November 2015; Sea Lion Island.
We never did see a sea lion during our days on this island, although an elephant seal came up the path to the door of the lodge. But, Sea Lion island is a great place for gentoos, rockhoppers and blue-eyed shags, as well as numerous song birds. Although the lodge is surrounded by colonies of gentoo penguins, the big rockhopper and shag colonies lie a few miles away ; not too far to walk, but we had the luxury of a land rover to drive us there. The trail - there are no roads on the island, just muddy tracks across the peat bogs - ends at the top of sheer cliffs, marked by a memorial to the HMS Sheffield, sunk offshore during the Falklands war. A granite amphitheater is home to the rockhopper penguins, which were dutifully hopping up and down among the boulders and small cliff face. Above them, nesting shags (imperial comorants) were outlined against the sky, squabbling with one another and with birds flying in carrying new nesting materials. All great fun to watch and photograph, and we spent several hours there.
Our leader, Hugh, had gone off to reconnoiter nearby areas, and returned to report a dense colony of shags on an open rock shelf a short distance along the top of cliffs. I was happy to have a change of scenery, and followed Hugh back, edging around the colony until we were on the upwind side. Shags were taking off into a strong wind that was blowing straight down along the line of the rock shelf. Fromm where I stood, they passed close overhead as they gained height. At any given instant there might be only two or three birds in the air, but the feeling was of a continuous stream; of being enveloped in a canopy of birds. To capture this impression in a photograph I set up my camera on a tripod, and fitted a super-wide 14mm lens for a field of view vide enough to encompass birds that passed almost directly above. With a cable release I then triggered the shutter, estimating by eye - rather than looking through the viewfinder - the instant when birds would be well placed. In total I took more than 50 shots, aiming to get a good mix with with birds distributed throughout the frame, and taking lots of extras assuming a high failure rate with birds clipped or outside the edges.
To composit the final photo I took a single image of the colony and blended it with about a dozen separate shots of the flying shags, using the 'darken' overlay mode in Photoshop and masking out all but the immediate area of sky around those birds I chose to include. With so many shots I could be quite selective, trying to achive a pleasing balance with the flight path of the birds appearing to originate from a single 'radiant' within the colony; rather like a meteor shower. |
#88 - June 2016
"Mono Lake color palette" |

Looking back through previous posts, I find this is the sixth time that I have featured the tufa formations at Mono Lake as Photo-of-the-Month. Given that other photos encompass all seven continents from the Arctic to Antarctic circle, that must be a complement to this tny piece of California no more than a few hundred yards across. Indeed, Mono Lake is one of my favorite locations on earth to photograph - with the bonus that it is within a weekend driving distance from my home. The tufa and ancient saline lake are the foundation for creating striking images, but importantly the conditions are always different on each repeated visit. Situated in a high (6000 ft elevation) bowl beneath the Sierra Nevada mountains Mono Lake gets plenty of weather, and on several ocasions I have arrived during an afternoon thunderstorm that providentially cleared just in time for sunset. Moreover, the lake level is in continual flux, as determined by a balance between evaporation (there is no outflow), runoff from Sierra snowmelt, and the extent to which that inflow is diverted by the LA Department of Water and Power. The latter agency is legally required to adjust diversions to target an ecologically sound level some 14 ft above the present height. For a few years after the legal settlement that codified this decision the lake level rose by 10 ft, but more recently the prolonged drought in California has renderd this for nought. At the time of my visit, the lake was down to its lowest level in 20 years. That is not good for the vast numbers of birds nesting on islands that would become vulnerable to predators crossing a land bridge exposed by only a slight further drop in water level. It does, however, mean that the shoreline is continually changing; lagoons appear and disappear, grasses grow where previously there was shallow water or mud, tufa islands become connected to the land along sandy isthsmus. Most attractively, the low level has exposed an area of flat rocks at the tip of the South Tufa area, lapped by shallow translucent water that takes on yellow-turquoise tints. On a previous visit under grey, overcast skies I had been intrigued by photographing these colors as a pastel contrast to a monochrome background. Most recently I was lucky to have the chance to expand this color palette under dramatic sunset clouds.
This month's photo was taken using a 17 mm tilt-shift lens, utilizing a small tilt setting to increase depth of field, but primarily using shift to gain a wider field of view. Also, by combining two vertically shifted shots with the camera in landscape orientation I could obtain a final image in a square format, which makes a nice change from the exaggerated 3:2 aspect ratio of the standard 35 mm frame. Shifted images are usually made with a tripod-mounted camera, combining two shots taken in quick succession to, yield a result essentially the same as would be achieved by a single exposure if the camera sensor were larger. In light of the recent kerfuffle concerning Steve McCurry's 'Photoshopping' of some of his images I should explain that the two shots that were combined to create this image were taken at slightly different times and positions. The lower half is one of a shifted pair of shots I took after collapsing the tripod legs to get a low-down viewpoint emphasizing the foreground rocks and the translucent turquoise glow of the saline water. However, at that time the sunset light had not fully developed, and the matching upper image of the pair had only a nondescript sky. I ought to have left the camera set up where it was and waited for the light to change, but not knowing how the sunset might develop I repositioned the tripod a few feet to focus on reflections from the clouds. Within a few minutes the sky illuminated with nice color and beams from the setting sun as it descended through a clearing above the mountains. The shifted pair of shots I took at that time included a more dramatic sillhouette of the tufa spires against the clouds, but taken from a higher vantage point the lower shot did not capture the color of the water as effectively. In processing my images from that evening I first combined each pair of shifted captures as they were taken, but neither result was entirely satisfactory. An obvious solution was to mix and match, merging the better top-shifted frame for the sky with the bottom-shifted frame for the water and rocks. The image above is thus not a strict representaion of the scene at an instant of time, and would not meet the strict criteria of photojournalism or even entry for many photo contests, but I think it does succeed in conveying the otherworldy aspect and strange color palette of this unique place. |
#87 - May 2016
Getting creative with penguins - Part #3,
"King penguins at the Neck of Saunders Island" |
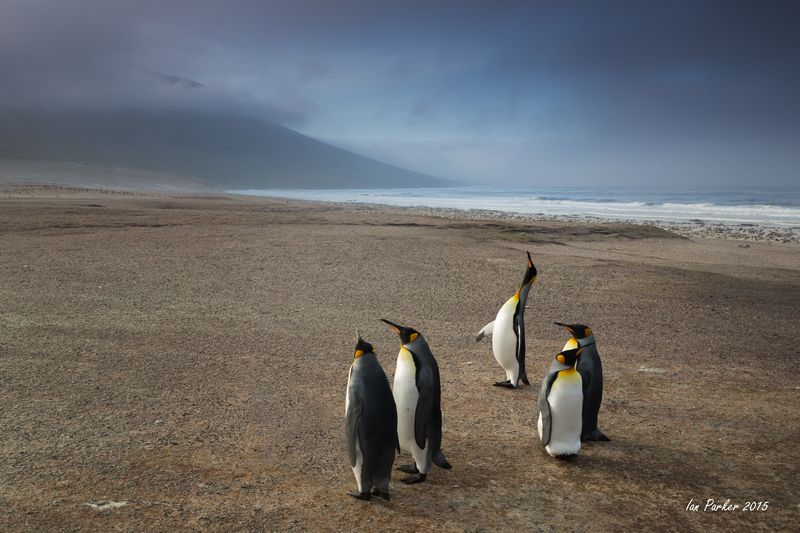
Back to penguins this month.
The photograph was taken at the 'Neck' of Saunders Island, a thin strip of sand connecting an outlying hill to the main island. This location is among the best wildlife sites in the Falkland Islands, hosting vast colonies of black-browed albatross and rockhopper penguins on the cliffs of the main island, together with a smaller colony of king penguins on the Neck itself. Our little group aboard the Hans Hansson had spent a very long, utterly wonderful day on the island and I was walking back to the beach for a Zodiac ride back to the boat, when I came across this little group of kings. They were quite isolated on a barren stretch of sand, and I was struck by the contrast with the densely teeming birds in the large colonies. Moreover, a typical Falklands mist had started to descend, patchily hiding the hillside and darkening the sky. Altogether there was a strangely moody, almost eerie feel to the scene - at least, that is what I felt, the penguins probably took no notice.
A recurring theme among photographers is that a photograph should convey the emotion of the person pressing the shutter button, beyond merely capturing the literal scene before the lens. That is usually difficult. A two dimensional, visual representation of an instant of time cannot directly convey aspects of the immediate environment such as sounds, smell, and temperature; yet alone the previous history of the photographer that has led him to this spot. In this case, though, it was strictly the visual aspects that dominated, and a simple 'snapshot' was sufficient to capture the mood. The little group of penguins were just hanging out on their way back to their colony from the ocean, and I had plenty of time to frame various compositions. Obligingly, one penguin threw back his head to call, and that provided the something extra to make this shot the winner. My only 'trickery' in capturing the photo was to use a graduated ND filter to darken the sky and enhance the moody atmosphere; and a little Photoshop tidying up to remove distracting debris on the beach.
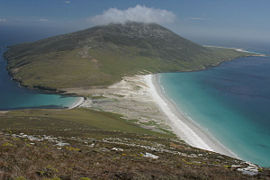 The Neck of Saunders Island
 |
|
|
|
#86 - April 2016
"Monarch Blurs" |

Enough of penguins - for this month at least...
Instead, I feature a much smaller subject - a few individuals among the thousands of monarch butterflies that gather to overwinter in the Pismo Beach Butterfly Grove. This was my first visit, and we arrived early on a January morning. My initial impression was that I was not impressed, and that the butterflies were going to be hard to photograph. Monarchs can't fly unless the air is warmer than about 55 F, so on this cool morning they were all clustered high in the trees, looking almost indistinguishable from dead leaves. Even though a 400 mm lens on my 7DII gave enough reach to resolve the fine wing patterns on individual butterflies, I could only frame large clumps of monarchs and it was hard to find compositions where they stood out from the random tangle of leaves and branches, interleaved with distracting highlights from the sky.
As the day warmed up, however, increasing numbers of butterflies took to the air, and some began to alight on a low tree close to the fence that keeps visitors well away from the butterflies. With the 400 mm lens I could now fill a good part of the frame with an individua lmonarch. Better yet, one of the branches was catching a shaft of sunlight, so butterflies on it were brightly highlighted against a deep shadowed background. I initially concentrated on static butterflies that had already landed, but then realized that those in flight might provide a better subject. Experimenting with different shutter speeds I used the lcd screen on the camera to see what would most pleasingly blur their motion. The optimal exposure looked to be 1/30s at f8: that nicely blurred the wing beat while mostly freezing the forward motion, so while the monarchs were rendered in an abstract fashion they remained sharp enough to be recognizable. I was particularly taken by the way the white dotted patterns on the wing margins often traced out beautiful swirls. Thus, capturing butterfly blurs is rather analogous to photographing waterfalls - a matter of taste as to what shutter speed results in the aestheticallymost attractive blur..
Watching butterflies approaching and leaving this one branch kept me happily engaged for an hour or more, and I got too engrossed to walk over to listen to the docent talk about the peculiar life cycle and migration of the monarchs. Altogether I accumulated more than 200 shots; a good archive from which to later make selections. For a final image I wanted to include several butterflies to convey the variety of patterns formed by their wing motions . No single shots captured more than two butterflies, so I composed the montage above by combining four individual frames with the monarchs disposed in a seemingly random, but hopefully pleasing pattern. The process was facilitated because the backgrounds were so dark I could turn them to complete black without losing any detail in the butterflies, allowing me to position them with complete freedom.
|
#85 - March 2016
Getting creative with penguins - Part #2,
"Magellanic Penguin in a Sandstorm"
|
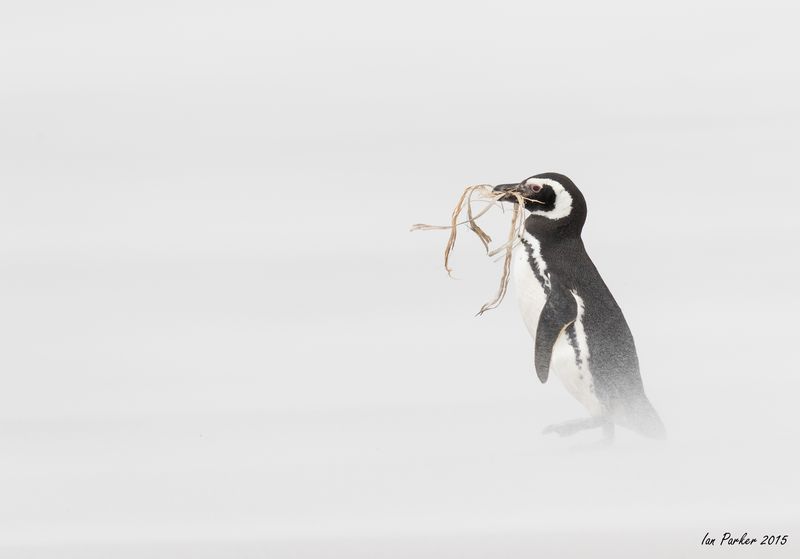
Continuing the penguin theme for this month: and addressing the issue of subject isolation.
For much of my time photographing penguins on our Southern Oceans voyages I was aiming to capture images that placed them in the context of their natural environment. For that reason, I was usually wandering around with a 24-105 mm zoom lens on a single camera, whereas my companions were armed with long telephotos. But I also wanted to get some shots that abstracted the penguins from their background; isolating them to capture the essence of 'penguiness'.
Almost every sort of photograph must deal with subject isolation - 'cutting the cluter'. The main subject should be immediately obvious, and should be clearly delineated from the background. Of course, the background often complements and provides context for the subject, but nevertheless the viewer's eye should go first to the main subject before exploring elsewhere. In wildlife photography a common ploy is to use a long, wide-aperture telephoto lens so that only the animal or bird that forms the subject is in sharp focus, and any background or foreground distractions become pleasingly, and non-distractingly blurred. That technique works well, but can become rather cliched and, nevertheless, careful attention is needed to find neutral backgrounds.
Here, I wanted to get rid of the background entirely, leaving only the penguin. Photographing against a background of clean, featureless snow would be one option, but that can create an artificial 'cardboard-cutout' effect. For this month's photo a fortuitous combination of location and abysmal weather provided an alternative approach. Our small group of photographers spent the last day of our week on the Falkland Islands visiting Volunteer Point, home to a small colony of king penguins approached by a rough drive of several miles through peat bogs on the East Island. Gettting out of the Land Rovers we found a freezing, gale-force wind blowing, and I soon became disheartended trying to get good shots of the kings in a rather muddy colony while struggling to hold my camera still against the wind and bouts of shivering. Going for a walk seemed like a good idea, both to get warm and to scout out other possibilities. I headed down to the nearby beach and there discovered that the wind was blowing a thick carpet of sand to a height of several inches, through which a few penguins (kings and magellanics) were nonchalantly marching to and from the ocean. The blowing sand obscured all background details, giving the effect I was looking for, but to maximize this and get a 'penguins-eye' perspective I had to lie down flat, with my camera raised just to the level of the top of the airborne sand. That position was tenable only looking downwind, so I chose a spot and waited for suitable penguins to walk by. My favorite was the little magellanic penguin featured above, bravely carrying back nesting material for his mate.
This photo reinforces the axiom that good shots frequently involve some discomfort and suffering, even though that might not be apparent in the final result. Half an hour lying on a damp beack in a sandstorm was kind to neither camera nor corneas; the zoom ring on my brand new 100-400 lens and my eyes were both gritty for days afterwards, and I took a long to time to warm up and stop shivering. In retrospect it was a good thing I did not know at the time that the small refuge hut at Volunteer Point was equipped with a propane heater, or I may have never ventured down the beach. |
#84 - February 2016
Getting creative with penguins - Part #1, "Penguin Sunstars"
|
Everybody loves penguins! The different species (seventeen in total; among which I have been fortunate to see nine) all have their very different and adorable quirks and behaviors. Apart from the obvious issue of travelling to where they live, penguins are very easy subjects to photograph. A Google search for 'penguin photographs' pulls up nearly one million hits. There are a lot of penguin photos out there! On our recent voyages to penguin lands in the Southern Ocean one of my aims was to portray these strange birds in a different way; not simply to replicate numerous existing photos but to capture the essence of penguins and place them within their environment.
But how to achieve this? I had little in the way of preconceived ideas beyond trying motion blur effects (to be the subject of a future Photo-of-the-Month). Instead, ideas came as fortuitous opportunities presented themselves; as in the two photos featured this month. After several days of wild weather on South Georgia, we found the conditions during our landing at Gold Harbour living up to its name. We shared the beach with an enormous colony of king penguins and spent a full day photographing them. Kings are my favorite species because of the beautiful yellow-shading-to-orange coloration around the head and neck of adults, and their inquisitive nature. Stay quietly on a beach on South Georgia and they will come up to you and gently peck on tripod legs and overtrousers.
Toward evening the sun began to cast a beautiful diffuse golden glow. Sitting amongst a small huddle of kings peacefully grooming themselves, a thought came that I might be able to sillhouette them against the sun. Indeed by lying flat and placing my camera on the ground I could get the necessary angle of view without being so close that I disturbed the birds. Time was short as the sun would soon set behind the mountains and clouds intermittently blocked the sun, so I rapidly took numerous shots, bracketing exposures and trying various angles with the sun either completely occluded behind penguins or just peeking to the side to create sunstars. Most shots were failures, as I expected, but a few worked both from the point of view of composition and technically (horizon level, sharp, not over or underexposed). After selecting the best, the remaining problem was to deal with the enorrmous dynamic range in the RAW files. Before processing the penguins appeared as mere sillhouettes against a bright and washed out sky. To create the final images and bring up the shadow details I needed every trick in the Photoshop book, primarily using layer masks to apply drastic curves adjustments., |
#83 - January 2016
"The Petrel - Grytviken"
|

Anne and I recently returned from a small boat voyage to the sub-antarctic island of South Georgia aboard the MV Hans Hansson. South Georgia is accessible only by sea - there is no airport or even airstrip on the island and no accommodations or inhabitants beyond a small research station and a seasonal museum. Our tour operator, Cheesemans Ecology Safaris, had originally proposed that we would be able to camp overnight, but in the end the requisite permit was not forthcoming owing to lack of sufficient scientific justification. I was disappointed to lose this opportunity to do long-exposure night photography on the island, as this is impossible from a boat: even in calm water the boat is constantly swinging at anchor. But there was one chance: the Hans Hansson is small enough to moor at the dock at the old whaling station at Grytviken whereas larger ships must anchor offshore, and we would spend one night with the possibility to go onshore.
I already had a subject in mind, inspired by a beautiful night time photo of the Petrel, a wrecked whaling ship close to our mooring, which has also featured on a British postage stamp. (See photos below). "The Petrel is the best-preserved whale-catcher at South Georgia. She was built in 1929 at Nylands Verksted in Oslo. She is 244.8 gross tons and 31.1 m (115 feet) long. Petrel was withdrawn from the whaling fleet at Grytviken in 1956 and converted to a sealing vessel the following year. This involved removing her whale-winch and replacing it with an ordinary cargo winch, creating a large cargo hatch (for loading the seal blubber), removing the gun platform and the cat-walk that connected it with the bridge on the starboard side. Petrel was one of the first catchers to be equipped with a cat-walk, which was introduced in 1926. The line-blocks were removed from the mast and a derrick installed. She was capable of 11 knots from her 810 indicated horse-power triple-expansion engine. Her funnel has been re-painted in the Salvesen (Leith Harbour) colours, but when she was operated by Grytviken she had blue and white bands on her funnel." [South Georgia Whaling Museum]. The Petrel was restored and the whale gun replaced by the British garrison stationed in South Georgia after the Falklands war. A 1991 photo (below) shows her afloat with spick paintwork, but she is now grounded and undergoing rapid, if picturesque decay.
I woke to my alarm at about 1:00 am local time (the World's least inhabited time zone!), and quietly went out on deck with tripod, camera, interval timer and 14 mm super-wide lens. An immediate problem was that the gangplank had been removed and the tide had gone out since we boarded in the evening, so that the jetty was now three feet above the boat, leaving a wide gap to black freezing water below. Trying to jump across from the rail did not seem wise, so after passing over the camera gear I stretched across and pulled up on a good finger hold in the planking of the jetty. Although the Petrel was then only a hundrd yards away, getting there continued to be a little hazardous, with snow covering ground strewn with industrial detritus and light only from red and green harbor navigation lights and a small led headlamp.
Any hope of replicating my inspirational shot with Milky Way or startrail photography had seemed unlikely given the typical weather of South Georgia, and indeed a keen wind was sending clouds scudding across the sky with a light snowfall. Moreover, the wind constrained photos to only one direction, as otherwise the lens became covered by blowing snow during minute-long exposures. Fortuitously, however, that direction placed the red navigation light directly behind the Petrel and, though occluded by the ship, its light imparted a red glow to the falling snow. A two minute shutter opening at ISO 1600 gave a good exposure for the sky and diffusely blurred out individual snowflakes. Some light was falling directly on the Petrel from the green navigation light, but this was distant and dim as compared to the red in the sky. I thus supplemented the exposure by light-painting with my headlamp. After a few experiments I decided that the image on the camera screen looked good enough, so I could end this masochistic persuit and snuggle back into my warm bunk to thaw out fingers and toes. |
#82 - December 2015
"A Quiet Dawn at Pine Park"
|
The recently issued third edition of Laurent Matres' book on Photographing the Southwest: UtahPine Valley includes several new locations, including Pine Valley, a rather remote site, deep in the Dixie National Forest near the Utah/Nevada stateline. After the crowds of people at Monument Valley, I was looking for peace and solitude to break my journey back home, and from Laurant's description and photos Pine Park looked as if it should be both secluded and photogenic. The main feature is an area of white, eroded Tuff, a 1000ft layer of consolidatede ash erupted millions of years ago from a nearby caldera. Weathering of this soft rock has produced intriguing formations, reminiscent of a miniature version of Tent Rocks in New Mexico, or Cappadocia in Turkey.
The most scenic area lies in a westward-facing bowl, and I tried to get there before sunset to catch the warm light on the rocks. The roads through the forest are suprisingly good, with the last section being well-graded dirt despite leading nowhere other than a tiny campsite with no facilities beyond a single table and a post proclaiming 'designated campsite'. Nevertheless, I had underestimated the total driving distance, some 70 miles after leaving the interstate at Cedar City , and arrived exactly as the light faded. I did get a single, hasty shot, but not what I had hoped for. Anyhow, it was a nice place to be. I had not seen anyone for the last 15 miles, and the designated campsite was a flat area with soft pine needles on which to spread out my camping mat. I soon had a campfire going, and settled down with the last can of Tecate from the cooler to to eat a 'dogs-eye' pie from the Aussie pie shop in Costa Mesa. With a full tummy I had a comfortable night, waking in advance of the Marimba chimes from my iPod as the first light of dawn started to challenge the still bright moonlight.
Its always easy for me to find good reasons to stay snuggled up in a warm sleeping bag; the dawn sky looked boringly clear, and the sun would be rising behind the tent rocks, so they would not receive direct light for hours. But, having driven all that way I wanted to get a good photo, and past experience had taught me that I am no good at predicting conditions and that it is best to go and see what may transpire. Its a quick half mile drive back up the road from the campsite to the rocks, and the best overlook is from the side of the road itself, so there is no hiking. A good job, as serrated layers of thin cloud that had been almost invisible began to glow with the rising sun just as I arrived. The light show lasted maybe for 10 minutes, and I took many shots as it progressed. My final choice was at a time when the serrated clouds were well illuminated, and clouds directly above where the sun would rise (out of the frame to the right) cast a diffuse backlight over the formations. Because the sky was much brighter than the foreground I thought about using a graduated ND filter to even the exposure, but worried that it would introduce an artificial black band across the higher formations. Instead, I took bracketed exposures so I could achieve a more subtle blend later in Photoshop. A final consideration in processing was how to crop the image, which I had framed quite wide to allow some leeway. Should the sky be given prominence and fill more of the frame, or were the rocks the main point of the image? Giving both equal space and weight would create a conflict, and put the horizon awkwardly in the middle of the frame. My feeling was that the formations were the main point of this photo, and that the sky needed to be cropped, despite loosing some nice red clouds above the striations. |
#81 - November 2015
"Lunar Eclipse over the Mittens"
|
The evening of September 27th marked the last of a tetrad of lunar eclipses. The totality period (around an hour) of this eclipse was unusually long; for viewers in the Western US the eclipse started around the time of moonrise; and, the next lunar eclipse will not be until 2018. So, that gave me plenty of reasons to justify a trip to photograph the eclipse at an interesting location. In thinking about possibilities my criteria were somewhere with a high likelyhood of clear skies, and some spectacular foreground scenery in a view looking almost due East. The Trona Pinnacles came to mind, but the classic view of the Mittens in Monument Valley won out. Even though involving a much longer drive, that iconic view is hard to beat, and gave an excuse to take a few extra days to photograph in Utah.
The Photographers Ephemeris indicated that the moon would rise next to the East Mitten as viewed from the visitor center, and then follow an almost perfect 45 degree diagonal path, with maximum eclipse at an altitude of about 22 degrees, and ending at about 40 degrees. I wanted to frame the scene to encompass both mittens and the entire eclipse sequence, and the angle of view of my 17 mm TS lens on a crop-frame camera looked about ideal for that. To compress the horizontal extent a little, and have the moon rising closer to the mitten I chose to shoot from near the camping area, which also had the advantage of taking me away from all the other photographers clustered by the main parking lot. Then it was just a matter of setting up a tripod (heavily weighted with rocks in a shopping bag to minimize the chance I would dislodge it), focusing the camera to infinity, framing the scene, and settling back in my camp chair to wait for moonrise. In the past I have struggled trying to correctly set external timers, sometimes coming back in the morning to a camera that should have been taking shots at intervals through the night only to find just the single image when I set it going. My new 7DII, however, has a built in timer, easily and clearly set through the menu rather than squinting at the tiny screen on an external device. I decided on an iterval of 12 minutes, to give a good separation between each exposure of the moon as it rose, while capturing several shots during the period of total eclipse. But I could not leave the camera entirely unattended - there is the need to change exposure settings because the brightness of the moon changes enormously (about 2000 times) as it goes from fully illuminated to completely eclipsed. I used the shutter speed/ISO settings suggested by Michael Frye and found them to work well.
Producing a final photograph from an image sequence like this is a matter of blending together the individual images, but that's not an entirely mechanical process. For the base image, I took a shot just before sunset, with the Mittens still illuminated by the sun, and darkened it to look more in keeping with the nightime sequence of the eclipse. The problem, then, was what to do about the sky. If the eclipse had been later at night the sky would have been completely dark, giving a black background on which to place each exposre for the moon using the 'lighten' function in Photoshop. But now the partial phase of the eclipse had already started at moonrise, when the sky was still bright. Making the entire sky dark would look very artificial; but equally it would look strange if the later stages of the eclipse, with the moon high in the sky, were on a bright sky background. My solution was to take two image of the sky - one captured at moonrise, and the other during totality when the stars were brightly visible without being obscured by moonlight - and blend these using a vertical transparency gradient. |
#80 - October 2015
"Mono Lake tufa - the flip side of a sunset"
|

The most obvious attraction of a good sunset is the sky itself. But this is a case where the camera has a very hard time capturing what the eye sees. The range of intensity values between those brigh, red-glowing clouds and shadowed foreground is usually just too great, leaving foreground features as mere sillhouettes. To encompass the full dynamic range of the scene usually needs multiple exposures or use of a a graduated ND filter. Even then, it takes some trickery (and subtlety) to cram this into the much smaller range of any display medium (print or computer screen) without producing a false and obviously manipulated result.
One solution to this dilemma is simply to turn around and face away from the glowing clouds. They will be lit up by the rich, warm color of the setting sun, but unlike the very directional light of the sun itself, the clouds act as a vast diffuser, providing a wonderfully even, soft illumination. This month's photo thus pairs with its immediate predecessor; both images were captured within about 5 minutes of each other, but looking in opposite directions, and with the emphasis now on the ground rather than the sky.
As recounted last month, I was fortunate to be at Mono Lake when a clearing storm created a spectacular sunset. At first I was engrossed in shooting the sky, but then noticed that the tufa formations, which are inherentlya muted grey, were taking on some beautiful color. To get a more interesting composition I headed along the beach toward the eastern end of the South Tufa, where there is a concentrated 'cityscape' of slender vertical towers. Space here is constrained, so to capture a more extensive panorama I took a series of vertical shots that I could later stitch together; remembering to use manual exposure and, without tripod, trying to keep the horizon level and centered for each shot. The light was fading quickly, and I could get only one sequence, taken from a quickly chosen vantage point that gave some elevation looking down onto the formations. In retrospect, I wish I had been able to include some more interesting foreground, or leading line into he picture. Being critical, it is rather horizontally linear. That's where scouting and pre-visualization of a location come into play; to know in advance exactly where you want to be in the event that you are lucky to be there during such evanescent light. Here, I knew the general area where I wanted to be, but had never mapped out very specific viewpoints that would suit different lighting conditions. |
#79 - September 2015
"Sunset after the storm: Mono Lake"
|
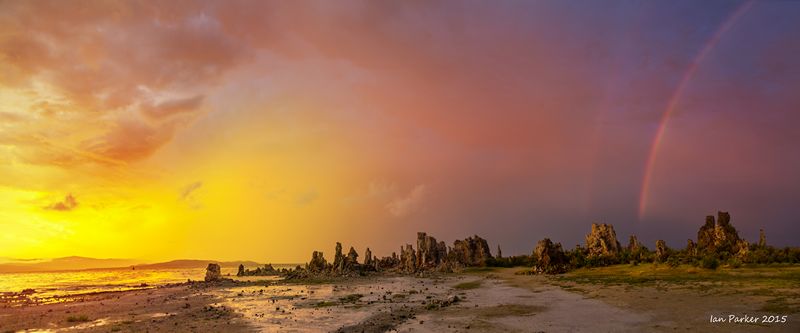
Mono Lake holds great attraction for me, and for numerous other photographers. The tufa towers emerging from the water and shore give a strange and otherworldly presence. As far as I know there is no other place like it in the world. Although there may be otherplaces where freshwater springs bubbling up from the bottom of saline lakes have created similar tufa formations, they would lie underwater and invisible. At Mono Lake the thirsty citizens of Los Angeles have exposed the tufa, diverting the streams that feed the lake over many years so that the water level has dropped precipitously. A legal agreement with the L.A. Department of Water and Power was meant to rectify the situation and restore the lake back to its historic level in 1950, but ongoing drought has now left the lake at not much above its lowest ever height. For the visitor that has exposed more of the formations, but left a wide expanse of muddy foreshore, seething with dense clouds of alkali flies.
On a sunny day, Mono Lake is a hard place to make a good photograph. The tufa is a nondescript grey, choppy waves preclude reflections, and the beaches look scruffy with scattered clumps of tufa among the mud. But with some good lighting, the place becomes transformed. That was my motivation to visit a few weeks ago when, after photographing the Badwater Ultramarathon in Death Valley, the weather forecast predicted thunderstorms over the Owens Valley. The morning had started clear, but fluffy white clouds started to develop during the day and by mid afternoon formed towering thunderheads. I went down to the South Tufa area to try out my new lightning trigger, and captured several shots of lightning strikes. I had been carefully noting the intervals between lightning and thunder, and when the lightning seemed to be getting too close I beat a hasty retreat back to my SUV. That was a good decision, both for safety and because the sky blackened and the rain became torrential. Soon after the thunderstorm died out, but the rain continued, with little visibility through the murk. All the other vehicles left the parking lot, but I stayed, re-reading the 'Worst Journey in the World' on my Kindle, and trying to convince myself that there was a faint brightning in the sky to the West and that maybe, just maybe, there was a possibility of a sunset if the sun could break through a gap between the clouds and the mountains...
In addition to technical skills and artistic sensibilities, patience is an important attribute for a landscape photographer. Spectacular light is fleeting and comes rarely - you need to wait and be ready for it. There have been times in the past when a pervading grey gloom has convinced me that there was no hope, only to to experience a beautiful sunset after hiking back to my car. This time I was going to stick it out. And, as a practical matter, it made no difference whether I stayed at the South Tufa, ready to run down the boardwalk at the first hint of light. If I had a reservation in a motel in Lee Vining the temptation of lobster taquitos at the Whoa Nellie Delli and a comfortable bed might have lured me away. But I was car camping, with a good dinner and a can of beer in the cooler, and my fluffy goose-down sleeping bag laid out in the back. Hotels, beds, restaurants and suchlike are best shunned by the dedicated photographer. Galen Rowell got the best photograph of his life when he left his companions to their dinner and set off running across the Tibetan plateau chasing a rainbow; and I was surprised when my companions on an Antarctic photo cruise stayed at their dinner tables while a luminescent blue iceberg floated past the windows.
The 'Worst Journey' is an engrossing read, so I was happily entertained while the rain continued to rattle the roof. Occasional glances through the rain-smeared windscreen showed only marginal improvement in the weather, and I had little inclination to get out for a better look having neglected to pack any raingear despite the forecast - an oversight conditioned perhaps by the almost total lack of rain in California for the last several years. But then, just as I got to the part where the Terra Nova was close to floundering in a great storm in the Southern ocean, the sky over the Sierras really did look to be brighter, and a faint glimmer of yellow appeared over the lake. I had put my camera ready in a small pack and, checking that it had a fresh battery and card with lots of space, grabbed this along with my tripod and headed out quickly down the trail, with some rain still falling.
By the time I got to the beach the light was becoming spectacular, with a diffuse, luminous yellow glow from a cloudbank over the lake, and clouds to the West starting to take on a red tinge. At that point I was faced with a decision of whether to take time to set up the tripod and aim for a few carefully composed shots, or to go handheld, cover more ground and have more spontaneous possibilities, but at the cost of noisier, less sharp images as the light faded. My watch showed that it was already only a few minutes before sunset so the light was going to be very transitory. Without much conscious thought I opted for the latter option, dropped the tripod and set off running for the closest tufa formations. I had brought only a single lens - a 24 to 105 zoom - and even at the wide setting it could not fully encompass the span of the sky, so I concentrated on taking a series of shots to later stitch into panoramas. Handheld, that needed some discipline to keep the horizon centered and level; a job complicated by the need to keep wiping raindrops from the lens. The yellow glow was my main subject, but just when I thought the light could not possibly get better a rainbow appeared!
In retrospect, I rate this as the second best sunset I have been privileged to experience (and photograph). The best was an amazing evening at the Salar de Uyuni in Bolivia (subject of last month's photo), that combined wonderfully sculpted clouds with colors transitioning across the red end of the spectrum, all reflected by the flooded lakebed. At Mono Lake the water was too choppy for reflections, but in compensation I had never before seen such a luminescent yellow glow, yet alone with a rainbow accompaniment. It was an intense, almost spiritual feeling to be there, particularly because I was entirely alone at this popular tourist site. My only regret is that I was so occupied with technicalities such as checking histograms and choosing ISO settings in the fading light that I had little time to simply become immersed in the experience. I wish I had more memories of that evening stored in synapses rather than pixels!. |
#78 - August 2015
"Lithium Dreamscape : Salar de Uyuni"
|

My selection of a photo this month was prompted by a recent article in the New York Times Sunday magazine by Jaime Lowe, entitled "I don't believe in God, but I believe in lithium", that details her 20-year struggle with bipolar disorder. She was treated - successfully - with lithium, a mood stabilizer that helps stop and prevent mood cycles and is usually the first medication tried with bipolar patients. However, as is the case for many (most!) other drugs used to treat phschological and neurological problems, little is understood of how lithium actually works in the brain. One hypothesis is that it acts to inhibit the recycling of inositol trisphosphate (IP3), an intracellular 'messenger' molecule that regulates many functions in neurons and other cells. My lab studies the actions and functions of IP3, and we recently published a paper describing that lithium can protect cells from damage caused by the amyloid proteins found in the brains of Alzheimer's patients.
Well, that's all very interesting, but this is my photography website, not my lab website. What has it got to do with the photo?
The link comes from an account later in Jaime's article describing her visit to the Salar de Uyuni; a vast salt flat in the Bolivian Altiplano which is the world's largest reserve of lithium. Her article is illustrated with several photos of the Salar but, despite the regard in which Mike Johnson (The Online Photographer) hold the NY Times as the "World's Best Photography Magazine", I thought the accompanying images were rather mundane. That gave me an excuse to go back into my archives to look through photos I had taken of the Salar during a visit in spring of 2011. Among these, I thought the one feature here best captured Jaime's description of the Salar as "a perfect backdrop for a grandiose delusion".
About the photograph itself, it is largely a consequence of being at an exeptional location under exceptional circumstances, including spectacular sunset clouds and flooding of the salt flat to create a giant mirror of the sky. Often it takes a lot of work to extract a good image from a scene; to picture something which is not immediately obvious to the eye. In this instance, though, I can claim little credit as photographer. It was just a matter of pointing the camera in an interesting direction, getting the horizon level, and adjusting the exposure with a slow shutter speed to smooth small ripples on the water. |
#77 - July 2015
"King Penguin Colony; St. Andrews Bay, South Georgia Island"
|

June 30th marked our 30th wedding anniversary, and for this month's photo I thought I would choose one that holds special memories for Anne and me. Our travels around the world have taken us to many beautiful places, but remote islands rank among the best; Easter Island, Iceland, Falkland Islands, South Georgia and (if Kiwis will forgive the description as 'remote') New Zealand. After several visits, Iceland has come to feel familiar, and visits seem almost like returning home. South Georgia, on the other hand is certainly nothing like home. It is cold, windy, rugged and utterly inhospitable; but the stark scenery and, above all, the myriad hundreds of thousands of penguins make the island one of the most spectacular places on the planet - Art Wolfe's "favorite place on earth".
I took this Month's photo during our best day on the island, following an early morning landing at St. Andrews Bay. We embarked in Zodiacs soon after dawn, anticipating a full day with the penguins, and provisioned with bio-secure cheese sandwiches tucked in our pockets. The landing site was near cliffs at the far southern end of the sweeping 2 mile-long bay. From there I set off along the beach toward the largest King penguin colony, keeping a careful lookout for agressive fur seals hiding behind grass tussocks. Saint Andrew's Bay is one of those places that is so overwhelming that I tend to freeze, trying to decide which of the many possibilities to photograph: wide angle to capture the enormity of the penguin colony beneath the mountains; telephoto shots to isolate individual behaviors; or just sit down on the beach and let the penguins come to me (they are very curious about tripods). In terms of composition, trying to capture penguin colonies present a similar problem to photographing in forests - there is just too much random detail and stuff going on, making it tough to get a simplified, coherent picture. However, the topography of St. Andrews bay presents at least one natural solution. Two glacier-fed rivers join a short way above the surf line, forming a 'V' of land on which the penguins conveniently array themselves. The converging waters provide a geometric structure, framing the countless numbers of penguins receding into the distance. Getting the shot did involve wading out into the freezing and swift waters of the confluence - but that's what Arctic Muck Boots are for!
Anne and I visited South Georgia in November, 2013 on an 'Ultimate Antarctica" tour run by Jo van Os. We had planned it as a one-off , 'trip-of-a-lifetime" voyage. But, the lure of South Georgia was too strong, and we will be returning again during the entire month of November on a small-boat expedition orgainzed by Cheeseman's Ecology Safaris. |
#76 - June 2015
"Ancient bristlecone pine in snow"
|

There are many reasons for a photographer to return to favorite locations multiple times. On any given visit I find I can get locked into a particular 'vision' of what I am looking for, fixate on using a particular lens, and generally just fail to register most of the myriad possibilities . A return trip, after the preconceptions have faded often leads to new insights. And, the light and weather conditions are never quite the same. David Muench's quote that 'bad weather leads to good photographs' must be one of the truest axioms in landscape photography. But, living in Southern California, bad weather is rather rare!
In one sense, that certainly applies to one of the most evocative locations in California, the ancient bristlecone pine forest high in the White Mountains. I have visited many times, usually in summer and under startlingly clear, deep blue skies. Of course, the White Mountains do experience atrocious bad weather during winter, but then the high elevations are snow-bound, and the formidable gates controlling access by both paved and dirt roads are locked shut. Hiking in would be a possibility, but very committing, requiring a multi-day backpack carrying serious winter camping gear in addition to camera gear over many miles and with an elevation gain of over 7000 ft. The recent forecast of a rare May storm gave the prospect of an easier option. Following an exceptionally dry winter with minimal snowpack the roads to the bristlecone pine forest had opened very early in the year, and it seemed that a brief storm might deposit enough snow to be photographically interesting, without blocking access. That indeed proved to be the case. I was able to drive most of the way along the unpaved road following the crest of the mountains, encountering only mud and a few patches of shallow snow. Finally, a mile of so before where the road contours the mountainside at an elevation of about 11,000ft toward Patriarch Grove the snow grew deep, and a couple of red traffic cones suggested that would be a good place to park. From there I hiked in, grateful that I had thought to bring my down jacket, but regretting having no better footwear than running shoes.
Patriarch Grove is always a peaceful, serene place; but even more so this day. I much prefer it over the more popular Schulman grove, both because of the scarcity of people, and because the trees at this higher elevation are themselves more scarce and widely spread out. For most of my time I was alone, and the onset of a gentle, but dense snowfall reduced visibility so that I was isolated in a white landscape punctuated only by the ancient trees. Photography was thus not a matter of landscapes, but instead the soft, diffused light and veiling snowfall enhanced the subtle colors of the weatherd wood and facilitated intimate portraits of individual trees without distracting background clutter.
In summer, I find the dead, weathered snags of the bristlecones make the best subjects, contrasting the bare ochre trunks and limbs against the deep blue sky. In snowfall, however, that did not work so well. Against a white background the bare trees appeared as dark sillhouettes, and my subsequent attempts to bring up the shadows in post-processing gave an artificial look. Instead, I had better success by selecting the still-living trees (only a few thousand years old!) and finding viewpoints where bark-free ancient wood was exposed before live branches bearing pine needles. That gave a nice 'self-framing' effect, with the colorful wood accentuated against a dark background, rather than the uniform white of the sky. The snow and cloud-filled sky further helped isolate a single subject, allowing an intimate portrait of individual trees, with background clutter minimized by the veiling, mist-like effect of the gently falling snow while retaining enough detail to still provide a sense of place. Because of its symmetry and twisted branches reminiscent of uplifted, clasped arms, the tree shown above is my favorite among others I shot that afternoon.
|
#75 - May 2015
"Novice Monk at Bagaya Monastery"
|

Both the taking and the selection of this month's photo were influenced by two different equipment failures; but with a serendipitous outcome...
For a recent trip to Burma, I took a 24-105 f4 zoom as my main and 'walk-around' lens. After the first week it suffered irreperable damage - not from any fault of the lens, but owing to human (my!) error, about which I won't elaborate further. That left me with only a 50 mm f1.4 lens as a backup to fill the gap between my 14 mm superwide and 100-400 telephoto. Of necessity, the 50 mm thus became my main lens for the remainder of the trip. This was a lens I had purchased many years ago but had never used much, mostly out of laziness because a zoom makes it that much easier to frame a composition. But a fast prime certainly has advantages, and was well suited to our 'Faces of Burma' photo safari which concentrated on portraiture.
Young novice monks were a popular subject to capture in their native environment of ancient, elaborately carved monasteries. The interiors of the monasteries provided light which, although wonderfully diffused, was often very dim; emphasizing the advantage of a fast prime lens. Moreover, the very shallow depth of field afforded by the wide aperture enabled enhanced separation between the main subject and background. Both these factors are illustrated in this photo. In framing the shot I placed the monk's body before the inky black interior to maximize contrast, and focus attention on his face. The light was in deep shade and even at f1.4 needed an exposure of 1/60s, so I would have been struggling to get a sharp shot with my zoom. And, this aperture just nicely gave a slight blur to the teak carvings, retaining enough detail to complement, but not compete with the monk for the viewer's attention.
The original shot, taken on a Canon 5DIII, was, of course, in color; and I had first posted it on my website as a color image (here). When trying to make a print of this I encountered asecond equipment failure - my printer (an Epson R3880) started dribbling black ink. Curiously, this problem ocurred only with the photo-black ink for printing on glossy paper, not with the black ink for printing on matte paper. (Especially curious because both inks share the smae nozzles and feed tubes - the printer just switches between ink tanks depending on the type of paper selected. If anyone knows a cure, please contact me.) As an immediate fix I switched to printing on matte paper. That results in a more muted palette, and it then struck me that color really did not add anything to the photo, and if fact that the ochre-red of the robe was a distraction. Thus prompted, I did a b/w conversion, adjusting the sliders to darken the reds. The final result, after a little judicious cropping, I much prefer in black and white: and it makes a great matte print! |
#74 - April 2015
"Cottonwood tree in a sandstone pothole"
|
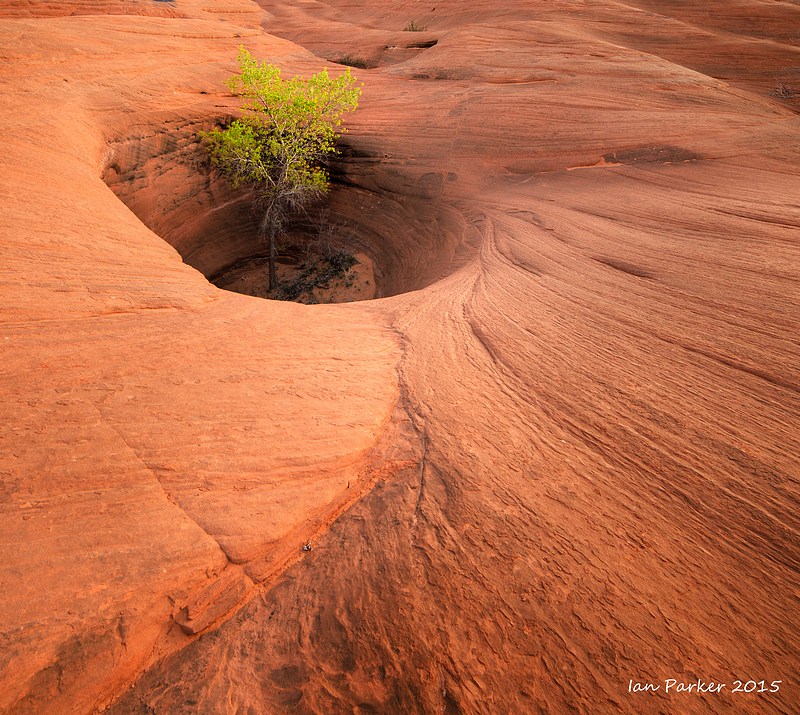 C |
|
A 'tree in a pothole' sounds a rather mundane title; but the tree here is a most evocative subject. I have been looking for such a tree for several years, having seen Guy Tal's images of trees isolated among a sandstone wilderness. Hovever, Guy does not reveal locations; my own random wanderings were unfruitful; and an exploration last year following up an internet suggestion to look behind Tunnel Slot were thwarted by deep water in the slot. I had also heard that the top of Dance Hall rock was a good place to look, but a previous attempt to check that out was also thwarted by water after the dying fringes of a hurricane turned the Hole in the Rock road into slippery goop.
My Utah trip this spring break was enlivened by the delivery, just a few days before I departed, of Laurent Matre's third edition of his guide to Southern Utah. The book describes many new locations not in the earlier editions, and among them was confirmation, and a photo, of a solitary cottonwood tree growing in a deep pothole on top of the sandstone plateau behind Dance Hall Rock. After driving down the now dry, but washboarded road, I reached Dance Hall by mid afternoon, hiked around the side and scrambled up onto the surprisingly vast expanse of undulating slickrock. There are potholes everywhere up there: mostly empty, one occupied by a tangled jungle of several trees, and just one 'perfect' pothole with a single tree.
As with many of the best photographic subjects, this forms a very simple composition - simply a tree, a round pothole and the sweep of the rock around it. However, depending on season, weather and the intent of the photographer it would serve as a visual metaphor for many emotions and human traits: bare branches against a lowering sky as a symbol of isolation and foreboding; or, as I saw it with fresh green leaves, as an icon of tenacity and perseverence under arduous conditions. The photos above illustrate different interpretations, all captured over just a few hours before and after sunset. I am sure I have nowhere near exhausted the possibilities, and hope to return during a summer thunderstorm, at the peak of fall color, and under snow-laden winter skies. |
#73 - March 2015
"Sand-carrying girl: Mandalay"
|

Still in Burma for this month's photo - but, as promised, no more monks. Instead another portrait that I like as a photograph, and which also serves as social commentary.
We spent three nights in the ancient Burmese captial of Mandalay, staying in a very nice, Western style hotel directly across a busy road fronting the Ayarwady (Irrawaddy) River. The road forms an abrupt and striking transition betweenFirst World to Third World. On one side, mud banks are densely settled by a shanty town extending a mile or more along the river (photo #1 below), on the other a newly installed kiosk with ATM gives immediate access to unimaginable wealth for those equipped with a plastic card and a PIN number. (I withdrew $100 in Khat; the majority of Burmese citizens subsist on an annual income of less than $200.) Given the proximity I was able to get down to the river in the early morning to photograph as the river people cooked their breakfast and began their work. Among the many occupations, the sand carriers were particularly striking: women and young girls carrying massive baskets of damp sand balanced on their heads. The sand is quarried from mid-river islands, loaded into rowboats and ferried across to the riverbank (photo #2). There it is transferred to baskets that are transferred from one carrier to another (photo #3) for the steep climb up to waitig carts on the roadway.
I took many shots of the sand carriers. This, I think, worked best. Not from any deliberate forethought in composition, but just a happy coincidence of nice lighting, context among the boats to give a sense of place, and an expression on the girl's face that conveys the effort and tedium of her occupation. |
#72 - February 2015
"Novice monks sweeping the yard: Burma"
|

A companion photo this month to accompany my January photo: more young Burmese monks enjoying themselves.
This was another set-up photo shoot. Daniel recruited a half dozen monks (with their Abbot's permission) to energetically sweep the courtyard of their monastery. The idea was to get them sufficiently engaged that they would lose any stilted, posed expressions, and would kick up a good cloud of dust to enliven our photographs. Indeed, they thought it highly amusing to be performing in front of a group of western photographers and got to sweeping with abandon.
Capturing a good image in this sort of situation is a mix of deliberate preparation, luck, and shooting many frames to select the best one after the fact. In terms of preparation, I had little choice over composition or angle. A group of several photographers needs to stay in a group to avoid having each other in the picture; and some members can certainly elicit vocal grumbles if they do get in the way. I decided my best bet would be to lie down in front of everyone else. That got me out of their shots, and provided a low angle that would accentuate the brooms and give more drama. Also, I anticipated that I would offer an attractive target for the monks to sweep dust and gravel towards; a decision that involved balancing the likelyhood of getting a more dynamic photo against possible injury to camera or self. My other main decision was to select a slow enough shutter speed to blur motion of the brooms, while keeping the monks themselves reasonably sharp. That allowed me to stop the aperture right down to keep a wide depth of field, and I switched to servo focusing to automatically follow the monks as I shot off a burst on motor drive as they advanced toward us with brooms flying.
The photo above is my favorite from the sequence - largely, of course, because of the gleeful expression. And, there is a nice dust cloud, and motion blur in the brooms. A little cropping from the full frame removed distracting limbs and broom handles of other monks around the edges, and I cloned out the edge of a broom that intruded too far on the left.
Next month's photo will be something different. No more monks - for a while at least. |
#71 - January 2015
"Novice monks playing football : Burma"
|

This month's photo was taken in a monastery as Salay, an isolated Burmese village near Bagan. It might seem incongrous that Buddhist monks would play football, but the account below, taken from the website of Dietmar Temps, provides a good explanation.
"Myanmar (Burma) is one of the most devout Buddhist countries in the world. About 89% of the people are Buddhist. People in Myanmar practice the Theravada Buddhism, which is more austere and ascetic, but also harder to practice than the Mahayana Buddhism, the other main branch of the Buddhism. Theravada Buddhism is also followed in Cambodia, Sri Lanka, Laos and Thailand. No one really knows, but experts estimates that in Myanmar live about half a million monks. It's customary for a male in Myanmar to enter a monastery twice in his life. Once as a samanera, a novice monk, between the age of 10 and 20, and again as a hpongyi, a fully ordained monk, sometime at the age of 20. Some might remain a monk for just a few days, while others stay for life. Monks hold the highest status in the society of Myanmar. The overwhelming majority of the monks and novices in Myanmar wear maroon- or ochre-colored robes. Monks receive two meals per day, breakfast and lunch and they are not allowed to eat after 12:00 noon. The novices in Myanmar have quite an easy-going life. They only have to keep 10 precepts, a fully ordained monk has 227 precepts. Young novices are allowed to play football, watch TV, play video games and have fun, which is great to see, because all in all they are just normal kids."
The scene above is indeed kids being kids, despite their monastic robes. The game was not entirely spontaneous, having been arranged by Daniel, our local Burmese guide, who rounded up some novices and produced a football. But the young monks got very much into the spirit of it, and their expressions and committment are entirely genuine. The Burmese people are passionate about football, which was introduced early during the period of British colonial rule by Sir George Scott. They closely follow both domestic and foreign football matches (Manchester United!), and the blackouts typical of the shaky electricity supply have been known to be postponed when a match extends into overtime.
We set up the shot by placing the ball so the novices would run from shade into a shaft of sunlight to provide a good contrast with the background. I wanted to get a low angle, and lay down flat in the dirt. That had secondary advantages that it got me close to the action and out of the way of our group of photographers standing behind, but required faith that I would not be hit by the ball or indeed, kicked by an over-enthusiastic monk. Using a mild telephoto setting I pre-framed my composition estimating where the monks would be when they came out from the shadow, and set my camera to high-speed motor drive and AI servo focus. Then it was just a matter of hitting the shutter button when Daniel gave the command to 'GO', and looking to see later what I had captured. |
#70 - December 2014
"Shwedagon Kaleidoscope"
|
As I write this, there are only 3 days left in December: Rather late for a Photo-of-the-Month. The reason for the delay is not simply procrastination, but rather that Anne and I spent much of the month on an extended photo tour of Burma (Myanmar), organized by Jo vanOs Photo Safaris and excellently led by Don Lyon and local guide Daniel. I am still working through the many thousands of shots I took of this country and its warm, welcoming people, but as an appetizer, here are two photos from the Shwedagon Pagoda, taken during our first day in Burma.
The Pagoda is the largest, most impressive and most sacred Buddhist site in the capital city Yangon. However, during our visit it was not looking at its best, as the main structure was encased in a basket of bamboo scaffolding to enable restoration of the gold leaf surafacing (see small photo below at left). And, space on the surrounding platform is restricted, so even with a super-wide lens it is difficult to encompass the massive main pagoda. Instead, while walking around the platform in the prescribed clockwise direction, I focused my attention and camera on the numerous smaller temples, pagodas stupas and spires. These made attractive subjects in their own right, particularly as twilight drew on and floodlighting began to balance the natural light from the sky.
Looking to capture something more than a straight shot, I found a temple whose roof was supported by pillars surfaced with an elaborate mosaic of mirrored tiles. Given that the pillars were round, and that the tiled mirrors had not been placed with a high degree of optical precision, they presented a kaleidoscopic view reflecting random segments of the surrounding stuctures, spires and people (see small photo below at right). That was neat, but I found I could enhance the effect to create a 'dreamscape' by selecting a wide aperture, focusing on infinity, and placing the camera lens so it was almost touching the mosaic. The lines of mortar between the mirrored tiles then became blured out to the point of invisibility, so that the fragmented images of the gleaming gold structures merged seamlessly.
In my lab we use highly specified mirrors for steering laser beams, that are rated to reflect 99% and to be optically flat within a quarter wavelength of light. The builders of the Pagoda clearly did not feel it necessary to achieve such precision, as the mirrored tiles were quite tarnished and warped. The quality of the reflected kaleidoscopic fragments is thus quite variable, with blurring and fading. But, I think this adds to the overall impression of the images; a verification that they were captured 'in camera' and not created by post-processing trickery in Photoshop.
Small changes in positioning and angle of the camera resulted in enormous differences in the scene as viewed through the finder and on the camera's lcd screen. It was hard to know what would work best, so I took numerous shots. The two above ended up as my favorites, taken under different lighting conditions. The photo on the left was captured during late afternoon, under diffuse sunlight and a blue sky with scattered clouds. The photo on the right was taken later during the blue hour after sunset when the floodlights were turned on and alcoves containing statues of Buddahs were illuminated. By that time I had progressed on my circuit around the Pagoda, and thus had to battle agains the throngs of worshippers and visitors while headed in the wrong, counterclockwise, direction to get back to the mirrored mosaics. |
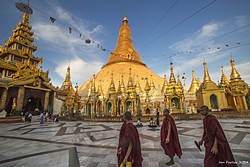
Shwedagon Pagoda overview
|

"Straight' shot of reflections from the mirrored mosaic
|
#69 - November 2014
Backlit casting: Diaz Lake
|

Mono lake is reckoned to be among the oldest lakes in North America. At the other end of Owens Valley is what may be the youngest natural lake: Diaz lake, situated just south of Lone Pine. Diaz lake was formed by the 1872 Lone Pine earthquake on Tuesday, March 26 of that year when 18 mi (29 km) of the Owens Valley dropped approximately 20 feet (6 m) and a new spring opened, causing water to fill the lowland. The lake is clearly visible from highway 395, but until recently I had never paid it much attention, despite driving past literally hundreds of times on my way to the Sierras and Mono Lake.
Indeed, I took my first photographs of the lake only a few weeks ago, when returning in the mid-morning from an overnight trip to photograph the lunar eclipse over the Alabama Hills arches. From the car I could see that the lake surface was absolutely still, perfectly mirroring the backdrop of mountains and ring of cottonwoods around the far shore. That made for an OK photo (left image below), but aside from the nice reflections it lacked impact or any salient feature. The frontal lighting was harsh, and the cottonwoods were still a muted green, needing time to take on fall color. I added the lake to my mental list of locations to return to under better conditions.
An opportunity came sooner than I had expected. Only three weeks later Anne and I returned to make a 4wd drive journey from Big Pine across Steele Pass down to the Warm Springs and out through Saline Valley. That expedition was thwarted when we encountered a severe washout at the base of the pass, and elected to retrace our path and return the way we went in. The result was that we ended up passing Diaz Lake in the late afternoon. The air was again still and the reflections perfect; but now the cottonwoods were golden yellow, spectacularly backlit by the sun which had sunknear the crest of the mountains. I grabbed my camera and hastily ranged along the shore looking for good compositions, focusing on the contrast between the bright tree line and the deeply shadowed bulk of the Alabama Hills. In haste, knowing that the trees would very soon be engulfed by the shadow. Although the position of the sun was the source of the beautiful backlight, it presented a big problem because, even when I composed to keep the sun above the top of the frame, it introduced enormous lens flare. To mitigate that I tried using overhanging branches to both shield the sunlight and to act as a frame within the photograph (e.g. right photo, below). Even through the viewfinder, though, I felt that something was still missing. As I discussed in photo #67, one criterion I use in assessing an image is its complexity; how many elements can you add while retaining a coherent whole.
Two women fishing from a deck over the lake fortuitously provided an answer. At first I had deliberately excluded them from my shots, as I usually include people in my landscape photos only to provide a sense of scale, which was not needed here. However, their fishing lines glinted nicely in the sun, and I took some shots as they waited for fish to bite. But the lines were dangling into the water near reed beds, and drew the eye out of the composition rather than enhancing it. Then, I noticed that one woman had reeled in her line and was about to cast. I had little time to deliberately frame, but repetitively pressed the shutter button to capture several shots, of which the first was the most successful, catching a gleaming arc over a dense group of cottonwoods. |
 Diaz Lake: morning
 |
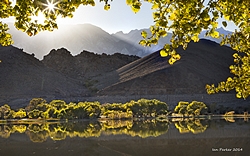 Diaz lake: late afternoonl
 |
#68 - October 2014
Lunar eclipse over Mt. Whitney photographed through Lathe Arch
|

Shadows. I must have travelled several thousand miles to photograph shadows. My wife teases me about it; but shadows do make interesting photographs and some, particularly those involving a combination of astronomical alignment and terrestrial geography, ocurr infrequently and require a long journey.
A 2000 mile round-trip last month to photograph the coincidence of the 'mitten's shadow' at Monument Valley with a rising full moon was a bust, as the remains of hurricane Norbert resulted in a completely overcast sky. Last week the next full moon was shadowed by the Earth to give a total lunar eclipse which, conveniently, was visible from California high in the western sky in the early morning of October 8th. Given that the eclipse would be visible from my backyard a journey was not strictly necessary; but I wanted to try to photograph it juxtaposed with an interesting terestrial foreground, and anticipated that light pollution in the city might be a problem because the fully-eclipsed moon becomes surprisingly dim. Some research on The Photographer's Ephemeris (TPE) showed that maximum totality would align nicely above Mt. Whitney as viewed from the Alabama Hills, and I thought I should be able to get good time-lapse shots shooting through the adjacent Mobius and Lathe arches. So, only a 500 mile round-trip this time.
Good news was that the forecast was 0% cloud cover on the night of the eclipse. My remaining worry was that other photographers would have the same idea for a location, so I arrived early to stake out tripod space. There were indeed two photographers present when I arrived, but both departed after sunset to shoot the eclipse from Death Valley, leaving the arches to myself for the night. I brought two camera bodies, each with ultra-wide lenses (16 and 17 mm FF equivalent), and two interval timers and tripods. Using a printout from TPE as an alignment guage I set up the cameras before the two arches, framing to capture the arc of the moon from well before the start of the partial eclipse through to moonset an hour or so after the end of the partial eclipse.. In the case of Lathe Arch that took some guesswork, as space behind the arch is severely restricted, and I had to position the camera right up against the back rock wall in order to encompass the full span of the arch within the frame.
Photographing an eclipse presents some technical problems, and necessitates quite a lot of post-processing in Photoshop. To convey the sequence of the eclipse in a single image I set up the cameras with timers to take shots at 12 minute intervals, enabling these to later be superimposed. However, the full moon is enorrmously (~500 times) brighter than the totally eclipsed moon, so I further set the cameras to acquire exposure-bracketed sequences ranging from 1/100s to 4 s at f11, ISO 400. That took care of image acquisition, but the problem remained of how to display the extreme brightness range. A print or computer display is simply not capable of representing the range from full to eclipsed 'blood' moon. The approach I took in the photo above was to take a long-exposure image of the fully-eclipsed moon, and superimpose it (in 'lighten' mode) over images of the partly-eclipsed moon. This effect is somewhat artificial as, by eye, the shadowed segment of moon is so much dimmer than the illuminated crescent that it appears black, but I think it gives a more natural appearance than an alternative method of abruptly changing to display long-exposure images when the eclipse enters full totality. Another issue relates to the capture of the foreground, 'terrestrial' image on which the lunar sequence is ultimately superimposed. During totality it is almost completely dark, so a different source of light is needed. To create this photo I took a shot earlier during the night when the full moon behind the arch nicely illuminated the mountains, and supplemented the moonlight falling on the arch by lightpainting using a flashlight and warming gel.
Once everything was set up I could leave the interval timers in charge of the cameras, and snuggled into my sleeping bag with an alarm set for 2;00am to wake me so I could enjoy the eclipse for myself. That was an unaccustomed luxury, as more usually I find I become so engrossed in taking photographs that I fail to fully appreciate what it is that I am photographing.
|
Some other eclipse photos
#67 - September 2014
"Mt. Cook/Aroraki from Hooker Lake"
(A 5th order photograph)
|

A 'fifth-order photograph"? What the heck does that mean...?
Well, it's a measure I use of the complexity of a photograph - the number of levels of features or elements from which the image is comprised. This month's photo taken of Mt. Cook during what is "indisputably New Zealand's most scenic day walk" serves as a good example of this idea.
Much of the art of photography involves simplification - 'cutting the clutter'. Indeed, very simple compositions can be highly effective, with a high WOW factor. Conversely, more complex images involving several elements can add extra interest. The aim then is not so much the immediate impact of a photograph but to establish a more sustained interaction, with the viewer looking around and finding further details to explore. The difficulty lies in refining the composition - the arrangement of the elements; how they are combined - to achieve a harmony wherein the features and their layout complement, rather than fight one another.
So, let's analyze this photo, which I will do by illustrating several reject shots that follow my thought processes leading to the final image.
The hiking trail up Hooker Valley ends at a viewpoint across to Mt. Cook. From there the striking, isolated profile of the mountain, as well as its status as the highest mountain in New Zealand, made it the obvious main subject for a photograph. But, even including the rather nice cloud cap, a snapshot of the mountain alone does not rise above the scenic postcard level (Reject photo#1 below). Unless the main subject is truly spectacular, or has meaning (as in journalistic photographs) beyond that intrinsic in the image, something else is needed. In landscape photography that is often added by finding a secondary foreground feature, or by being lucky with lighting conditions. Here, two sculpted icebergs trapped among ice sheets in the lake presented an obvious possibility for a foreground feature, so I scrambled down a rough path down to the lakeshore for a closer view. A shot of the mountain and icebergs indeed was looking better (Reject photo #2 below), but I had plenty of time to seek further improvement (my accompanying photographic elf is very patient!). Wandering along the shore I found a patch where the ice sheet had fractured into several geometrically-shaped floes. I had brought only a single lens on the hike, a 24-105mm zoom, but that went just wide enough to frame a close-up of an interesting trapezoidal floe in nice proportion to the bergs and mountain. Moreover, having lined up these three features, I was looking directly into the sun, giving a dramatic backlighting. Shooting into the light can be difficult because of the extreme contrast and possibility of lens flare, but at midday the sun was high, mitigating deep shadows and placing it well above the top of the frame. Nevertheless, I was getting annoyed by a reflection of the sun on the ice and open water to the left of the floe (Reject photo #3). The bright reflection distracted from the main features; an exposure that captured these bright highlights rendered the rest of the scene too dark;, and moving to shift the reflection out of the frame destroyed the symmetry I was looking for. A solution came in an 'ahah' realization that by re-framing slightly I could bring the sun's reflection to line up exactly with the leftmost tip of the ice floe. I hid much of the sun's disc under a patch of snow to reduce its brightness, and having already selected an aperture of f22 to achieve maximal depth of field I knew the remaining flash of light should create a nice sun-star.
Thus, I count the five orders or elements that combine to make this photograph as (i) Mt Cook; (ii) dramatic backlighting, (iii) the icebergs, (iv) the trapezoidal ice floe, (v) the sun-star. Each adds its own interest, and together I think they form an harmonious whole. Overall there is a strong left-right symmetry that leads the eye through the center of the frame from individual snowflakes on the tip of the ice floe through to the massive bulk of Mt. Cook, but this is interrupted by small asymmetries (the sun-star, the off center geometry of the floe, the different shapes of the bergs) that prevent the composition from becoming trite.
|
 Reject #1
 |
 Reject #2
 |
 Reject #3
 |
#66 - August 2014
"Cerro Gordo Nightscape"
|

The Cerro Gordo Mines are a collection of abandoned mines located in the Inyo Mountains, in Inyo County, California. Mining operations were undertaken from 1866 until 1957, producing high grade silver, lead, and zinc ore (Wikipedia). Unlike the mining town of Bodie, which is now a State Park, the remains of Cerro Gordo township remain privately owned, under the care of Sean Patterson. Some of the buildings, including the American Hotel were restored by Jody Stewart and her husband Mike Patterson, while others remain in various states of picturesque dereliction.
Being in private ownership Cerro Gordo is closed to casual visitors, but I recently had the opportunity to photograph and spend the night there during the 2014 running of the Badwater Ultramarathon. Having been barred from its usual course through Death Valley (click HERE to read about that travesty), the Badwater Ultra this year took a new route, including an arduous out-and-back climb of over 5000 ft from the floor of Owen's Valley to a turn-around at Cerro Gordo. I was serving on the race staff as a photographer, but found only a few chances to get shots of the runners as they approached Cerro Gordo since most arrived during the night. In compensation, the race did offer an unusual opportunity for nighttime photography of the ghost town. The Badwater organizers had booked use of the American Hotel for a checkpoint and aid station and to facilitate this, and provide a welcome beacon for runners struggling up the steep hill, the hotel was brightly floodlit for the occasion.
Night photography involves a fine balance between whatever natural light may remain in the sky and artificial lighting applied to illuminate foreground features. The latter may conveniently be achieved by 'light painting' with a hand-held flashlight, but that tends to be rather harsh and directional, casting deep shadows. Instead, on this night, light reflecting from the weathered wooden sidings of the hotel provided a warm and diffuse illumination of the surrounding buildings. The photo above of the old church is a 25s exposure with a 14 mm super-wide lens, taken toward the end of the 'blue hour' when faint light remaining in the sky after sunset balanced that cast from the hotel, and a flying sucer cloud fortuitously added extra interest. The wiggly line in the foreground is a light trail from a runner finding his way in near darkness to the outhouse around the corner from the church.
|
#65 - July 2014
"Two views of the skies above Mono Lake"
|
 Milky Way arcing above Mono Lake, viewed from the Log Cabin mine road

Noctilucent cloud arcing over the tufa formations of Mono Lake
A pair of photos this month - paired in terms of location and geometric composition and, as will be revealed below, by a minor lapse in my usual Photoshop ethics.
Both images were captured during a recent visit to Mono Lake. The first is a 'previsualized' composition, in that I had had this in mind for some time following an earlier trip up to the Log Cabin mine high in the mountains above Mono Lake. The rough dirt road to the mine accesses a spectacular viewpoint looking due east over the lake, and it occurred to me that this should provide a good astrophotography shot with the Milky Way arching above the lake early in the summer night. My trip provided a good opportunity to try out this idea, as the waxing moon would be only a few days old. Indeed, as the light faded after sunset the Milky Way emerged vividly bright in the clear, dark sky, aligned perfectly above the lake. The angle subtended by the arc of our galaxy was a little too broad to encompass even with my 14 mm lens on a full-frame camera, so I took several panned shots to later stitch together; taking care to facilitate this process by carefully leveling my tripod and positioning the horizon dead center. Exposure with the lens wide open (f 2.8) was a compromise, and I selected a shutter speed of 50 s to minimize streaking of star motion while maintaining a reasonable ISO of 3200.
The second image was composed near the shore of the lake a day later. Well after sunset, but while a little color remained low on the north-west horizon, an arc of whispy clouds appeared high in the sky. I think they are noctilucent clouds (high ice clouds in the mesosphere, visible only when illuminated by sunlight below the horizon), although it is unusual to see them so far South. The clouds presented a beautiful spectacle in themselves, and I was struck by the similar geometries of the atmospheric and galactic phenomena in my two photos.
Now, about that ethical lapse... On my drive up to Mono Lake I had stopped for the night on the volcanic tablelands above Bishop, and there met another photographer at the skyrock petroglyph. While waiting for the light, our conversation fell to discussing the use of Photoshop to construct composite images; for example to pair the sky from one image with landscape from another. I opined that such extreme manipulation was cheating, and that I did not do it! However, both the above images are in fact composites, but perhaps a sufficiently minor transgression to appease my conscience.
I took the shots for the Milky Way photo before the crescent moon had set, hoping that it would provide enough light to illuminate the lake, but a check of the camera screen showed that was not the case. To solve this problem I set my alarm for 4:30am, and re-photographed the exact same scene when the first glimmers of light and color appeared on the eastern horizon. A composite of the night and pre-dawn images thus provided both a sharp sky and a clearly outlined image of the lake with added color. The result looks perfectly natural, although it would not fool an astronomer.
I took the cloud photograph after I had returned to my campsite, several hundred yards from the lakeshore. Reviewing this later on the computer screen the image of the sky was captured nicely, but the lake was reduced to a mere sliverat this distance and the composition lacked any foreground interest. Thus, I thought to blend the cloud shot with a photo I had taken only minutes earlier while down at the lake.
So, two breaches of my usual ethics, but mitigated because in both instances the sky and land components of the composites were captured from essentially the same locations, looking in the same direction, and within minutes or a few hours of one another. Whatever, the final images are improved, and better convey my impressions of the scenes at the time. |
#64 - June 2014
"Candystripe boulder: South Coyote Buttes, Arizona"
|

Even by the standards of the Colorado Plateau, the Coyote Buttes in the Vermillion Cliffs National Monument contain some of the most intricate and fantastically colored sandstone formations on the planet. There are two sections of the Buttes; North and South. Although only a few miles apart they have different characters, and are accessed by very different routes. The North Coyote Buttes contains the famous 'Wave' formation, and while the trailhead is easily reached by a regular car, actually gaining access is difficult because of a permit system that is swamped by the large number of people wishing to visit this popular area. Instead, I prefer the Southern area, in particular the Cottonwood Cove section. This sees few visitors, likely in part because it has no single iconic feature such as the Wave, but more so because access involves many miles of deep sandy trails necessitating a stout 4wd vehicle. Different to the Northern section, there are fewer wide sweeping vistas, but instead an intricate landscape with numerous intimate features to be discovered around every corner.
Among the most striking features are colorful striated bands that twist their way for hundreds of yards through the sandstone, crossing patches of pink and yellow 'brain' rock, and curving around teepee formations. The bands sometimes intersect isolated boulders and, even more remarkably, the banded striations continue through the boulders. This month's photo features the most spectacular of these striated boulders.
In composing the picture, my first, and most obvious aim was to place the boulder in context of the continuing stripe as it travelled across the level sandstone floor and then up and across colorful brain rock. One possibliity was a low shot, with the boulder in the foreground, and the brain rock as a distinct background with the curve of the stripe above and mirroring that of the stripe in the boulder itself. Instead, however, I took a higher viewpoint, positionined so that the stripe at the top of the boulder appeared to merge with its continuation on the rock floor. By tilting the camera I could then align the stripe to follow a classic sinusoidal curve, diagonalling across the frame to lead the eye from boulder to brain rock. Although the horizon ended up very crooked, that matters little here, as the subject is so abstract that there are few clues as to what actually is level. In full sunlight the scene is much too contrasty, with a deep shadow cast be the boulder. I thus waited until after shortly after sunset to take this shot, so the rock would be gently and uniformly illuminated by the warm light in the Western sky.
Bonus photos: some other nearby striated boulders. |
#63 - May 2014
"Gentoo colony and sea shells: Antarctica"
|
Did you know that the color of penguin poop can tell you what they are eating and how they are faring? Pink-brown means that the penguins are eating plenty of shrimp or krill, which is usually abundant and easy to catch. If the guano is white, it means the penguins are eating fish, which is considerably harder to catch than krill, and therefore is energetically more expensive to eat. Finally, if the guano is green, the penguins are eating algae. This is usually the sign of a bad year for the penguins. [Link to Yahoo answers]
What's that got to do with photography? Well, I was struck by the resemblance of these Antarctic gentoo penguin colonies to an old-fashioned sepia-toned print. The penguins were obviously doing well on a plentiful diet of shrimp or krill, and because our visit was early in the season the colonies were nicely isolated among pristine snowfields.
Antarctica offers an abundance of photographic subjects. Often too many; there is a temptation to take a few hasty shots and then move on because what you next encounter might be better than what is already in front of the lens. In this case, however, I thought the wide view of the colonies before the sea and background mountains was worth spending some time to wander around on the lookout for a good composition. A small rock shelf offered a higher viewpoint, and I was happy to find a pool near the edge. Sea shells in the pool added foreground interest, and with a polarizer to reduce glare from the water they showed up well, with a complementary color matching the penguin poop.
The final image has a muted color palette, which does indeed achieve my notion of a sepia-print effect. In terms of composition, I placed the camera so that the diagonal line of the rock would trace the outline of the near colony and divide the picture into two, yet with the curve of the shells creating a leading line toward the colony to unify foreground and background. My usual approach when selecting subjects and compositions is to simplify as much as possible; to reduce the photograph to its essentials. It is much easier to create an effective result in that way. Here, however, there is quite a lot going on - mountains, penguins, the isolated sepia 'islands', lichen, shells - with no single feature to arrest the eye. But having followed a route of increasing simplification for several years, I sometimes try to reverse course and experiment with greater complexity. This month's photo, I think, does hang together despite including several disparate elements. Viewed at a distance, or as a small thumbnail, the overall pattern is attractive. A close-up view reveals interesting details to explore. |
#62 - April 2014
"Pampas grass, fog and clouds"
|
If you have ever driven up Highway 1 between LA and SanFrancisco, you will likely identify the above photo as having been taken at Big Sur, even though no recognizable landscape features are present in the image. Instead, the tall fronds of grass are a conspicuous sight along Big Sur coastline, scattered densely across the steep hillsides falling to the ocean. Pampas grass is iconic of Big Sur in the same way the tumbleweed is to the desert southwest: although, curiously, neither plant is native to the U.S., originating respectively in the Andes and Eurasia.
My aim in creating this picture was to capture the feeling of an early, winter morning high above the Big Sur coastline in a simplified, semi-abstract manner. Just three elements - the grasses, a fogbank out across the ocean, and whispy clouds echoing the curves of the grass.
I had camped out for the night along the Nacimiento-Fergusson road which ascends into the mountains through the Los Padres National Forest, and drove down at first light to a switchback a few hundred feet above the main highway that provides a sweeping view north and south along the coastline. That morning the beaches were obscured by fog, so instead of attempting grand scenic compositions I focused on more intimate details, using the fog as a backdrop to isolate the grasses. After wandering up and down the road I found a clump of fronds that were relatively clear of surrounding weeds and clutter, and set up my camera with the tripod fully extended so they would be framed entirely agains the fog, without intercepting the horizon line. The sky looked as if it would provide an interesting counterpoint to the grasses, but I had to wait a while before the rising sun brought some color. By that time, the cloud formation had drifted and no longer lined up well, so I took two shots, panning round to center the clouds so I could later align them in Photoshop.
For the final composition I chose to place the horizon dead center; deliberately breaking the usual commandment to avoid symmetry and follow the 'rule' of thirds. I thought the sky deserved equal precedence with the land, and thus arranged them as if a dyptic - two images that could each stand alone, but in combination evoke a certain tension yet complemented and echoed one another. |
#61 - March 2014
"Penguins and Elephant Seals in a Katabatic Sandstorm"
|

Among the many millions of digital photos that are taken every day, how can one hope to create an image that is unique in some way?
One approach depends upon the photographers skills and vision; applying a unique composition or perspective before pressing the shutter button, or specialized subsequent post-processing. Another way is simply to be present (with a camera!) at a unique place, preferably under unique conditions. This month's photo is an example of the latter case, and was taken at St. Andrew's Bay in South Georgia, at about the same time as the featured photo for December 2013. Few people are fortunate to be able to visit the vast king penguin colonies on South Georgia, and a landing at St. Andrew's Bay was to be a 'big day' on our Ultimate Antarctica tour with Jo van Os. As it transpired our time with the penguins was cut short by the development of fierce katabatic winds which, however, gave the opportunity to photograph under extreme conditions as the wind kicked up a sandstorm on the black sand beach.
The following excerpt from the trip logbook of Jo van Os tells the story...
November 14, 2014—St. Andrews Bay
At 0300, Monika and Joe Van Os had scoped out the early morning weather situation. The sky was filled with broken clouds, a photogenic sunrise looked possible, the wind was favorable for a landing, and wave swell was moderate. Our landing was a “go.” By 0400 we commenced the landing on the legendary beach at St. Andrews Bay. Just prior to our departure, “bio-secure” breakfast sandwiches and snacks were available in the ship’s lounge to eat on board or to take ashore.
By 0430 the 50 participants who opted for the early morning landing were ashore and experiencing the spectacle of St. Andrews—the largest king penguin colony on South Georgia and the island’s largest and most populated elephant seal beach. Safety instructions were given as well as rules for the engagement of wildlife on this sweeping 1.8-mile (3 km) long beach. Clouds forming on the low horizon precluded a dramatic sunrise. People fanned out in all directions, some heading to the far distance to visit the king penguins, others working the shoreline where penguins were heading out to sea for their morning foraging expeditions, while several photographers concentrated on fighting and mating elephant seals. Still others headed into the interior to shoot introduced reindeer before their expected removal from the island, sometime in 2014.
By 0600 the wind had picked up strongly with hints of katabatic gusts blowing bursts of dry sand across the beach. This barely dampened the spirits of our photographers and most kept on shooting—unfazed.
By 0700 the beach and the bay were experiencing a full-blown gale. Strong westerly winds and 60-70 mph katabatic gusts created blasting sandstorms across the beach and our safety became more of a concern as Joe Van Os, on shore, and Monika, aboard the Ushuaia, monitored the situation. The 0800 landing for our remaining passengers who had stayed onboard for breakfast was postponed due to the hazard of mounting sea swell on the ship’s gangway and the possibility of drenching waves during the Zodiac operation. Despite the blowing sand, photography on shore continued and unique images of South Georgia wildlife emerging from a fog of blowing sand were undoubtedly created. It is a testament to the quality of today’s camera equipment, that little damage to cameras and lenses by the blowing sand was reported.
By 0900 it was obvious that, despite inviting blue skies and sunshine, the persistent strongly gusting wind presented a safety issue and the entire shore party was collected and gathered together for an orderly departure from the beach. With a potential threat of a Zodiac flipping by the off-shore wind, several staff or seamen remained in the Zodiac as human ballast for the return trip from ship to shore after passengers were offloaded. By 1000 all passengers and staff were back on board Ushuaia. |
#60 - February 2014
"Icelandic Aurora"
|

Another 'atmospheric' photo for this month's selection - one taken at the other end of the Earth from January's photo. Indeed, within just three months we have visited both arctic and antarctic regions, returning a week ago from Iceland.
Winter is a special time in Iceland. Tourists are few, the landcape is snow-covered, and the light from the low sun can be gorgeous. And, there is always the chance of seeing the aurora borealis. That chance, though, tends to be low; even though the solar cycle is now near its peak. During three visits over the past three years we have seen the aurora on only three nights. Our first visit yielded the brightest and most spectacular displays, but at the time we were driving on a desolate section of road lacking any interesting foreground subject to add interest to photographs. Our second visit yielded nothing. So, maybe third time lucky this year? The Icelandic Met Office has an excellent website predicting auroral activity and showing cloud cover across the island. All looked good for the second night after we had arrived in Iceland, with auroral activity predicted at 5 on a 0-9 scale and clear skies - but then, just as it got dark, the activity prediction was abruptly dropped to 1 (quiet). The next few days were socked-in, with heavy cloud cover and gale-force winds. Only on our penultimate night in Iceland did there seem a good chance seeing good auroral displays, and that required an unplanned drive of 200 km from Reykjavik to an anticipated window of clear sky over South Iceland.
On the roadI was thinking about possible locations location that might provide interesting terrestrial foregrounds to complement photos of the aurora, and decided to head for the black sand beaches near the small town of Vik. The latitude of Iceland is sufficiently high that the aurora typically appears almost overhead, rather than low on the northern horizon. . To the east I could then hope to capture auroral dsplays over the sea stacks of Reynisdrangar; to the west the promentary of Dyrholaey with its summit lighthouse; and to the north the Mýrdalsjökull glacier. After a meal of excellent lamb cutlets at the N1 gas station in Vik we settled into our sleeping bags in the back of our rental SUV. My iPod chimed Marimba at 4:00am, when the half-full moon had diped below the horizon, and a glimpse through the iced up windows showed stars and a hint of green; promising enough to don Muckboots and antarctic clothing and wriggle out into the freezing but still night.
I had expected that the best aurora was likely to be to the north, over the glacier and with the possibility of capturing reflections in the lagoon between the beach and mainland.Instead, activity seemed to be concentrated in an arc stretching directly overhead, so I walked some way along the beach to get some distance from the cliffs that blocked the view to the east. Then, it was a matter of deciding how close to the ocean I dared set my tripod. I wanted to frame shots with surf in the foreground to reflect the auroral light, but was well aware that infrequent and unpredictable rogue waves might carry surprisingly far up the beach and swamp over the top of my boots. As it happened, I stayed dry and had to grab the camera and run for it only once. I stayed out for about three hours, taking hundreds of shots as the auroral patterns constantly changed while trying to capture good displays timed to coincide with nice patterns of receding surf and the rotaion of the lighthouse beam. The photo above is my favorite from the night, as it includes both red and green auroara together with arcing and ray-like formations.
For a few minutes I also noticed a very different pattern of auroral activity that I had not seen before; several discrete tear-drop patches of green that were asynchronously pulsing in intensity with a period of a few seconds.A Google search for 'pulsing aurora' revealed that I was lucky to observe this relatively rare phenomenon, whose mechanism has been elucidated in a recent Science paper.
Some technical notes.
I was photographing using a Canon 5D Mk3 camera with a 14 mm f2.8 Rokinon lens. The latter is an excellent choice for auroral photography. Aurorae span over a vast are of the sky so a super-wide lens is best, and although the Rokinon lens costs less than a sixth of the Canon equivalent, its quality is very high. Although it lacks any electronic controlsof focus or aperture that is not a limitation for night-time photography as the lens needs to be used wide-open anyway, and can be pre-set to focus on infinity (which actually reads close to the 10 ft mark on my lens!). Perhaps the main limitation with the Rokinon lens is its wierd 'mustache' distortion, but although that is a big problem for architectureal photography, no one is going to notice if aurorae are distorted! Auroral displays change surprisingly rapidly, and my experience is that exposure times longer than about 4 s blur the finer details. For very bright displays that is not a problem, but although the aurorae were beautiful this night, they were relatively dim, necessitating an ISO setting of 12,000 even with an f2.8 lens. By eye the greens were vivid, but although the camera captured the reds I could not see them at the time. |
#59 - January 2014
"Antarctic Rainbow"
|

Nearing the end of our Antarctic voyage, I woke early on Nov. 24 and was on deck well before the wake-up call for breakfast. We had cruised the previous day through the Lemaire Channel under heavily overcast skies, but this morning sunlight was streaming through breaks in the clouds and the air was completely still. I was greeted by the calmest, silky waters that we had seen on the entire trip, which appeared inky black, and became even more so when photographed through a polarizer. The only disruption was the ships wake as we cruised at low speed, making beautiful ripples highlighted by reflections from the snow-covered shoreline of Paradise Bay. I was occupied creating semi-abstract compositions of the ripple patterns when a rainbow began to appear below some brooding clouds. By good chance, the rainbow was almost dead astern, and as the ship's course began a gradual turn the wake began to curve around to line up nicely with the rainbow's end. Then, it was just a matter of waiting and taking several 'insurance' shots while hoping that the rainbow would not fade before the ship moved into an optimal alignment. In fact, the right half of the rainbow did disappear. Nevertheless I preferred to frame the shot as a wider landscape view rather than cropping to portrait orientation to encompass only the illuminated segment of the arc. I feel that the snow-covered hill and its reflection give a horizontal balance to the vertical symmetry of the rainbow and wake and help communicate a sense of place; while the mirror-calm water adds contrast to the ripple patterns. |
#58 - December 2013
"King penguins in surf"
|

As promised, penguins for this month's photo. Rather delayed, as I am working through a backlog of nearly 10,000 photos taken on a trip to Antartica and South Georgia.
This picture was taken on what was probably the best day of our voyage - certainly the most exciting day. We had landed at 4:00 am at St. Andrew's bay on South Georgia. The early start was in anticipation of a golden sunrise, but that was not to happen. Nevertheless, the overcast light was great for photographing the (literally) hundreds of thousands of king penguins in colonies stretching along the beach and up toward the glaciers. Through the morning the weather worsened, and by about 10:00 am katabatic winds were gusting up to about 60 mph. We were signalled by the ship's horn to return immeiately to the landing site to evacuate the beach, but no one heard the signal over the roar of the wind , and people gradually straggled back having decided on their own that conditions were getting bad. Only a single zodiac was operating to ferry us, and that needed two extra crew members at all times to act as ballast to avoid flipping over in the strong surf, so I was waiting a long time to return to the ship.
However, that did provide for some exceptional photographic possibilities. The wind was so strong that it was difficult to remain standing, or to hold the camera steady, but the penguins appeared quite unfazed. Dense groups of king penguins weere still waddling down the beach through a sandstorm and swimming out through the surf and blowing spray. As usual, bad weather made for good photography, and this image captures something of the arduous environment in which these plucky and entertaining birds live. |
#57 - November 2013
"Abandoned shack below the Eastern Sierras"
|

Just a quick catch--up for November, as I have been away for a month in Antarctica and South Georgia. December's photo should be posted soon, featuring penguins or icebergs!
The photo was taken on a trip along Owens Valley timed to catch fall colors in the cottonwoods and aspens. I had been photographing sunrise at Mono Lake, and was driving along highway 350 toward the famous Whoa Nelli Deli near Lee Vining for breakfast. A low cloud/mist had come down over the mountains, completely hiding the Sierras, although the valley was in bright sunshine. But very suddenly the mist began to dissipate, revealing lines of golden cottonwoods curving along the stream courses, and crisp mountain slopes dusted with recent snowfall. I stopped to photograph through gaps in the mist but, as usual, the problem was to find some foreground interest. A few miles further a dilapidated shack, conveniently placed right by the road, nicely filled that need. The photo above is basically just a 'grab shot', taken without much premeditation. I did try a few different compositions, altering the placement and perspective of the shack relative to the mountains, but the first ended up being the best. A polarizer helped bring out the colors and the contrast of the mist against the sky, and I needed to do very little work in post-processing other than cloning out some obtrusive fence posts.
The theme of a weatherbeaten shack/hut/barn against snowcovered mountains is a veenerable photographic cliche; but I have to admit quite liking this photo, and a print of it hanging outside my office door has gained more appreciative comments than have most of my more deliberately-formuated photographs. |
#56 - October 2013
"Monument Valley Cloudscape"
|
Another photo from the archives (taken four years ago this month), and another example of trying to come up with something new from a much-photographed location.
The picture was taken from John Ford's point
along the loop road through Monument Valley; a scene made famous in many Western movies. The landscape with all those orange/red sandstone buttes and mesas is spectacular, but they need something else added to make a good picture. Often, that something involves some diligent searching to pick out a sufficiently interesting foreground subject from the generallydesolate desert floor. The pair of rocks by the parking lot at the visitor center have fulfilled that purpose for generations of photographers from Ansel Adems on! On this day, however, the late monsoon season weather was putting on a good show, and the rapidly changing sky was rivalling the landscape for visual impact. The wonderful, frilly-edged cloud in this month's photo developed quickly while I was some way from my car, with only a mid-range 'walk-around' lens on the camera. Even with the lens fully zoomed out the cloud was too big to fit into a single frame. Not wanting to risk losing the shot by going back to get a wide lens, I took three overlapping vertical frames to stitch together afterwards. In addition to blending the images in Photoshop, I did some post-processing to give more depth to the foreground. As originally captured, the lighting here was rather even and flat. To create a more three-dimensional feel I copied an artifice used on some topographic maps, lightening elevated areas and darkening shaded slopes. |
#55 - September 2013
"Emergent Island - Lake Powell"
|

Back again to the archives for this month's photo - a favorite from several years ago, a print of which hangs on our wall at home.
The photo was taken from Alstom point - a long, bumpy ride along a dirt road to a high promentory with superb views across Lake Powell. The lake is not really a 'lake', but rather a giant reservoir impounding the waters of the Colorado river and swamping what used to be Glen Canyon. The reservoir began to fill in 1963 following completion of Glen Canyon dam, and reached its high water mark in 1980, overtopping the spillway. Since then drought conditions caused the water level to fall precipitously, reaching a low point in the winter of 2005. Photographs taken during high water years show red and yellow sandstone cliffs forming a color contrast with the deep blue of the lake, but more recently the scene is marred by the bathtub ring left on the rocks by the receding water. My visit was in 2006, when the water had dropped about 150 ft below its high point.
Nevertheless, a good sunset with the wind in the right direction to blow away pollution from the Navajo power plant produced a spectacular vista of glowing sandstone. After taking the requisite picture postcard scenic shots, I started looking for different and less literal ways to to capture and communicate the scene by using a long telephoto lens to isolate tiny sections. Golden reflections from the sunlit Gunsight Butte directly across Padre Bay caught my eye, and zooming in revealed a tiny island that had recently emerged from the depths as the water level receded. I framed the shot to exclude the cliffs (and the bathtub ring), creating an almost abstract composition consisting almost entirely of diffuse reflections with the island as the only solid, sharp subject. Light winds were constantly changing the patterns of the reflections, so I took several shots over a few minutes, ultimately selecting one where a band of still water below the island framed a reflection of the very top of the butte.
My hope is that this photo works on multiple levels: as an almost abstract composition of colors and form with the island providing just enough clue as to the physical setting; and as a metaphor for our reliance on the erratic and unpredicable flow of the Colorado river. The water level rose almost 60 ft over five yearsfrom the date of my photo , but has now (2013) dropped back to about the same level. The little island will be once more emergent! |
#54 - August 2013
"Moai by moonlight"
|

A return to the archives for this month's photo. I usually select a recent image, but I realised I had never featured anything from Easter Island; a place that is very high among the most evocative locations I and my wife have been fortunate to visit.
Easter Island (Rapa Nui) is the most isolated inhabited island on earth. This lonely place contains one of the world's most spectacular .collections of archaeological wonders - the moai or stone statues. These were largely carved at a single quarry, rano raraku, where they can still be seen in various states of completion. Many.mysteries remain, however, regarding how they were transported miles across the rugged terrain of the volcanic island, and how they were finally errected on the ceremonial platforms (ahu). All the moai (except those remaining to be transported from the quarry) were toppled during tribal battles soon after the first European discovery of the island in 1722, but some, notably at Tahai, Tongariki, and Ahu Aviki have been restored in modern times.
Our preferred time to visit the moai was well before dawn. There were no fences or forbidding signs, and the moai at rano raraku are left in much the state as when they were abandoned by their makers. We could walk among and right up to the moai, and at that time of the morning there were no other people. Just a few peacable wild horses, who made good use of the sharp chins of the moai to scratch the backs of their necks. Sitting on the grass under the dim sillhouettes of the moai in the cool stillness there was a very tangible sense that the ancient peoples who carved these figures were somehow still present: a slightly shivery feeling that I have experienced also on hiking to remote and little-known Anasazi ruins on the Colorado plateau. This sense of 'connectedness' to a place or time can only happen with quiet and solitude. Sites such as Mesa Verde and Angkor Wat, with their teeming tourists and regimented tours, strike me as only a more authentic Disneyland. The architecture, craftsmanship and sheer scale are impressive, but I find more emotional connection and reward from discovering even a small granary or single room Anasazi dwelling. Perhaps the isolation of Rapa Nui will protect it from development and over-visitation?
Back to the photograph. How to convey something of this feeling in a mere flat image? For most of the photographs I took of Rapa Nui - including the most successful ones - I used light-painting to highlight the moai against a moonlit or dawn-light landscape. This approach retains a sense of mystery that is lacking in full daylight, and gives more control to bring out features in the carving and provide a three-dimensionality. I used a halogen dive-light, which gives a powerful yet diffuse beam with a more pleasingly warm color balance than led flashlights. The photo is of one of the moai on the slopes of the rano raraku quarry, fully carved and upright, but now waiting for eternity to be transported to its intended ahu. |
I was honored when my photo was chosen by Pavel Pavel for the front cover of his book describing experiments revealing how the moai were transported from the quarry to their final destinations.
"Local legend says that the statues arrived at their current locations by themselves - that they actually 'walked'. Several expeditions visited the island during the last century, trying to work out how the early Easter Islanders transported the moai statues. When the Norwegian explorer and archaeologist Thor Heyerdahl announced his plans to conduct more field work on Easter Island in 1986, he did not know his expedition would be joined by a young Czech engineer, Pavel Pavel, who would eventually make the moai statues walk.
Mr Pavel had followed the research and experiments on Easter Island since 1981 and came up with a theory. With the help of his friends he cast a 4.5 metre tall concrete statue weighing 12 tonnes. In the South Bohemian town of Strakonice, they conducted a trial. They fastened ropes around the top of the head as well as around the base of the bust and through a system of tilting and twisting Mr Pavel and sixteen other people were able to move the statue forward. In this manner the experimental moai wriggled forward as if it were "walking". Whereas 180 people pulling a statue on its back had been used during Thor Heyerdahl's experiment on Easter Island in 1956, only 17 people were needed for Pavel to transport a "walking moai".
Thor Heyerdahl invited Pavel Pavel to join the KonTiki Museum expedition to Easter Island in January 1986 to try out his experiments on an original statue. It worked well and the mystery was solved" - or maybe not quite? |
 |
#53 - July 2013
"Ponte del Diavalo by floodlight"
|

Ponte della Maddalena (Italian: "Bridge of Mary Magdalene") is a bridge crossing the Serchio river near the town of Borgo a Mozzano in the Italian province of Lucca. One of numerous medieval bridges known as Ponte del Diavolo, the "Bridge of the Devil", it was a vital river crossing on the Via Francigena, an early medieval road and important mediaeval pilgrimage route to Rome for those coming from France. The bridge is a remarkable example of medieval engineering, probably commissioned by the Countess Matilda of Tuscany circa 1080-1100. It was renovated circa 1300 under the direction of Castruccio Castracani. The largest span is 37.8 m. (Wikipedia)
This spectacular bridge ranked high among the list of attractive subjects I hoped to photograph during a recent visit to Tuscany, but it presented some problems in creating a good image. However, photographic difficulties are basis for many of my selections as 'Photo of the Month'. Just occasionally I might find a great subject under great lighting, so that all that is required is to press the shutter and upload the photo with very little post-processing needed. But then there is nothing much to write about... In this instance the difficulties lay in both composition and lighting. Access is severely hindered by a railway running along the west (left) bank of the river, and by a narrow, busy road along the east. The only safe place to set up a tripod was from a small parking area, from where I tried to get the best possible view from the top of the parapet. Not actually difficult, but I felt constrained in having little freedom to compose the shot.
The second aspect concerned the lighting. During a first mid-day visit under full sunlight the bridge looked rather mundane and lost in its surroundings. Noticing floodlights mounted along the river banks I had better expectations for a night shot, and we returned during the late evening anticipating a time when the remaining natural light might balance the floodlit bridge. The question then was whether the floodlights would actually be turned on. For several frustrating minutes they remained off, while the remaining light in the sky faded. Eventually one, two and finally all four lights came on but, even more frustratingly, they would erratically extinguish and re-ignite. I wanted a long (30s) exposure to blur the ripples in the river and get a nice reflection, and took several shots before getting one where all the lights remained on. But then a further problemn was that the lights on the far side of the bridge were deep orange mercury bulbs, whereas the near-side lights were of a much higher color temperature. Even on the camera lcd screen it was horribly apparent that the lighting on the bridge came out as a lurid and most unattractive green with a white balance setting that gave a realistic blue sky and pleasing orange backlight. Producing the final image thus took some time in Photoshop, principally using a masked layer to selectively adjust the color temperature of the bridge where it was illuminated by the white-green floodlights. |
#52 - June 2013
"Lightpainted tufa under lenticular cloud sunset: Mono Lake"
|

The tufa towers in Mono Lake were created underwater, and are visible only because much of the water flowing into the lake was diverted to the thirsty mouths of Los Angeles. By themselves the tufa formations are intriguing, but in harsh sunlight photographs come out looking very mundane. Around dawn and dusk it is a different matter, and the lake can take on a very otherworldly appearance. Even then, though, the lighting matters very much, and a dramatic sky really helps complement the tufa as a strong second subject. On a recent trip to the lake I was thus heartened to see a classic 'Sierra Wave' cloud formation developing over Owens Valley. I arrived at the South Tufa area in the late afternoon, when the bright edge of the cloud provided nice silhouettes against the tufa pinnacles; but the pallette was almost monochrome. The real action would have to wait until close to sunset, and I had good hopes as the sky to the west was completely clear.
The photo above took some pre-planning. I wanted to make the cloud an equal co-star with the tufa, but its north-south orientation did not line up well with the most attractive formations. After some wandering around I settled on the formation pictured above, waded out into the lake (having thought to bring my wellies) to get clear reflections without the clutter of stones and mud at the lake edge, and set up camera and tripod. I took several shots as the light changed toward sunset, but at that time the tufa appeared as just a black silhoutte. So, I waited as the light faded, until it was dark enough to be able to use a powerful Maglite led flashlight to 'light-paint' the tufa. A gel over the flashlight nicely warmed the color of the rock, and a 30s exposure both gave time to evenly illuminate the formation and blur the waves in the lake into a silken, reflective sheen. The final image is thus a blend of two shots, taken about an hour apart, and manually merged in Photoshop. |
#51 - May 2013
"Fairy Castles : Bryce Canyon"
|

Bryce Canyon must be high on the list of the most visited national parks in the US. The eroded hoodoo formations are striking and iconic, but it is the lighting that makes Bryce truly unique.
This comes about because Bryce is not really a canyon, but rather a series of east-facing amphitheaters. The viewpoints are up on the rim, so you are looking down onto the formations, and directly into the rising sun. Such backlighting would normally cause big problems for photography, because the intense direct light from the sun would overwhelm and render foreground subjects as mere sillhouettes. But here the downward angle of view allows the sun to be excluded from the frame, so that the hoodoos fall within a sensible exposure range. The real magic though is created by reflected light. Bryce is at an altitude of over 8000 ft, and catches the very first rays of the rising sun. That soft red light then diffusely reflects off the white and orange sands of the amphitheater, illuminating the hoodoos so that they almost seem to glow with an inner light.
It is easy - too easy - to come away from Bryce with a collection of excellent photos. It is much harder to come away with anything original. The walls of the visitor center and Ruby's Inn are lined with spectacular and inspiring photographs; the challenge is to find something a little different. I usually pass by Bryce two or three times a year. It lies a one-days drive from my home, and I often stop there overnight on my way to or from destinations further in Utah. I can camp for free in the forest immediately outside the National Park boundary, sleep in until just a few minutes before sunrise, and still get to one of the overlooks in time for frst light. On recent visits I have concentrated on using a long telephoto lens to abstract distant features, rather than focusing on the iconic and much-photographed formations directly below the rim. This month's photo was taken with a 400 mm lens, looking across from Sunset Point toward features in Fairy Canyon. By eye these appeared insignificant and lost in the bright sunlight, but through the viewfinder they shone with a mysterious luminescence. To get a sharp image I used a tripod, switched on live view to act a a mirror lockup, and selected a 10s timer delay to let any vibrations die down after pressing the shutter button. That delay also allowed me to move round and use a hand to shield the lens from direct sun, as the lens hood alone did not completely block the light. Even so, the image out of the camera appeared rather washed out, mostly due to haze in the air over the long distance at which the shot was taken. However, global and local adjustments in Photoshop brought up the contrast nicely, allowing the glowing hoodoos to really 'pop' againt the shadowed background. |
#50 - April 2013
"Entangled Oaks - Capitol Reef N.P."
|

On a recent trip over the University holiday I journeyed through southern Utah at the end of March. I was hoping that spring would already have arrrived - that the cottonwoods would be fluorescent green and the fruit trees in Capitol Reef would be in blossom. But no; the tail end of winter lingered on, and all the trees were bare. However, that can make for some attractive photographs, particularly in redrock country where backlit branches stand out against the dark, shadowed canyon walls.
The subjects in this photo are a pair of ancient, wonderfully twisted and intertwined oak trees, growing in a meadow close to the old barn in Capitol Reef National Park. I was there early in the morning, soon after the sun had risen above the canyon wall. Looking directly into the sun, the backlighting accentuated the tangles of small branches, while reflected light made the trunks positively glow. I wanted to frame the scene in an almost abstract manner, and wandered around exploring various combinations of position and focal length to find a composition that would eliminate everything apart from the trees themselves. Flare from the sun shining directly into the lens was a problem, but easily fixed by removing my usual in-situ polarizer and using a hand as a shade.
The end result is a rather complex photograph, without any single focal subject, but I feel it succeeds as an interesting mix of textures and colors, and as a sort of visual maze. The trees are so intertwined, that it is fun to try to trace out which branch belongs to which tree! |
#49 - March 2013
"Bixby Bridge and Big Sur Coastline"
Complexity vs simplicity
|

I usually strive for simplicity when composing a photograph. Images that emphasize just a few subjects and cut out the clutter of the real world tend to have more impact. Indeed, there is a natural progression in the evolution of a photographers skills toward ever simpler and condensed compositions. Sometimes, however, it is good to make a U turn, and try to make a complex composition that still manages to hang together. This month's photo is an example; though one created more by chance than initial intent.
I was driving along then Pacific Coast highway north of Big Sur. The road is narrow and wriggly, demanding full attention, but I noticed a spectacular view of black cliffs layered with mist and pulled off onto a convenient dirt shoulder to have a better look. It was only then that I realized that, in addition to the natural coastline, Bixby Bridge was hiding coyly in the background. And, even better, there was a sea arch in the foreground. I walked around to find a viewpoint that nicely lined up the natural and man-made arches, and selected a focal length of 400 mm to achive a tight composition. Then it was just a matter of waiting for a big wave to break before pressing the shutter. The two birds sillhouetted against the wave were a pleasant discovery after I got home and looked at the image on the computer screen - I had not noticed them when taking the shot.
The final result is a quite complex picture, There is no single subject, and the eye wanders between the bridge, sea arch, wave and birds. But, I think it works, in part at least because the bands of mist and reflections from the sea break the image into several receding layers. Long telephoto lenses compress perspective, and there are certainly no leading lines in this image to provide a sense of depth. But, the distinct layers of diminishing contrast provide a three-dimensionality - akin to Japanese paintings - and allow the viewer to consider each in turn. The sea mist, brightly back-lit by the early morning sun, is a crucial element in the image, serving to define the layers. I returned the following morning to the same viewpoint, but there was no mist, and the magic was gone.
|
#48 - February 2013
"Zebra dust trails at sunset"
|

To be effective, a photograph needs to have at least two distinct elements. One is (usually) the subject of the photograph - what you are photographing. But, to have any deeper meaning or 'wow' factor there needs to be something extra. In the case of wildlife photography there is a natural progression. At first it is satisfying merely to capture a decent static portrait of a new bird or animal. After all, that is difficult enough as the subject is inclined to fly or run away. Soon, however, there is an urge to shoot more intersting pictures; for example, the challenge may become that of catching interesting behaviors or composing to place the subject in the context of its environment. And, as exemplified by the title of my website, a common theme in my photography is to capture a chosen subject under optimal light.
During our visit to Etosha National Park last summer there was no shortage of spectacular Namibian wildlife, but lighting was problematic. Access to the park is strictly regulated, and everyone has to be within the fenced camps at night. The gates open and close strictly at sunrise and sunset, so we always seemed to be spending the times of golden light waiting for the gate to open, or driving frantically back to camp before it shut. One evening, though, we returned early, and went down to the viewing area by the waterhole. The main attraction here is watching animals approach at night under floodlights, but the waterhole at Okaukeujo also gave a good view across the surrounding plains, looking directly toward the setting sun. As animals walked toward the waterhole they kicked up dust cloud, which caught the light as the sun sank to a red orb in the thick African air. |
#47 - January 2013
"Gold and Blue Ice Cave"
|

This month's photo was taken on an Ice Cave tour guided by Einar at Local Guides. We visited Iceland in December, and the weather was heavily overcast and raining on ther first day we met up with him. Although the ice cave we visited was architecturally impressive, it lacked any real color. However, by the next morning the sky was clear, and Einar took us to a much more beautiful cave, with a second entrance that aligned with the rising sun to create a wonderful golden glow contrasting with the blues and greens of light filtering through the ice.
Ice caves present some unique photographic problems, and as this was my first time, I was not sure how best to solve them. The space is confined, so I took my widest lens, a 14mm on a full-frame camera (Canon 5DIII). Then, to handle the extreme contrast range I bracketed 3 exposures for each shot at 2-stop intervals, and manually blended these to create the final image. Perhaps the biggest problem though was finding and setting up good compositions. To get a wide field of view I found that I mostly had the camera hard up against the back wall of the cave, making it difficult to see what was in the frame through either the viewfinder of the live-view screen. Compounding that, the floor of the cave alternated between irregular blocks of slippery ice, glutinous black moraine dirt and silty, ice-cold water, making avoidance of injury and immersion a higher priority than optimizing the camera angle.
Enough excuses! The photo above was my favorite, and perhaps the only one where I can claim a deliberate composition, rather than a random shot hoping that a super-wide lens would capture something interesting. My aim was to combine the diagonal slant of the ice formations together with contrasting colors progressing from white through green and blue to gold. As a neuroscientist, the bizzare, brainlike formation at the top right appealed to me, and I framed the shot to juxtapose it against the golden light entering through the lower tunnel and highlighting the group of figures. I usually don't include people in my landscape work, but here I felt that they helped (indeed, were vital) to provide scale to what would othervise be an utterly abstract scene. |
#46 - December 2012
"Sandhill crane in flight"
|

Last month's photo was a deliberately blurry bird against a black background. For contrast, this month features a sharp shot of a bird againt a white background.
The image was captured during a recent visit to Bosque del Apache, where the over-wintering sandhill cranes take pride of place on the wildlife reserve. My visit coincided with the annual Festival of the Cranes, so the photographer count was also very high; and the density of white super-telephoto lenses correspondingly great. My longest lens is a 100-400mm, and I was feeling quite out-gunned by massive 600 and 800mm rigs on gimbal mounts, but took advantage of my much lighter set-up by concentrating on hand-held shots of birds in flight. I had both 7D and 5D MkIII cameras with me, and was interested to compare their respective merits for this type of photography. The crop-factor 7D gave me an equivalent 640mm lens for tighter framing, but the focus on the 5D is much nicer, and its lower noise allowed use of higher ISO settings corresponding to about a 2-stop faster shutter speed.
Cranes are elegant, if gangly birds, and although they are somewhat skittish and difficult to approach closely, they compensate for that in sheer size with wingspans up to 7 ft. Nevertheless, I ended up with many hundreds of shots of cranes and only a few 'keepers'. Other than choosing a location from which to shoot, relative to the wind direction and the , pond or field to which the birds are approaching, there is not much you can do in terms of deliberately composing a photo. Everything is happening too fast, and it is just a matter of firing off a burst of shots and seeing later what you might have captured. Any editorial and artistic comesafterwards in terms of selecting the best images and processing them.
Two features of this month's photo appealed to me. Firstly, the bird was positioned against a uniformly white sky. Often, it works well to include some (out-of-focus) background for perspective, but here I liked being able to abstract the crane and present it against a pure white backdrop simply by tweaking the highlight levels. Secondly, I liked the graceful curves of the nearmost wing and feathers. The exposure and sharpness were good straight out of the camera, and the only other processing I applied was to lighten the underside of the far wing to bring out more detail, and to subtly increase the color saturationand warmth. |
#45 - November 2012
"Egret blur"
|
Canon 5D MkIII; 100-400 @ 400mm, f5.6; 1/15s; ISO 3200 |
My selection of this month's photo was triggered by a recent article by Mike Johnson in The Online Photographer, in which he contrasts the notion of image quality with image properties.
"What does that mean? When it comes to photographs, a "property" is what I call "quality" without the value judgment attached. And with a much broader range of possibilities. Sharpness is the most highly prized, the most widely accepted, image virtue. But who says an image has to be sharp? Some are, some aren't. Some sharp images look like crap and some sharp images look great. Unsharp images, ditto—sometimes that can look good, sometimes not. It depends.
Sharpness is a property that suits some pictures and not others. Some photographers treat it like a virtue, as if possessing more of it confers ever more glory and honor upon them. Granted, it's somewhat more difficult to make a photograph work when it suffers from unvirtuous properties—you have to be sensitive to the effect those properties have, the way they function visually, and how well they suit a particular picture and its message, instead of being just plain clueless about all those things. And in order to achieve the virtuous properties, your equipment, materials, and techniques need to be capable of it. There is a certain—slight—honor in that, I suppose."
So, I present an image that is almost completely blurred: deliberately unvirtuous in quality, but I think virtuous in properties. At least, I like the final result - but you can decide whether there is honor to be attributed.
As is often the case, the actual taking of the shot was a mix of planning and serendipity; and being an action shot of a bird, the balance was shifted toward the latter. I had set off well before dawn to drive to Huntington Beach, intending to photograph the offshore oil rigs at sunrise before continuing on to the bird reserve at Bolsa Chica. But the parking meters along PCH were blocked off, so I arrived at Bolsa Chica earlier than intended. The light was still dim, requiring a high ISO setting and long shutter speed to get any photos at all. Of necessity I thus decided to try for motion blur photographs of the birds. Happily, a snowy egret obliged by coming in to land in front of dark foliage close by. I was able to pan my camera along its approach, and grabbed a couple of shots of its final approach. Looking through the viewfinder at birds in flight everything is changing too fast to know what shots you are going to get, but reviewing the image afterwards on the camera screen showed one promising frame. |
 |
The image on the left shows the unprocessed photo straight out of the camera.
Good aspects: I particularly liked the sinuous curves and feathering of the blurred wings; the entire bird is in the frame, without clipping wing edges or feet; the dark and featureless background nicely contrasts against the white wings and yellow feet to create an abstract portrait of the egret.
Problems: way too much empty space on then left, but not enough 'breathing room' below and to the right of the bird; although the wings are deliberately blurred, I would have liked the head and eye to be sharper; the vegetation is an unappealing olive green. |
The RAW file was thus a good starting point, but was going to need a good deal of processing to yield the final result I wanted. I began by cropping out the left of the frame, then increased the canvas size along the bottom and right edges and used the context-aware function in Photoshop to fill in the blank areas.
Then it was time to deal with the most troublesome problem, the egret's head. Blurred photos are most effective when something - even a tiny detail - is sharp. Unless you are really talented it otherwise looks as if you messed up the focus rather than making a deliberate choice. In the case of birds (and people) it is the eyes that need to be sharp; and that was not the case here. So I cheated. I had another, sharp, photo of a perched egret from later that morning, so I made a copy of the head and, after many tweaks of levels, sizing and puppet-warping, adjusted it as a new layer aligned on top of the blurred bird. Using a layer mask I then painted through with a transparency brush, keeping about 80% opacity around the eye and beak while fading to complete transparency toward the back of the head and neck.
Finally, some finishing touches. I applied some selective local contrast enhancement to enhance the edges of the wings. And, to remove the background color and some color casts in the wings I desaturated the entire image, masking off only the orange feet and yellow region around the eye. The final result is thus an almost monochrome portrait, giving added emphasis to the small splashes of bright color. |
#44 - October 2012
"Dichotomous Aloe with Crepuscular Rays: Namibia"
|

The main attraction in this month's photo is the light: the crepescular rays ("God-rays") radiating out into the sky. These are formed (Wikipedia reference) 'from a single point in the sky, specifically, where the sun is. The rays, which stream through gaps in clouds or between other objects, are columns of sunlit air separated by darker cloud-shadowed regions.' To make them visible, there must be something in the air (e.g. mist, particulate matter) to diffract and scatter the sunlight. In this case the dramatic rays were created by the thick, hazy layer of dust that was continually present during our recent visit to Namibia. Most of the time I regarded this as a nuiscance, because it rendered sunrises and sunsets very muted and robbed long-distance views of contrast. But, on one day the sky filled with clouds, and the haze redeemed itself by bringing these rays into being.
Crepescular rays are, in fact, parallel to one another (the sun is a long distance away!), but because of perspective appear to diverge from a vanishing point; an effect that becomes more pronounced when the sun is near the horizon. I had been watching the rays through the afternoon as they became more dramatic and colorful with the approach of sunset, and was on the lookout for a suitable forground to supply a terrestrial reference. Not so easily found in the arid Namib desert, but fortunately we were close to an excellent example of an Aloe dichotema (quiver tree) with exposed forking branches forming a nice mathematical series.
In terms of composition I usually like to keep thinks very simple, and that was very easy here because, apart from the one tree, there was absolutely nothing else for miles around in the barren desert to clutter up the photo. I used a 24 mm lens to encompass a wide swath of the sky and got low to the ground to sillhouett the tree agains the light. The only remaining issue was then the framing and positioning of the tree in relation to the rays. Given the radial symmetry of the light the obvious solution was to place everything dead center, though I did take other shots as insurance in case I later preferred an offset composition. [I could have wished for a reflecting pool below the tree to create a perfectly circularly symmetrical image: but as this was the dry season in one of the most arid countries in the world, that was not a possibility!]. Of course, one of the first 'rules' of composition states that you should never place the main subject in the center, but my experience is that it gives extra emphasis when a subject allows me to spectacularly break the rule.
The taking of the photo was straightforward, as the sun was hidden behind the clouds and attenuated by the haze, so there was no need for a graduated ND filter. But, on opening up the RAW file, the imaged looked too 'flat', failing to capture the vivid scene I remembered. Even after some global tweaking to apply an S curve to enhance contrast it still did not 'pop'. As a final step to bring out the rays I duplicated the image, applied a quite strong unsharp mask with wide radius to bring up the local contrast on the background layer, and then selectively painted through transparency on the top layer using a soft brush to bring out the rays without exaggerating the clouds or tree. |
#43 - September 2012
"Deadvlei - photograph or painting?"
|
Any photograph can be analyzed in terms of four essential elements: subject, composition, lighting and post-processing. Their relative importance may vary enormously. Sometimes, as in much journalistic photography, the subject is all-important, and any manipulation after the fact is strictly taboo. Sometimes the lighting is the main point, and the subject is merely secondary. Sometimes a striking alignment or geometry in the composition takes precedence. As for post processing, I would rank that last. I am suspicious of attempts to generate a striking image in Photoshop starting from an unpromising original capture.
Although an outstanding image might capitalize on only one of the above elements, it obviously helps if all four contribute in their different ways. Which brings me to this month's photo of the month, taken during a recent trip to Namibia. The subject is clearly the star attraction, but I hope I have been able to add more by careful choice of lighting conditions, composition and processing.
Subject. The photo is of the Deadvlei ('dead lake') within the Sossusvlei sand dunes of Namibia. This is a clay pan, formed during an earlier time when ephemeral rainwater pools allowed camel thorn trees to grow. When the climate changed, drought hit the area killing the trees, which are estimated to be about 800 years old. The dry conditions have preserved the wood, but it has become blackened by the intense sunlight. Surrounding the pan on three sides are enormous red sand dunes, said to be among the highest in the world. The contrast of black skeletal trees against the red dunes and white clay creates an iconic subject for photographers: easily ranking with the Grand Canyon and Delicate Arch among the 'top-ten' worldwide landscape photo locations, but with the advantage of being remote and less well known.
Composition. The Deadvlei already has an otherworldly feel about it, and my aim was to create an almost abstract image, sufficiently detached from reality that it had the appearance of a painting or Japanese woodblock print more than a photograph. My main artifice was to use a telephoto lens to compress the perspective and photograph at some distance from the trees so that the dune on the far side of the pan towered over the trees, allowing the sky to be excluded from the frame and thus exclude that reference to reality. Then, there was the matter of choosing which particular trees to include. The highest density of trees is found at the northern end of the pan where the hiking trail enters, but I favored the opposite side of the 'forest' where the trees are more sparse and allow for a simplified composition. In particular, there is a small grouping that includes some wonderfully sinuous trunks. By moving around, sideways, toward and back from this group I was able to find an angle where the trees were attractively arranged, and which gave a good separation without their branches appearing to overlap. A final choice was the height from which to take the shot, which determined the ratio of dune- to- pan in the final image. I took several captures, ranging from holding the camera overhead to lying flat on the ground. Among these I chose the composition you see above, taken from normal standing height, which gives a sense of depth and three-dimensionality to the spacing between the trees. I wanted the dune to provide a colored backdrop, but without detail that might distract from the trees. It is not apparent from the photo, but the dune lies quite a long way behind the trees. Thus, by using a relatively wide aperture (f 5.6) I could slightly blur the dune (and the plants growing on it - the small yellow dots), while keeping all the trees in good focus.
Lighting. The orange/red of the dune is a major part of the image, contrasting with the slightly blue-white of the clay pan. The intense color comes from both the red sand itself, and the warm sunlight shortly after dawn. The sun rose behind a large dune immediately at the back of me, casting a shadow line that descended down the opposite dune. I took the photo just before the shadow reached the clay pan, when the distant dune was evenly illuminated, but the pan remained in shadow. This took some logistical planning, because the entrance gate to the National Park opens only about one half hour before sunrise, and it is 60 km from the gate to Deadvlei, with the last section involving a 4wd drive in low-ratio first gear through deep sand followed bya hike across the dunes. On our first morning I missed the best light having got lost on the walk in, but was able to scout for locations and on the second day was in place with a little time to spare.
Post-processing. The image already looked great straight out of the camera, but I applied a couple of subtle tweaks to provide further enhancement. The first was to deal with the texture of the clay pan, which has a blocky, hexagonal appearance, rather like the Racetrack of Death valley. I felt this was somewhat distracting, and introduced a mundane reality into my intended abstraction. After experimenting with selective Gaussian blurs, I discovered a better treatment by applying a negative 'clarity' setting in Adobe Camera Raw. This gave a mistlike appearance over the pan, but needed careful adjustment to avoid creating obvious halos around the trees. Secondly, reflected light from the dune was warming the pan, whereas I had hoped for a marked color contrast between the dune and shadowed areas illuminated by the blue sky. The final photo is thus a blend of two image files, separately processes in Camera Raw to tweak down the color temperature and add 'negative clarity' in the lower half of the frame.
Full disclosure. I cannot claim my phototo be an entirely original concept. Before leaving for Namibia I had seen this photo of Deadvlei taken by Frans Lanting for National Geographic - indeed, it was a major inspiration for me wanting to visit the location. Although I had not remembered the details of his image, I was interested to find after comparing our photos that we had both chosen the same group of trees. However, we have different interpretations. Frans closely cropped his image so that the outer branches are amputated, whereas I wanted to show the trees in their entirety and emphasize the dune towering above them; and he chose a lower perspective, giving a more two-dimensional appearance. You may also notice that my photo is left-right flipped. I thought this gave a more pleasing 'flow' to the composition; but it is a manipulation that would likely be impermissible for National Geographic!). |
#42 - August 2012
"Bristlecone pine by reflected light"
|

Bristlecone pines are the oldest living organisms on the planet, and can be found in abundance at altitudes around 10,000-11,000 ft in the White Mountains of California. Indeed, the White Mountain Bristlecone Pine Forest includes both the largest and the oldest individual living trees. Photographically, however, it is the dead trees that hold most attraction for me. The exposed branches are gnarled and twisted as if expressing the millennia of harsh conditions the trees have endured. Moreover, the wood weathers to a beautiful orange sheen, and it is often the color and texture of the trees that I find myself trying to capture, rather than just the shapes.
This point was brought home a few years ago, when I met up with a husband and wife team photographingt Patriarch Grove, at the very upper altitude limit of the bristlecones. The husband was photographing on medium format black and white film, and was interested only in shapes. He got to sleep late in the mornings, and was out mid-day wandering around at leisure to scout out the best compositions. In contrast, his wife was up well before dawn, scurrying in below freezing temperatures to make best use of the golden light before and just after sunrise.
Sunrise is, in fact, usually better than sunset at Patriarch Grove, because the setting sun is obscured by a high hillside early in the evening before it takes on much color. Given a clear sky to the east, on the other hand, sunrise brings a deep red glow to the trees for just a fleetingly brief few minutes. But, there are still some possibilities in the evening, and on a recent visit I was primarily on the lookout for the quality of light on the bristlecones. with their shapes only a secondary factor. Direct sunlight was uninteresting, but sunlight reflected from the ground onto the shadowed side of the trees created a much warmer glow. This is a standard technique for photographing in narrow slot canyons, where the aim is to avoid direct light at all costs, and frame the picture so the only illumination comes from light reflected and difused from the canyon walls. Not so easy, though, for isolated trees on an open landscape.
To create this month's photo I took advantage of the shaded face of the facing hillside as a background, and gradually worked my way up the opposite slope, staying just above the advancing shadow line while moving from side to side to intersect interesting trees along the way. The bristlecone pictured above had both an interesting and compex form, and was catching beautiful light reflected from the hillside above and behind me. Although dim as compared to direct illumination, by getting very low to the ground I could frame the tree to stand out well in contrast to the deep shade of the opposite hillside and the already fading sunlight on the near foreground. Technically, the only problem was that I was shooting stright into the sun, which was only just above the top of the frame. For once, I remembered to first remove the (flare-inducing) polarizer that usually lives on my lens, and used my hand to shade the lens from the sun. That, together with the remarkably good flare-resistance of the Canon 24-105L lens gave an excellent, contrasty final result. |
#41 - July 2012
"Compare and contrast: Rock pinnacles 5000 miles apart"
|
 The 'Four Kings' : Devil's Garden,
Escalante/Grand Staircase National Monument, Utah |

Old Man of Storr :
Isle of Skye, Scotland
|
Two photos for the price of one this month. Both have groups of rock pinnacles as the main subject; both have plants as foreground subjects; and both are examples of extreme near-far compositions. They were captured within a month of each other, but at locations nearly 5000 miles apart. As exam questions during my undergraduate studies in Britain often used to begin "Compare and contrast...".
First, a similarity. Both photographs have interesting landscape features as their main subject. But, a photograph that contains only a single subject is likely to be dull unless that subject is truly exceptional. Something in addition is needed to makean interesting image- for example, spectacular lighting, a complementary foreground/background, or striking composition. At the times I took these shots the lighting was merely meh (as our youngest son would put it), and the skies were either utterly boring (left) or just passable (right). So, I went looking for foreground interest, deliberately seeking small, attractive subjects that would allow an extreme near-far effect. This is something of a contrivance: you don't normally go around looking at things with your head on the ground and eyes a few inches from spiky cacti! But, with care to avoid a totally artificial appearance, the effect can be dramatic. A technical problem then is achieving a sufficient depth of field to encompass the scene. Here I used a tilt/shift lens; specifically the Canon 17 mm TS-E L lens. The foreground plants are just a few inches from the camera. With a conventional lens on a DSLR camera it would not have been possible to maintain sharp focus to the much more distant rocks, but by tilting the lens down relative to the sensor I could obtain a gradient of focal plane from bottom to top of the image to match the progression of the scene into the distance.
The photo on the left is of an iconic group of sandstone pillars in the Devil's Garden, located in Utah's Grand Staircase/Escalante National Monument. I call them the Four Kings; though they may have some other 'official' name. I had photographed the Kings before at sunrise, when they take on a beautiful orange glow, and on a recent trip to hike the Escalante canyons stopped off to scout out other possible compositions. A group of flowering prickly pear cacti stood out as a nice foreground, but as the mid-day light was harsh I resolved to come back after my hikes for a sunrise shot. On returning, I found one error in my planning. The flowers had closed up during the night. But, it still seemed worthwhile to continue. I mounted the camera (5D mkIII) on my tripod, lowered almost to ground level, and used the lcd display to roughly frame the composition. Setting up to use a tilt/shift lens is a fiddly business. Adjustments include the tilt angle, shift, focus and camera angle; all of which interact in non-intuitive ways with one another. Using a magnified live-view image to check focus made it much easier, but I was glad I had allowed plenty of time before the sun was due to rise. The first rays of sunlight then revealed a second error in my planning. My previous visits had been in winter, when the rising sun casts an even light on all four Kings. But now it was late May, the sun was much further to the north, and the leftmost two monarchs were in shadow. Nothing much I could do about that, and even a return visit in January would be to no avail as the cacti would not be in bloom! To make the best of it, I brought up the shadow detail on the rocks in post-processing to reduce the contrast differential. In the end, not quite the photograph I had planned for, but one I am happy with.
The photo on the right is of another iconic group of rocks; the Old Man of Storr and his pointy neighbors on the Isle of Skye. I had got out of bed at 3:00am hoping to photograph the rocks sillhouetted against the sunrise (which comes early that far north), but after much scurrying up and down steep, muddy paths failed to find a good angle. Before heading back to our b&b for a full Scottish breakfast (with local black pudding), I hiked round to the other side of the Old Man to a viewpoint that placed him before the distant Sound and hills of Raasay. A cloudy sky provided a chiaroscuro effect contrasting with fleeting light from the now well-risen sun. But something more was still needed to make a good image, so I scrambled up the steep hillside looking for a suitable foreground. A boulder covered in orange lichen fit the bill, and as a bonus, there was a plant with vivid green leaves and purple flowers just in front. Again, an extreme near-far composition, and I had my tilt/shift lens with me to accomplish this. What I did not have was my tripod; lost, along with all our other luggage, when our flight to the UK was delayed, cancelled, rescheduled and delayed yet again. (Thank you, American Airlines!) So, it had to be a hand-held shot. Not easy, lying on my tummy trying not to roll down a steep slope of wet grass, adjusting the little knobs on the lens while keeping the camera level and the composition composed.Most problematically, there was no way I could use live-view to critically set the focus, so I took my best guess through the viewfinder, and hoped that a small aperture (f18) to maximize depth of field would accommodate any errors. Also, I took many shots, slightly varying focus and position, so I could later select the optimal image.
In conclusion, neither photograph is quite what I had envisaged when setting out for these locations, but you have to go with the flow and accept what you are given. Both images have some failings, and individually I am not sure I would have chosen either as a 'photo of the month'. However, together they make a nice pair, with remarkable similarities yet contrasting two utterly different enviroments of desert and wet moorland. |
#40 - June 2012
"Transit of Venus"
|

Not a single photo this month, but a montage of several shots of the transit of Venus that was visible over California on June 5th, 2012. As usual, you can click on the image above to download a high-res file of the complete montage.
The transit was a once-in-a-lifetime opportunity to capture some unique images (I had missed the 2004 transit); but also presented some problems, both aesthetic and technical.
Aesthetic concerns arose because the transit is basically a small black dot moving across a bigger white circle - as in the top set of images. Deeply humbling because the little black dot is a planet nearly the size of the Earth, but as a photograph, not much to look at. With just regular photographic gear there is no way I could compete with the spectacular multi-spectral images captured by the NASA orbiting solar observatory, so I was looking for a way to introduce a terrestrial element into my photos to make them more interesting.
During most of the visible transit the sun was high in the sky, well above any distant features on the horizon. But, airborne objects were fair game. Conveniently, the hill behind my home provides a clear view to the northwest out over the ocean, and the track of the sun nicely crossed the flight path of airplanes departing from John Wayne (SNA) airport. So, I mounted my tripod, set the camera to high-speed motor drive and patiently waited, repositioning every few minutes as the sun dropped down, hoping for a coincident intersection. I had anticipated some difficulty as I was only a couple of miles from the flightpath, and at that distance the commercial jetliners spanned almost the full width of the sun. But luck was with me, and a small two-prop plane transited the sun at exactly the right incidence to complement Venus. The middle-left image above is a 'straight' shot; absolutely no Photoshop trickery! A little later, a commercial jet intersected the sun. This time the alignment was not so good. The plane crossed near the top of the sun, and I did not get a single capture with the entire body of the plane sillhouetted. The final image is thus a composite of two shots, respectively capturing the front and back sections of the jet - and I moved it lower down to create a more attractive composition. A bit of a cheat, but I like the result for the way the sunlight catches the jet exhaust.
At the very end, the sun dipped into a bank of haze (smog?), and took on a nice color as well as distorting into interesting shapes. The lower photo above was my very last view of the transit, heralded by a flock of birds.
Technically, difficulties arose because the sun is very bright, and Venus is a very small dot. To counteract the first problem, I stacked photographic 6 and 8 stop ND filters for a total attenuation of nearly 10,000x (OD 4). With the sun high in the sky, that gave an exposure of 1/2000s at f16, ISO 200. A fast shutter speed to minimize an blurring from camera shake, with an aperture large enough that diffraction would not be a problem. Toward sunset the sun dimmed appreciably, and I progressively removed the filters, ending with the sunset photo above with no filters and an exposure of 1/800s at f8. That means that the sun at the horizon was only about 1/80,000 times as bright as when high in the sky at 3:00pm. A testament, perhaps, to air quality in the L.A. basin! Althogh numerous websites warn that ND filters may not adequately block UV and IR light, I had no problems with either the camera or direct viewing through the eyepiece. To resolve the small dot of Venus I combined my longest lens (100-400 zoom) with a 1.4x teleconvertor on a camera (Canon 7D) with a 1.6x crop factor, for an equivalent (35 mm) focal length of 900mm. With that magnification the sun moved remarkably quickly through the frame, and needed frequent realignment to keep it centered. |
 |
The coincidence of experiencing an annular solar eclipse (i.e. a transit of the moon) and a transit of Venus within just a couple of weeks of one another got me thinking about how long one might have to wait to experience a dual transit: perhaphs to capture a 'Disney-like' photo like that at the left (which, of course, is a Photoshop composite). I am sure NASA can calculate the exact date of the next such occurrence, but as a rough estimate I started by assuming that transits of Venus occur roughly every 60 years. Solar eclipses (of any type) are much more frequent; about two per year if you are willing to travel anywhere on earth to view them. Given that an eclipse lasts around 2 hours, that means the probability of an eclipse at any given instant of time = 2hr/180 days, about 1/2000. Thus, a dual transit might be expected about every 60 x 2000 = 120,000 years. This calculation assumes that transits occur randomly and independently, whereas the orbits of the moon and Venus are highly periodic, but the number should be in the right ballpark.
120,000 years is a long time in human terms, but surprisingly brief in astronomical/geological time. There must have been many simultaneous transits throughout the history of the earth. Perhaps the dinosaurs saw one; but they probably did not take much notice.... year |
#39 - May 2012
"Dinosaur Egg"
Bisti Badlands, New Mexico
|

An effective photograph should convey more than merely a depiction of what is in front of the camera. A distinction between a photograph and a mere snapshot is that the former should give a sense of emotion; what it felt like to be at that place at that time. One way to help achieve this is by use of black and white imagery. By throwing away color information the image is immediately abstracted - it becomes more of an interpretation and creation of the photographer than a realistic depiction of a scene. And, following from that the photographer can indulge in tonal mani[pulations that would appear artificial and exaggerated in a color image.
This, at least, was my intention in the photo above. The scene is of a remote area known as the 'egg factory', deep within the Bisti/De-Na-Zin wilderness in northern New Mexico. The wilderness is an extensive badlands of eroded, often exceedingly muddy clay soils, which is beloved by photographers on account of its fantastical rock formations, but likely holds little attraction for other visitors. Indeed I have usually found myself to be the only person there.
The rocks and clay are are a dull brown, so most photographs of Bisti are taken right at sunrise or sunset when they pick up a nice warmth, contrasting with blue/magenta shaded in shadow area. However, on my most recent visit the light was not cooperating, and thin hazy clouds masked the sun right down to the horizon. Together with a biting cold wind and the two mile, trail-less hike back to my car, the gloomy light added to a sense of foreboding. To capture this feeling, I selected a feature that truly resembles a giant, dessicated reptilian egg, lined it up with the position of the sun, and waited until a thinning in the cloud let a little sunshine penetrate to cast faint shadows. A three stop graduated ND flter tamed the bright sky, and I deliberately set this a little below the horizon line, so that the distant landscape would be darkened to give a sense of mystery. The resulting image as captured was still rather 'flat', so I applied some local tonal adjustments to brighten and sharpen the ripples on the 'egg', and to accentuate the backlighting from the sun. |
#38 - April 2012
"One good tern ...."
Forster's tern courtship display : Bolsa Chica Wetlands
|

| For the last few weeks, the Bolsa Chica wetlands have been taken over by terns. They are attractive and lively creatures, but are not the easiest birds to photograph given their relatively small size and highly erratic flight patterns. I do most of my bird photography hand-holding a 100-400 lens, to be able to more easily track birds in flight. However, on a previous weekend I had noticed that Forster's terns often landed to perch on a wooden post close enough to the pedestrian bridge to frame a tight photo, and ended up spending much of the time focused on the post waiting for something to happen. The problem, though, was that I needed to keep looking through the viewfinder to keep the post in the frame, and thus could not anticipate when a bird might be approaching until the last minute when it entered the frame. On my next visit the marine layer was socked in with light was too dim and grey for effective flight photography, so I decided to try a different ploy and set up the camera on a tripod, pre-focused on the top of the post. Then, I could stand next to the camera holding a remote release ready to fire off a burst of shots when I anticipated a bird might be approaching to land. Two hours of waiting were rewarded with a one-second sequence as a Forster's tern approached his mate, who was already perched on the post, to feed her a tasty smelt in a courting ritual. |
#37 - March 2012
"Apocalyptic cloud: Iceland"
|

The landscape features in Iceland - waterfalls, glaciers, larva fields etc - are usually the main attraction. But sometimes the sky becomes the subject, and the land plays a secondary role in the composition. Although situated far north, the Gulf Stream ensures a relatively temperate climate. But westerlies bring a continuous succcession of storms directly across from Greenland, so the weather is highly changeable and unpredicable, with strong winds common. There is a saying that if you don't like the weather in Iceland, just wait a few hours. That is great for photographers. "Bad weather makes for good photographs". Many times I have found that it is the sky that is the main subject of my images: brooding black clouds sometimes appear almost to explode apart; shafts of sunlight diagonal down through small breaks; vivid double rainbows contrast agains grey sky; the underside of clouds glowing red from the low-angled sun.
This month's photo was taken as we drove over a back road crossing the mountains of the Reykjanes peninsula on the way to the gastronomic Christmas buffet at the Blue Lagoon. A small sign pointing along a snow covered dirt road pointed to an abandoned church site. Wandering round the fenced site failed to reveal any sign of a church, excepting for a lone cross partly buried in a snowdrift. Nothing much to photograph from a landscape perspective, but the rapidly forming cloud formation was something else. I waded through the snow to line up with the cross, taking a circuitous path to avoid footprints that might mar the composition I envisaged. Once in place, it became apparent that the cloud was too vast to fit in a single frame even with a 10 mm lens, so the final photography is a composite of two shots, for the ground and the sky, using a 30s exposure to blur the cloud movement and enhance the otherworldly feel.
'Apocolyptic' seemed a good title for the forbidding squall, but in fact it was quite innocuous, and heralded the clearing of a storm, not its onset. By the time we reached the Blue Lagoon the sky was clear, and we bathed under the stars in the geothermal waters before a sumptuous dinner. |
#36 - January/February 2012
"Jokelbergs on the beach"
|

My New Year resolution to keep up to date with the Photo of the Month has come to naught - already it is the middle of February, and I am only now posting the first photo of 2012. This is not for want of new images to feature, as a trip to Iceland before Christmas was both memorably enjoyable and photographically productive.
Thus, my first selection for the year is from perhaps THE top photographic location in Iceland; Jokulsarlon. The main feature here is a lagoon, into which icebergs calve from a glacier descending from the Vatnajokull ice cap. The bergs drift around in the lagoon, slowly melting until the pass out to sea along a narrow channel. But, they are not done then, as the tides and waves may wash them back up onto the black sand beach. Photographically, the jewel-like bergs contrasted with the jet black volcanic sand make a subject at least as intriguing as the lagoon itself.
Many photographs of the Jokulsarlon beach feature long-exposure images of bergs at the edge of the sea, with receding surf blurred into dream-like patterns. That was not to be on our December visit. Firstly, an account by Varina Patel described her disastrous experience just a month earlier, when a rogue wave brought her down, resulting in a damaged knee and destroyed camera and lens. Secondly, all the bergs had in any case been washed up to the high water mark, and the surf (which appeared innocuous) was breaking far down the beach. Thus, on this visit I had to be content with creating less dynamic images. In consolation, the winter sun rose and set well to the south and out to sea, rather than behind the mountains as in summer. Daylight lasts only a few hours during the depths of the Icelandic winter, but the 'golden hour' stretches throughout this time as the sun barely picks itself up above the horizon. If the clouds cooperate, this can make for spectacular skies. I was lucky on this occasion, when a clearing in the south west allowed the late afternoon (3:00pm!) sun to shine through and catch drifting clouds overhead. To capture the photograph above I selected my widest (10 mm) lens and positioned the tripod low down and close to a grouping of attractive bergs. Even with that lens, I could not encompass enough of the sky, and the final image is a blend of two shots, with exposures set independently for sky and foreground. In both cases I used a 6 stop ND filter to give a 30s shutter speed to blur the surf and the drifting clouds. |
# 35 - December 2011
"Juniper and monolith at Joshua Tree "
and the problems of photographing an icon
|
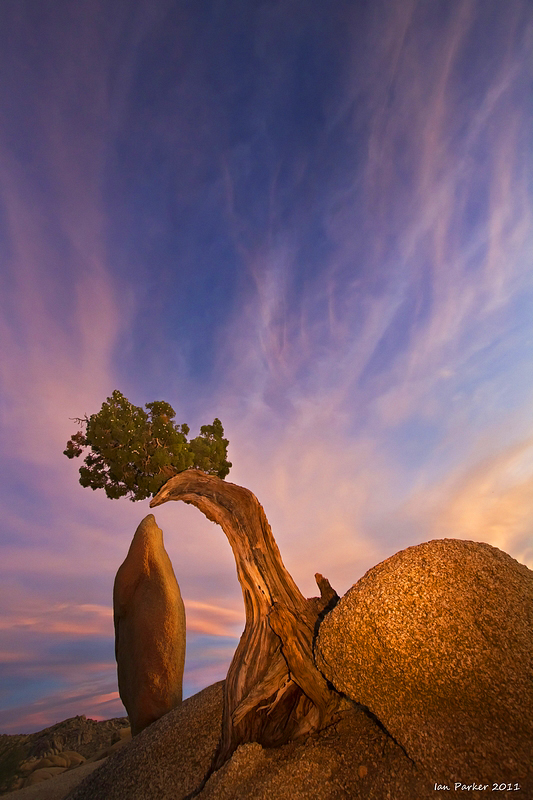
I find Joshua Tree National Park to be a difficult place to photograph. Which is strange, because it is the location of several of my favorite photographs; including the banner photo of the Evanescent Light Galleries. Much of the difficulty likely arises because Joshua Tree has few 'iconic' features - the likes of Delicate Arch, Horseshoe Bend, Half Dome, et al - where all you need do is plant your tripod to get a striking trophy shot. Instead, there are endless rocks and Joshua trees, individually appealing but none which stand out above the others. You need to work harder to create a memorable image, or have the luck to be there during superb light.
One exception, in a small way, is the happy confluence of a twisted juniper tree and a pointy rock monolith above campsites at Jumbo Rocks. They make an attractive composition, and by getting right down on the ground with a wide lens the tree can be made to frame the much larger rock. But, the scene has been photographed countless times and that raises another problem. How to create a different vision of a clichéd icon?
On an earlier visit I had photographed with nice sunset light just catching the tree and rock, and used a long exposure to blur the cloud movement to add some drama (photo at right). Not bad, but I thought I might be able to do better, and was happy when Eric proposed an overnight trip to try to photograph by moonlight. |
|
Well, that idea did not work out well. After a 3:00am departure from home we arrived at Jumbo Rocks to a completely overcast sky, with just glimmers of the moon showing in entirely the wrong place. The clouds remained for much of the day, but began to clear toward evening, raising hopes of good sunset light. There is only one small spot where the tree and rock line up, so at first Eric and I played tag carefully setting up and removing our tripods, giving each of us a few minutes to shoot as the light changed. The best conditions came several minutes after sunset, as wispy clouds to the South behind the rock lit up. No time then for tripods, as the light wasfleeting. We took turns lying flat on the ground, shooting hand-held and hopefully keeping the horizon level while holding steady enough to get sharp shots. By this time the rock and tree were shaded, forming sillhouettes against the sky. We were both therefore using fill-flash to add light; in my case using a warming filter in front of the flash. We had the thought of using two flashes to separately illuminate the tree and rock, but Eric is a Nikon guy and I use Canon, and the two won't talk to one another to synchronize. So, I cheated a little after the fact, and in the final image above blended in an earlier shot when the rock was still gently lit by the setting sun.
In terms of composition, I had zoomed out to the widest setting (10 mm) on my lens to encompass as much of the sky as possible, and that had the result of also including the rounded boulder next to the tree, adding an extra element and nicely contrasting shape. Fortuitously (meaning I did not plan or even notice notice when shooting, but only after viewing later on the screen), the clouds gave the appearance of emerging, mist-like, from the foliage and trunk of the ree. In post-processing it was obvious that the filtered flash light had imparted too much red onto the tree in the original RAW conversion, so I toned that down, while correspondingly boosting saturation on the sky and applying some selective sharpening to accentuate the clouds. Overall, I was striving to create a slightly surreal impression, not simply what I observed at the time - even with my head on the ground! |
#34 - November 2011
"Portrait of two snowy egrets "
and thoughts on a new camera focus mode
|

Egrets are easy birds to photograph. They are white, elegant and big! An additional attraction at Bolsa Chica is that they are well acclimated to people, so you can approach quite closely without them becoming spooked. Mostly, I lke to capture birds in action - flying, landing feeding... But sometimes a simple, 'posed' portrait is nice.
The photo above resulted when two snowy egrets landed together on the railing of the bridge, and perched companionably side by side. It was a quiet morning in terms of human visitation, and the birds allowed me to slowly advance and get a well-framed composition with a 400 mm zoom backed out to around 300mm. The sun was low in the morning sky, catching the birds with a warm light slightly diffused by thin clouds, while the far bank of the wetlands remained in shadow. I positioned myself to get a fairly high angle, so as to contrast the bright plumage against a dark and non-distracting background. To further blur the background, and to keep a fast shutter speed as I was shooting hand-held, I kept the aperture wide open. But, that then introduced the complication that the depth of field was too shallow to have both birds in sharp focus at the same time.
A way around this problem is to take two shots at different focus settings, and blend a final image in Photoshop or Helicon Focus. Easy enough with a static subject and a tripod-mounted camera, but more difficult with live subjects and hand-holding. My technique is to first frame the composition as I finally want it, and select a single focus point that lines up with one subject (the nearest bird in this instance). Then I move the camera to reposition that focus point on the second subject (the more distant bird), half-press and hold the shutter button to lock focus, move back to the original, desired composition and capture a shot. Next, I fully release the shutter button, briefly half-press to lock focus now on the second subject and then fully press to take the second shot. Provided that the birds have not moved in the interval between the two shots, and that I held the camera steady, all should be well when merging the two images.
But, for this approach to work, it it is best that the interval between the shots be as short as possible, and doing this manually it is difficult to get much faster than a second or so. Instead, it seems that it should be possible to automate a 'through-focus' function in the camera, analogous to the way in which it is possible to obtain a bracketed sequence of three different exposure settings in very short time using the motor drive function. For example, after enabling a custom menu function, a half-press on the shutter button would cause the camera to determine the nearest and furthest focal distances among the array of focus points (or on a previously selected subset of points). A full-press would then expose two shots in quick succession at these two focus settings - or even a sequence of shots at intermediate focal distances, interpolated taking into account the aperture settting. As far as I can see, current generation DSLR cameras already have all the requisite hardware. Implementing such a through-focus function should merely be a matter of firmware programming. |
#33 - October 2011
"Proxy Falls, Oregon "
|
Waterfalls are one of the main attractions of Oregon for a photographer, but I found it surprisingly difficult to capture good shots of most of the ones I visited. A large part of the problem arises because most falls in the State seem to be tucked at the bottom of very steep, densely forested gorges. Although good trails lead to the falls, there is usually just a single viewpoint, looking directly across to the fall, and often partly obscured by tree branches. Robust fences, steep, loose and muddy terrain and impenetrable vegetation all conspire to make it almost impossible to seek out any composition beyond the most obvious.
I thus found it a refreshing change to discover that the gorge leading to Proxy falls opened out into a wide, boulder filled bowl, providing - at the expense of cold wet feet - many photographic possibilities. And, by good fortune, I had timed my hike so that the falls were still in shade, but shafts of sunlight were starting to pass through trees on the far rim. The falls cascade over a wide area of basalt shelves, but my favorite images came from close up details, abstracting just small parts of the cascade.
Photographing at the base of waterfalls presents a couple of practical difficulties. One is the constant spray, which can quickly deposit drops on the front of the lens. I use a protective filter, and carry several dry cloths to wipe this immediately before taking a shot. The problem, though, is compounded by the need to use fairly long shutter speeds, of the order of a second or so, to blur the water flow and create an attractive 'angel hair' appearance. Drops may catch on the lens during event this time, and make fuzzy spots on the image. My solution is to take several exposures, cleaning the filter between each. With luck, at least one shot will be clear; and if not, two images can be blended to mask out blured areas.
In the photo above, I composed using a sharply delineated fern growing on moss-covered rocks to provide a foreground to the whispy water flow, and sunshafts playing at the top of the frame gave both a color contrast to the vivid green and an orthogonal directional contrast to the diagonals of the rock and main cascade of the water. I took duplicate shots, focused for foreground and background, anticipating the need to do a focus blend to get sufficient depth of field. But, on reviewing the images on the computer screen, it turned out that a single shot at f13 worked just fine. |
#32 - August/September 2011
"Mistbow: Bandon Harbor "
|


In photography it is often - if not always - the light that is more important than the subject. The images above are a good example; a relatively mundane scene of old wooden pilings in a harbor transformed by unusual lighting.
I was in the small town of Bandon on the Oregon coast to photograph the famous sea stacks at sunset; but that was hours away. More to kill time than with any hope of getting good shots I went down to the end of the harbor, where there is a view of the lighthouse across on the far jetty. Well, that would be more correctly phrased as 'there should be a view', as the entire scene was enveloped in thick mist, with visibility down to a few yards. However, the mist soon started to thin to a 20 foot band above the water, with blue sky above, and the sun immediately behind me broke through to refract as an aetherial mistbow. The apparition did not last long, but I had time to frame several compositions using the sharply defined pilings as foreground to the softly outlined light. I like both of the two images above, but perhaps prefer the more complex composition of the second. The slanting pilings form a tangent leading the eye to the arc of the mistbow, and their angularity counterbalances and contrasts withthe light bow.
A curious feature of mistbows and fogbows is that they appear completely white, entirely unlike the spectrum of colors revealed by rainbows where sunlight refracts from raindrops or from the spray of waterfalls. Wikipedia confirmed my intuition that the lack of color results because of the exceedingly small size of the suspended water droplets, and according to a NASA explanation "The fogbow's lack of colors is caused by the smaller water drops ... so small that the wavelength of light becomes important. Diffraction smears out colors that would be created by larger rainbow water drops." Further, a Google search pulled up a charming letter on the subject of mistbows published in 1888 in the journal Nature. (As a research neuroscientist, I can only wish that it was as easy nowadays to get a letter published in Nature!)
" IN a letter to the Times of January 12, Prof. Tyndall calls attention to a white
mist bow, which he has seen on one or two occasions, and mentions its rarity of
occurrence. It may therefore be of interest to record that I witnessed a similar
phenomenon on January 9 last. My point of view was an elevated band-stand at the
head of Weymouth Pier; the time 11 a.m. The air, as on the occasions mentioned
by Prof. Tyndall, swarmed with minute aqueous particles, i.e. was foggy, and on looking away from the sun, which was shining weakly, I saw a well-defined white bow cast upon the mist. The bow appeared to be about 60 feet distant. My point of view being high, a full semicircle was visible. It was, as may be imagined, a beautiful and graceful object. "
The lack of color in the mistbow prompted me to prsent the final images in black and white. The only real color in the shots (see the thumbnail of an original capture below) was the blue sky, and I felt this detracted from the image rather than adding anything, with the color contrast drawing attention away from the main subjects. I processed the images using a simulated orange filter to darken the sky; providing a greater contrast to the mistbow and distancing the scene from reality to enhance the eerie mood that I felt at the time.

|
#31 - June/July 2011
"Anvil Cloud: Salar de Uyuni "
|
I have been dilatory the last couple of months in updating photos - so here, on the last day of July, is a new image to play catch-up for both June and July. Hopefully, soon to be followed by August's Photo of the Month...
The photo above was again taken during our trip to Bolivia. The undoubted highlight of the tour was the Salar de Uyuni. The Salar is the largest salt flat in the world, encompassing some 40,000 square
miles: rather similar to Badwater Basin of Death Valley, but following a large
dose of steroids and elevation to an altitude higher than the summit of
Telescope Peak. Our visit was timed to coincide with the end of the rainy
season, when the Salar is flooded to a depth of a few inches, creating a huge
'mirror of the sky'. We stayed for three days, based at a remarkably luxurious
hotel built of salt, and venturing onto the Salar each day for sunrise and
sunset shots. As it transpired, our first evening was the best. Arriving at the hotel, the sky was largely cloud-covered, with thunderstorms over the mountains to the West. At first I wasst not optimistic about photo possibilities, thinking that the clouds would block the sunset. But, as we drove out on land cruisers onto the flooded Salar, realized that the sun would set clear of the clouds and, indeed, that the spectacular sky and its reflections were likely to yield the most spectacular images.
Photographing on the innundated Salar presented some practical problems. Although the water is only ankle deep, it was very salty and very cold, necessitating a pair of Wellington boots. And, it seemed best to decide on exactly what gear to take before leaving the land cruiser, as dropping a spare lens was not to be contemplated. Given the expansive clouds, I set of with a single camera, ultrawide zoom and tripod, wading slowly toward a promising group of salt cones well clear of other photographers and their tripods.
The giant anvil-shaped cloud, together with the color contrast of blue sky and lower clouds catching the setting sun make this one of my favorites out of many other shots taken that evening. The only improvement I could have wished for was still water to provide sharp reflections, but a stiff breeze was raising ripples. To make the best of this, I used a strong ND filter to give an exposure time of several seconds, blurring out the ripples and giving an aetherial feel to the reflections. |
#30 - May 2011
"Flamingo feather in the Altiplano "
|
In a recent post, Guy Tal wrote" Your images should provide viewers with an experience they could not have had, and would never have seen or felt, if it were not for your sharing it with them. If someone could have produced an identical image to yours by simply being there at the same time, it also cannot be considered art (as in the product of an artist rather than a craftsman)... No matter how beautiful or powerful the feats of nature you photograph, if all you do is record them using photographic media without introducing your own sensibilities into the final product, they are not art! "
That pretty well sums up what I try to achieve in my photography – though, of course, whether I succeed with even a few images is another matter. This month's photo is one example where I deliberately set out to create an image that might convey more than a simple snapshot of a spectacular scene.
We were traveling on a photo safari with Joe van Os, and stopped by a lagoon high in the Altiplano on our first day in Bolivia. The obvious subjects were the hundreds of flamingos feeding in the shallow waters, set against the backdrop of snow-capped volcanoes. But, the birds remained far out in the lagoon. Too far for even a long telephoto lens; and in any case the world already has an ample supply of stock flamingo photographs. My usual approach when arriving at a new location, particularly those which do not seem immediately promising, is simply to wander around slowly, scanning for interesting features and compositions. In this instance, my meanderings turned up a lone feather, a discovery which prompted the idea of using it as a metaphor to convey the immense scale of the landscape in which the flamingos live.
Super-wide lenses are good at conveying scale, but only if a close foreground object is included in the frame. Thus, I carefully floated the feather in the shallow water, and lay flat out in the gunky mud of the shoreline to position the front of the lens just a few inches from the feather and almost touching the water. Two separate shots were clearly going to be needed to compose the final image – both to focus separately on the feather and distant background, and to encompass a sufficient span of the dramatic sky, which I envisaged as a complementary part of the composition.
In capturing the initial shots and subsequently blending and post-processing them to create the final image I had several themes in mind: to communicate an immense scale of distance from the feather, through the distant birds, to the mountains and overarching sky; to contrast the blue sky with the complementary ochre of the lake bed, and the red tip of the feather; and to create a visual pun between the down of the feather and the soft feathery clouds.
But, a picture should not need written explanation. You can decide whether the image succeeds on its own merits, and whether it meets Guy Tal's criteria. |
#29 - April 2011
"Flamingo take-off "
|

This image was captured during a 'Photo Safari' to Chile and Bolivia, led by Joe van Os. One of our first locations was Lake Chaxa, a shallow saline lake in the Atacama desert fed by water from the Andes. The lake itself is not so attractive, but it is home to three of the World's six species of flamingos. Our visit began with an early morning breakfast at 5:30 am, so as to drive to the lake and be first in line at the gate to the National Park when it opened at 7:00am. I had presumed that this was simply to get us in position during the golden light around dawn. But, it turned out that there was a further motive...
Flamingos are quite skittish, and even at Chaxa where the birds are well accustomed to people, they need to be approached with care, otherwise they fly off, never to return that day. As Joe instructed us, the trick is to stay together in a tight group, advance a little way, stay in position for a few minutes, then keep repeating this process. We eventually got to a good distance and set up tripods ready to photograph. At this point another tour group arrived and, posessing only point-and-shoot cameras rather than our collection of long telephoto-equipped dslrs, naturally wanted to get closer. However, the fact that we were physically blocking the narrow path, together with Joe's strong moral influence, deterred them for a while, allowing us to get good shots of the feeding birds. Eventually, though, the level of frustration grew too great, and one of the newcomers set off on his own toward the flamingos, making them visibly restless.
That turned out to be the opportunity for my favorite shot of the morning. There was plenty of advance warning allowing me to focus on the birds and prepare for them to take flight. My object was to try to capture the dynamics of flamingo takeoff. As with other large birds, this takes a lot of energy; long legs frantically striding to gain speed, and wings flapping to gain lift. Feeling that a fast shutter speed would merely freeze this action, I selected a slow speed of only 1/60 s, and panned the camera as a pair of flamingos took off, shooting a sequence of captures at 8 fps until the camera buffer filled. Only one of the resulting 15 frames came out well - but one is enough. The bird's heads were decently sharp, but with legs and wings blurred by their motion, and with the background similarly smeared into a uniform abstraction by the camera movement as well as by the narrow depth of field. Just a couple of Photoshop manipulations remained to produce the final image. The two flamingos were a little too far apart in the original shot, so I moved them closer together. And, a salt bar introduced a distracting background streak at the very top of the frame, so I cloned that out, replacing it with an extension of the pastel reflections of the lightening sky.
|
#28 - January/February 2011
"Bixby Bridge "
|
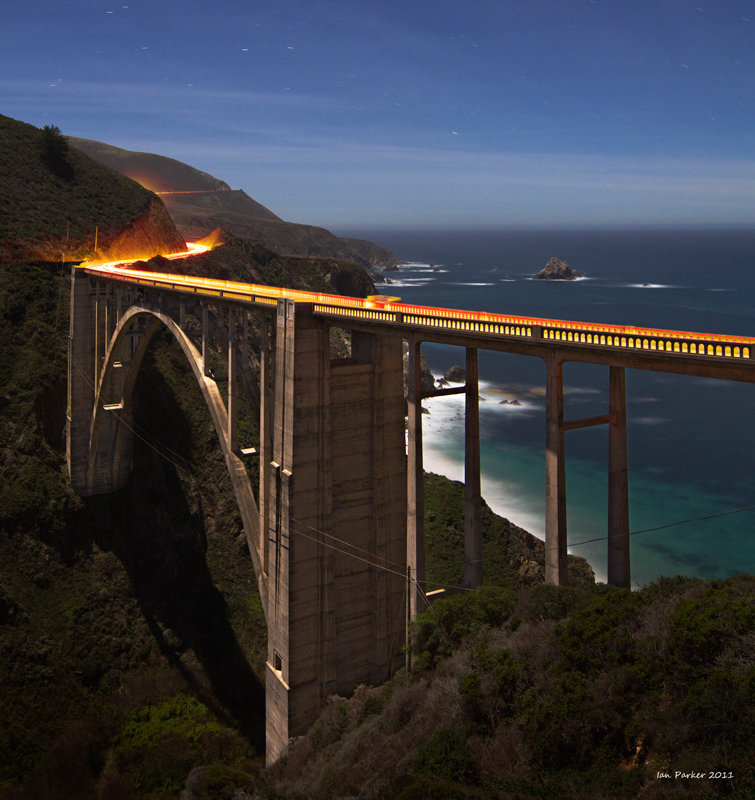
One of my usual places to camp (for free!) while visiting the Big Sur area lies a few miles along the old coast road, high up in the Los Padres National Forest. The road starts next to Bixby Bridge, so I often stop to photography this iconic feature of the Pacific Coast Highway when returning in the evening. This year I had a particular excuse, having received a new Canon 17 mm tilt/shift lens as a Christmas present. (Thank you, Anne!). One of the functions of the lensallows 'perspective control'; by shifting the lens it is possible to keep l features such as the bridge pillars truly vertical in the photo, without the convergence that would otherwise result from tilting the camera to include the full depth of the canyon.
Dusk is a good time to photograph the bridge, as the lights of passing cars can be used to highlight the roadway. This is a matter of timing, and some luck, to balance the fading daylight with the tracings of the car tail lights. It typically takes about 45 seconds for cars to cross the bridge and disappear out of sight around the following corner, so that sets a minimum exposure time. Then, it is a matter of opening the shutter as a southbound car enters the bridge, and hoping that headlights from a northbound vehicle do not wash out the shot. Not so easy, as most traffic is heading north at night toward the campgrounds and hotels of Big Sur and Carmel. However, my recent visit coincided with a full moon, giving unlimited time to wait without worrying about rapidly changing light. The final image above is a blended composite of three exposures: one with the lens tilted up and exposed for the sky; a second tilted down and exposed for the bridge, without traffic; and a final shot timed for two southbound cars crossing the bridge in convoy. |
#27 - December 2010
"Canyon Dweller"
A praying mantis in the depths of Antelope Canyon
|

Antelope Canyon is a narrow, deep and sinuous slot canyon located on the Navajo reservation near Page, Arizona. It has become an icon among photographers because of the way sunlight bounces from the sandstone walls to create a wonderful yellow-red glow and abstract patterns. Given some care with exposure settings (and a day when the canyon is not packed with tourists!) it is easy to come back with a collection of great phorographs. The trouble is that the canyon long ago became a photographic cliche. The first time you see an Antelope canyon photo it is stunning; but after a while all the images, even those taken by the photographic greats, start to look rather alike. I can only envy the pioneers, including Galen Rowell and Alain Briot, who first 'discovered' the canyon and could present their work to a fresh and unjaded audience. Antelope canyon thus falls into a category together with other icons such as Delicate Arch and the view from Deadhorse Point which are fun to photograph, and a necessary addition to the repertoire of a photographer of the American Southwest, but from where you don't expect to achieve more than the classic 'trophy' shot.
That said, the canyon (lower Antelope in particular) is a fun place to explore, and offers a welcome opportunity to have a subject where the lighting is good for photography in the middle of the day. I had stopped off to break the journey while driving from Zion to Cedar Mesa, and spent a few hours wandering up and down the canyon looking for the 'glow'. I was getting cold (this was mid-November) and starting to think about mole enchiladas in Page, but rather than climbing out the set of ladders leading from the bottom of the canyon decided to take a last trip up through the canyon. One section had rather nice light, and as I squeezed behind a boulder to get a wider view I discovered that I had company - a startlingly green preying mantis. I suspect he did not want to be there, and had been blown down by strong winds the previous day. But, there he was, sitting on the boulder, presenting a remarkable foreground for a unique shot of the canyon.
How to get the photo? That presented several, interrelated problems. It's dark in the depths of the canyon, requiring exposures of around a second that really need a tripod for sharp results. But, space was tight - not enough to set up my tripod properly so I ended up with just two legs jammed against the boulder. Next, a preying manis is small, the canyon is big,, and I had only a wide-angle lens which needed to be within just a few inches of the green guy to get the proportions and composition right. That raised the issue of depth of field; how to get both insect and canyon in sharp focus?. I could not stop down the lens very far while keeping a reasonable exposure time, and I suspect that even the smallest aperture would not have sufficed. So, my ploy was to take two exposures, focused separately for the preying mantis and the canyon, aiming to blend them later in Photoshop. This is not cheating! - just a means to overcome a technical limitation. For those who might suspect the final result as being no more than a Photoshop artifice, HERE is a link to a straight conversion of the original RAW file, and HERE is one of many failures. Last problem, my subject would not keep still. Although I used a mild fill-flash to highlight the green guy, I wanted him mostly illuminated by the natural light filtering down from the sky overhead to avoid that unnatural 'caught in the headlights' apearance. Digital to the rescue. I took about 50 shots, and ended up with two where he stayed still enough to come out acceptably sharp. Luckily, one of those two also gave a nice composition, wth the green guy appearing to admire the view of the canyon. He was probably getting fed up with me by then. He kept scurrying over the top of the boulder, but I had found I could get him to back up to where I wanted by putting my hand an inch ahead of him. At the end I wondered about trying to take him back out to a more hospitable above-ground environment, but decided not given the difficulty of safely transporting him up narrow ladders while also carrying camera and tripod. I hope he may have found some insects to snack on down there...
Update, September 2011. This photo was used as the cover artwork by the Journal of the European Molecular Biology Organization
|
#26 - November 2010
"Fleeting Dawn Color over Racetrack Valley"
|

Racetrack Valley is not the easiest of places to get to. Even the most straightforward approach involves nearly 30 miles of driving along an extremely washboarded dirt road - and just getting to the start of the road 50 mile drive north through Death Valley from the visitor center at Furnace Creek. The reward is the other-worldly experience of the racetrack itself ; a vast, completely flat lakebed, dotted with the famous moving rocks. It is not uncommon to find a few photographers scouting for the most appealing rock trails, but they all tend to disappear as soon as the sun falls behind the mountains and casts the racetrack into shadow, heading back for the long drive to the comfort of a distant motel. Better to camp out though and shiver through a cold night, as the best photographs are to be found at the edges of dusk and dawn light.
This month's photo was taken before sunrise, during a fleeting minute for which whispy clouds lit up in red striations. Fleeting indeed, but I was lucky to be close to a good rock, and quickly lined up a shot so that its 'snail trail' nicely mirrored the curve of the clouds. The shot was taken looking due south, at right angles to the sun, so a polarizing filter greatly enhanced the contrast between clouds and sky. An undesirable side-effect in a wide-angle view like this is that, because the polarizing effect varies with angle, the sky comes out very uneven. That was mitigated here since the clouds filled most of the frame, and some post-processing in Photoshop finally evened out the blue tones. A separate problem was the extreme contrast range between the lakebed and the brightly lit sky. A graduated ND filter would have worked well given the perfectly linear horizon, but there was no time to retrieve a filter before the light faded. Again, Photoshop to the rescue. |
# 25 - October 2010
"Towers of the Virgin at dawn - two interpretations"
|
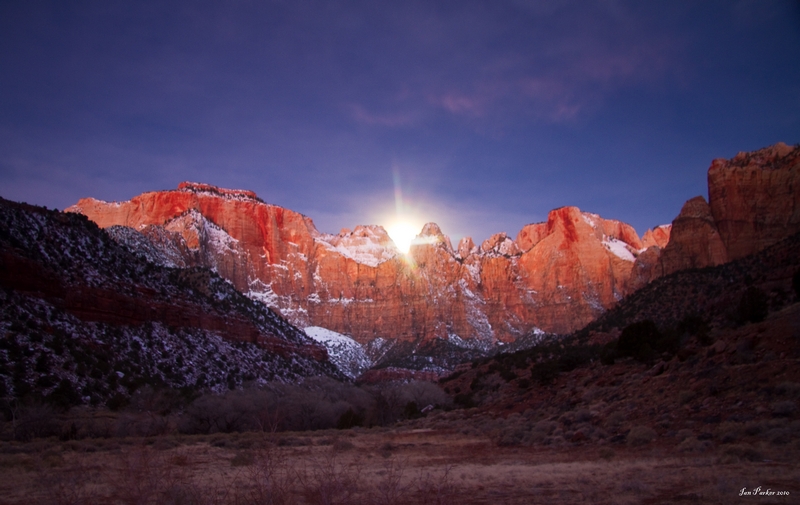
The Towers of the Virgin are one of the iconic photo locations in Zion National Park. These red sandstone rock walls face almost due East, and light up beautifully with the rising sun. The classic view is from the back porch of the Zion museum, and it is usual to find a small cluster of tripods lined up ther before daybreak each morning. But, there are two problems with this viewpoint. First, everyone takes their photo from here, so how do you create anything different from hundreds of other images? Second, the foreground is downright uninteresting. Two low ridges stay in shadow for a long time after sunrise and make a nice frame for the Towers, but below them is only an open scrubby area, without much in the way of discernable, yet alone interesting features. The two photos this month are my attempts to come up with something a little different.
The image above was captured before sunrise on a very cold early January morning. A big storm had cleared only the previous day, leaving a nice dusting of snow on the rock. I try to get to sunrise locations well ahead of the time when the sun will actually crest the horizon. That allows time to scout for good compositions. And, as was the case here, the light was actually better before than after sunrise. A red glow in the East provided a nice, subtle and diffused light, coloring the sandsone a deep red without creating harsh shadows. Better still, the date was close to a full moon, which was setting directly behind the Towers. When I first arrived the moon was still quite high, and in my initial shots was far too bright in comparison to the rest of the scene. However, as it approached the horizon the moonlight began to be dimmed by some low, hazy cloud, and of course the rocks brightened with the approach of sunrise. Once you have the camera, it costs nothing to take photos, so I took shots every minute or so,while moving the tripod to line up the setting moon with a notch between two of the Towers. My favorite was when the moon had just started to be eclipsed by the rocks, taming its brightness and producing a nice 'moonstar' effect with the lens stopped down.
I like this image; but still there is the problem of the nondescript foreground... |

Thus, a return visit to the same location for another sunrise. This time in September - so no need for gloves, shivering, and warming the camera battery agains my stomach to keep it alive. But, what to do about the foreground? I left the usual huddle of photographers by the museum, and set out to explore. No success at first, just scrubby brush everywhere, and a cluster of park service buildings among the trees at the far end of the open area. Then I came across a small burn area, and in the middle a single cluster of datura; striking (but toxic!) flowers that bloom in the evening and wilt with the first rays of the rising sun. A foreground subject at last, suggesting a composition with the white flowers contrasting with the yellow/red of the Towers catching the early sunlight. But, not so easy to set up, representing an extreme case of a near-far composition with rather small foreground subject and a very big background subject. I wanted the flowers to really fill the frame, and collapsed the tripod flat on the ground, with a super-wide (10 mm) lens just a few inches back from the closest flower. Next, how to deal with two technical problems? There was no way to get enough depth of field to have both flowers and rocks in sharp focus, even with such a wide lens fully stopped down. And in any case a strong breeze was blowing the flowers vigorously, so a wide aperture would be needed to get a fast enough shutter speed to freeze the motion. My solution was to make multiple exposures, focusing first on the Towers, and then on the flowers. That also allowed use of different exposure settings to better capture the wide contrast range between the sunlit rock and the shaded foreground. I took many shots of the flowers, to increase the chance of a sharp capture between wind gusts, and to have some choice among slightly different positions of the flowers. Compositions with wide lenses like this change enormously with very slight movements, and it was hard to judge what might work best when the camera was only six inches above the dirt. The photo above was created in Photoshop by blending a background shot with a shot of the flowers when they lined up nicely with the outline of the trees in middle distance. I also like the beetle on the closest flower, though I had not noticed it at the time. In retrospect, my only regret is that I should have taken an additional exposure focussed to blend in the middle distance, which is confusingly blurred in contrast to the sharp foregrouns and background.
Click on either image above to download a full resolution file.
|
#24 - September 2010
"Perseid meteor shower"
A first attempt at astrophotography
|
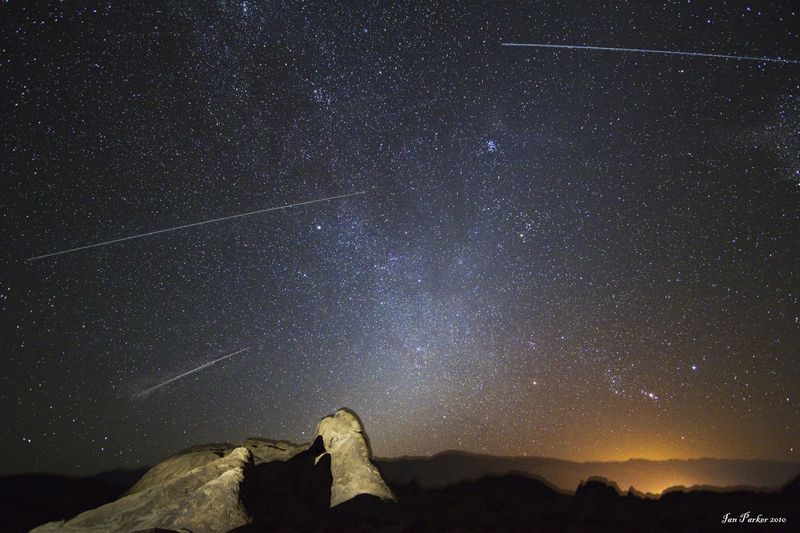
Gadgets are fun! Although the essence of photography is aesthetic, it is always nice to have a new lens or camera body to play with and provide motivation to get out and experiment . However, my new toy this summer was not an item of camera gear per se, but rather a motorized equatorial mount intended for astronomy.
The idea came from viewing a spectacular image of the Milky Way as a backdrop behind a bristlecone pine tree, taken by Tony Rowell and exhibited in the Mountain Light gallery in Bishop. What made this photo especially remarkable were the sharply-focused bright stars, the intensity of the stellar clouds in the galaxy, and a 3-D effect that made the tree appear to 'pop-out' of the frame. Click HERE to see for yourself. After some pondering, I figured out that all of these effects came about because the photo had been exposed while the camera tracked the movement of the stars (or, more correctly, tracked against the Earth's rotation against the stationary stellar background). Capturing photos of the stars with a fixed camera otherwise presents a dilemma. Short exposures don't capture much light, but exposures longer than a few seconds or tens of seconds blurr out the stairs, giving an unattractive appearance as elongated streaks (but very long exposures can be used to generate nice star trails). Although you can try increasing the ISO setting to shorten the exposure, this gives more noise; and using a wide aperture (small f#) lens introduces the problem that the depth of field may not be enough to have stars and foreground in focus together. Tracking the stars solves these difficulties, allowing exposures of many minutes at reasonable ISO and aperture settings. And, as a by-product, it gives that 3-D effect. Foreground objects appear as a black sillhouette while exposing for the stars, and move across the image as the camera tracks so that the trailing edge appears to cast a graded shadow onto the sky. After stopping the tracking motor, the foreground can then be 'painted-in' using a hand-held flashlight, and the shadow provides the 3-D illusion.
So, I had to get my own tracking mount and try this for myself. After some research on the web, I ordered an Orion Astro View equatorial mount and single axis motor drive; a mid-size amateur system chosen because it looked strong and stable, but not realizing how heavy it is! At least I could remove the weights intended to counterbalance a heavy telescope. The only other modification was to machine an adapter to remount the ballhead from my regular tripod so it would be level at the latitude of Californmia.
Fortuitously, the mount was ready just in time for the Perseid metor shower, which this year peaked close to a new moon, ensuring dark skies. My chosen location was the Alabama Hills, a site with very low light pollution and where zero cloud cover was almost guaranteed. Moreover, I anticipated that the Mobius rock arch would provide a striking and unique foreground. But, I was not alone in that thought. Shortly after arriving together with my son Robin, who was helpfully acting as assistant and sherpa to carry all the gear, another set of flashlights approached out of the dark, revealing Tony Rowell himself together with his sherpa. A nice coincidence indeed, and a good opportunity to get some tips from the expert. The problem however, was that there was not really enough space for two tripods at the perfect vantage point, and since Tony was there to make a time-lapse movie for the noble purpose of promoting designation of the Alamama Hills as a National Monument I left the arch to him after a couple of shots, and wandered off into the rocks to try to catch meteors.
Setting up for astrophotography is quite a job, given the pitch darkness and hand-numbing cold at 2:00 am. Align the mount exactly with the North star, and then don't trip over the tripod; set the interval timer to the correct exposure; check ISO and bulb settings on the camera; make sure the lens is still focused at infinity when there is nothing bright enough to focus on; frame the shot when it is too dark to see anything through the viewfinder; check the drive motor is set for the Northern hemisphere, turn it on, remember to turn off at the end of the exposure; then take a few more shots light-painting the foreground for subsequent blending with the star shot in PhotoShop. I ended up with a lot of duds, but imagine I will get the hang of it with practice.
I count the photo above as a good success for a first try, the result of numerous 5 minute exposures while shivering for about 2 hours. The frequency of meteors was quite low - most shots captured none, and I never got more than one meteor trail per exposure. Thus, the final image is a cheat, blending 3 long-exposure shots each with a single meteor, together with a final short exposure to paint-in the foreground rocks. The orange glow comes from the lights of Lone Pine, |
#23 - August 2010
"Moonset over the Sand Tufa"
|
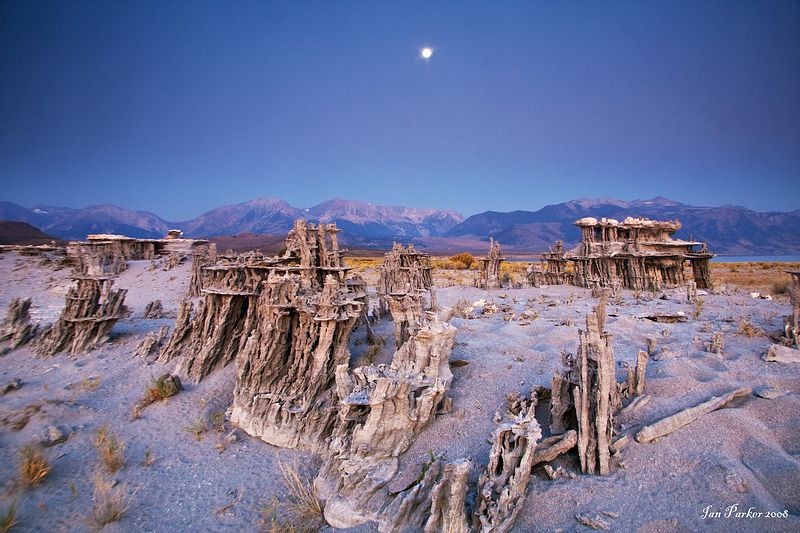
Sometimes it is possible to create a landscape photograph which, athough entirely 'straight' and unmanipulated, looks as if it was shot nowhere on Earth. The first requirement is, of course, to find somewhere that is truly unusual. Among the most surreal locations I know of are the sand tufa of Mono Lake. Unlike the better known carbonate tufa formations in and around the water-line of the lake, the sand tufa are small structures, only two or three feet high, but are sculpted into fantastically delicate filligree patterns. Owing to their delicacy, the sand tufa are not widely advertised, and are infequently visited; I happened upon the scene above only by chance explorations.
The second requirement to evoke an 'other-worldly' atmospher is to shoot under unusual lighting. Indeed, the natural grey color of the sand tufa appears rather mundane under full sunlight. But, catch them at the edge of light, an hour or so before sunrise and it is a different matter. The saturated blue of the (almost dark) sky casts a diffuse overhead illumination, while the faint orange glow in the east preceeding the rising sun casts a sbbtle, contrasting front light. This visit was also timed around a full moon, providing a highlight in an otherwise uniformly blue sky.
I often like breaking the 'rules' of composition, and here placed the moon directly in the center of the frame - also framing the tufa so as to align as a V pattern centered on the moon. My aim was to create a symmetry that would draw the eye into the picture, but with enough variation and asymmetry in the formations themselves to maintain interest. To emphasize the tufa I used a wide-angle lens, getting close, and setting the tripod as low as possible in a small depression. The composition is quite critical, as movements of the camera by a only a few inches make a big difference. Working on soft sand also introduced the complication that I needed to anticipate in advance where I might want to photograph, so as to avoid leaving footprints that would quite destroy the otherworldly affect.
Click on the image above to download a full resolution original.
|
#22 - June/July 2010
"The Raptor Stalks at Night"
|
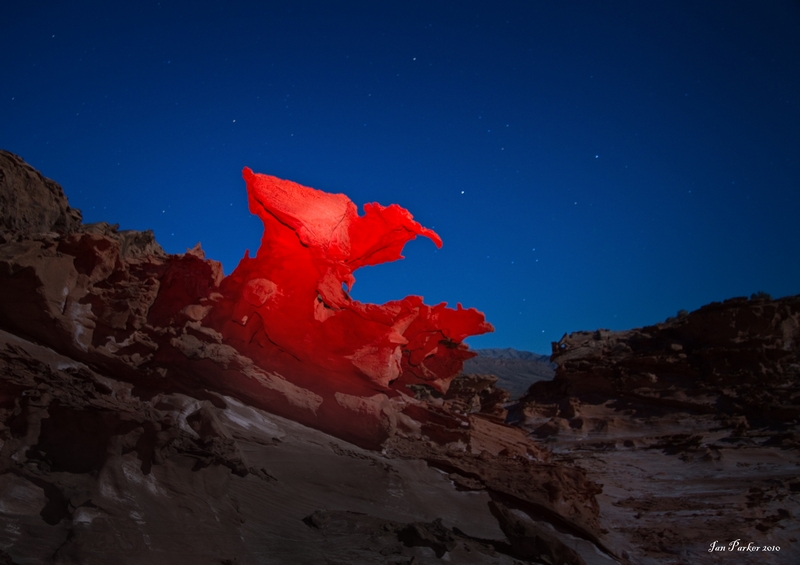
Light-painting provides a way to highlight only those elements of a photo that you want and, to a limited extent, introduces to landscape photography the freedom of lighting available to studio photographers. I tend not to use flash guns very much: with a camera-mounted flash the light is harsh and directional, and the complications of setting up remote flash units and diffusers are off-putting. Instead, I find the simpler means of 'painting-in' a subject using a hand-held flashlightto be more satisfying and to allow greater freedom. You can open the camera shutter, then run off to the side to provide directional lighting; stay in one place to create sharp shadows and edges,; or move around to blurr the apparent light source to obtain a more diffuse illumination. And, with a tightly focused beam, you can selectively highlight just those parts of the composition that you want, and with filters even paint different subjects in different colors.
Of course, all this must necessarily be done at night, when the light is dim enough to allow long exposure times, and the light from a flashlight is sufficient to overwhelm any ambient light. However, a totally dark, black sky is generally not attractive, so light-painting is best done during fairly brief windows of time a couple of hours after sunset or before sunrise when sufficient blue remains in the sky to balance the artificial light and provide an exposure time sufficiently long (about 30 s is good) to enable some control of the light-painting. Setting the exposure is a matter of taking a camera reading for the ambient light, and then trial and error to adjust the artificial flashlighgt illumination. This technique must have been difficult to impossible to apply before the advent of digital cameras, but now it is just a matter of looking at what you have captured on the screen and adjusting accordingly. Light-painting works best with subjects at moderate distances up to around 100 ft from the camera, as beyond that the available light from flashlights falls off too much. 'Million candlepower' lamps can extend the range, but my experience is that their battery life is severely restricting. My usual sources are a halogen 'dive lamp' intended for scuba diving which gives a powerful, broad, and fairly warm beam, or a high-powered LED Maglight that emits an amazingly collimated, intense white/blue beam. Colored gel filters taped on the flashlight allow the color temperature of the light to be adjusted or, with some loss in intensity, to provide a provide a pure monochromatic illumination.
The photo above captures one of the fantastical rock formations at Little Finland. The image was taken about two hours after sunset, on a night with a full moon to give a background fill when color remained in the sky (visible to the camera, but not by eye at that time). A red gel on the flashlight gives a striking color contrast with te sky, and turns a natural (if unique) landscape into an almost abstract composition. |
#21 - May 2010
"Lindisfarne Castle and pebble beach"
|

Lindisfarne (Holy Island) is a small island off the East coast of Northumbria in the North of England. At least it is an island some of the time, being connected to the mainland by a causeway that becomes flooded as the tide rises. Thus, it is necessary to schedule day trips to the island with some care, and in summer it becomes overrun with tourists when the tide is out. The opportunity of an overnight stay provided a very different perspective. A tranquility settles over the island, and it becomes possible to feel some of its ancient history dating back to the founding of the priory in 635AD and the role of Lindisfarne in spreading the Christian message throughout the world.
As well as the Priory, Lindisfarne boasts a castle, not as ancient, originally built around 1550 during wars between the English and Scots and subsequently much remodelled. It is spectacularly situated on an isolated whin stone hill, the highest point on the island, making a most obvious subject for photography. My wife and I were staying for one night in a small B&B in the village, and the previous afternoon I had reconnoitered the island looking for promising vantage points. My favorite for a potential morning shot was a point on the coast where a pebble beach curved gracefully toward the East, leading the eye naturally to the distant castle. Early the next morning I tiptoed quietly out and through the village well before dawn, under a largely overcast sky, but broken by thin gaps holding promise of color during sunrise.
The tide was well out, exposing a wide swath of attracive brightly hued pebbles. I set my tripod low and fitted a super-wide (10 mm EFS) lens for a near-far effect to exaggerate the closest rocks and composed so the line of the beach formed a diagonal from the corner of the frame toward the castle. I set a small lens aperture to both achieve a wide depth of field and give a slow shutter speed to blurr the small waves, and waited patiently (but cold) for the light. Soon some nice red streaks appeared in the sky, while the sea and pebbles remained largely illuminated by diffuse grey/blue light from the clouds. An extreme range of intensities between the sky and the beach needed taming with a 3-stop graduated ND filter held horizontal along the horizon line, which is why the castle appears dark and almost a pure sillhouette. However, even though aritficial, I think the dramatic contrast with the bright sheen on the sea adds to the mood of the photo.
Click on the image above to download a full resolution file
|
#20 - April 2010
"Northbound Tracks"
Star circles and moving rocks at Racetrack Valley
|
_star%20%20circles_symmetric%20crop%20tweak.jpg)
Nightime provides some interesting opportunities for photography (see HERE); even when there appears to be no light! Digital cameras have improved greatly in terms of sensitivity and low noise over the past few years, so it is now possible to take photos even by starlight. Hovever, this does require long exposures, and a problem is that the stars move (or, rather, the Earth rotates) surprisingly quickly, so that images of stars start to become smeared out with exposures exceeding a few tens of seconds. On the other hand, that can be turned to interesting effect by capturing images over very long (hours) times, so that the stars trace out their own trails.
The end result depends upon which direction you are looking. To the East or West, near vertical streaks result. Due North is more interesting as (in the Northern Hemisphere), stars then appear to circle around the North star, Polaris. This is a neat effect, but of course one 'star circle' photo is going to look exactly like another. The trick then is to contrast the stars with some terrestrial foreground feature. My aim in the image above was to combine the mystery of the heavens with the mystery of the moving rocks of Racetrack Valley. The rocks are mysterious in that they leave trails behind on the flat lakebed, but nobody has ever seen them move! Thus, star trails and rock trails in the same photograph.
Before sunset I used my GPS to locate the direction of true North, and then went looking around the lakebed to find some rocks with trails heading in that direction. There are numerous moving rocks near the southern end of the playa, and I was pleased to find a pair heading at just the right bearing. While still light I set up the camera with a super-wide lens pre focused to infinity, and took a shot that I could later use to blend the foreground into the final image. Then came the waiting. The moon was almost new and would not rise until near dawn, but even so several hours passed before the sky was dark and the stars shone bright and crisp. No need to be uncomfortable though, as I had taken a sleeping bag and mat, drink and dinner. Indeed, it was quite an experience to lie out with the moving rocks as silent companions and watch the stars emerge. Around 10 pm I started the remote interval timer that controled the camera and, my job done, settled down to sleep.
Some technical notes: Getting the star trails to trace out long arcs needs an exposure of several hours. This is one instance where film cameras still have an advantage over digital. The shutter on older, 'mechanical' cameras can be left open indefinitely without running down the battery! Also, the reciprocity characteristic of film actually becomes an advantage as compared to the perfect linearity of digital sensors. . Background light in the sky registers only faintly on film during a long exposure, whereas the continual movement of the stars means that their trails are not subject to reciprocity failure. This is good, as the night sky is not as dark as it appears, and even in the remote backcontry of Death Valley light pollution from distant cities still intrudes. A solution for both problems with digital cameras is to take several successive exposures of medium duration, rather than a single much longer exposure. Then, if the battery fails, all is not lost; camera noise, which accumulates with length of exposure, is minimized; and there is less build-up of background light. The photo above is a composite of nine 20 minute exposures set using an interval timer, which I later combined as layers in PhotoShop using the 'lighten' blending function, and finally merged with a separate shot of the foreground rocks.
Click on the image above to download a full-resolution original in a new window. |
#19 - March 2010
"Rainbow on Upper Yosemite Falls"
|

The easy way to spot a lion in a Kenyann game reserves is to look for a cluster of Land Rovers. The easy way to look for good photographic subjects in Yosemite Valley is to look for a cluster of tripods.
Thus it was that I spotted a huddle of tripods, and accompanying photographers under the forest to the side of the road near Sentinel bridge early in the morning of Presidents' day. While driving it was not easy to tell where all the expensive white lenses were trained, but it seemed worth stopping to find out. The answer revealed itself through a clearing in the trees: the angle of the rising sun was just right to create a rainbow in the spray at the base of Upper Yosemite Falls. Well known, I am sure, to locals, but something of which I had not previously been aware. A thin cloud attenuated the intensity of the color that day, but forearmed, I went back the next morning, to find a clear sky, more saturated colors, and a blessed lack of other photographers.
The time window for capturing this phenomenon is only brief, since the rainbow rapidly moves downward with the rising sun and is lostas it sinks below the spray. Also, the waterfall needs to be in direct line with the photographer and the sun, and it seems that February is the optimal time of year to achieve the best alignment of altitude and azimuth of the sun, together with a good flow of water down the fall.
The refracted light from a rainbow is fully polarized, so I used a polarizing filter to enhance contrast and saturation by selectively darkening the rocks and trees (conversely, the rainbow can be completely obliterated by misalignment of the polarizer!). A tree with interesting profile provided a nice sense of scale and foreground interest, and I moved around a little to vary the relative positions of tree and rainbow. Other major variables were the changing ways in which the water cascaded down the fall and the patterns of spay kicked up by the wind. It is hard to predict the results, so I prefocussed a composition, locked up the mirror, and captured numerous shots triggered by cable release while looking directly at the fall, not through the camera. I also played with varying the shutter speed, to either capture the texture of the falling sheets of water, or to blurr the motion. The photo above is my favorite from among more than 100 shots captured that morning: for those interested in the technical details, Canon 7D, ISO 100, 100-400 at about 300mm, 1/125 s.
As always, click on the image above to download a full-resolution original file. |
#18 - February 2010
"Pfeiffer Arch Sunset"
|

Pfeiffer Beach (not to be confused with Julia Pfeiffer Burns State Park) is located in the heart of Big Sur and is one of the favorite beaches in all of Big Sur. To help keep it secluded there are no signs from the main highway, and getting there involves an extremely acute turn onto a mostly single-track road that meanders for a few miles to the trailhead. The big attraction for photographers is a rock formation just beyond the low-water line that is pierced by a square-cut arch. In winter the setting sun aligns to cast a shaft of light through the arch highlighting, according to the tide,the breaking surf or the sandy beach. Even at the right time of year, much depends upon the particular conditions of weather and sea. The Big Sur coast is notorious for dense fog, and that is what I encountered on a previous visit (see Photo of the Month for November 2008. However, on a subsequent visit in November 2009 the sky was clear, a heavy surf was running, and sunset coincided with high tide.
Indeed, the waves were breaking high up on the beach, leaving only a narrow strip of sand for the several assembled photographers to set up their tripods and jostle for the perfect alignment. My favorite image above was selected from among about 200 frames shot as the sun slowly sank toward the horizon and the beam of sunrays gradually lengthened and became more intensely red. As each wave hit the rock it would completely fill the arch, transiently blocking the sun, but then leaving a fine mist that became beautifully backlit. I experimented with various angles either side and directly in front of the arch, but ended preferring an oblique view to provide a diagonal composition, and ensure that the glowing mist in the arch was not burned out by direct sunlight. Shutter speed was another important variable, and I tried settings ranging from a few hundredths of a second to a few seconds, not knowing in advance what might produce the best result. Viewed afterwards, the slow speeds gave the most pleasing effect, capturing the motion in the waves and giving an 'angel hair' effect on the water draining down the rock. However, having smashed my strong ND filter, the slowest speed my camera would accomplish even with the lens fully stopped down and the lowest ISO setting was about 2 seconds. That had the problem that an individual exposure captured the sunlit wave crests for only a short distance as they rode up the beach, leaving large areas of uniform, dark water. Thus, the final image is a composite, created by blending three successive exposures of a single wave.
Click HERE to download a full resolution file of the image, and HERE to view other images of the Pfeiffer Arch. |
#17 - January 2010
"Zion Christmas Tree"
|

Commentary on the first photo for 2010 begins in exactly the same way as for the last photo of the month in 2009: "Sometimes you go to a location with a definite image in mind, and come away with something entirely different."
In this instance I was driving with my family through Zion National Park on our way home after a Christmas vacation intended to visit Anasazi ruins on Cedar Mesa had been thwarted by unusually deep snowfall and strorm. Of course, having given up, the weather then turned beautiful, and I was on the lookout for subjects to salvage some photos from the trip. There had been a fresh snowfall the previous night, and the deep red rock faces of Zion were attractively patterned with snow. Given the harsh sunlight of mid afternoon, shots of shadowed faces catching reflected light seemed the best bet, and we stopped just after passing through a narrow canyon section on the eastern plateau leading to the tunnels down to the main canyon. I got some images, which turned out not to be very special. But, walking back to the car I spotted some trees far away on a high ridge that were intensely backlit by the sun hitting ice rime and snow on the trunk and branches. By good chance, the angle of the sun was such that the shadow of the ridge exactly intersected with the road , and by walking up and down to get the correct alignment it was possible to hide the direct sunlight behind the ridge while preserving the backlight on the most photogenic tree.
The photo was taken using a 100-400 mm zoom at 400mm, handheld as the tree was so bright as to allow a 1/2000 shutter speed at f8. Very little post-processing - the image is pretty much as captured by the camera. But, as with any photograph, it is impossible to convey the intensity of the original scene.
Click HERE to download a full resolution (7 MB) image in a new browser window/tab.
|
#16 - December 2009
"Polychromatic cloud and sand dune"
|

Sometimes you go to a location with a definite image in mind, and come away with something entirely different.
The publication earlier this year of a new and extensive guide to hiking in the backcountry of Western Death Valley National Park provided some interesting reading over the summer, while waiting for temperatures in the desert to drop enough to make actual exploration comfortable. Among the many remote locations described in the book, first on my list to visit was the 'Hidden Dunes', located behind a mountain range on the West side of Eureka Valley. I had made several trips to photograph the better known dunes at the South end of the valley, but hidden dunes appealed particularly as it seemed likely that they would be little visited, and that the ridges would be unmarred by the usual trails of footsteps.
Getting there required a two mile drive over a rough and inconspicuous 4wd trail, ending at a dry well by the wilderness boundary. Then a three mile hike across the desert floor and a gradually rising alluvial fan toward a low notch in the mountains, above which the top of a dune was just visible. Passing through the notch is an 'Alice through the looking glass' experience, as the vast open panorama of the valley changes to a close-up view of a dune rising steeply ahead. Once on top, the dunes spread out for a mile or more, along a ridge line paralelling the mountains.
My initial aim was to photograph shortly before sunset, when the low angle of the light would accentuate ripple patterns on the sand. But, the Hidden Dunes are not good for that, as high mountains to the West throw them into shadow early, before the angle and color of the sun are optimal. Instead, the hike in, and the hike back out in darkness navigating by GPS, were salvaged by the sky. A storm was forecast to arrive later that evening, and was preceded by wonderful cloud formations. This month's photo shows a 'polychromatic' cloud, refracting multiple colors from the sun. The effect arises from hexagonal ice crystals in high cirrus clouds, and gives rise to related photogenic phenomena including rainbow clouds and sundogs.
And, yes... The colors in the cloud are real, not a Photoshop artifice.
|
Here is another image of the cloud taken a few minutes earlier. It began as a single formation, then split into four before dissipating.
I am not sure which of these two images I prefer. The shape is more interesting in the 'quadruple' cloud; but the colors are not as intense.
Click either of the images to download a full-res 18 Mpixel original. |
|
#15 - November 2009
"Grand Canyon lightning"
The consolation shot
|
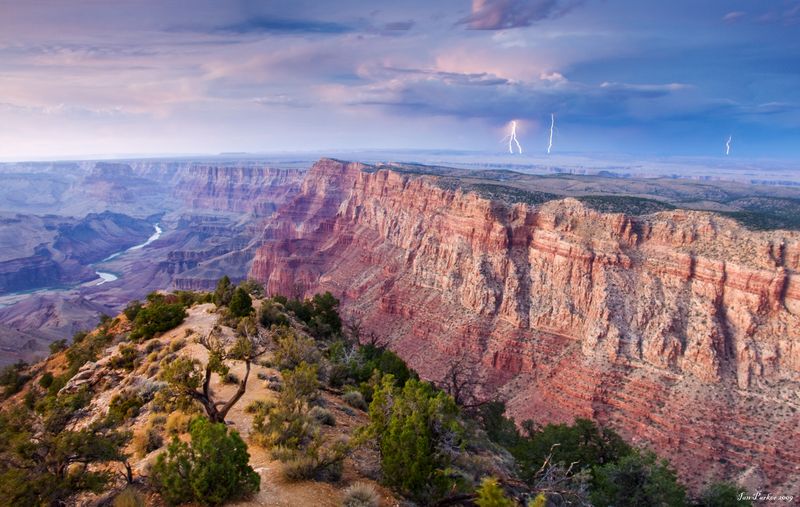
This month's photo was taken while returning from a trip to Monument Valley (see October photo of the month). On my last day at Monument Valley the dawn brought grey, overcast skies. I had been wondering whether to remain until that evening to get an even better alignment of the shadow on the East Mitten, but thought there was little chance of a clear sunset and, having already spent two days in the Valley, decided to start traveling back home. My original plan was to stop at Coal Canyon on the Navajo reservation for sunset photography, but when I got there the sky was still black, and I did not want to intrude on a Navajo herding cattle near the overlook. Plan B was to continue on, and stop for the night in the forest just outside Grand Canyon National Park. I was in no hurry, as the chances for good light that evening continued to look slim and, indeed, rain set in as the road climbed higher into the forest. However, about 30 minutes before sunset, the clouds started to clear from the West. As I reached the park entrance station the undersideof a great arc of dark storm clouds suddenly lit up bright pink, and a vidid rainbow appeared to the East. Too late! The sun was just touching the horizon, and by the time I got to the first canyon overlook at Desert Tower, the light had faded. As I walked down to the rim, everyone else, including many carrying tripods, was heading back to their cars. Overheard snippets of conversation were along the lines of "...miserable wet day; but that rainbow made up for it".
But, maybe all was not lost. A fading red glow from the sunset bathed the cliffs in a diffuse, warm light, and flashes of lightning played out across the distant Painted Desert. I stayed, the only person left at the overlook, as the light faded, the night grew cold, and shutter times lengthened enough to give a reasonable chance of catching a lightning strike. I took about 40 shots, and most failed to capture a strike. The photo above is a composite of two 30s exposures, selected from the time when the balance of light from the sky and the lightning was optimal.
I am happy with this image - but often wonder what I might have been able to capture if I had been just 15 minutes earlier.
Click on the image above to download the full-resolution orignal; click HERE for more photos of the Grand Canyonm |
#14 - October 2009
"Monument Valley Mittens"
The 1500 mile shadow
|
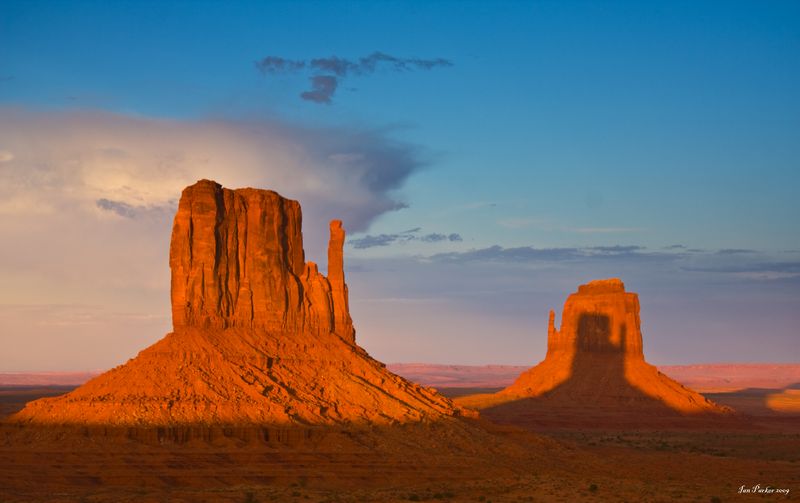
The Mittens are a pair of rock formations in Monument Valley, almost exact mirror images of one-another, and the first thing that visitors see after pulling into the parking lot of the Tribal Park. Given that they have been photographed by landscape artists of the calibre of Ansel Adams, it is hard to come up with new interpretations of this classic scene. But, one opportunity presents itself for just a few days in the fall and spring of each year. The Mittens lie close to a West-East axis, with the West Mitten slightly to the south. Thus, when the timing is right, the setting sun casts a shadow of the West Mitten directly on the East. Moreover, the shadow of the West Mitten from that angle fortuitously falls within the profile of the East mitten, rather than casting the whole formation into shade.
When, then, are the right dates to observe this spectacle? Google Earth provided the answer, with a high-resolution map allowing me to measure the angle between the Mittens. Next, the US Navy conveniently provide a website that can calculate tables of altitude and azimuth angles of the sun for any day of the year at any place on Earth. This indicated that September 12 th or 13th should be optimal. Corresponding dates in Spring would also work, and indeed might stand a chance of better weather, but I usually have teaching committments then. So, a good excuse for a quick trip to Northern Arizona. The trouble is that Monument Valley is a fifteen hundred mile round trip from my home. A long way for a shadow...,
UPDATE - I returned to Monument Valley at the same date in 2010. Storm clouds covered the sky, and I held little hope of seeing the shadow again. But, just a few minutes before sunset a window opened in the sky to the west, creating a nice chiracuso contrast between the highlighted formations and the dark clouds and shadowed foreground.
|
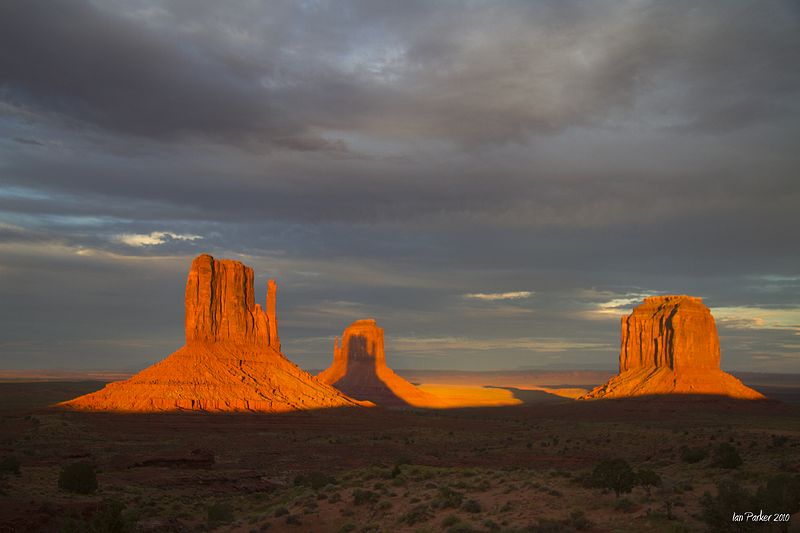
#13 - September 2009
"Rainbow and church in Iceland"
Homage to Galen Rowell
|
 This image makes a great computer desktop! Click these links to download for screen resolutions of 1600 x 1200 or 1900 x 1200.
Living in Southern California we don't get much rain, and hence rainbows are a rarity. Going on vacation in Iceland thus made quite a change. Lots of rain, and quite some time sitting in the car watching it come down, but more than compensated for by excellent light and cloud formations on the edges of the storms. This photo was taken near the end of our stay, while driving up into the interior after hiking in the rain to Glymur, the highest waterfall in Iceland. A few gaps were starting to appear in the clouds, and an intense rainbow formed against the grey sky. Initially the road passed along a featureless valley, and rather than stopping and photographing the rainbow in isolation, I thought it better to keep on going in the hope that some interesting foreground would appear before the it faded. Indeed, around the next ridge a classical Icelandic rural church appeared in just the right place!. The composition brought back memories of Galen Rowell's most famous image of a rainbow over the Potala Palace in Lhasa . But, it was merely a chance alignment and not any conscious decision to replicate his composition. Certainly he had the better shot and a more majestic subject; and whereas he had to run two miles gasping for oxygen at 15,000 ft altitude, I merely had to wander a hundred yards down the road in light drizzle. |
#12 - July-August 2009 2009
"Two long-billed curlew"
The making of a magazine cover photo
|
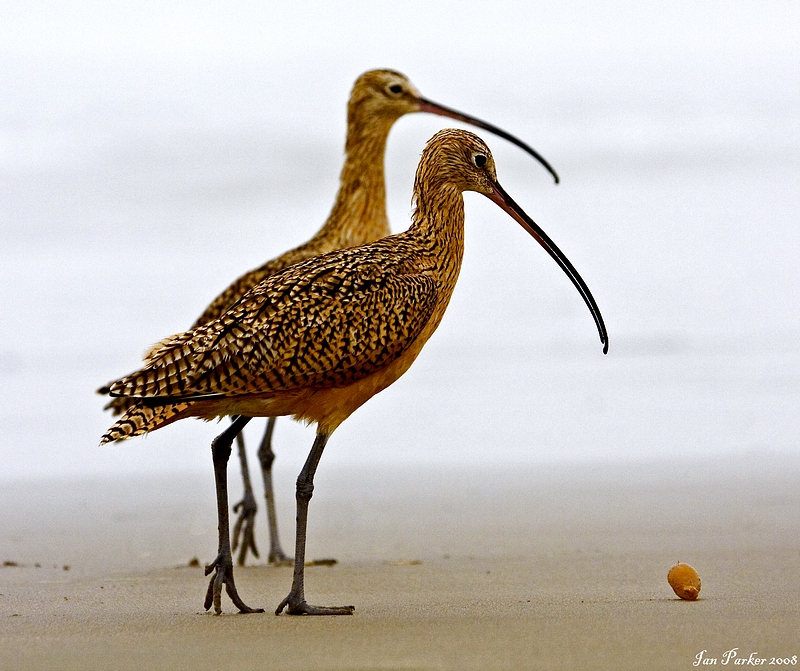
(click on the image to download a full-resolution original)
|
Photographing birds is mostly a matter of getting close enough, and then firing off numerous shots in the hope of capturing some interesting composition or action. Also, it helps to isolate the birds from their background to eliminate distracting clutter. A good way to achieve this is to get right down to the ground, and shoot at 'bird's eye' level. Using a wide-open long telephoto then ensures a nice blurring of the background. However, when shooting from a beach toward the water, the downward slope of the sand means that the background will be filled with surf, which can marr the picture even if well out of focus. In this case, I was fortunate to be on the beach at Morro Bay during a heavy fog, which provided a featureless backdrop giving almost a white-screen' effect. I was also lucky in that the curlew that I was originally photographing was joined by another, and for a brief moment the two lined up in a nice composition, accentuated by the tasty morsel (whelk?) on the beach that the foreground bird was about to eat.
The photo above shows my final image, after some fairly strong tonal adjustments to bring out the color and texture in the feathers, as in the raw file the birds were dark sillhouettes against the fog.
Each year, the Journal of the European Molecular Biology Organization (EMBO) holds a photo contest, and chooses images from among the top pictures for use as cover illustrations. They do a very good job of reproducing the selected photos, which are printed full page with minimal overlying text. I thought my curlews shot might have a good chance of being selected, but first needed to make some adjustments to match the orientation and aspect ratio of the Journal page. So, a little Photoshopping... Move the whelk in to allow for a tight vertical crop around the birds, and flip the image horizontally to leave a blank space at top right for the Journal masthead. The imaga at left shows the final result as published. |
#11 - March 2009
"Snow Goose Blast-off "
|

(click on the image to download a full-resolution original - and click HERE for more photos from Bosque del Apache)
Some photographs are the result of much pre-visulaization and methodical composition. Others are pure luck. This month's photo is an example of the latter.
While attending a meeting in Albuquerque in early February, I took the opportunity to visit Bosque del Apache, a wildlife refuge by the Rio Grande about 100 miles south of Albuquerque. The reserve is famed for the vast numbers (tens of thousands) of snow geese and sandhill cranes that overwinter from around November through to late February. The photography opportunities were remarkable. From almost an hour before
sunrise till well after sunset, this is a bird photographer's paradise. The highlight of the day, however, comes early. Before sunrise great flocks of geese erupt simultaneously after roosting overnight in the ponds and take to the air with a beating of wings as loud as approaching freight trains on the nearby railroad. This is an amazing spectacle, but difficult to photograph as it usually happens while still quite dark. On one morning, though, I was lucky. The geese took off in the twilight, but sooon after landed and congregated in one corner of the pond by the 'flight deck' observation platform. They then stayed there, contentedly bobbing in the water for the next hour, despite being surrounded by a hundred photographers. Like everyone else I was positioned along the bank, armed with a long telephoto lens waiting for the eventual erruption. I don't know what was the final trigger, but a few of the geese at the edges of the mass started to swim outward and suddenly, within a couple of seconds, thousands of birds were airborne. Everything happened so fast there was no hope of deliberately composing a picture. I had just set the camera on fast motor-drive and servo AF, and filled up the buffer with a burst of shots aiming roughly into the mass of birds. All but one of the resulting images were unusable - a blurry mess of wings and cut-off necks. By luck, however, I count the photo above as a good success. The heads of two geese are nicely framed and are in reasonable, if not tack-sharp focus. And, the closely packed motion-blurred wingtips contrast with 'frozen' splashed water droplets to convey a sense of the dynamics and sheer density of this unique event.
|
#10 - February 2009
"Joshua Tree Reflections"
|
 Click on the image to download full resolution (~25 M pixel) original)
|
What makes a good photograph? Subject, lighting, composition, and technical excellence all factor in. Following on from the theme of January's photo, the first two ingredients are very much a matter of being at the right place at the right time, and this month's photo is one such instance. Joshua Tree National Park is a great place for photography, combining the unique forms of the Joshua trees themselves with warm granite rock formations. Usually it is a hot, arid place, but heavy snowfall in the desert a few days before Christmas gave a very different appearance; further enhanced by crystal-clear blue skies with fantastical lace clouds. A good subject then, and under most unusual conditions. How to do it justice?
A recent article by Ken Rockwell emphasizes the importance of composition: where do you put the camera?, how do you frame and select the elements within the image? A common mistake is simply to walk around, always shooting photos at eye level. A more interesting approach is to select unusual viewpoints - to take photos that communicate a view that most people would not 'see' even if there at that same place and time. Reflections make a nice example, as even small rainwater pools can make for expansive images provided you get right down to ground level. Indeed, the photo here was captured using only a small 'puddle' of melted snow at the side of the road. At normal eye level it looked just like a small, muddy puddle, with a large expanse of tarmack behind - but with the camera almost touching the water the puddle became a giant reflecting mirror. This is one instance where I find the 'live-view' feature of recent DSLR cameras to be very helpful. Before, I would have been lying flat in the mud, trying to squint through the viewfinder to compose the picture. Now, I can simply crouch down, keeping dry and mud-free, composing with the lcd screen.
A further aspect of composition has to do with symmetry. The 'rule of thirds' holds that key features, such as the horizon line, shoud be placed either about one third up or down from the edges of the frame; but certainly not in the middle. For reflections, though, I often find it works better to break the rule, and put the horizon dead in the middle. The perfect vertical symmetry is certainly more eye-catching. Here there is also an interesting horizontal semi-symmetry, with the two rock formations straddling the center Joshua tree. But not quite symmetrical, and the left-to-right lines of diminishing outcrops and trees contrasted with the expanding lines of cloud formations lead the eye across the picture.
|
#9 - January 2009
"Double waterfall and icicles at the Emerald Pools"
F8 and be there
|

Steve Cossack runs a series of photography workshops entitled 'F8 and be there'. That title encapsulates the view that the main thing in landscape photography is to be at the right place at the right time. The 'F8' simply refers to what is likely to be the optimal lens aperture. In other words, don't worry too much about the technicalities; it is the subject and the lighting that matter. However, this presupposes that you have a camera with you at the time! Having found myself on several occasions gazing at a great sunset but without a camera, my requested Christmas present this year was a new Canon G10. This 'point-and-shoot' camera is small enough to carry in a (large) pocket, yet can create 15 megapixel RAW files, and has received excellent reviews.
Thus, when faced with a steep and icy dawn hike to the Emerald Pools in Zion Canyon, I decided to leave my heavy camera backpack with SLR gear and tripod behind in the car, and to take only the G10. My objective was the lower Pool; which does not live up to its name, as there really is no pool. Instead, however, a stream cascades over an overhang creating multiple falls - and best of all the trail passes below the overhang and behind the falls. I had previously photographed here in autumn, catching the falls as they were lit by the rising sun against a background of fall colors in the cottonwood trees. Now, in the middle of Winter the trees were bare, but the lack of color was compensated by fantastic fringes of icicles hanging from the lip of the overhang. Alone at this early hour, I scouted a good position to capture the free-falling water, and waited for the sun to rise over the opposite side of the canyon. But, there was a problem. Although the G10 zooms to an unusually wide angle (28 mm equivalent) for a 'pocket' camera, that was not enough to frame the entire height of the falls; and moving further away destroyed the composition. My improvised solution was to treat this as a vertical panorama, taking three sequential (handheld) shots trying to move the camera along a near perfectly vertical axis. The images were captured just as the sunlight back-lit the falls, while the back of the overhang remained deep in contrasting shadow. To avoid complications I took this initial series of shots using the tree to block direct sunlight from the lens, and then took an additional shot with the sun just peeping between the branches to create a 'sunstar' effect. Some subsequent work in Photoshop then created the final 25 megapixel stitched image, which you can download at full resolution by clicking HERE. Amazing for such a tiny camera! |
|
#8 - December 2008
"Mt. Whitney and Alabama Hills"
The problem with photographing the beautiful
|
 Mt. Whitney and Lone Pine Peak after recent snow (click on image to download 30 Mpix panorama)
A recent article by George Barr raised the problem inherent in photographing beautiful places; how do you ever compete with the real thing? And if you can't, why bother?
One option is indeed not to bother - and George's photography is aimed very much at finding beauty in subjects that to the casual eye may indeed not seem to posess much inherent interest or beauty. But, that is rather limiting, and to photographers of lesser skill it would seem that there might be a higher chance of coming out with a great image if you start with a great subject. The problem, of course, is that the great subjects (Delicate Arch, El Cap and so on) have already been photographed so many times, and by so many great photographers that it is hard to impossible to come up with some new interpretation. In his article, George discusses several several strategies that have been historically used to produce an image with some novely, and which conveys something in addition to and different from what a visitor might directly experience at that location. Such stategies include isolation only a small part of a grand scene, selection of unusual viewpoints, and post-processing (e.g. conversion to black and white) of the original photograph). The simplest, however, is merely to photograph the subject in exceptional conditions. It may (and has!) been argued that this reflects more on the photographer's perseverence and willingness to get up very early in the morning rather than his photographic skills; but surely that deserves some reward, and can result in a nice image.
Which brings us to this month's photo - a panoramic shot of Mt. Whitney and the Sierras behind the Alabama Hills. Being the highest peak in the lower 48 states this is cliched subject, but I hope the photo above has some freshness to it. Download the full-resolution original and see if you agree.
I had noted the composition on earlier visits while driving along the Movie Road through the Alabama Hills, and pictured an early morning shot with the sun on the mountains but with the foreground rocks sillhouetted in black shadow. During a recent Thanksgiving visit the conditions were promising, an earlier storm having dumped snow on the mountains and leaving the sky crystal clear. However, I spent too long photographing at Mobius and Lathe Arches, and by the time I drove along the road, sunlight was just touching the rocks. A little disappointing, but it's best not to get locked into preconceived notions, and just to take what is offered. Indeed, I think the result came out better than if the rocks were mere black outlines - but I will try that next time and see.
. |
#7 - November 2008
"Seaweed swirls - enhancement or manipulation'' |

c
(click on image to download full-res original in new window) |
Thoughts about this month's photo were prompted by recent articles reporting that the Pentagon had manipulated a photo of the first female four-star general by digitally replacing the background (boring office furniture) with an image of the stars and stripes. So, given the ease with which this can be accomplished using Photoshop, what is an acceptable level of manipulation?. For news reportage, the threshold is generally and appropriately set at zero. The image should reflect what is there, with nothing added or taken away. But what about landscape photography - particularly that which aspires to be "fine-art"? The threshold here is far less defined, and has been (and contines to be) the subject of much discussion. A reasonable viewpoint would be to say that the degree of 'allowable' image manipulation depends upon the photographer's intentions, the viewer's expectations and, in particular, what information the photographer may communicate to his/her audience. Differing examples include Michael Fatali ("no computer imaging ... only natural light") and Alain Briot ("of course my work is manipulated").
A starting point is to realize that no photograph accurately depicts the scene in front of the camera. The colors in a photo are modified by the camera's jpg processing or the raw conversion algorithm; perspective is altered by use of wide or telephoto lenses; a 3-dimensional environment is rendered in two-dimensions; etc. Images as they come straight out of a camera (digital or film) typically look rather 'flat', and some processing is needed to get them looking more like the photographer's remembered perception of the scene. But, beyond that, what might be acceptable in terms of adding or subtracting elements, or processing beyond merely adjustments to curves, color balance and saturation? The photo above can serve as an example of my own philosophy.
The picture was taken at Pfeiffer State beach in Big Sur, when returning from a conference in Monterey. I had been hoping to photograph the famous sea arch with the setting sun casting a light beam through onto the breaking surf. No such luck. As is often the case the beach was beset by thick coastal fog, so I turned my attention to other subjects. The tide was high, with waves washing among clumps of seaweed, presenting a nice opportunity for long-exposure photos to capture the 'dreamy' swirls as the foam from receding waves swept out. In itself, this is already a form of image manipulation. Our eyes and brain work at about 30 frames per second, so we percieve the motion of the waves and cannot integrate over long times as a camera can. But, that alone was not enough to produce the fnal image. Problematically, the most visually interesting clump of seaweed on the beach did not line up with the sea arch - as I envisioned for the final picture - and attempts to move it came to nought as currents were in the wrong direction directly in front of the arch. Eventually, a particularly big wave washed the seaweed out to sea. What to do? Let Photoshop solve the problem!. I had several long-exposure shots of the foam and seaweed, so it was easy enough to blend a foreground image with a separate image of the arch. Indeed, why not go a bit further? In all of the seaweed images, the currents carried swirl of the receding foam either to the right or left - giving an unbalanced appearance. Thus, the final photo is a composite of two shots taken during successive waves (luckily, the first wave did not appreciably move the seaweed). Final step, follow the motto for good photos of 'cut the clutter'. There are smaller rocks either side of the arch rock which rather disrupted the composition, so I cloned them out. The net result is a photo that (I think) succeeds in capturing my intent at the time. It is not intended to be a realistic depiction of a particular place. Rather, a semi-abstract composition conveying a certain mood, and a different way of looking at the world. Hard to put into words - I hope the picture itself speaks to you.
#6 - October 2008
"Mono Lake Tufa - two moods, one subject'' |
A common saying about photography is that we are not capturing an image of a subject; rather we are capturing light. I think this is exemplified by the two photos above, showing exactly the same subject from almost exactly the same viewpoint, yet expressing very different moods because of a 30 minute difference in time of day and a change in cloud conditions.
The subject is a formation of Tufa towers in Mono Lake. These unique faetures were created underwater, and are visible only because much of the water flowing into the lake was diverted to the thirsty mouths of Los Angeles. By themselves they are intriguing, but in harsh sunlight photographs come out looking very mundane. Around dawn and dusk it is a different matter. The topography of the lake does, however, present some problems. The tufa is found mostly along the southern shore; where views West to the setting sun are blocked by high mountains of the Sierras, and Eastern views of sunrise are cluttered by low hills and an indifferent shoreline. The formation shown here s thus one of my favorites, being nicely isolated at some distance out into the lake, and with a viwepoint giving a North-East perspective to better catch the light.
The upper photo was taken soon after the sun had set behind the Sierras when the clouds were nicely lighting up. The sky was still bright, and I used a 2 stop graduated filter to tame the exposure and bring out the reflections in the water. A classical 'calander' type shot; nice enough (I think!), but merely capturing what the scene looked like at the time.
The lower image, my favorite of the two, conveys a more mysterious atmosphere, and is a case where the camera captured something that was not apparent by eye. This requires previsualization (anticipating how the camera will 'see' what comes through the lens), a little technical trickery, and some luck. The key to the surreal atmosphere was a long (30 s) exposure time. This has the effect of blurring out ripples in the water to give a misty appearance; but more important here it has the same effect on rapidly moving clouds. A second trick was to provide some fill light from a hand-held flashlight. The tufa formations would otherwise (as in the top photo) remained as black sillhouettes, but a little artificial lighting highlights them and brings up the nearby rocks at the lakeshore to provide foreground interest. The art is to balance natural and artificial light to create a natural looking effect - somewhat hit-and-miss procedure, but greatly aided by the ability to immediately view the results on the screen of a digital camera.
And another impression of the same tufa formation... Taken a year later, at dawn on a day made hazy by wildfire smoke. The tufa appear to 'float' in a featureless void, neither water nor air. |
|
Click on any of the images above to open a full-resolution copy in a new window/tab. Click HERE to view many more images of Mono Lake. TThe key to the suhe
#5 - August/September 2008
"Huntington Beach Oil Rig" |
All my previous 'photos of the month' have, in one way or another, featured a piece of rock. So, time for a change. This month a man-made artifact close to home; one of the oil rigs off the coast at Huntington Beach. Two renditions of the same subject, under very different lighting conditions and conveying different moods. Both were captured using a 400 mm lens. The sunset image was taken with the camera down at beach level, perilously close to the surf line, to dramatize the breaking waves. Given the bright, backlit sky I could use both a fast shutter speed to 'freeze' the waves, and a small aperture to keep the distant oil rig and the close wave in focus together. This photo has been in the Evanescent Light galleries for a couple of years, and has been one of my best sellers, in surprising demand from oil exploration and supply companies for use in catalogs and advertising materials.
The pre-dawn photo is a recent image, captured at about 5:15am on an August morning when the sky was blanketed by the marine layer. It is one of a series, taken over the course of about 30 min, which best balanced the featureless pre-dawn blue of the sea and sky with the warm colors of the lights on the rig. I stopped down the lens to f8 both to maximize sharpness and to give an exposure time of about 20s so as to blur the reflections in the waves. Unlike the sunset photo, this was taken from high up on the bluffs; a vantage point providing a more extensive foreground and, given the slightly misty conditions, allowing the sea and sky to blend seamlessly.
UPDATE
I never got around to adding a new photo for September, so instead here is another capture of the same oil rig; now taken at dusk with a setting crescent moon. I had timed this visit to Huntington Beach three days after the new moon, but was disappointed to find that I was a little late, and that by the time the moon sank close to the horizon virtually all color from the setting sun had faded, and the sky was almost completely black. The photo here is thus a slight cheat, in that I combined an image captured earlier using the 'lighten' blend option in Photoshop layers to add color to the sky.
|
#4 - June/July 2008
"Little Finland Arch" |
The best light for photographing the sandstone formations of the Southwest is indirect: when the sun's rays are reflected into the image from an adjacent rock wall to accentuate the golden red color of the rock and give a pleasently diffuse illumination. A classical example of this technique is photography in slot canyons, as illustrated below by the image of Antelope Canyon. Another famous example is the sunrise view of Mesa Arch in Canyonlands National Park, where the rising sun hits a vast rock face below the arch, casting a golden glow on its underside. However, that location is too famous, and even in the middle of winter a group of photographers can be found each clear morning blocking all the good viewpoints with their tripods!
Thus, I was pleased to find a 'miniature' Mesa Arch while visiting Little Finland - an extremely remote and little-known region of amazingly eroded and fancifuul sandstone formations in Southern Nevada. The arch is much smaller than the Canyonlands version - only about 5 ft across - but lights up beautifully as the sun rises over the opposite hillside and hits the rock face below the formation. Moreover, the arch itself is patterned with much more attractive erosion flutings than is Mesa Arch itself. To add more interest, I also tried to catch a 'starburst' as the sun cleared the top of the arch. There are two tricks to make this work. First, the lens needs to be stopped down to its minimum aperture to project a pattern of the iris blades. Second, it is important not to capture the full disc of the sun, as that washes out the image and projects ugly reflections from the lens elements. Instead, the photo needs to be framed so that only a tiny part of the sun hits the lens. This is rather trial and error; so I took several handheld shots varying the camera position slightly, and later selected the best one.
Click HERE to download a full res image of Little Finland Arch, and HERE to see the real Mesa Arch
|
#3 - May 2008
"Uluru Cascades"
|
 |
Uluru (Ayer's Rock) is the iconic symbol of Australia's 'Red Centre'. In December 2007 I was fortunate to be invited to speak at a meeting of the Australian Physiological Society, and afterwards took the opportunity to travel to Alice Springs in the company of my colleague and good friend Dirk vanHelden. We rented a 4WD camper van with which to explore the outback, and drove through the McDonnel ranges south toward Uluru.
The famous rock is a magnet for photographers, and is usually captured at sunset and sunrise, when it takes on a spectacular sequence of color changes. However, to be honest, this has become very cliched, with hundreds of nearly identical photos published on the Web. More so, visitors are tightly corralled, and confined to just one defined 'sunrise' viewing area, and another for sunset, so it is difficult to find any original viewpoint.
Thus, after taking the obligatory sunset shots, I felt a little let down. But all was rescued the next day, which served to reinforce David Muench's maxim that "bad weather makes for good photography". Morning dawned grey and overcast, and we made use of the unusually cool conditions to set out on the 6 mile hike around the base of the rock. Shortly the clouds grew darker, it started to drizzle, and then to pour down in earnest. After some delay small trickes of water began to course down the rock face, and gradually these grew into roaring cascades that overflowed the pools at their base, and flooded across the path. This is a rare occurrence in the outback in the middle of summer! A ranger passed us exclaining that she had never seen anything like it before.
So, a great subject for unusual photographs; but the problem was a complete lack of any shelter under which to take my camera from its secure haven in my (waterproof) Lowe backpack. Any attempts were first thwarted by raindrops on the lens, and then when the interior elements of my mid-range zoom completely fogged up.
|
The solution came when we finally returned, completely soaked, back at the van. This provided the necessary shelter from the now torrential rain, and the distance from the perimeter road to the rock allowed use of a (non-fogged) telephoto lens. A problem shhoting from a vehicle, however, was that compositions were restricted to places along the roadsite where there was a clear view unobstructed by trees, and where it was possible to safely pull off the road. The photot here with two cascades framing a dead tree ended up as my favorite. Basically a 'straight' shot, using a polarizer to reduce reflections from the rain-slicked surface, a mild saturation boost to enhance the deep red of the rock, and a curves adjustment to compensate for the loss of contrast through the heavy rain.
|
#2 - April 2008
"Antelope Arch"
|
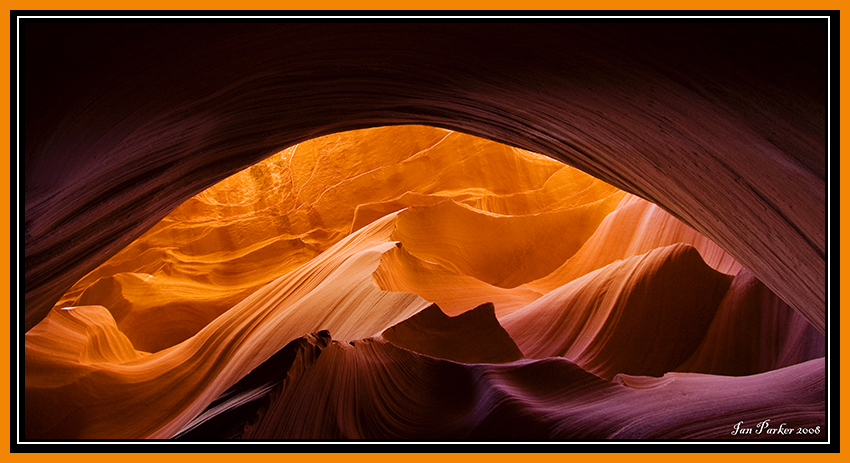
Antelope canyon is a small slot canyon on the Navajo reservation just outside Page, Arizona. It is bisected by a major highway, and lies close to one of the largest, and most polluting caol-fired generating plant in the country, so the immediate surroundings are not auspicious. Nevertheless, it has been a favorite subject among photographers since its 'discovery' some 20 years ago. The reason is that the depth and geometry of the canyon are just right to bounce sunlight off the sinuous sandstone walls to create a wonderful inner glow. Very deep, narrow canyons, such as Buckskin Gulch, allow little light to penetrate to the bottom, and have a dark and gloomy feel. On the other hand, shallower canyons like Spooky and Zebra are too brightly illuminated by direct light, so that the walls largely reflect only the true color of the sandstone. Although the rock of Antelope Canyon is itself only a nondescript orange/brown, it comes alive when sunlight falling directly on one wall reflects multiple times to cast a faint, but brilliant orange glow. Moreover, wonderful color contrasts are created by juxtaposed areas that receive either reflected sunlight, or take on a blue/cyan cast from the cloudless sky.
The trick in photographing slot canyons is to master the extreme contrast range. Indirect light filtering into the canyon is quite dim, necessitating exposures of a second or more, but any direct sunlight hitting the rock, or view of the sky, completely blows out the highlights. So, the art is to frame pictures to just exclude such highlights. Inconveniently, this usually seems to involve camera angles requiring the photographer to lie flat on his back on the canyon bottom, squeezed into a nook so that an overhang of the near wall blocks out any direct view of the sky. Such was the case with the photo above, taken in Lower Antelope Canyon. I had wandered uo and down the length of the canyon a few times scouting for interesting combinations of light and rock form, and was taken by this composition where a sinuous hollow in the back wall framed glowing rock high on the opposite face of the canyon. A wide-angle (16 mm) lens nicely took in the arch, and stopping down the lens to get good depth of field necessitated an exposure of about 1 second. However, there was no space to set up a tripod. Instead, I took the shot hand-held, pressing the camera agains the rock for stability.
While browsing through Michael Fatali's online galleries after returning from this trip, I noticed that his 'Centerfold' image was taken from almost exactly the same viewpoint; though with very different framing. How he managed to set up his 8x10 view camera to get the shot remains a mystery to me, as I struggled to get my small DSLR into position! Click HERE to compare our disparate visions of the same piece of rock (Click on 'view Portfolios, then select 'Stone Cathedrals' and scroll down to the 'Centerfold' image). |
|
#1 - March 2008
"Stalking the Yosemite Firefall"
|
|
Horsetail Fall is an ephemeral waterfall high on the cliff face of El Cap. In Yosemite Valley. Sometimes, and only sometimes, it pus on a fantastic light display, catching the dying red rays of the setting sun as the rocks either side plunge into shade. If anything captures the meaning of 'Evanescent Light', this is it!
The first photographer to capture and popularize the 'firefall' of Horsetail fall was Galen Rowell, and it is often said that no one since has done it better. Maybe so; but there is plenty of incentive to get your own photo, and maybe do it differently.
Capturing the firefall demands some planning, and a lot of luck. A first requirement is that the setting sun is aligned well. This happens only in Winter, with the optimal time being around the middle of February. By early March the lower part of the falls go into shadow before the sun is low enough to produce a red glow. Second, there must obviously be a clear sky to the West. Finally, there needs to be a good flow of water over the falls. The catchment area is fairly small, so this needs either a period of recent heavy rain, or a good snowpack with a few days of preceding warm weather. Some years the firefall never happens, and when it does, prime light last for only ten or fifteen minutes. On average, the firefall is present for perhaps only one or two hours per year!
The Photo of the Month here was taken on Feb. 16, 2008. I had been following the Yosemite weather forecast, together with updates on the Yosemite Blog and View from the Little Red Tent, that all pointed to good, clear conditions that weekend, following several warm days. The omens looked promising enough to justify the 800 mile round-trip journey from Irvine. Arriving in Yosemite, the next choice was where to shoot from. The classical view of Horsetail is from near the El. Cap picnic area, replicating Galen Rowell's image, and shown in this image I took the previous year. This time around I decided on a change, and selected a location on the far side of the Merced River with a clear view through the trees of the falls. The extra distance provides a surprisingly different perspective. The view from the picnic area shows the top of the cliffs silhouetted against the sky – nice if there are some high clouds to add interest and color, but otherwise leaving a big blank area at the top of the photo. In contrast, the view across the river reveals the snow slopes that rise steeply above the cliff top, giving the illusion through a telephoto lens of a viewpoint almost level with the falls, instead of looking steeply up from thousands of feet below.
Arriving at around 4:00 pm there were already around a dozen photographers staking out their few square feet of meadow to set up tripods. Then, it was just a matter of waiting and hoping, stamping around in the snow to keep warm. The photos below illustrate the progression of the light, as the sun swings round to the North casting a growing shadow from the nose of El Cap across the rocks to the left of the falls. On this day the falls became a silvery cascade at about 5:20pm, turned deep red by 5:30, and were extinguished by the setting sun at 5:41. So, not much time to get good shots. |
My aim was to produce a high-resolution image by stitching together several frames, taken with a 10 Mpixel Canon 40D and 100-400 lens zoomed in to about 200 mm. I set up using a RRS panning clamp and rail to focus the camera on the falls, and then lock everything down while allowing free movement along the vertical axis. With these settings, three shots nicely covered the height of the falls, with generous overlap for subsequent stitching. A final ingredient for a good photo involves enough wind to kick up a good amount of spray, otherwise the falls themselves appear as only a narrow ribbon of light. That was present, but I worried that changes in the spray pattern between successive shots would cause problems, and took photos as quickly as the two second delay on the mirror lockup would permit. In the end, the photomerge and blend functions in CS3 did a fine job.
|
Click HERE to download a full-resolution (24 Mpixel) file of the 'Firefall' image.
|
|
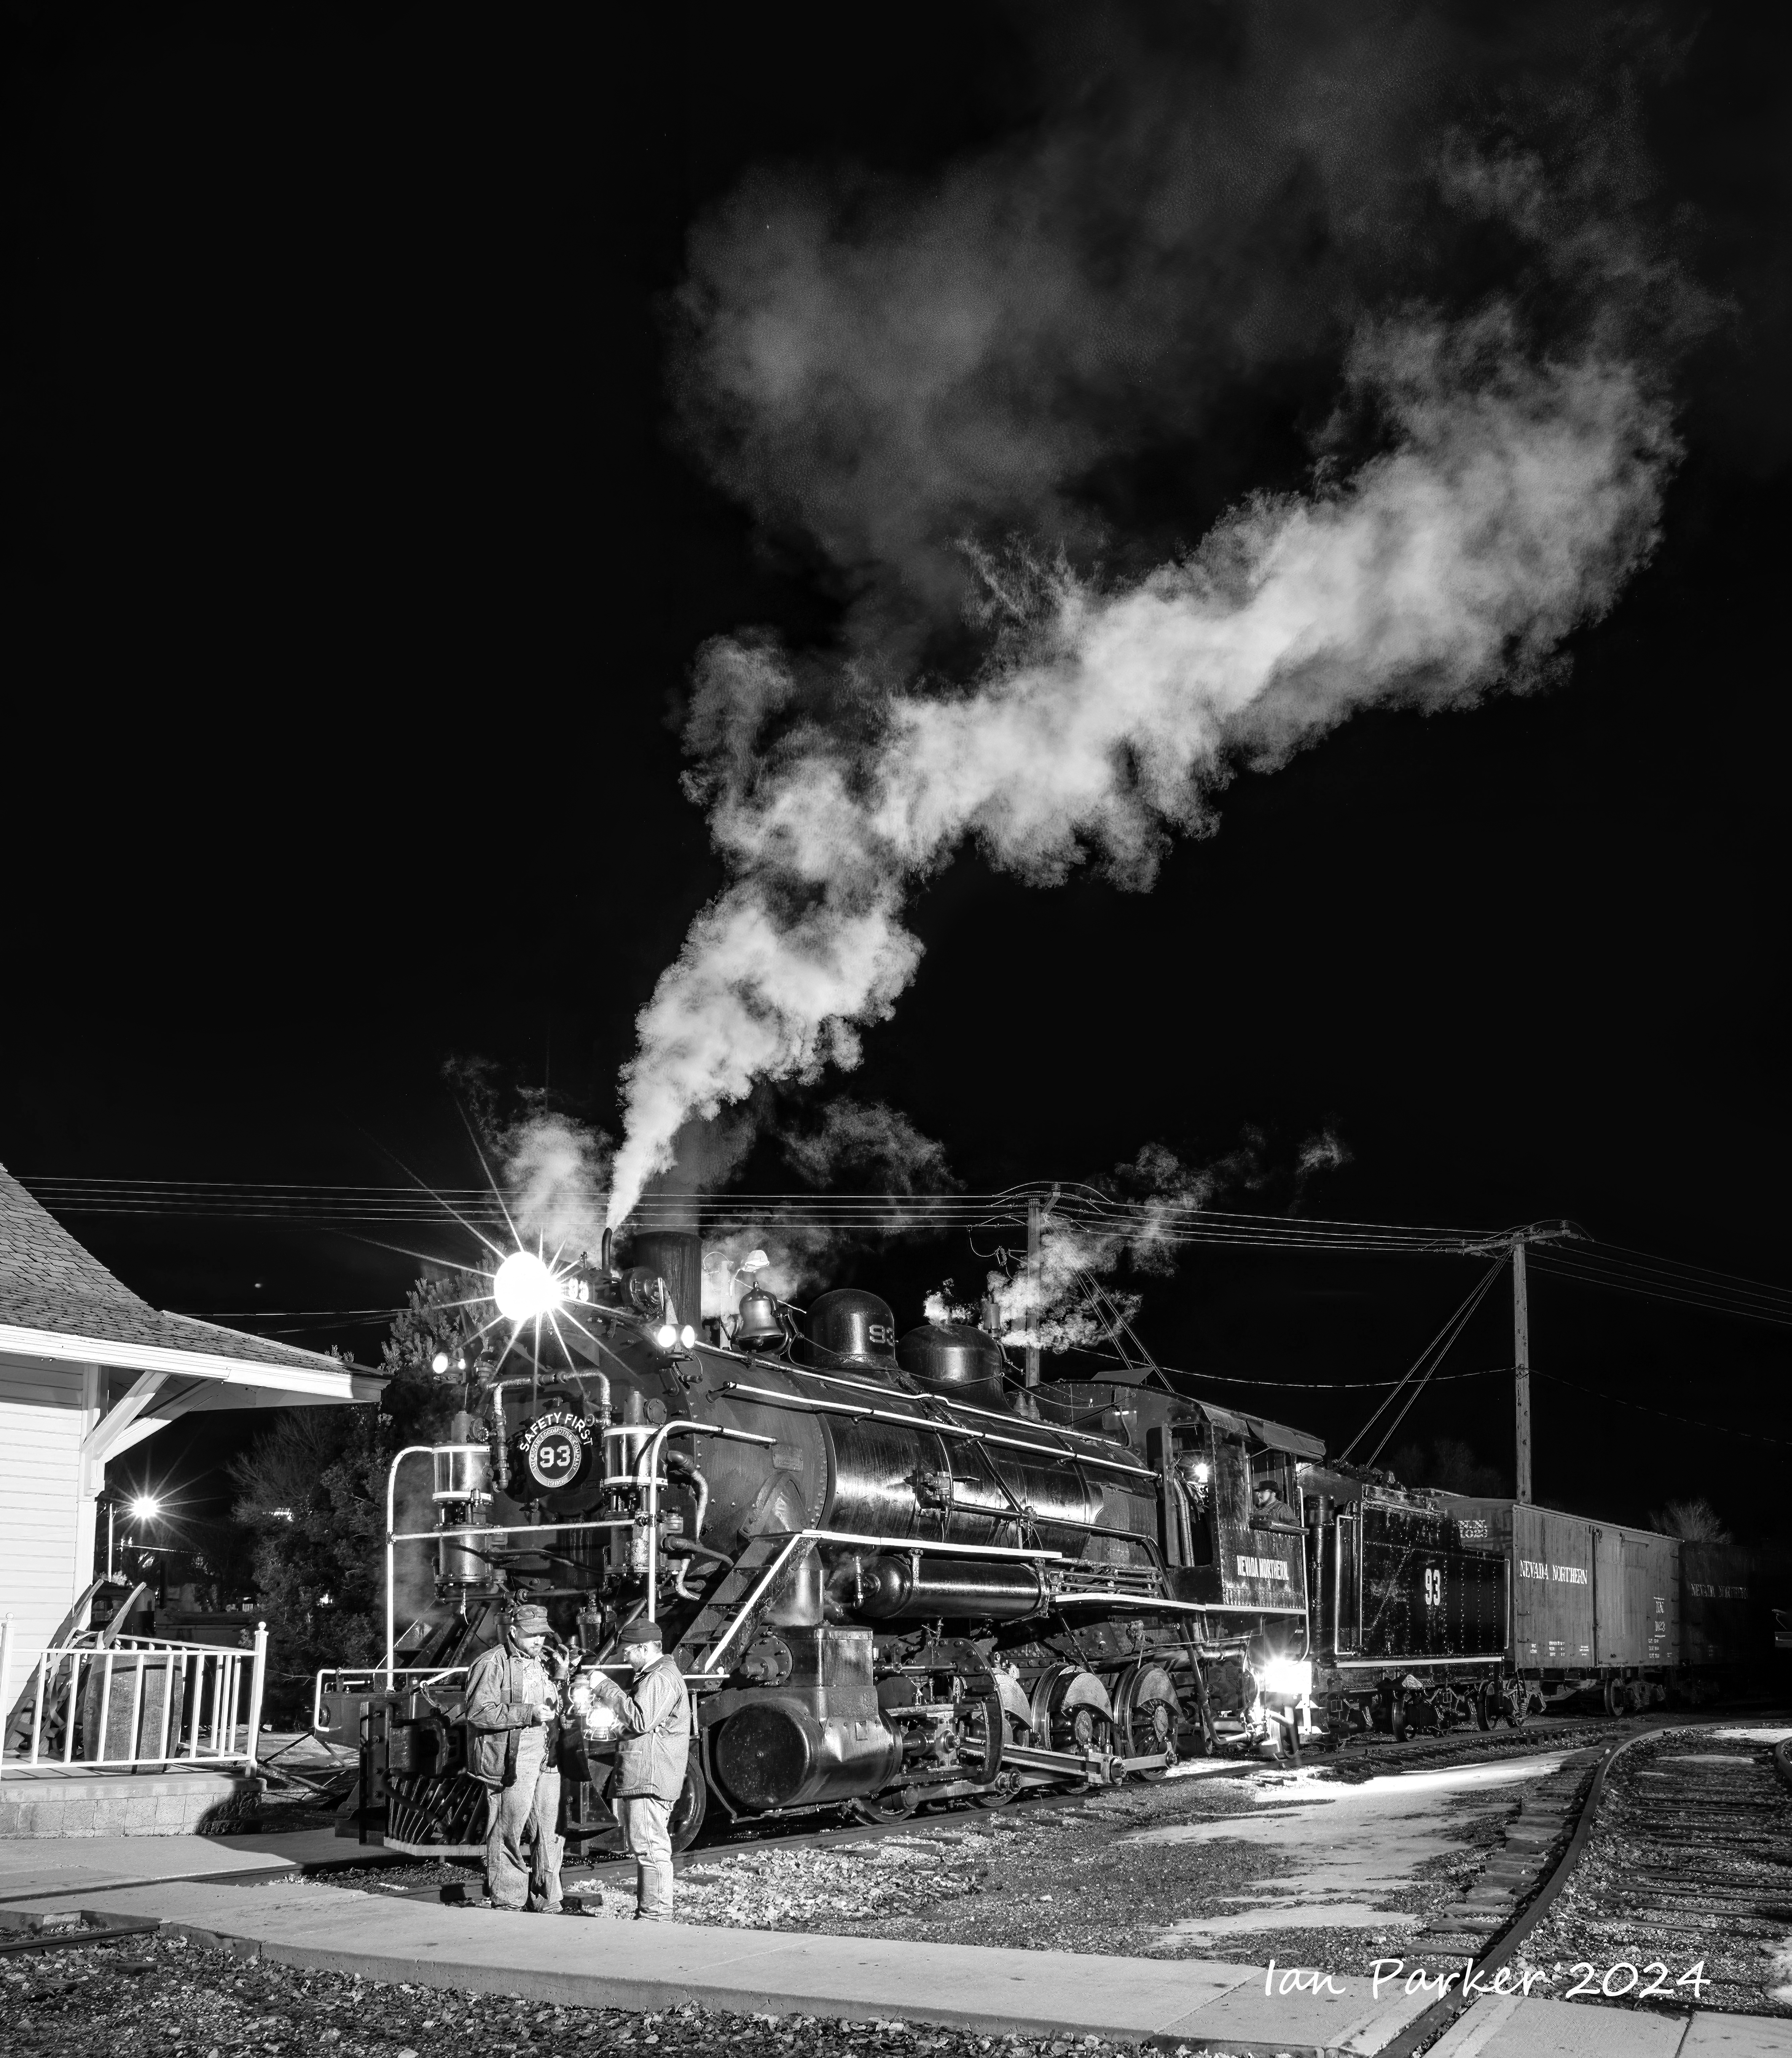
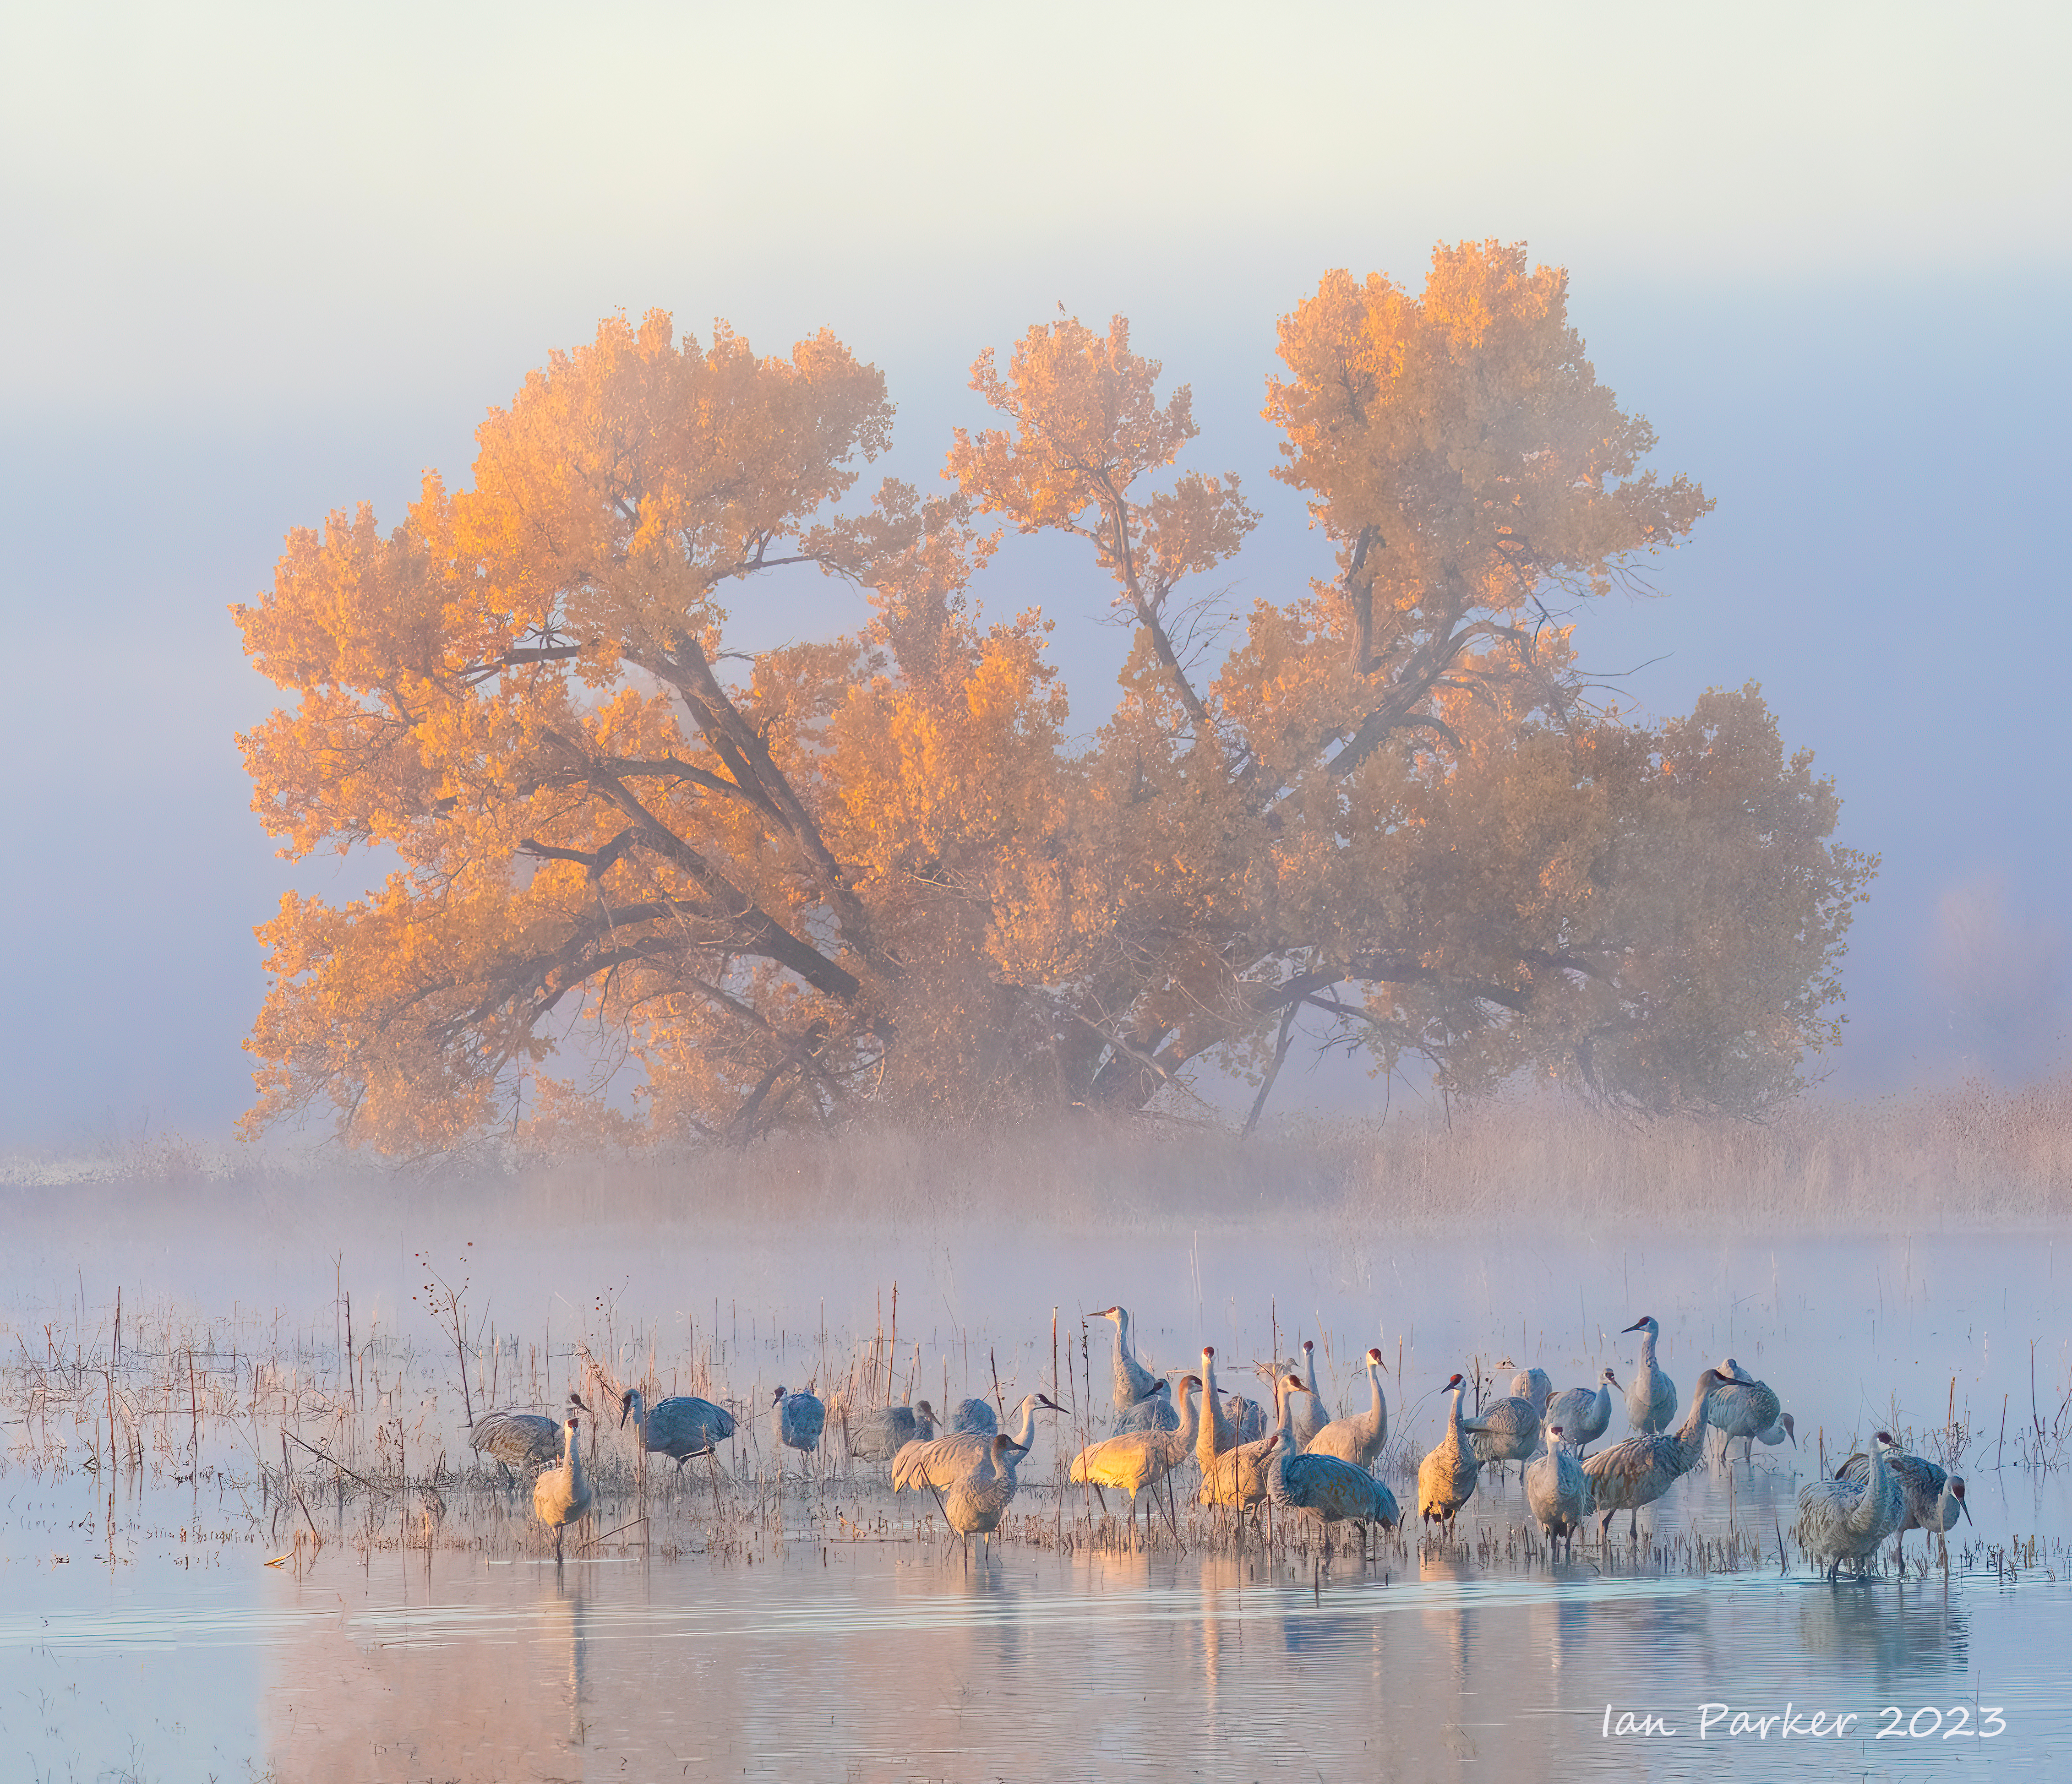
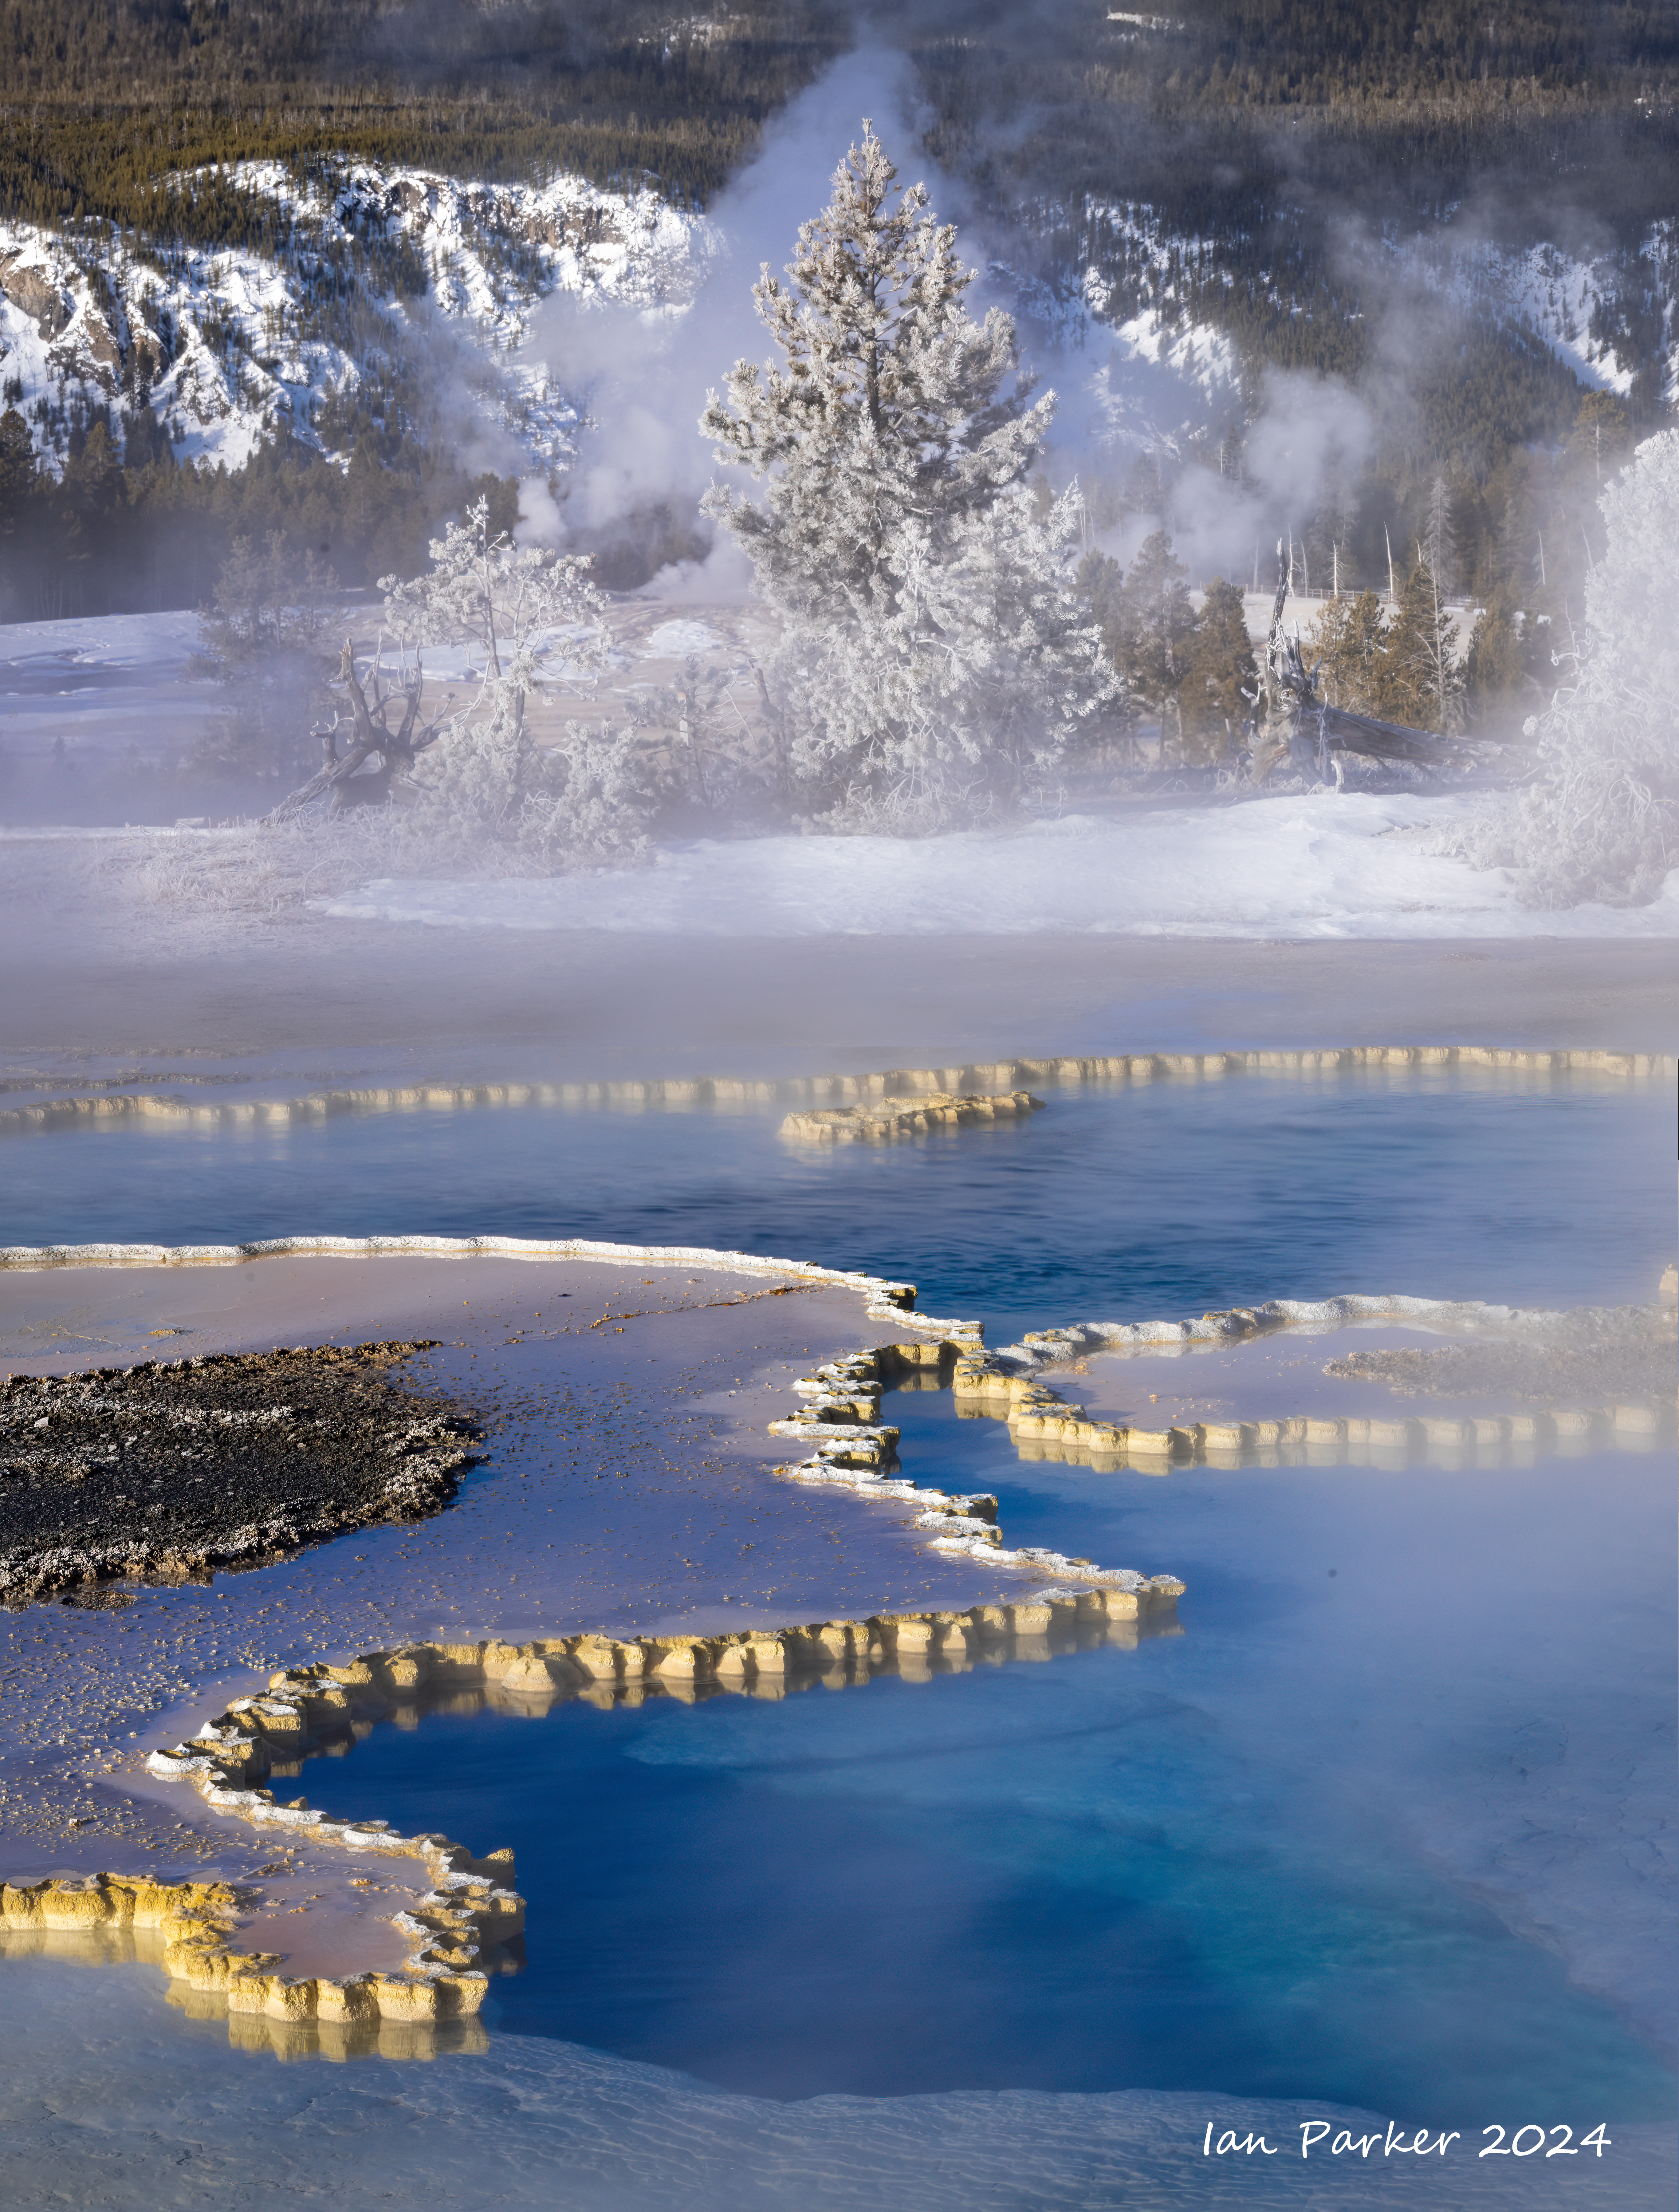

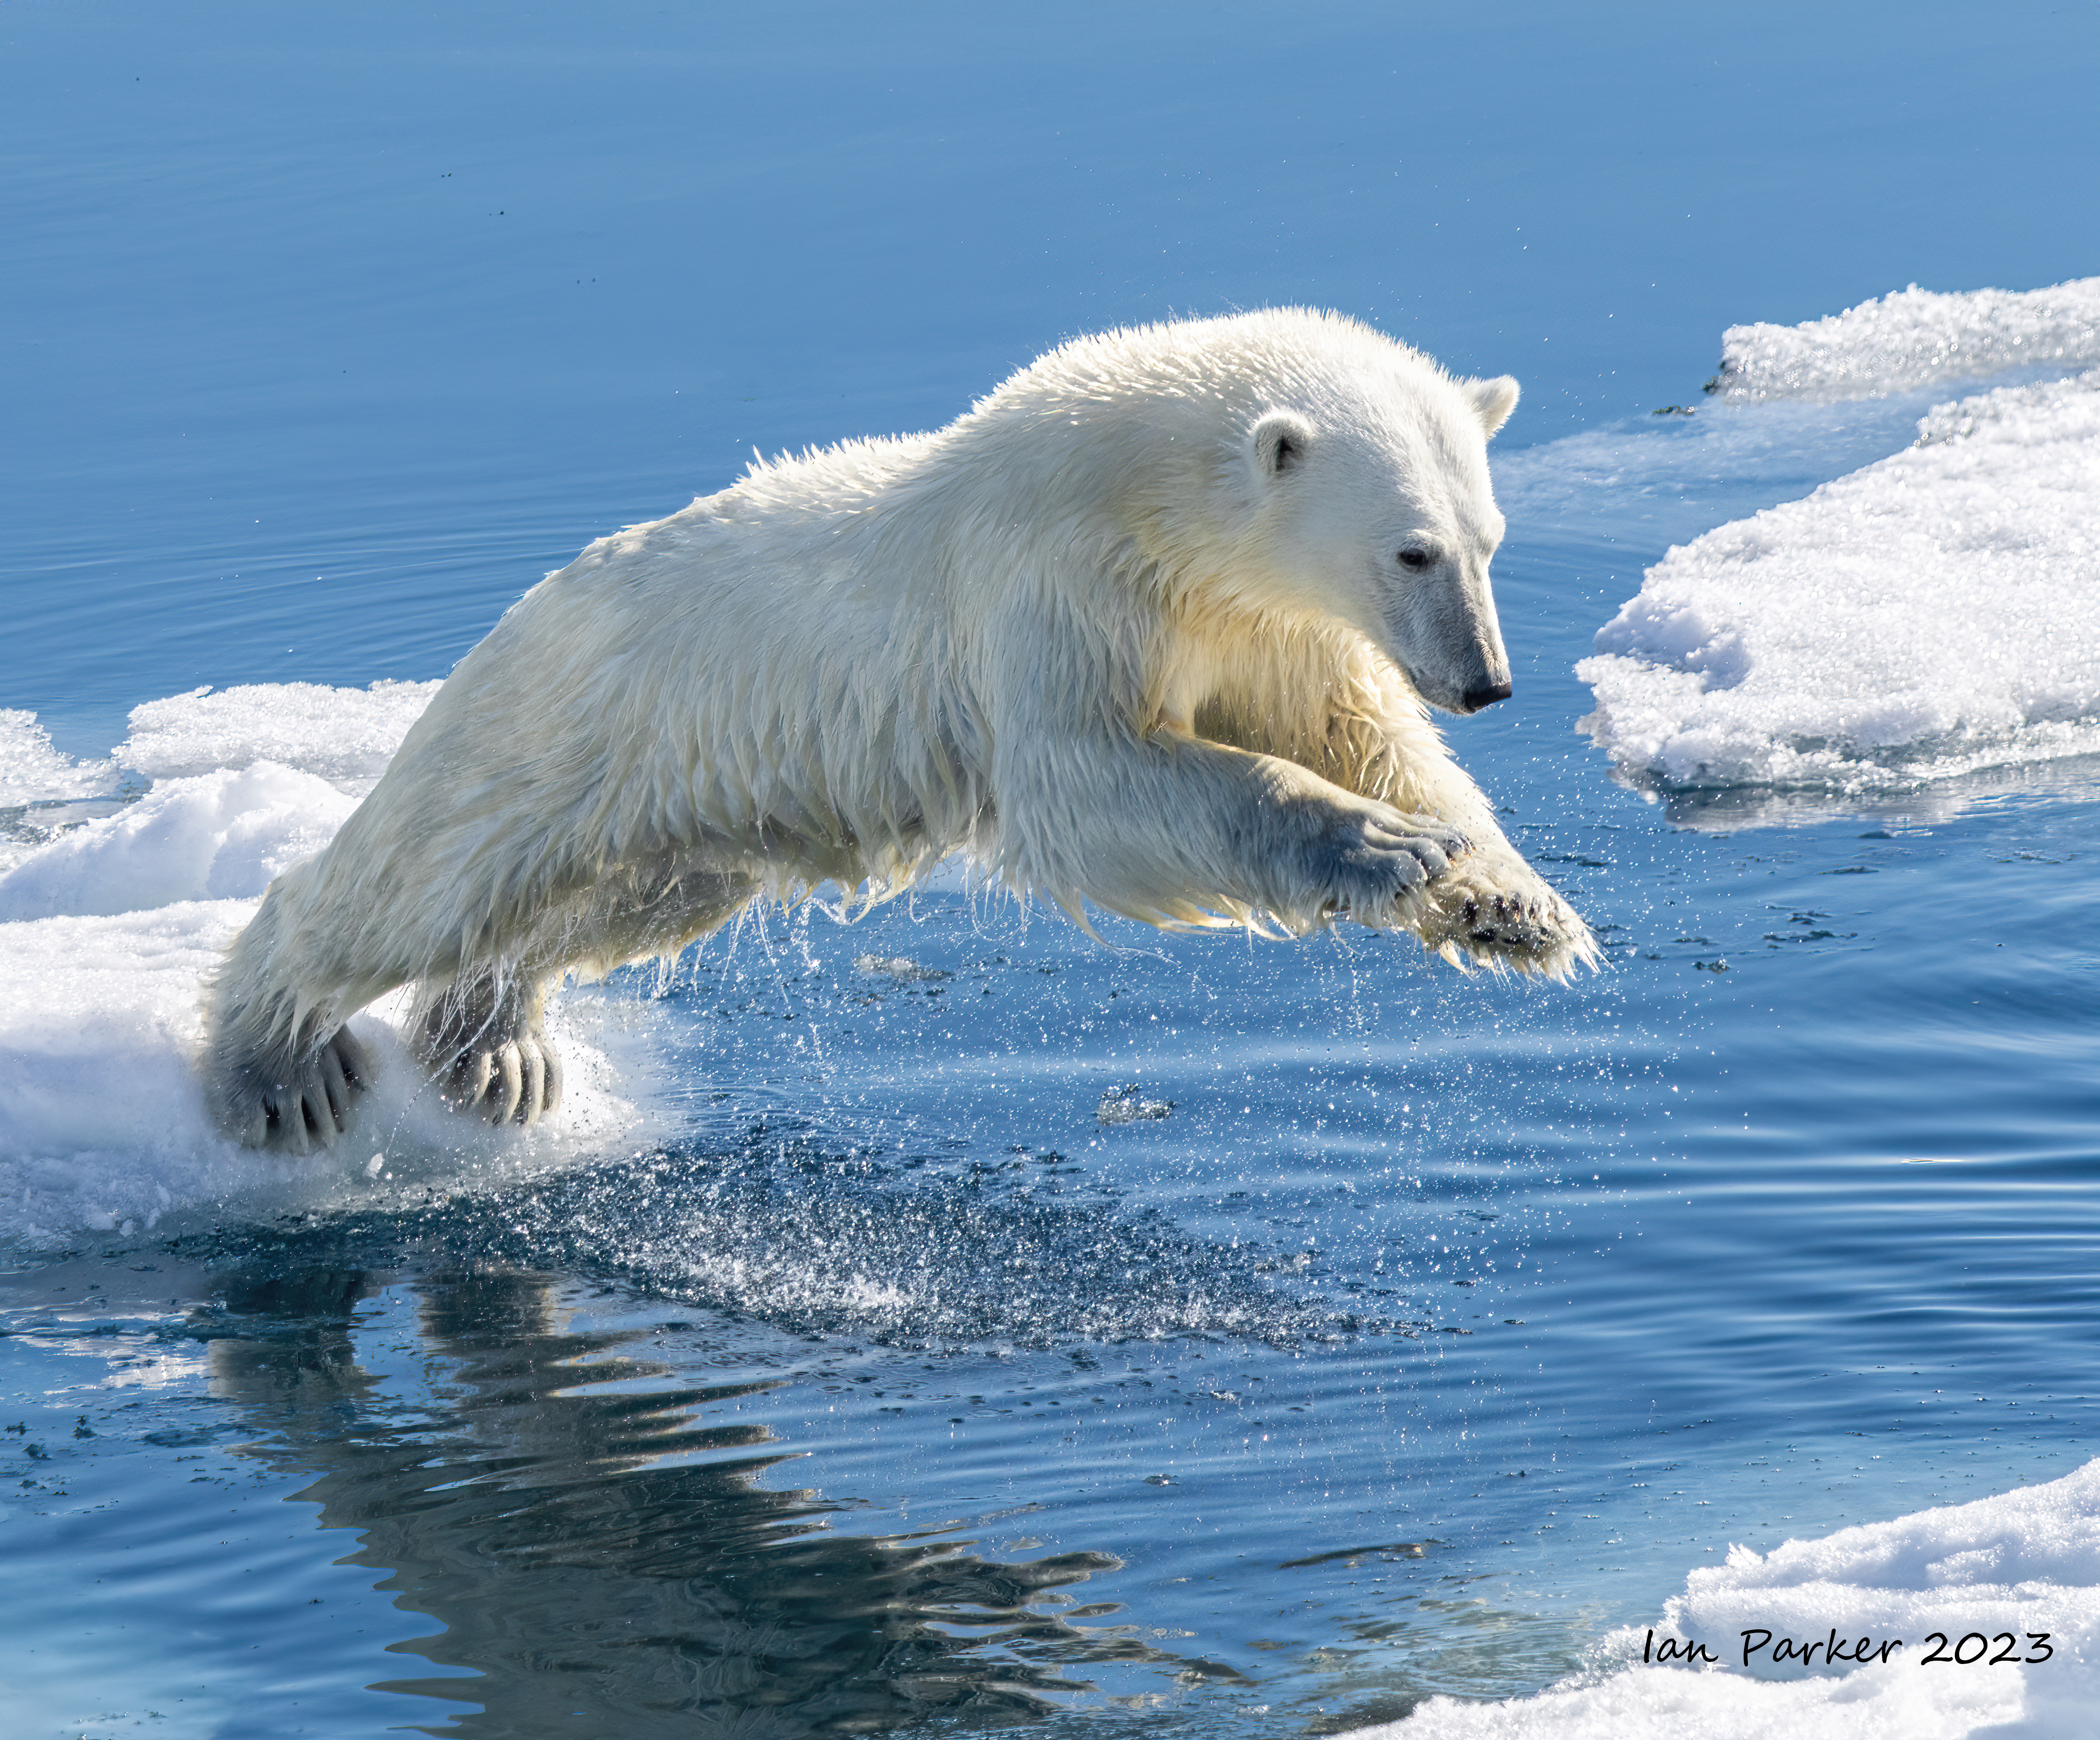
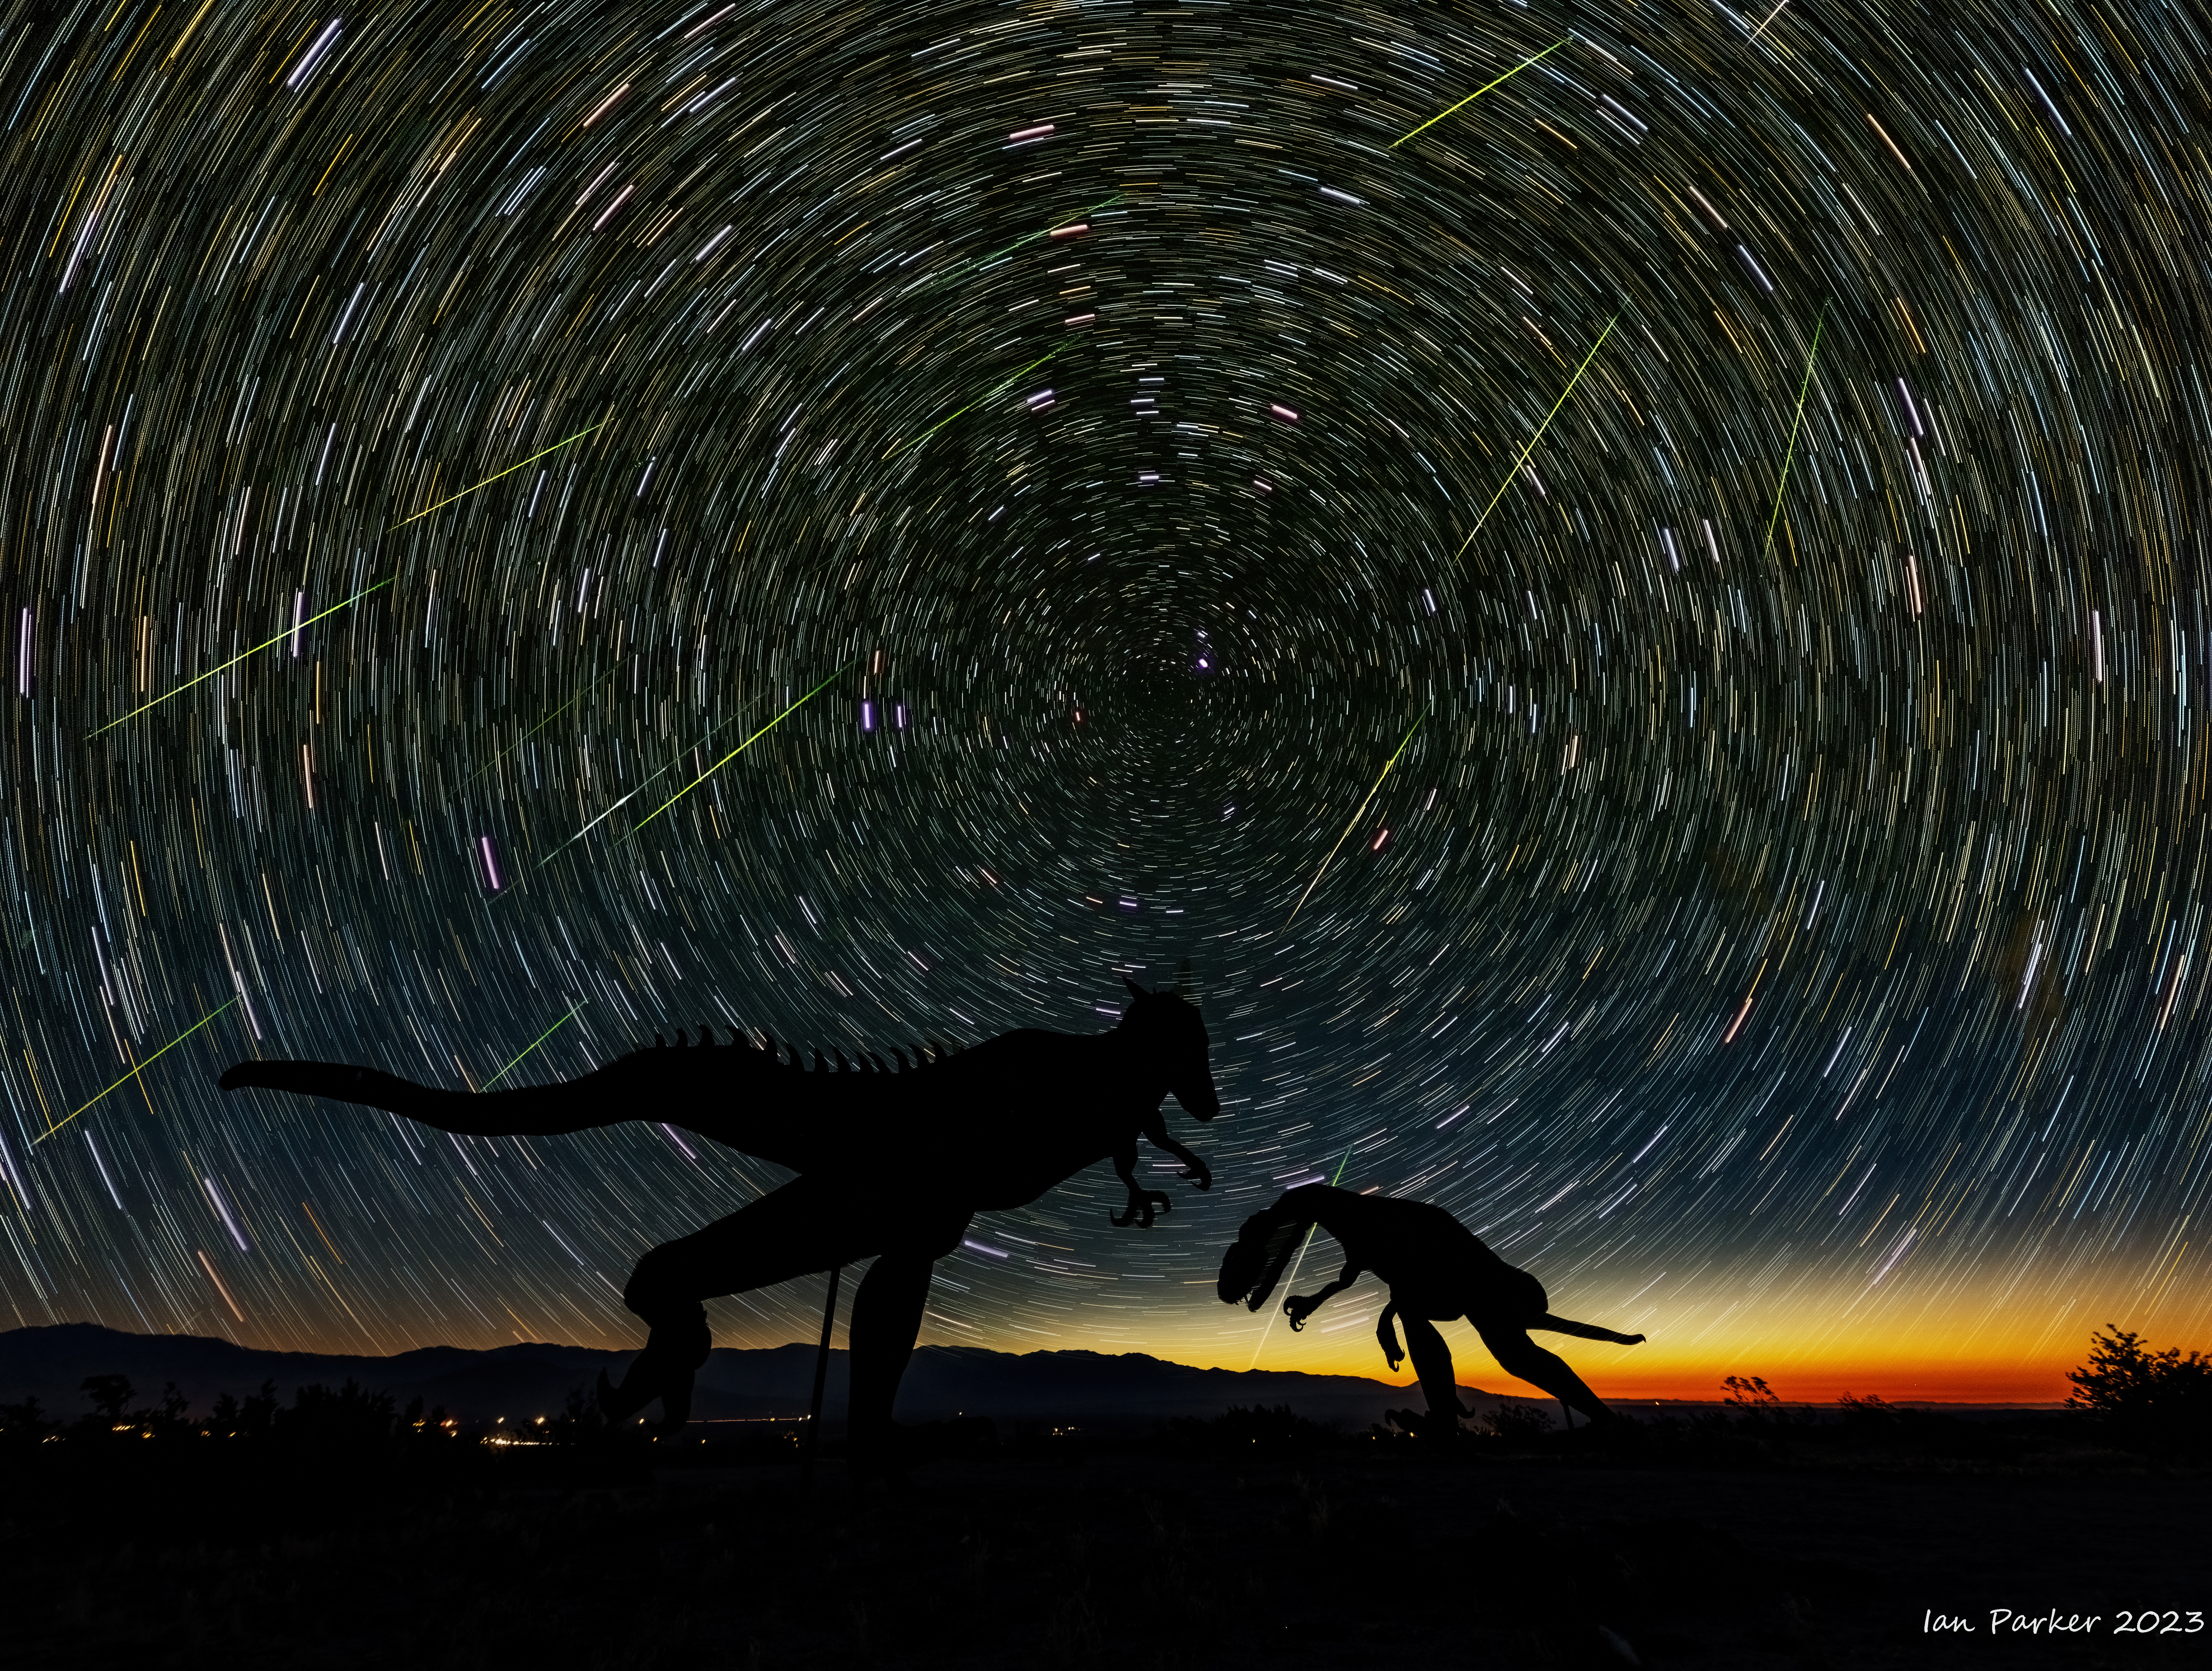
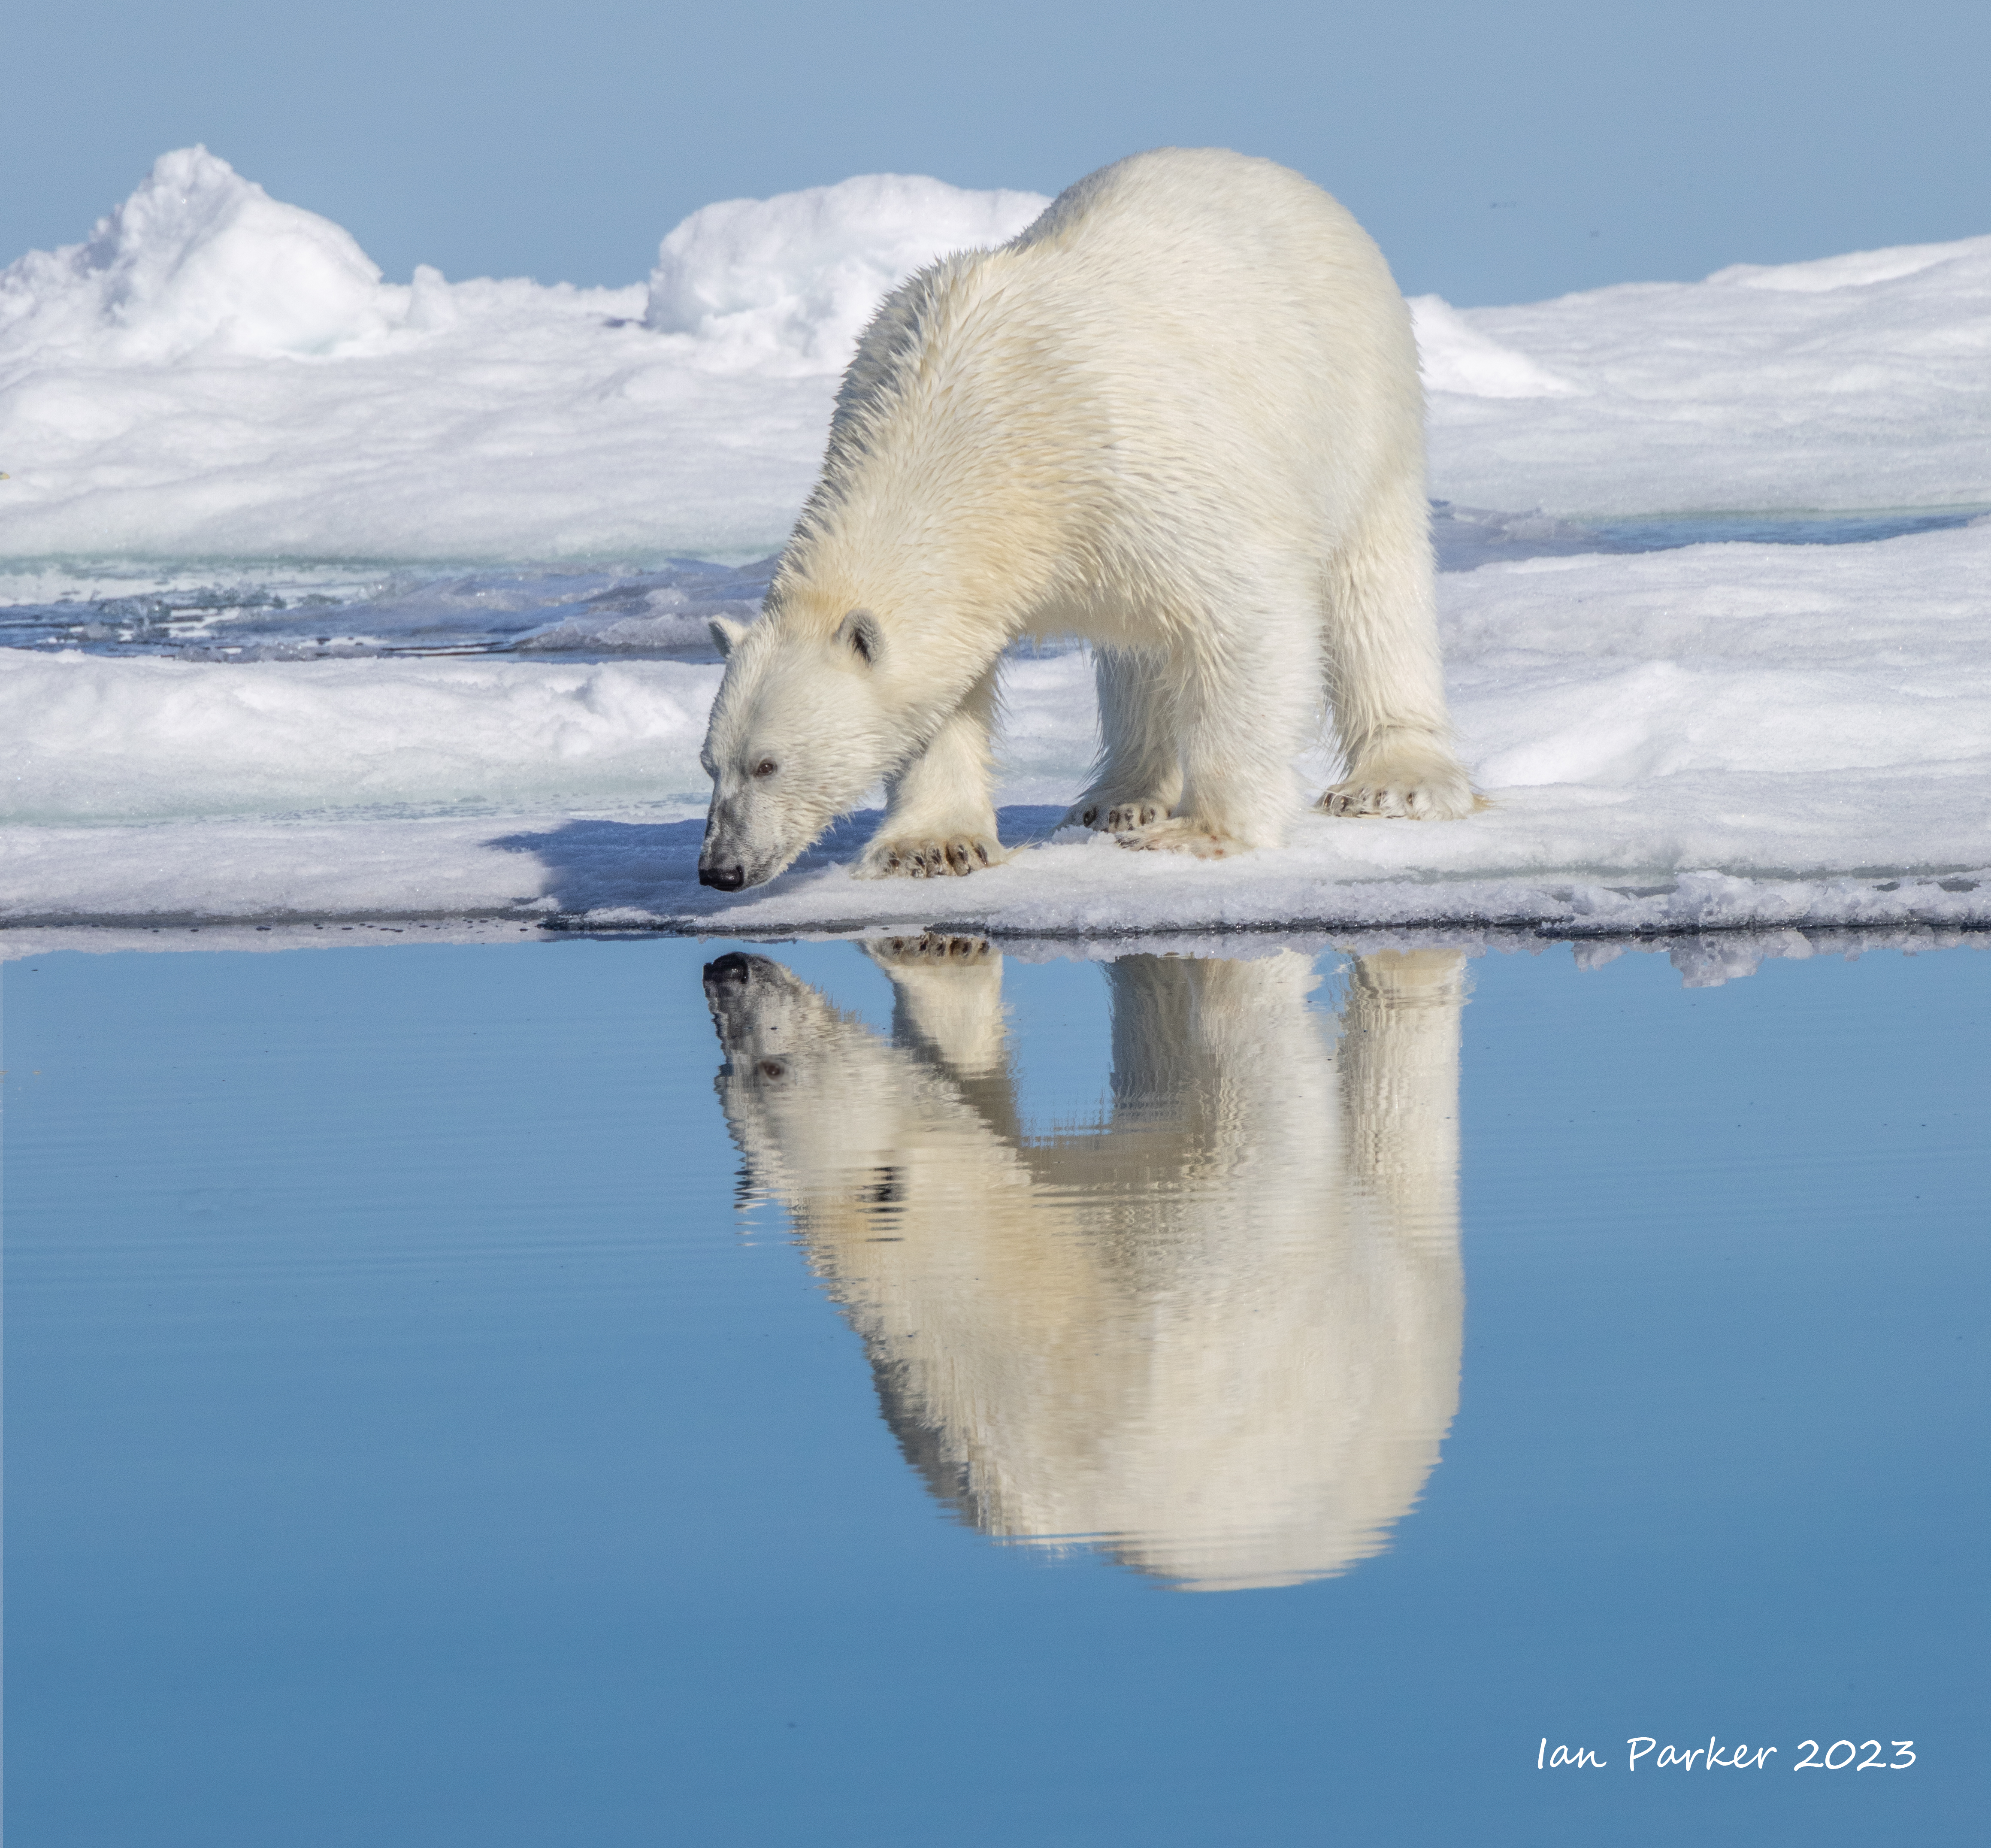

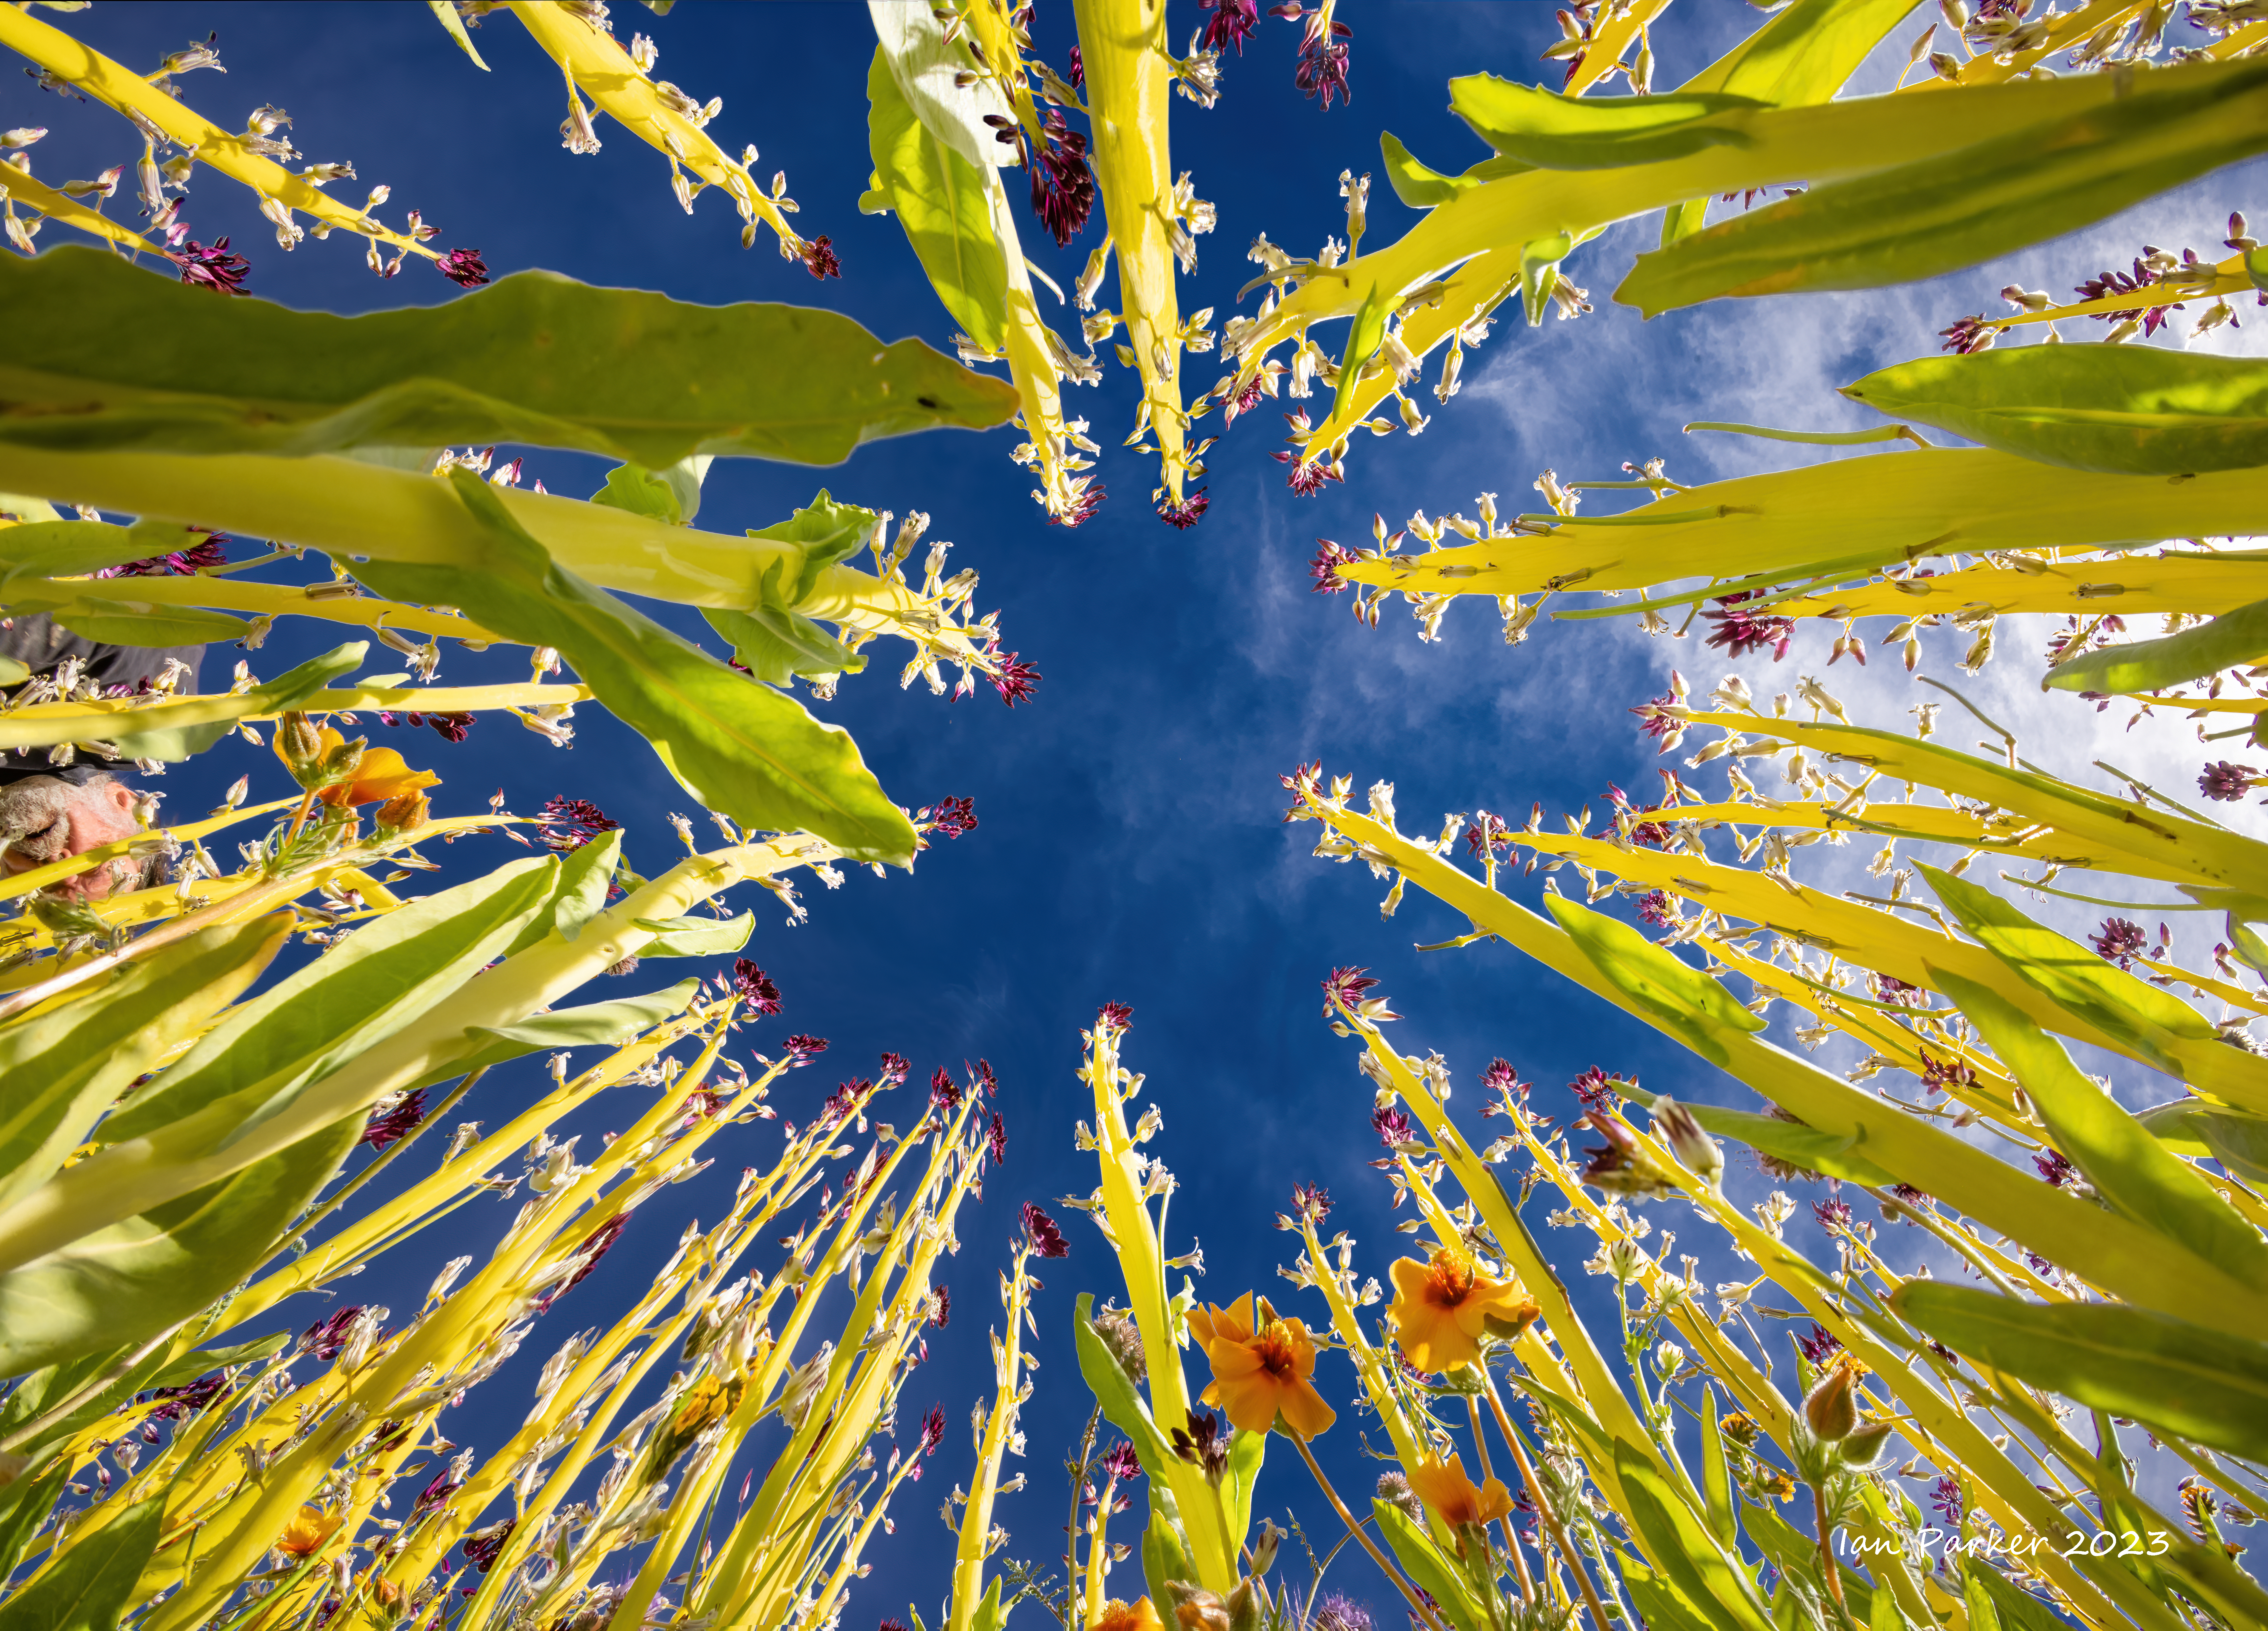
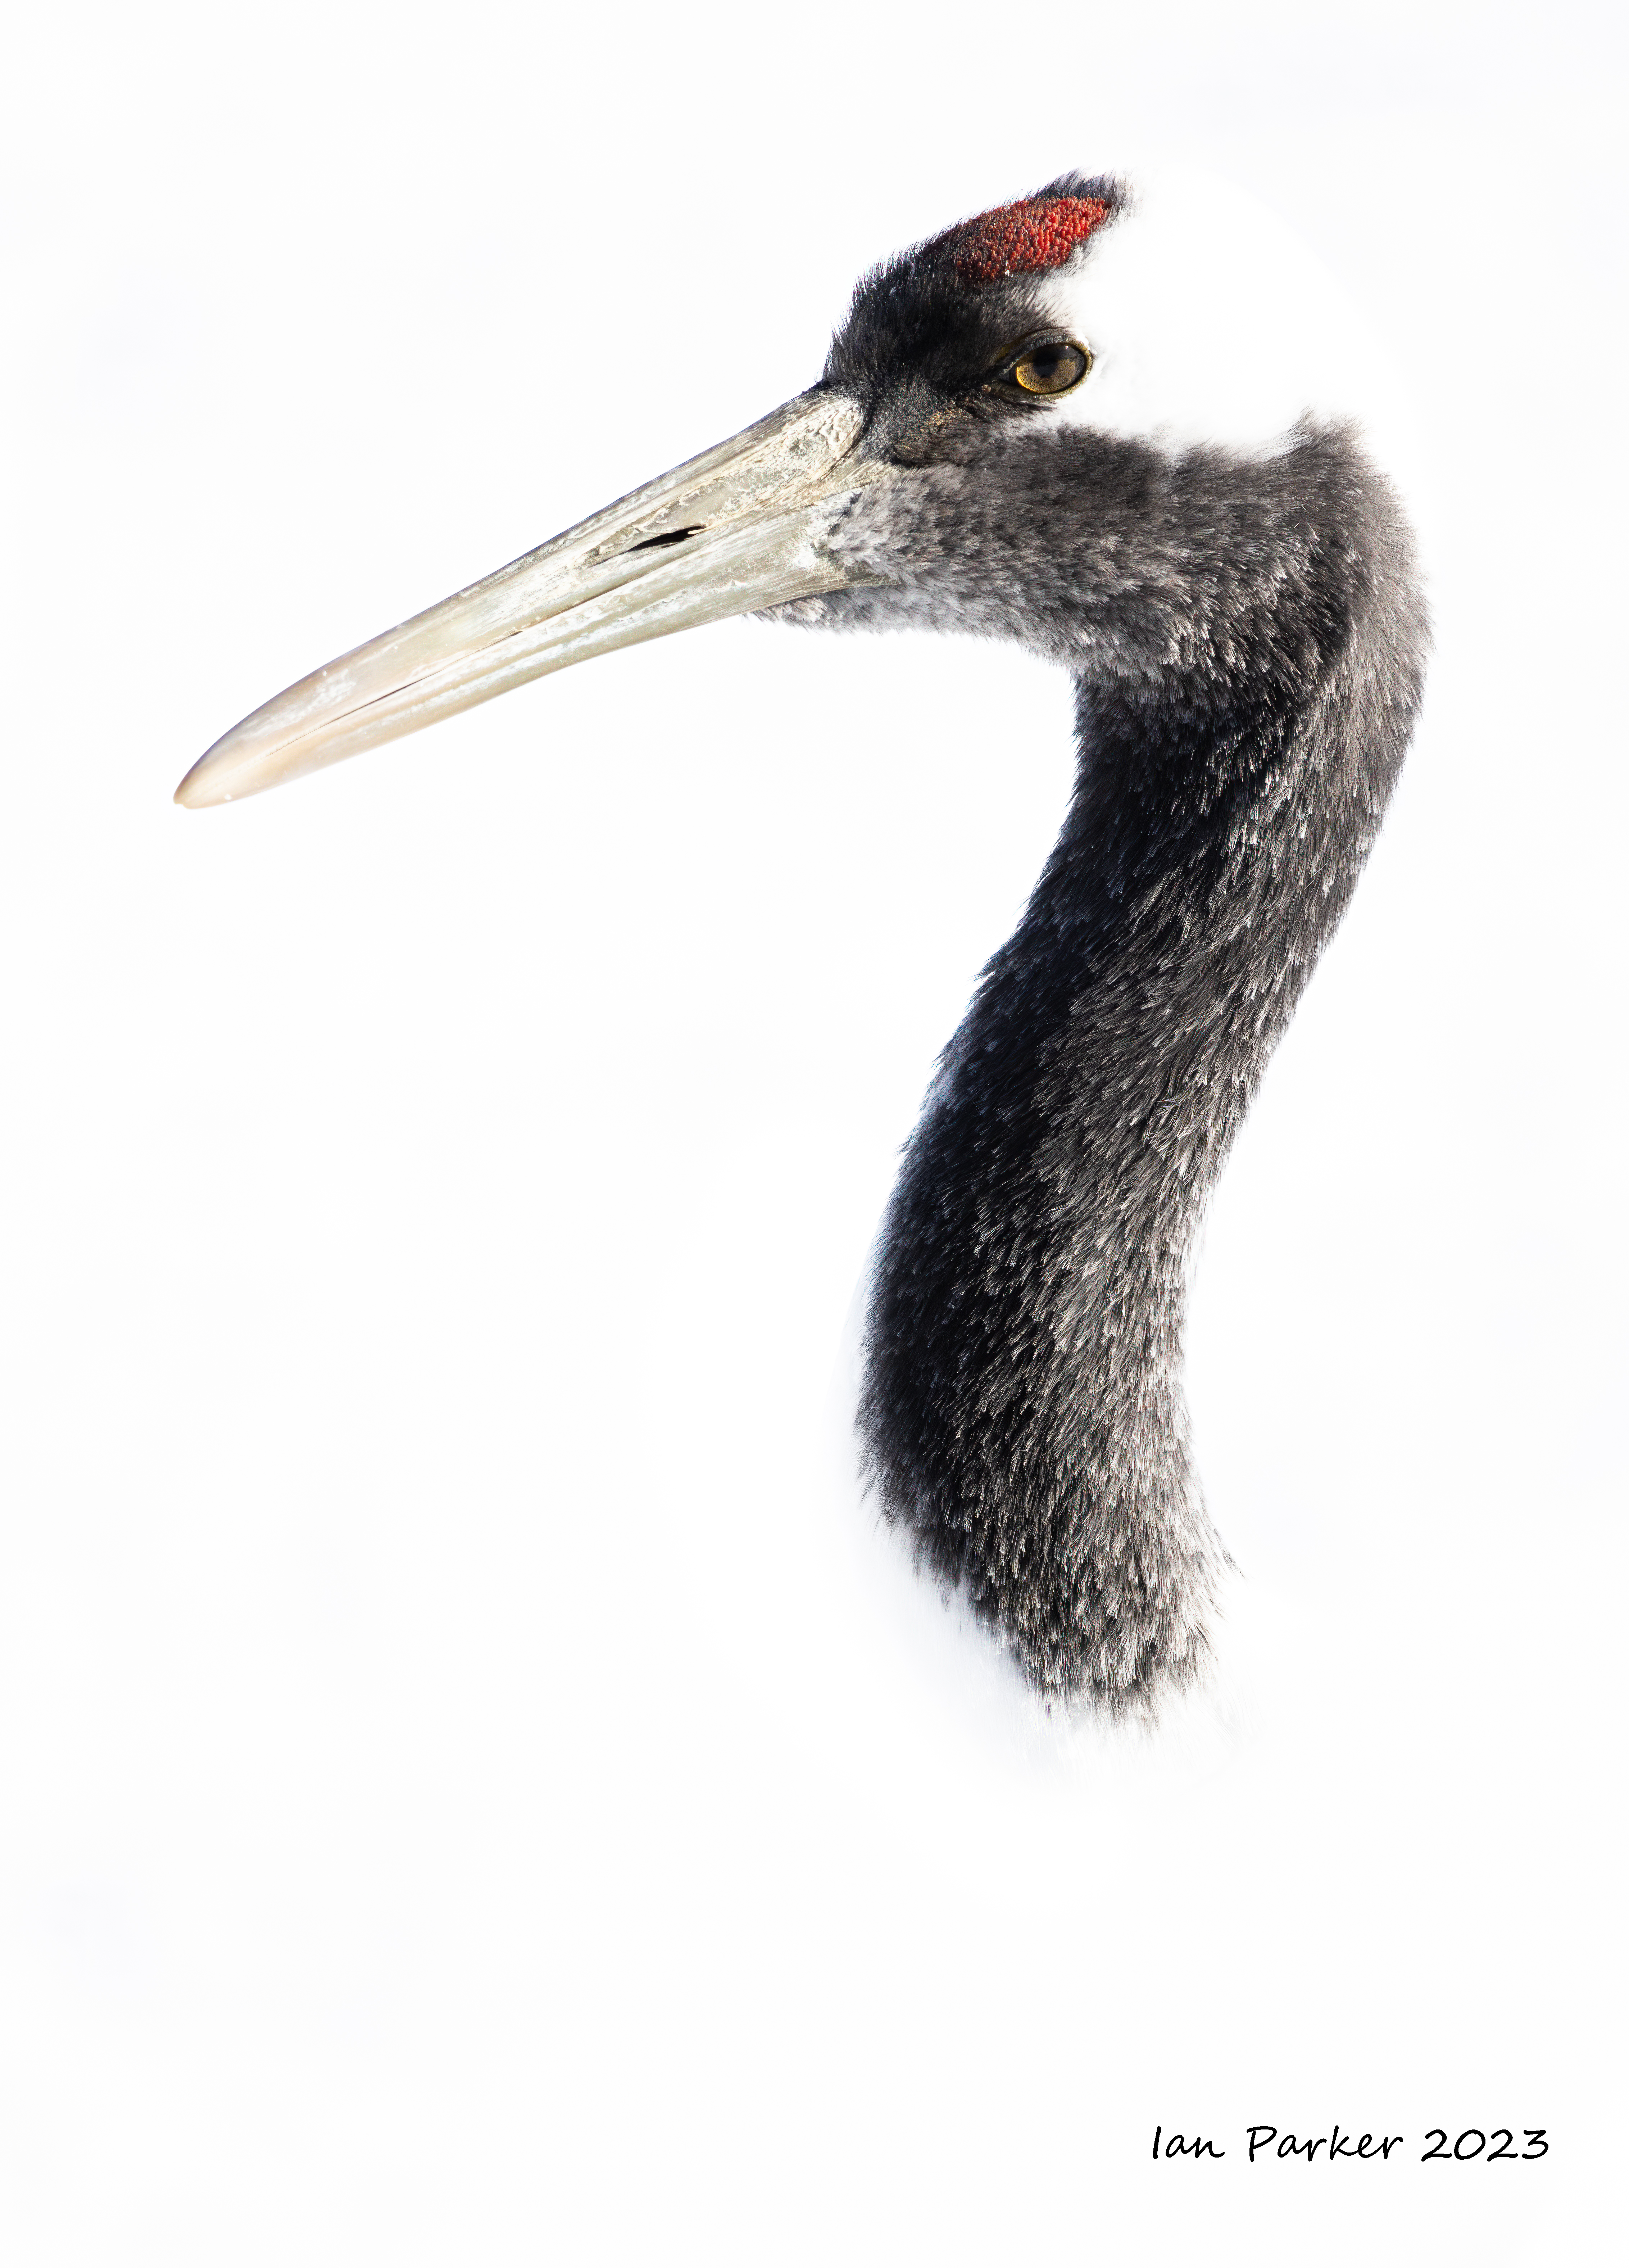

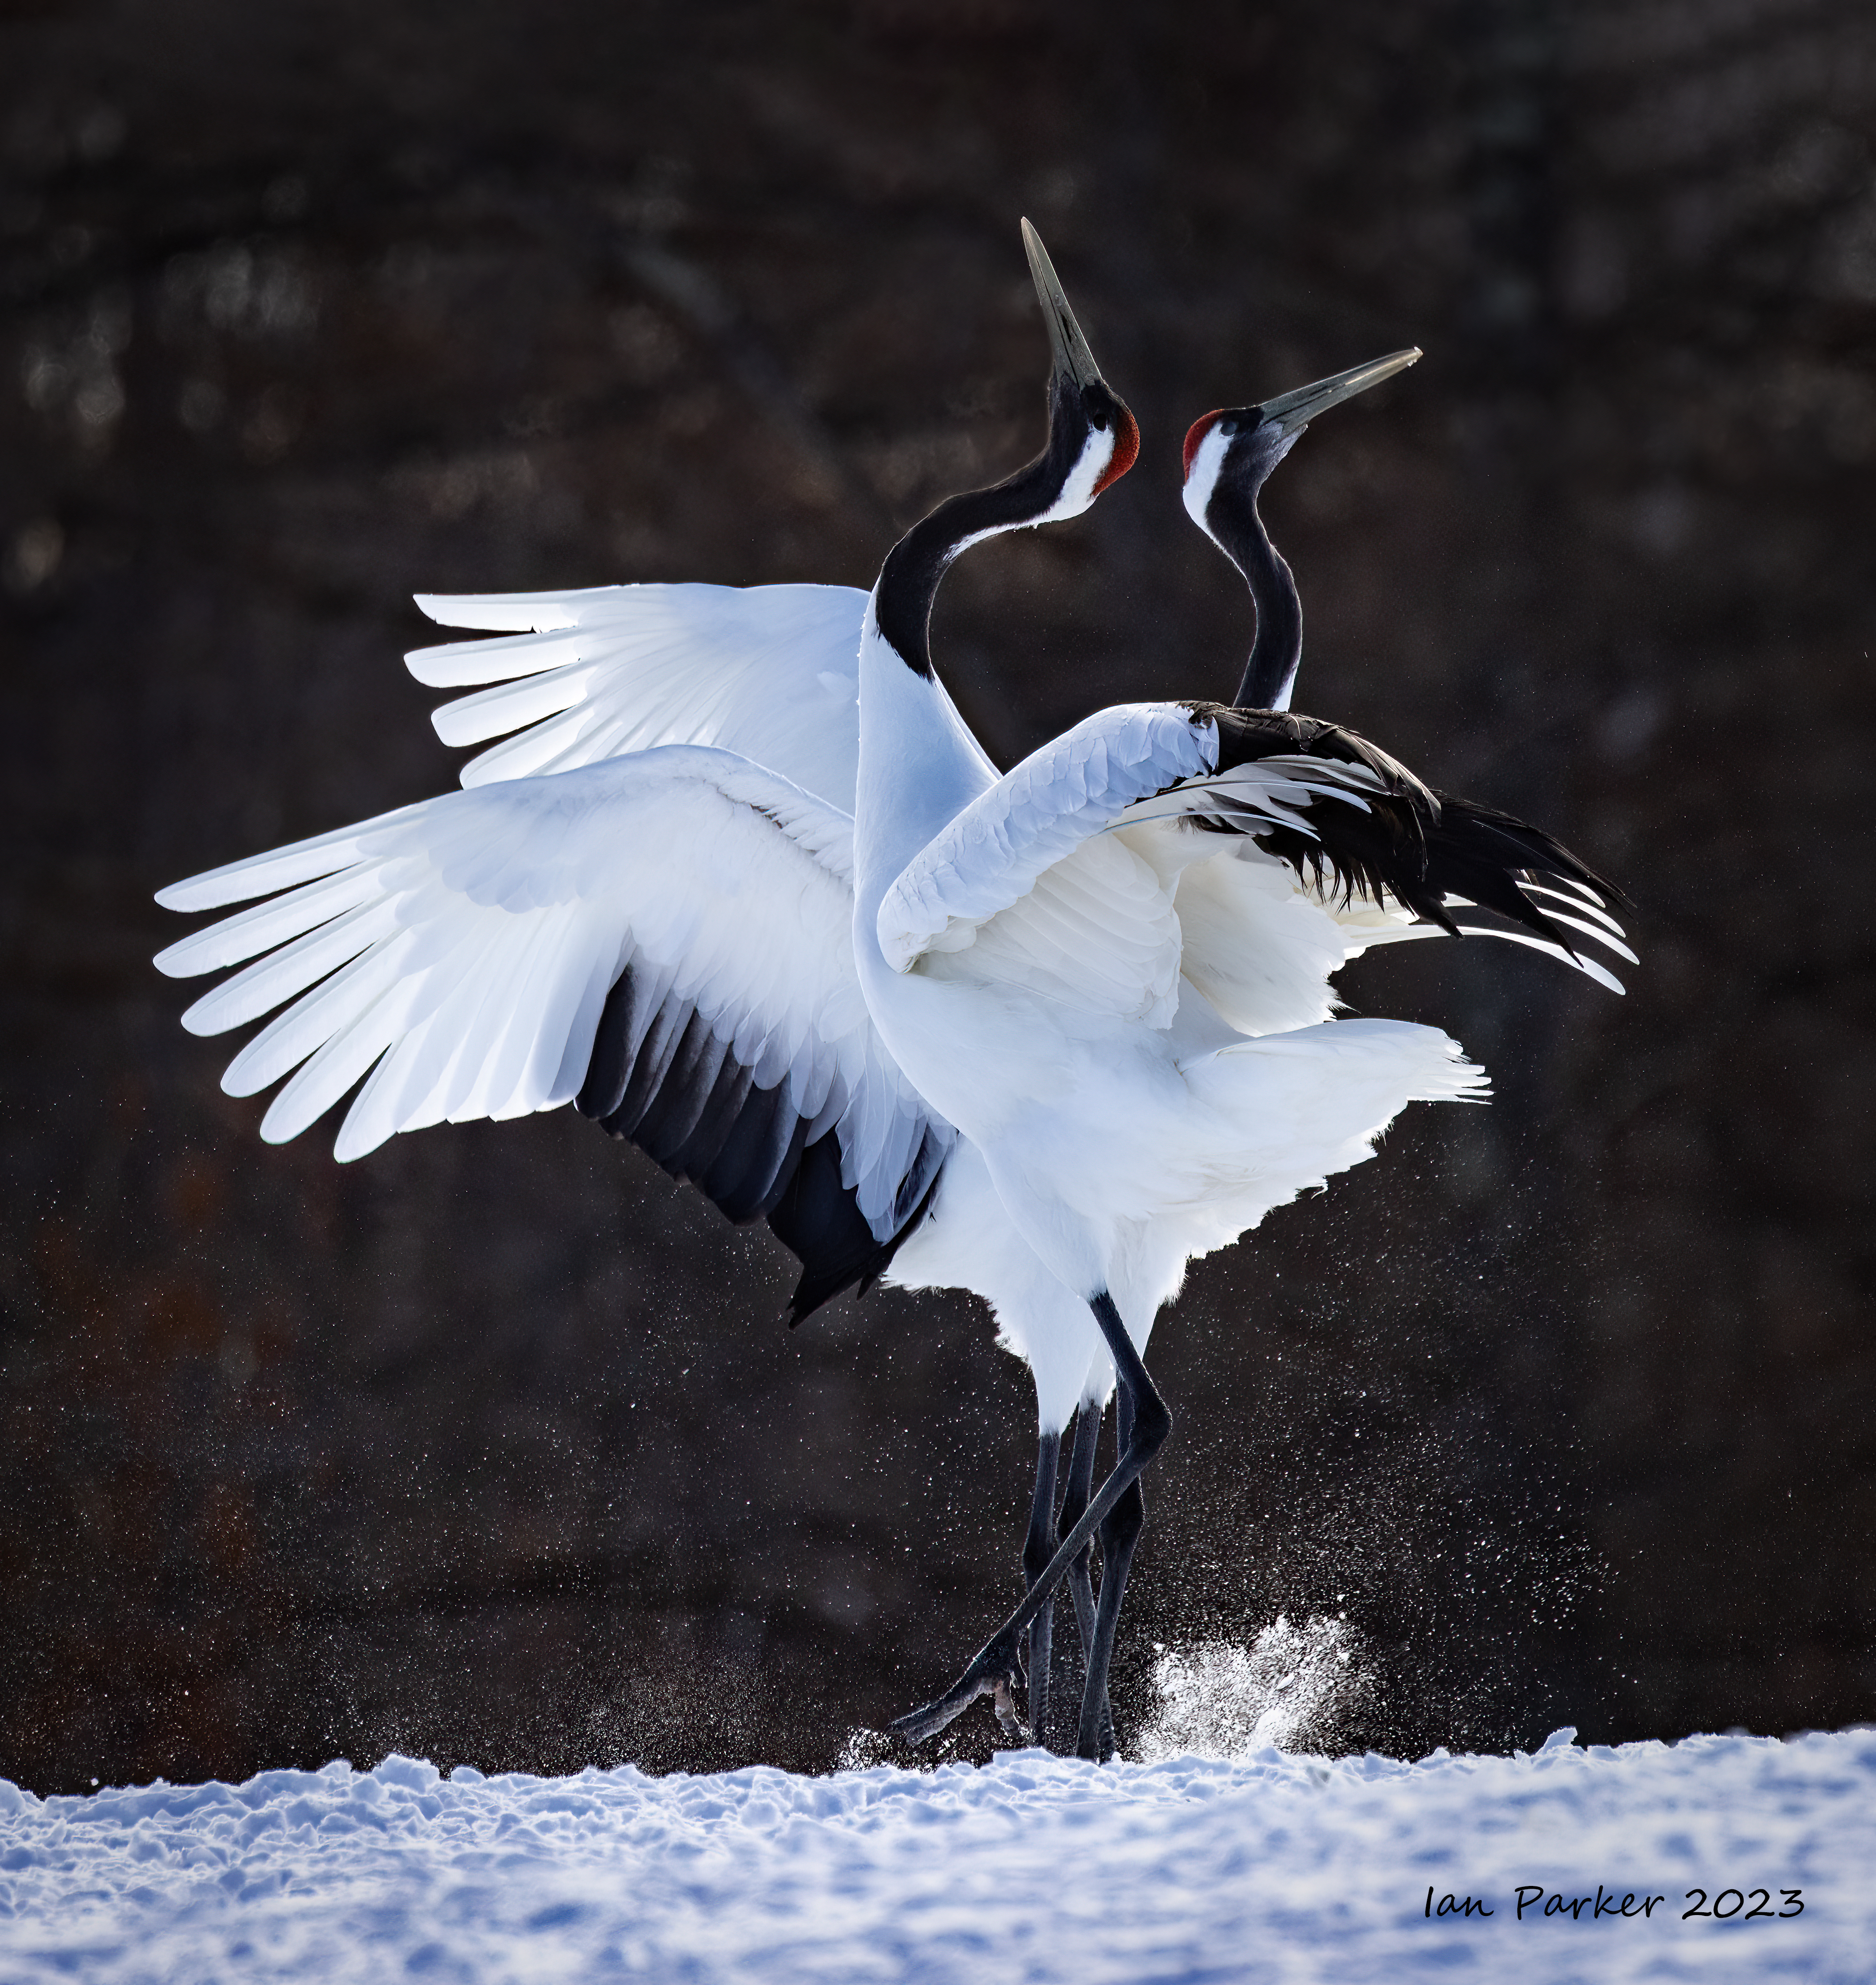
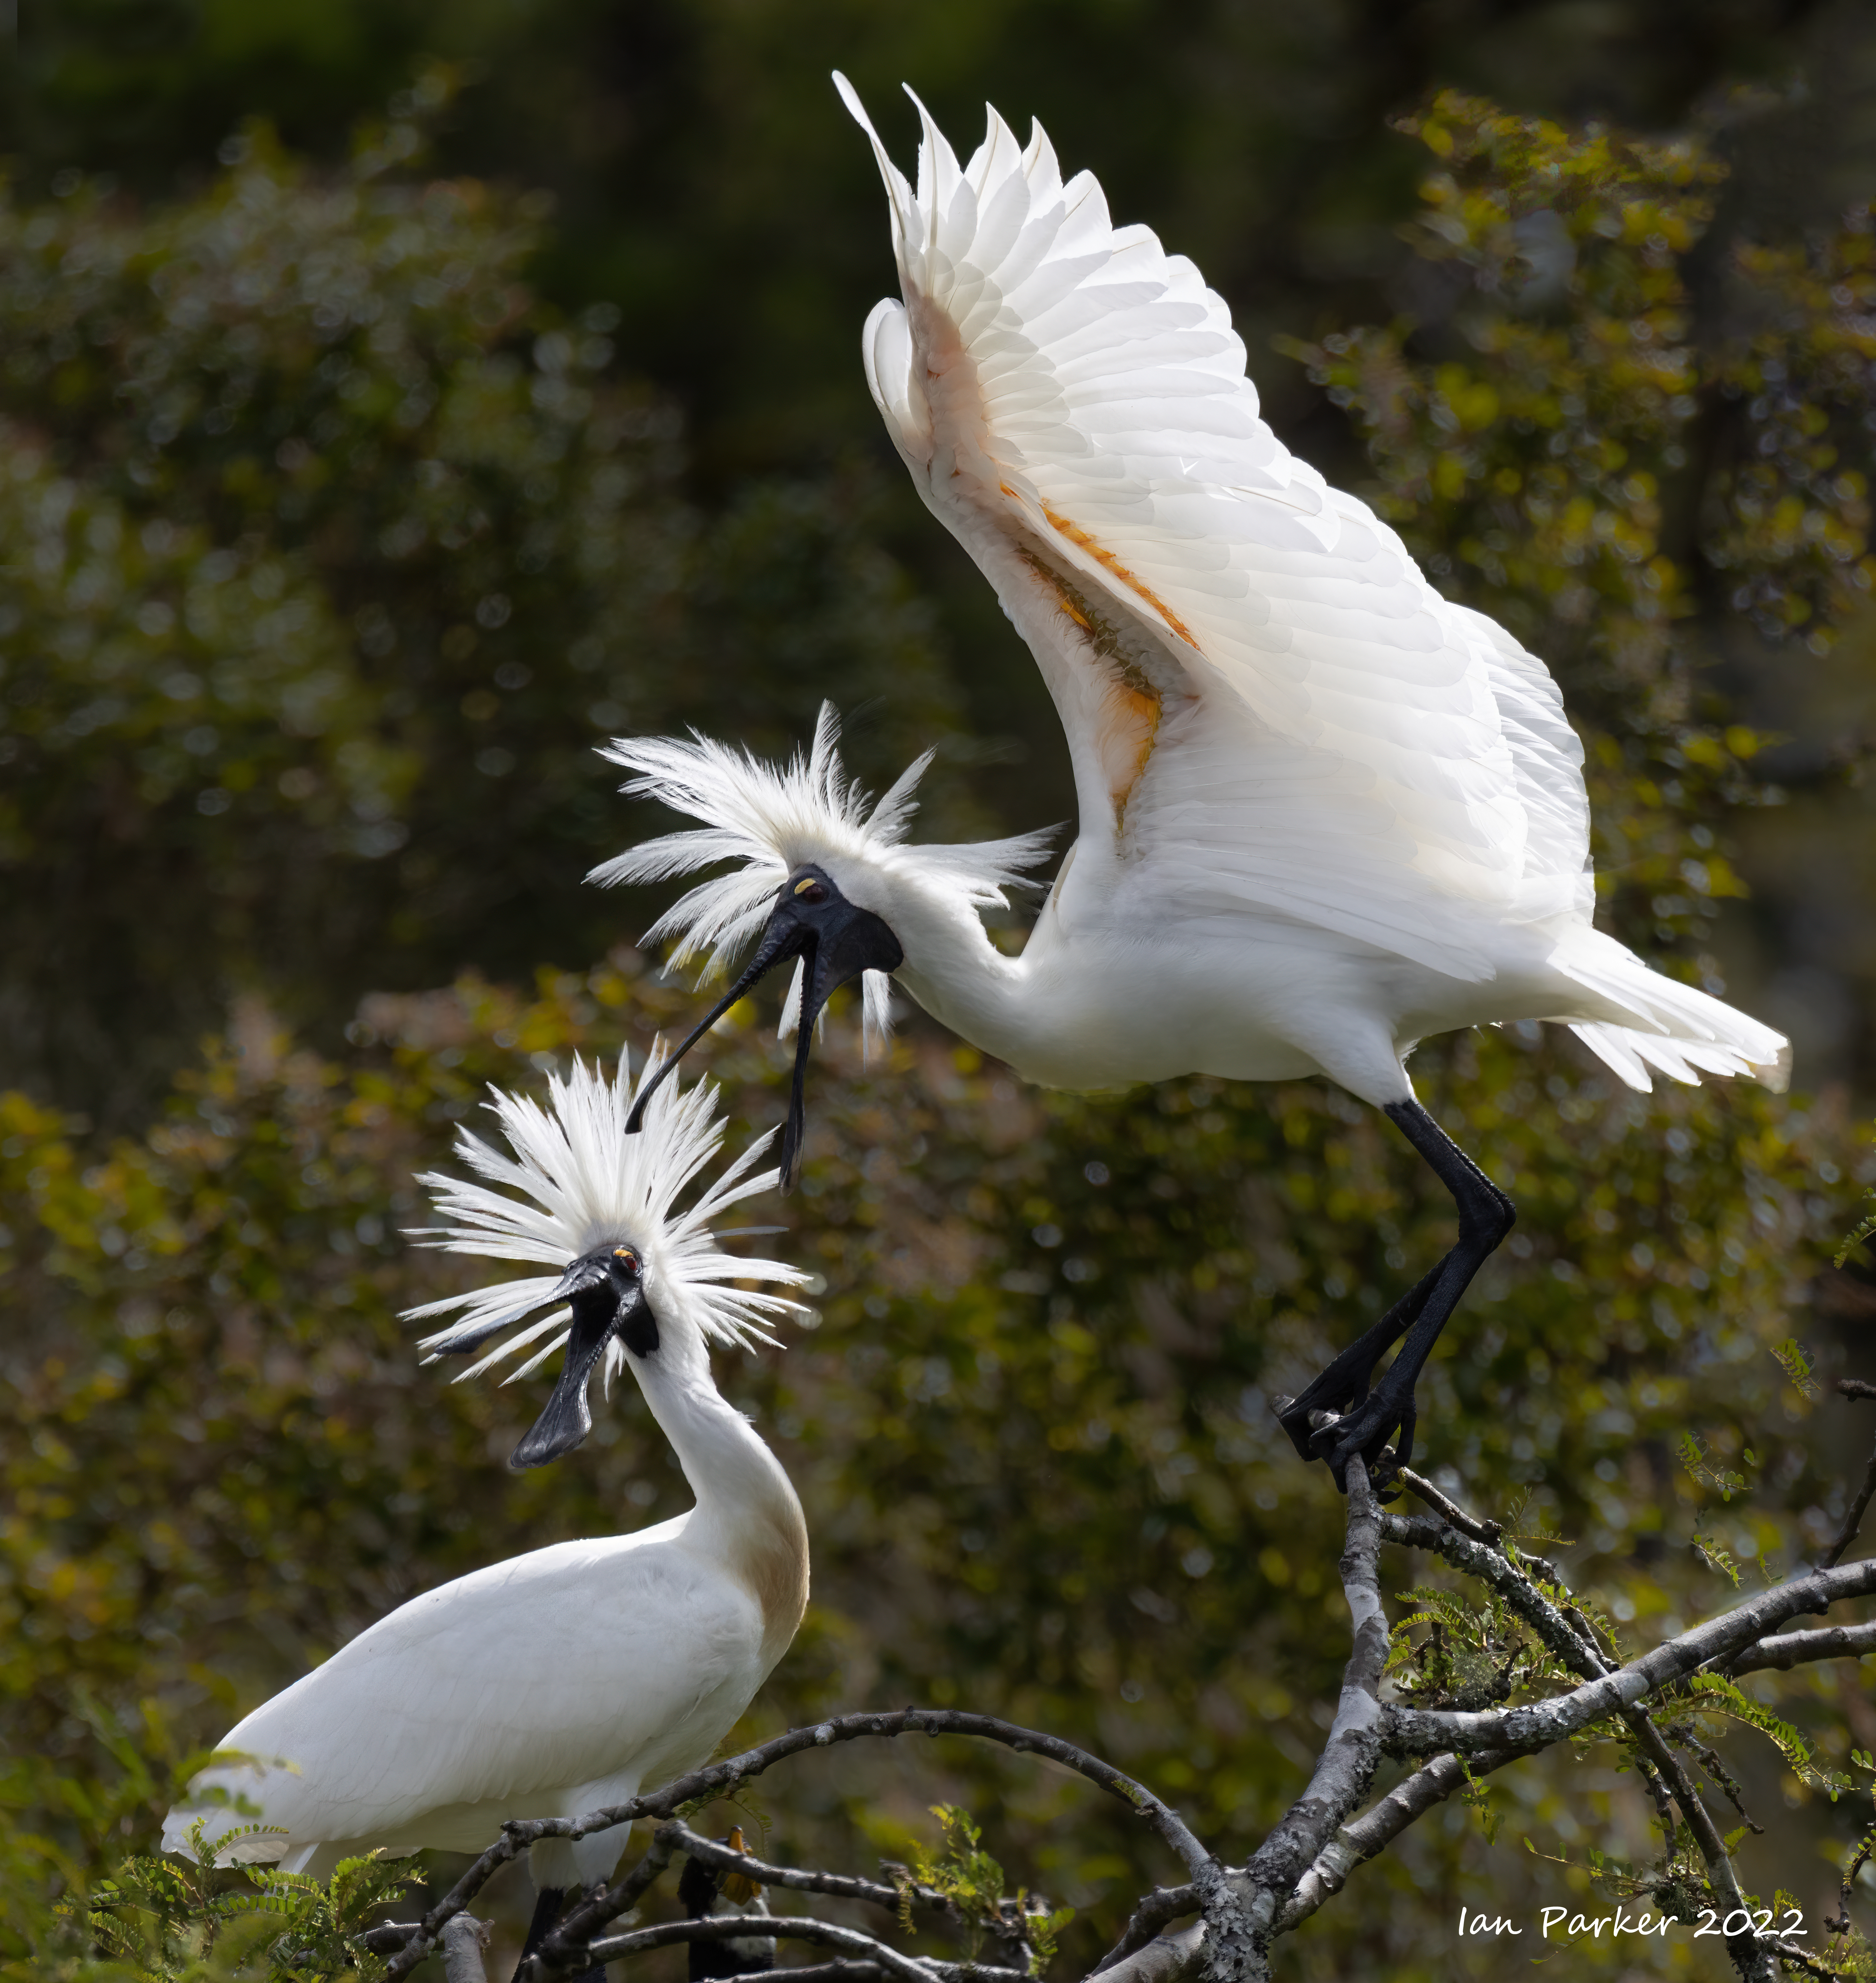


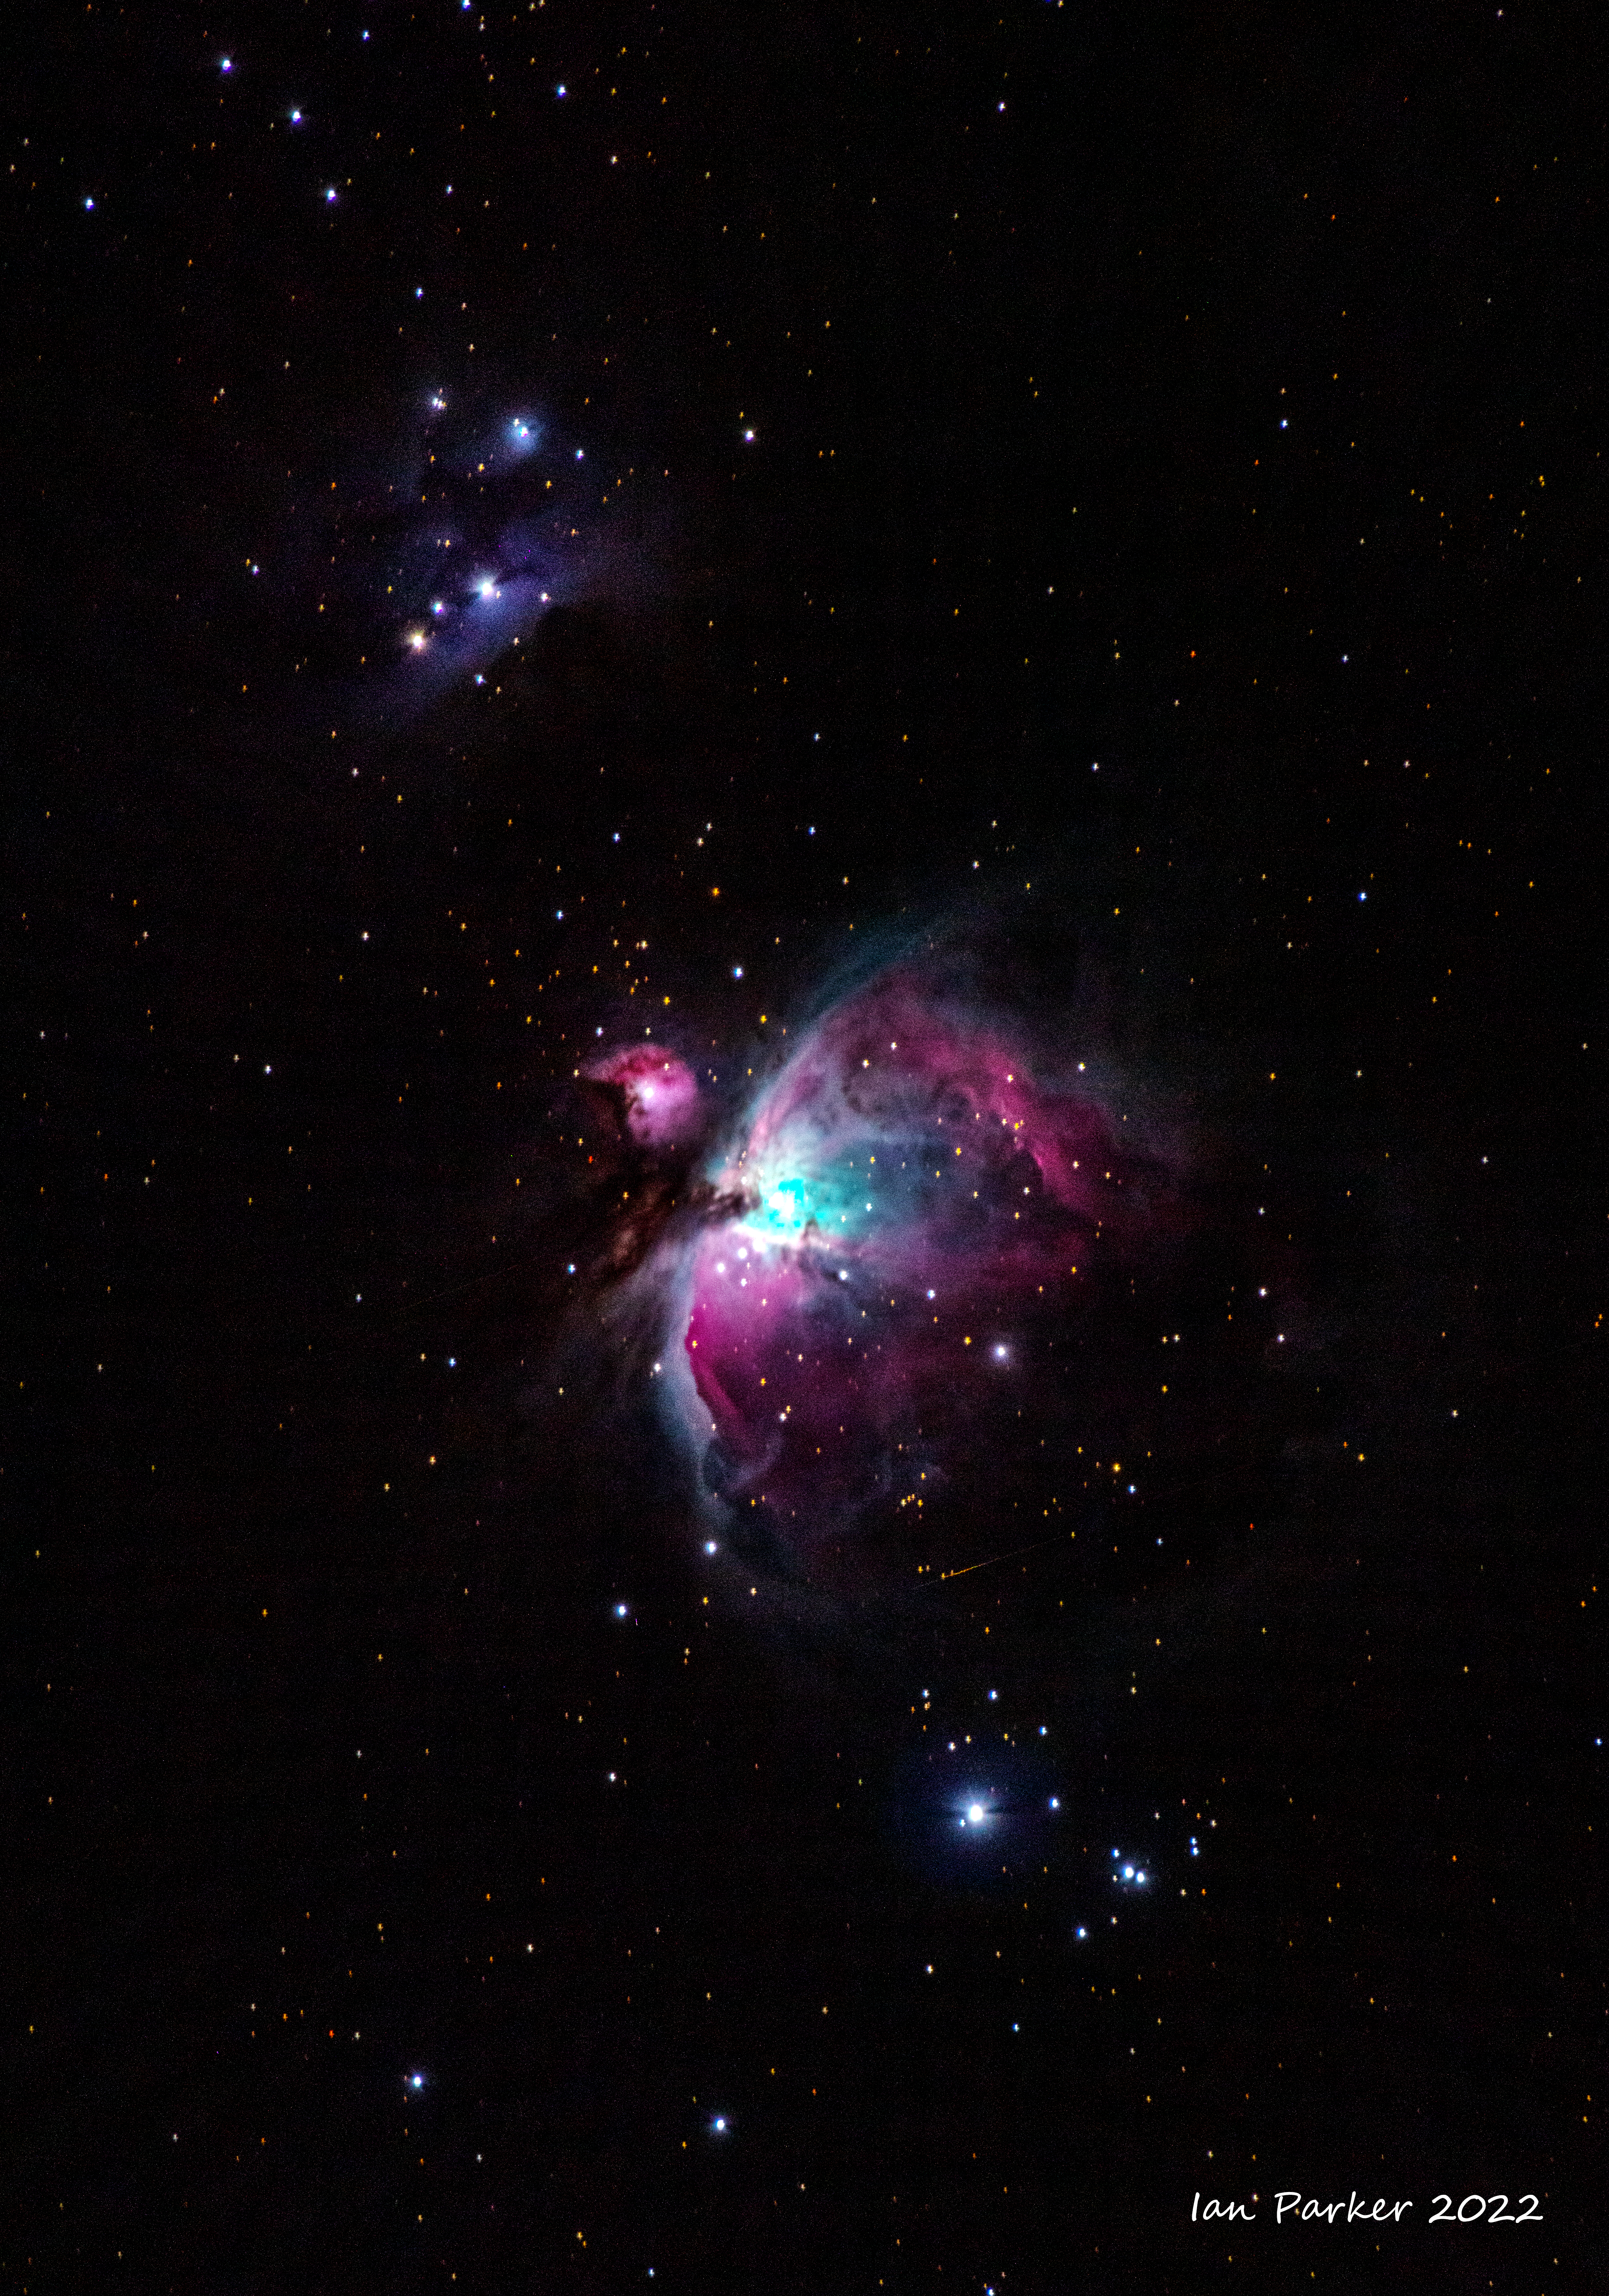
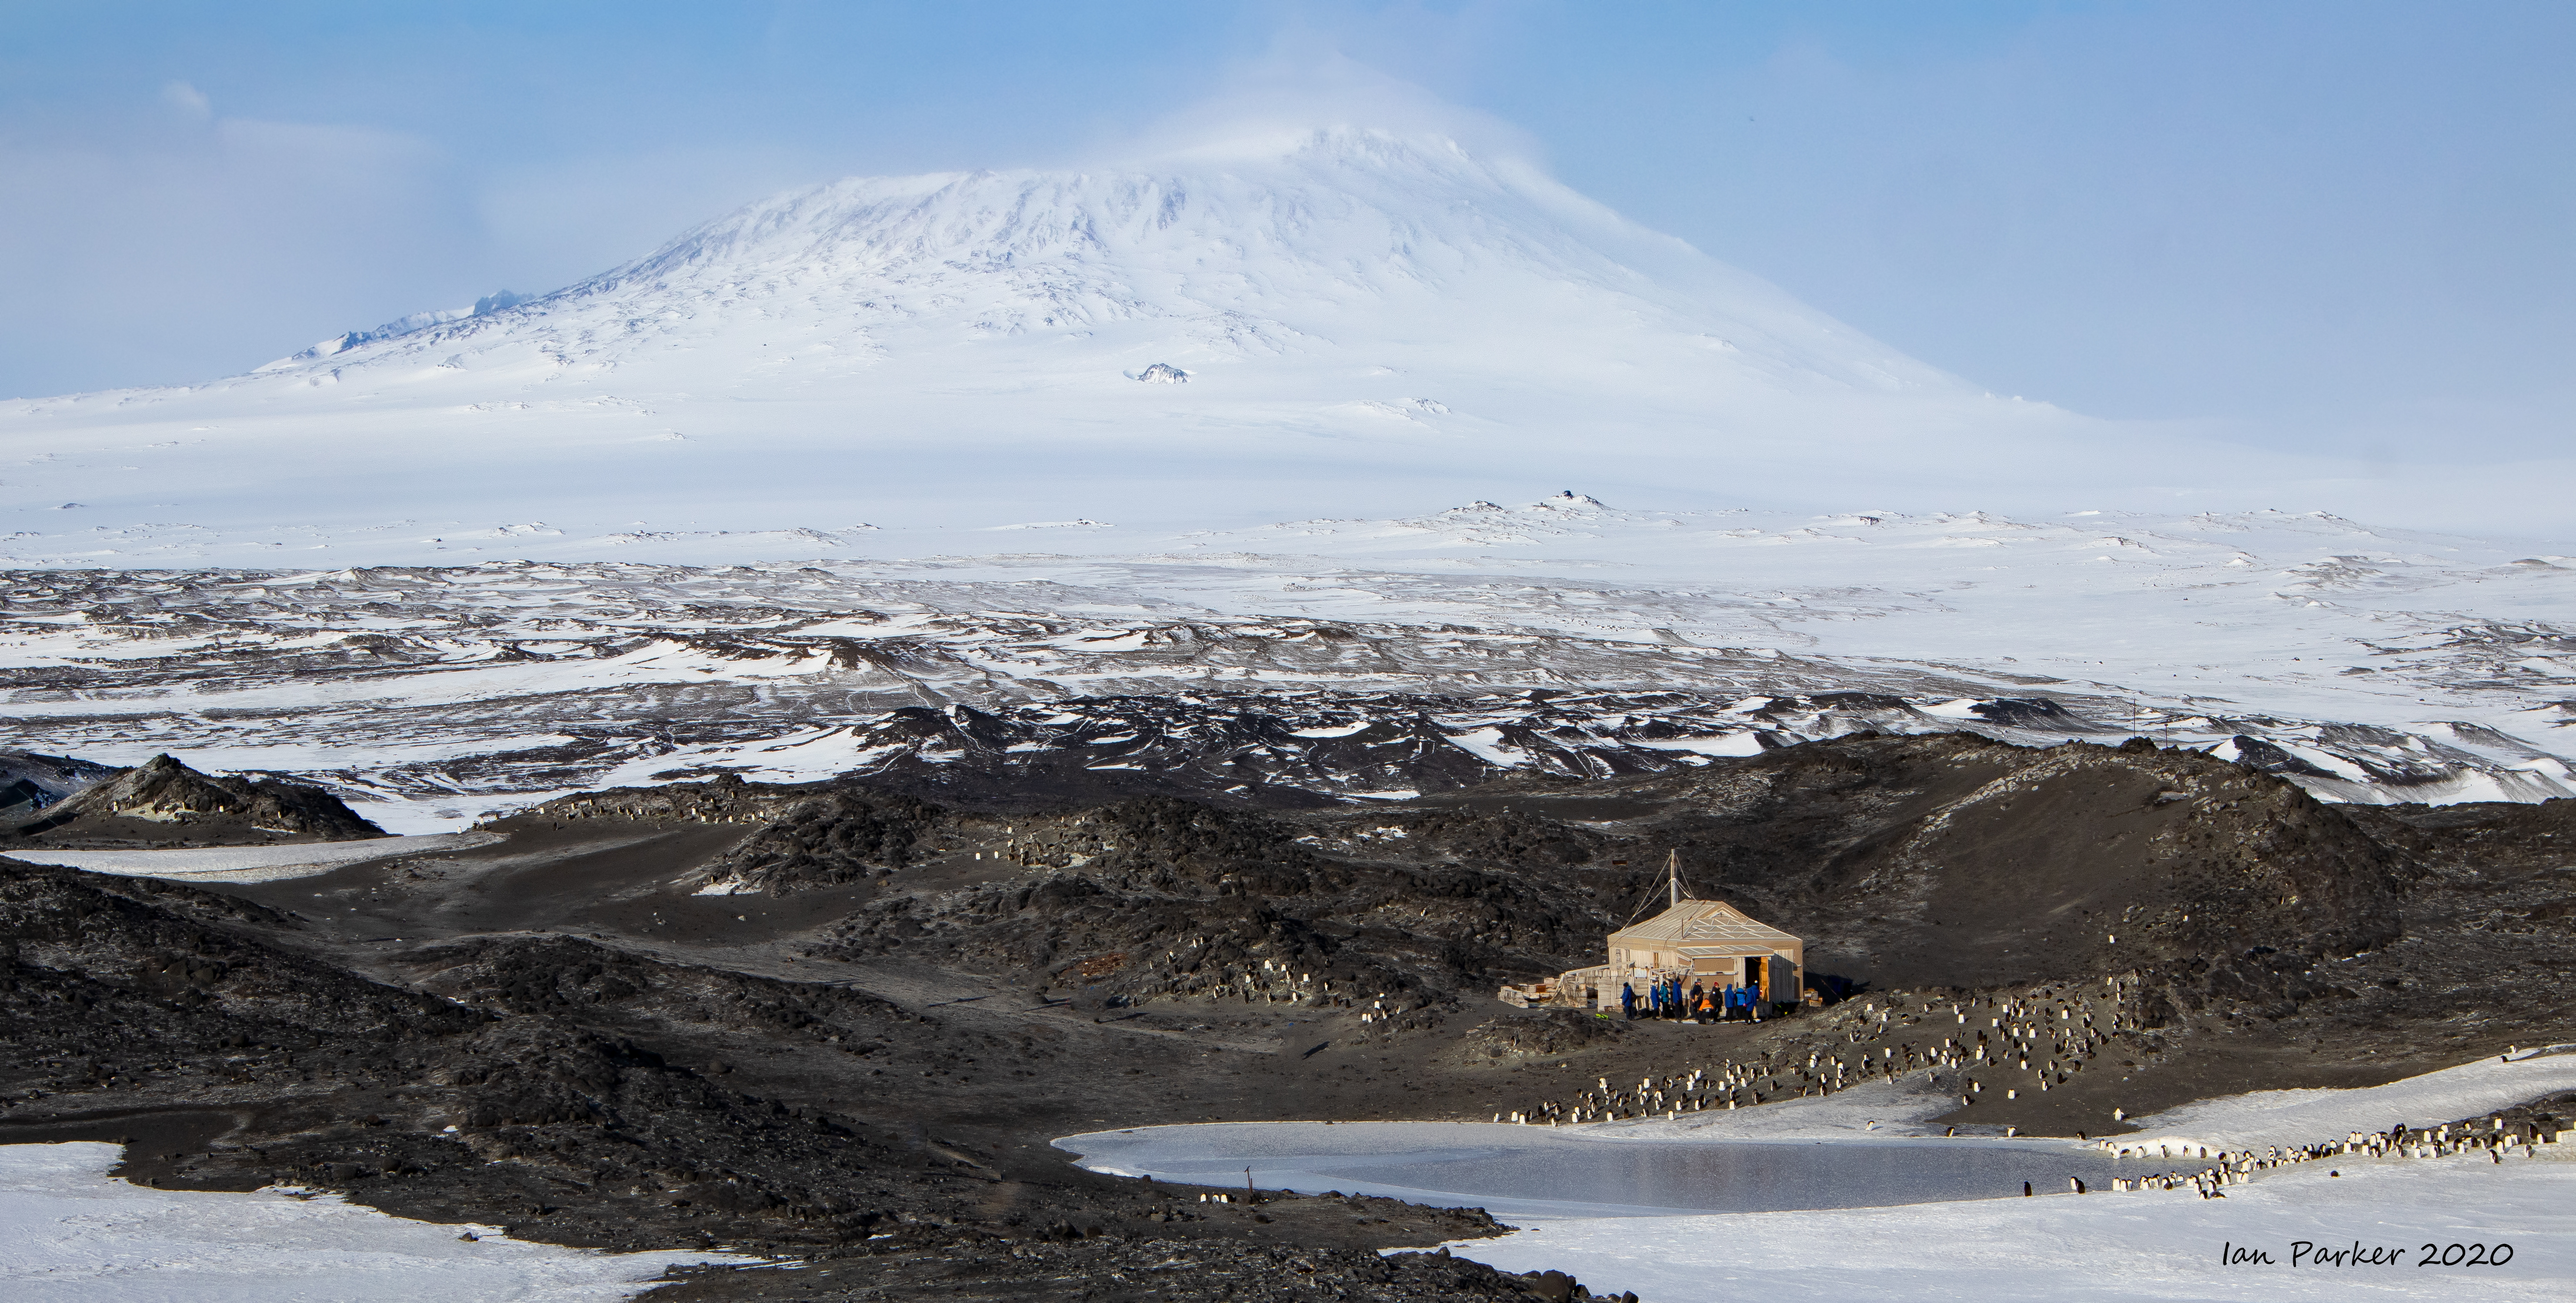
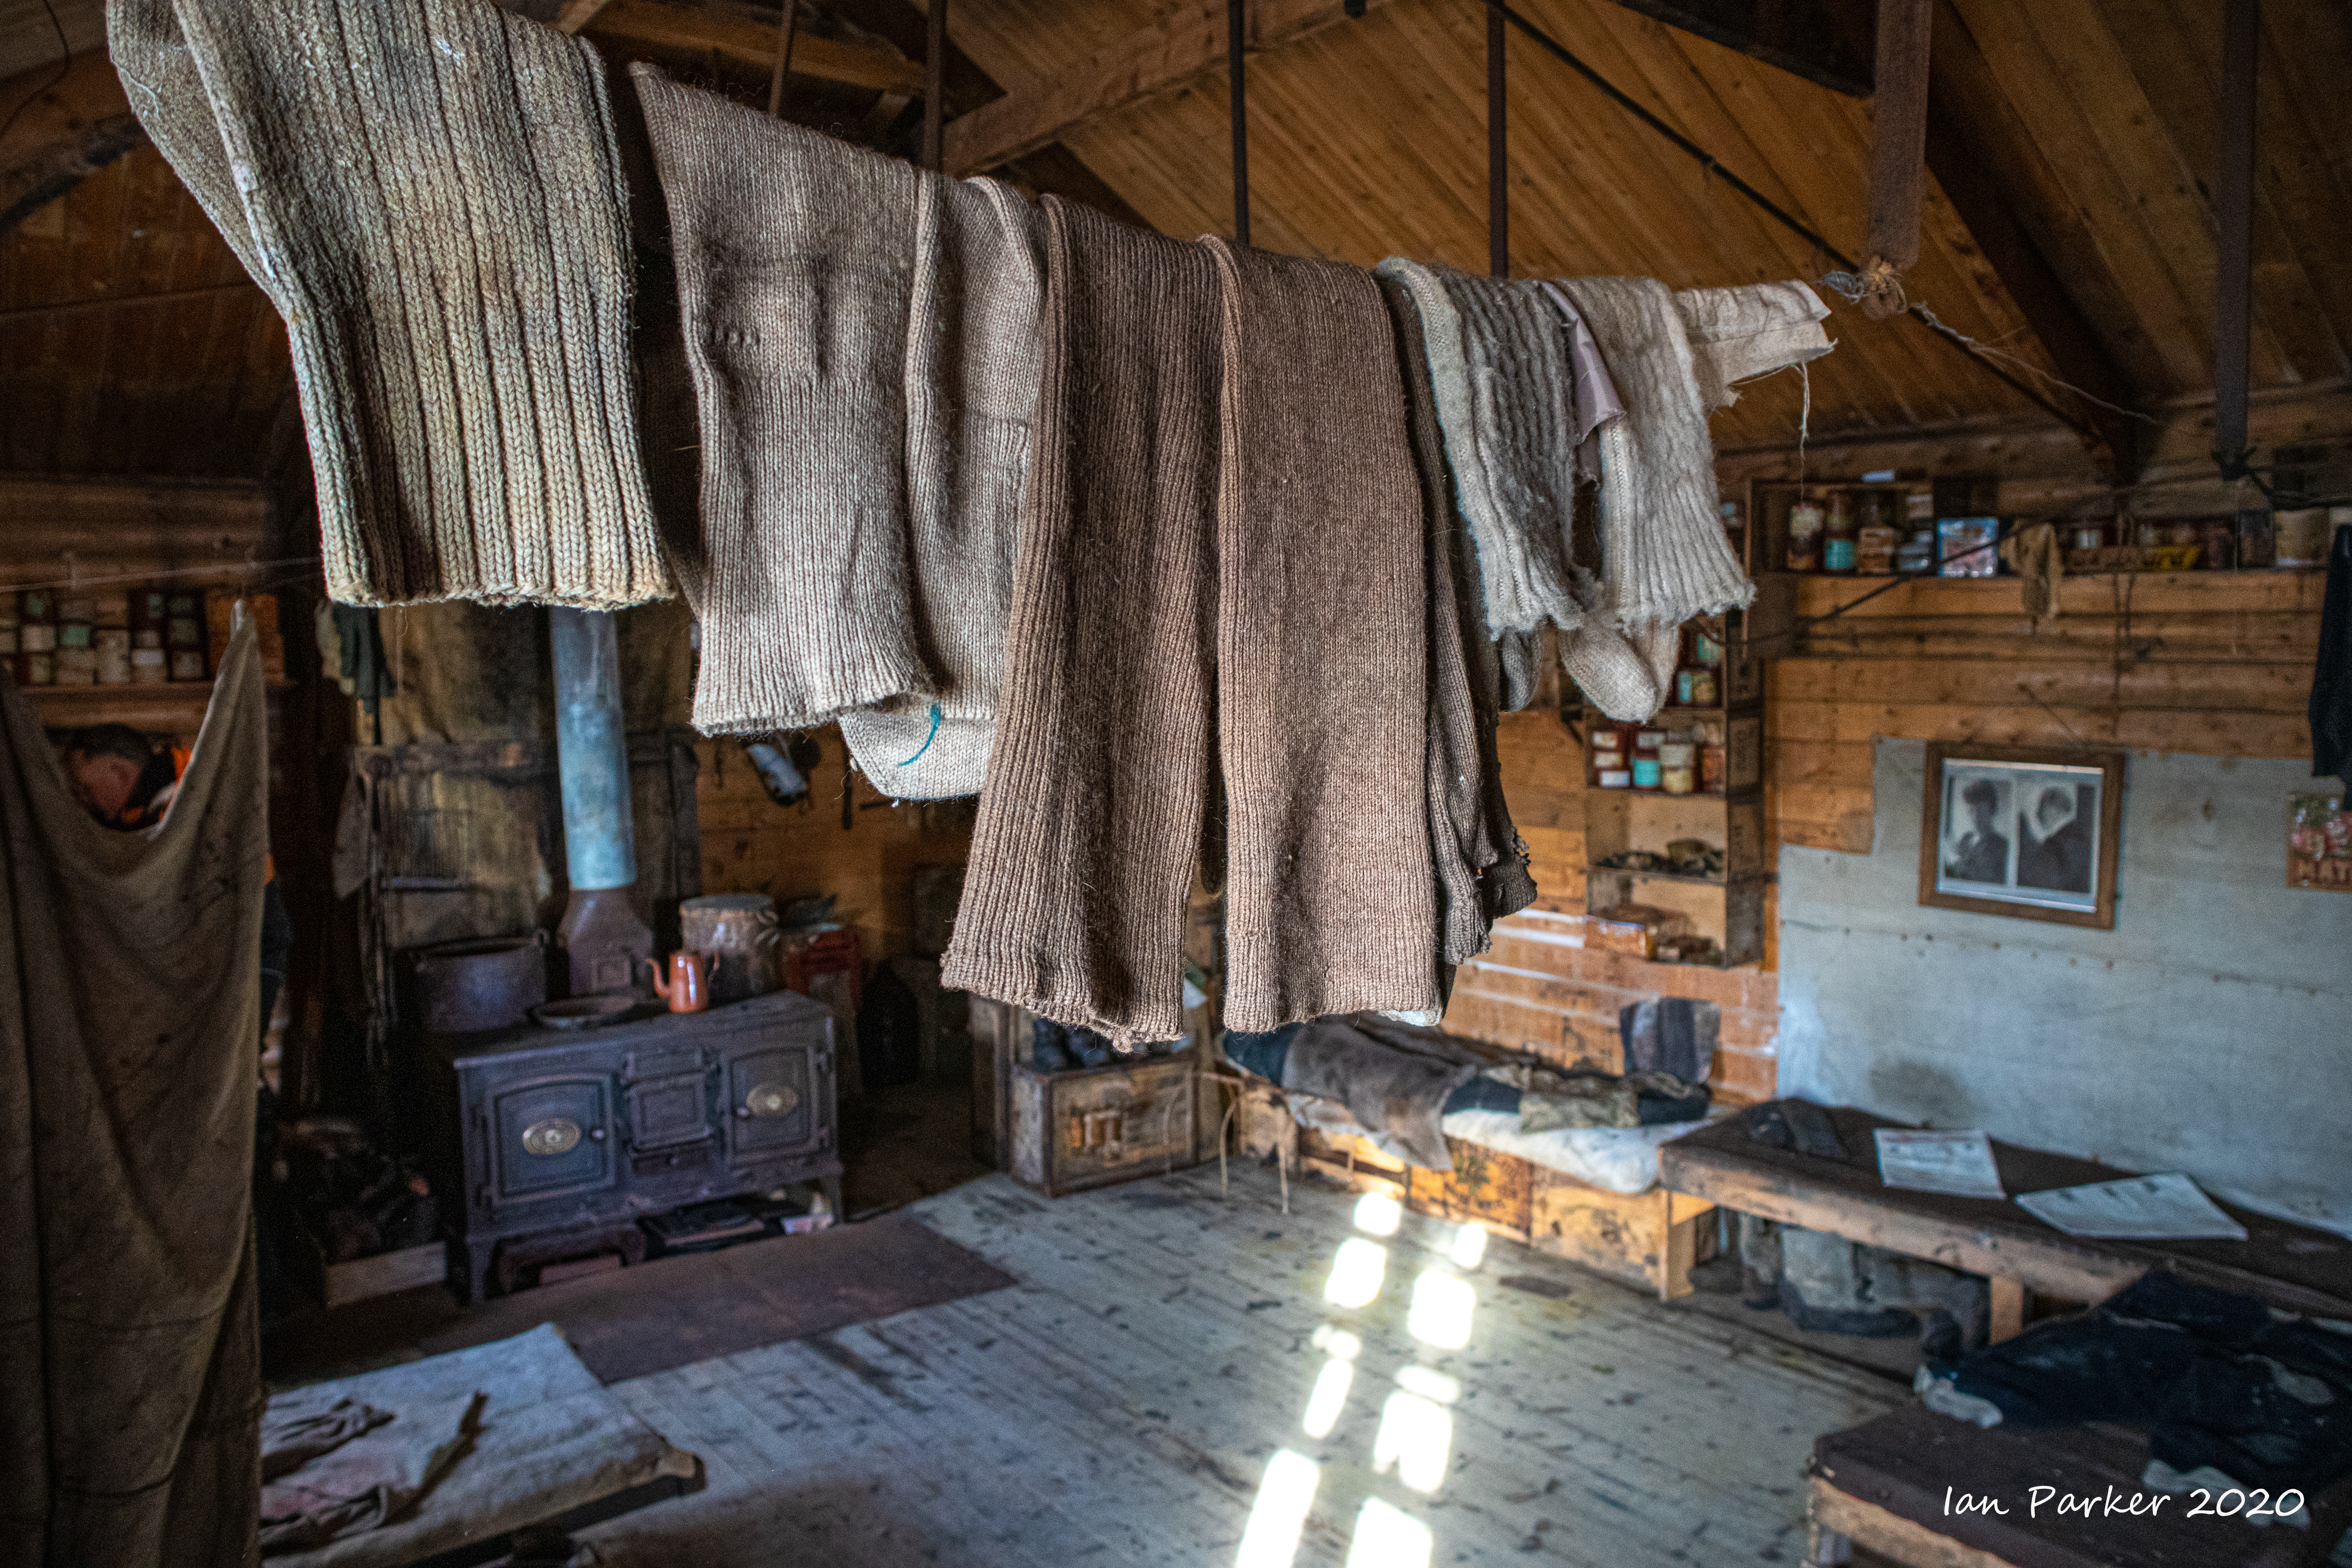


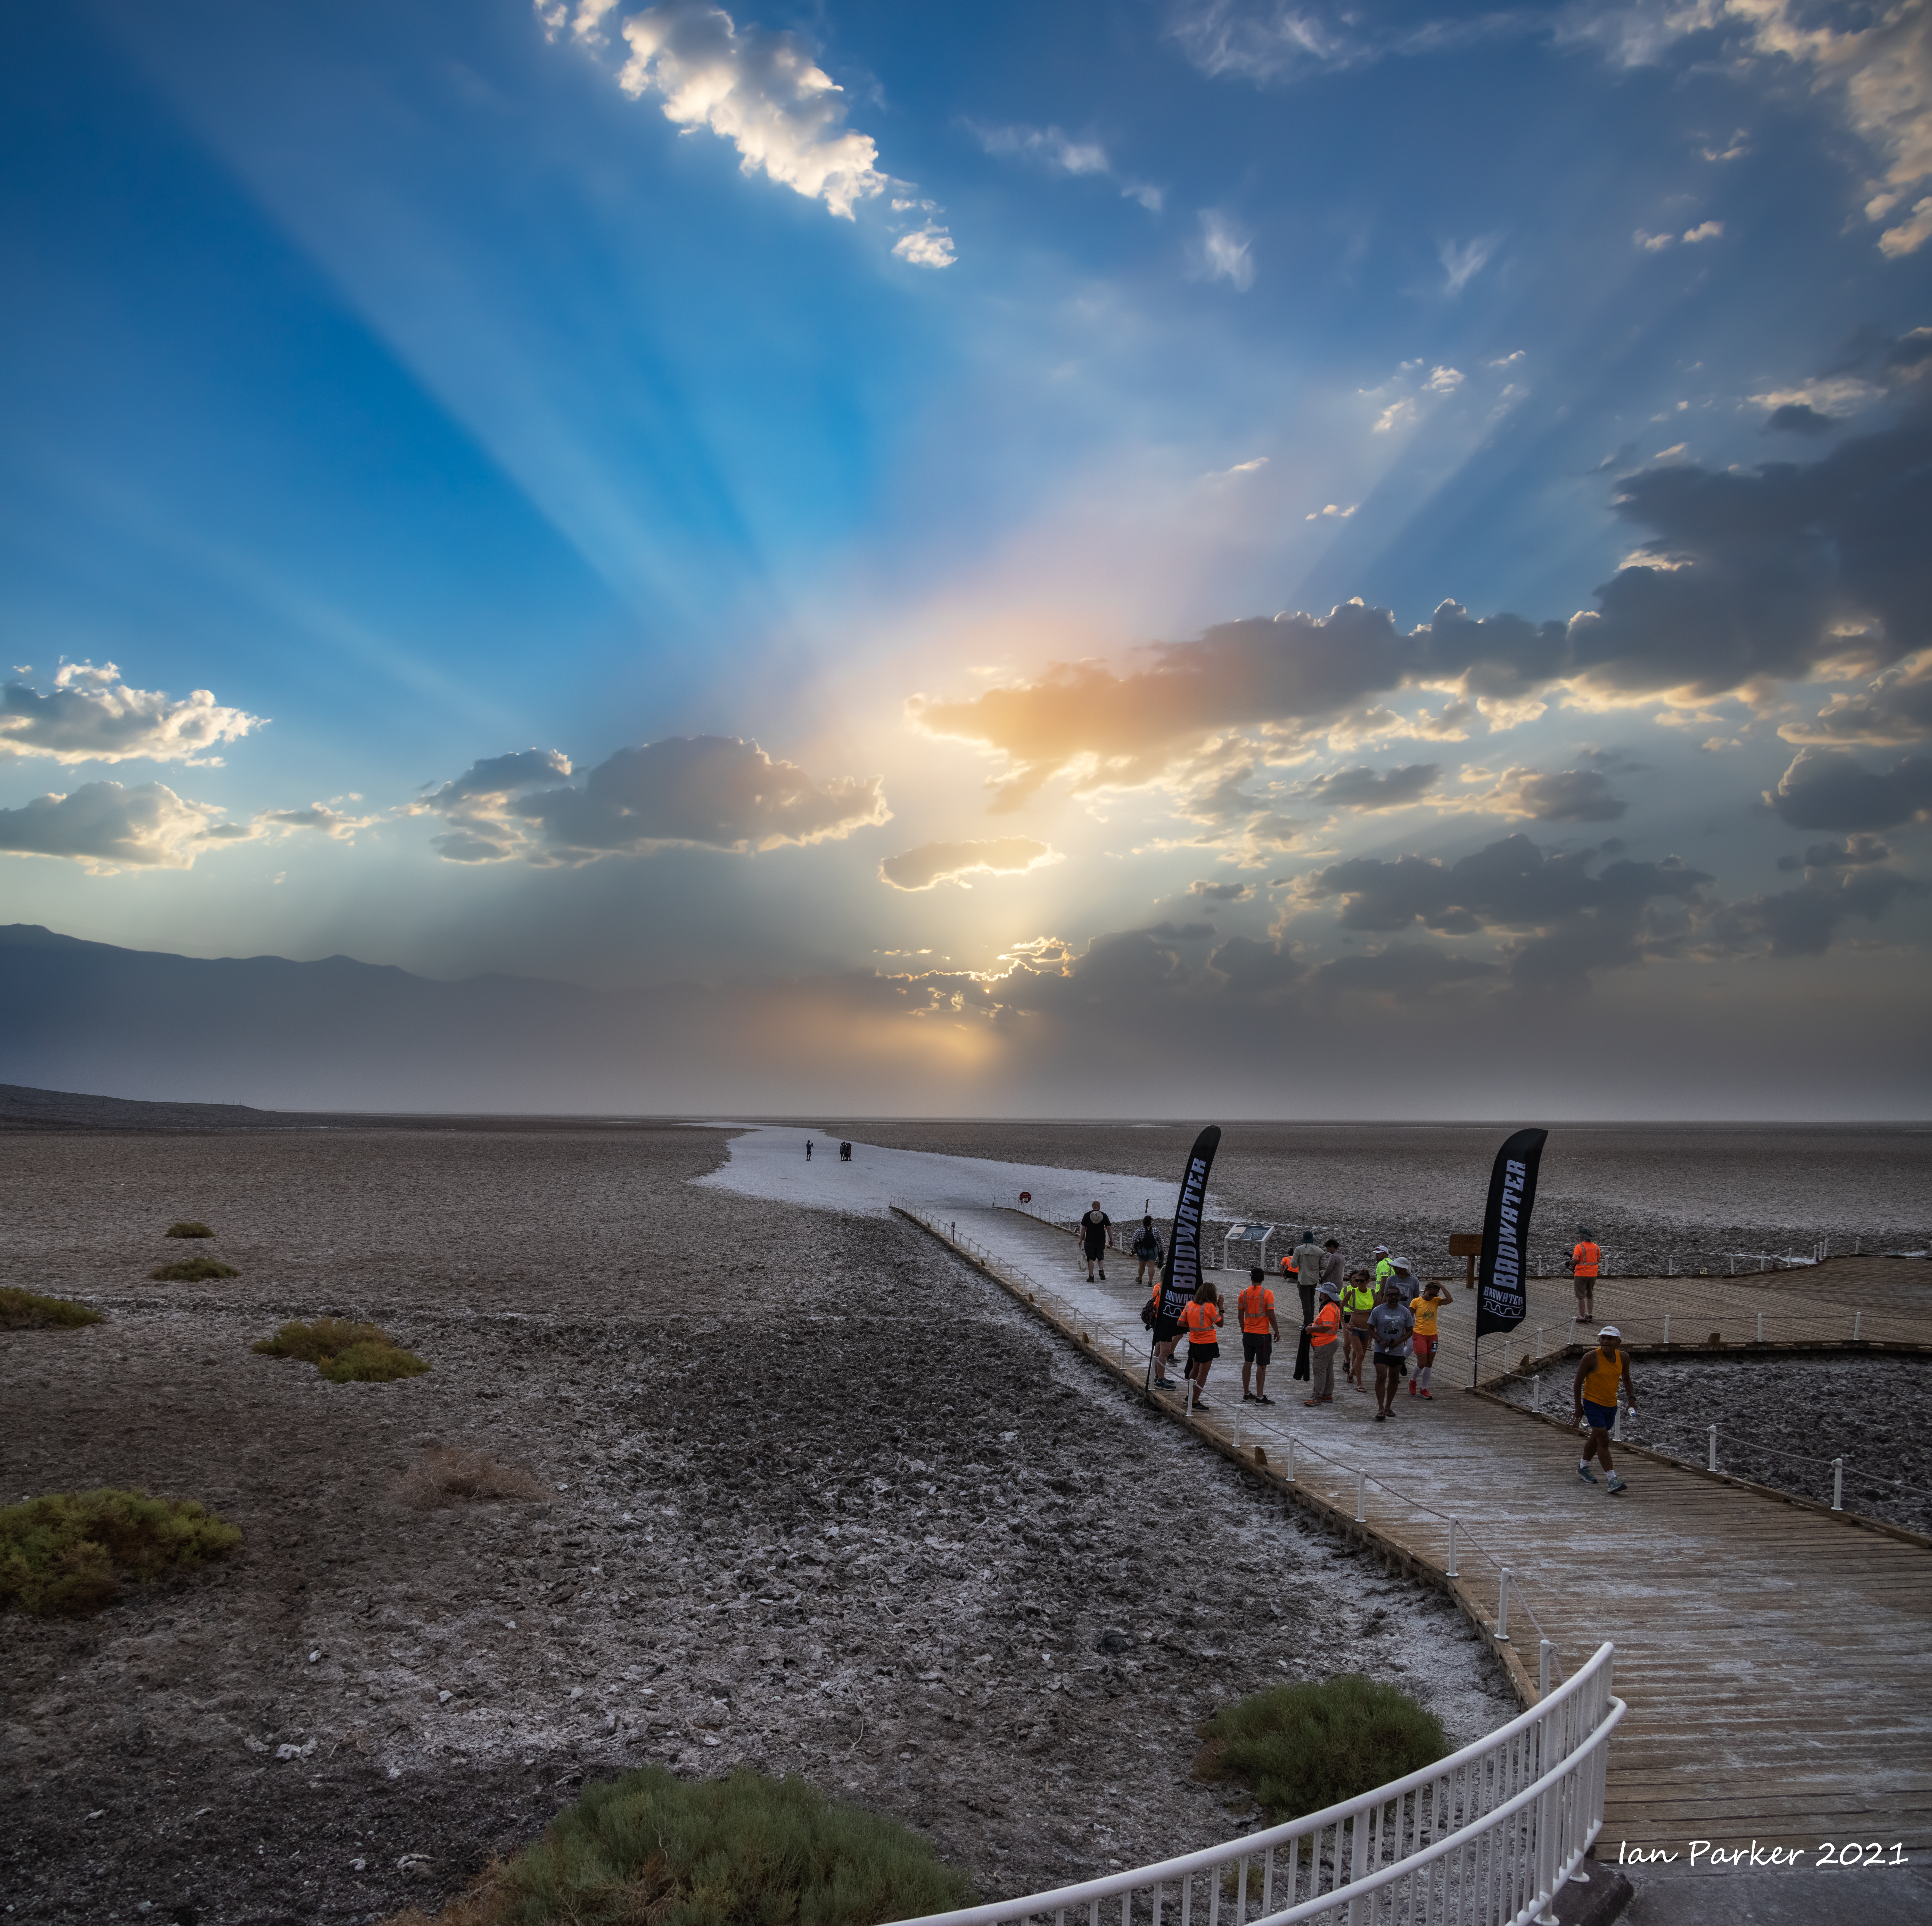

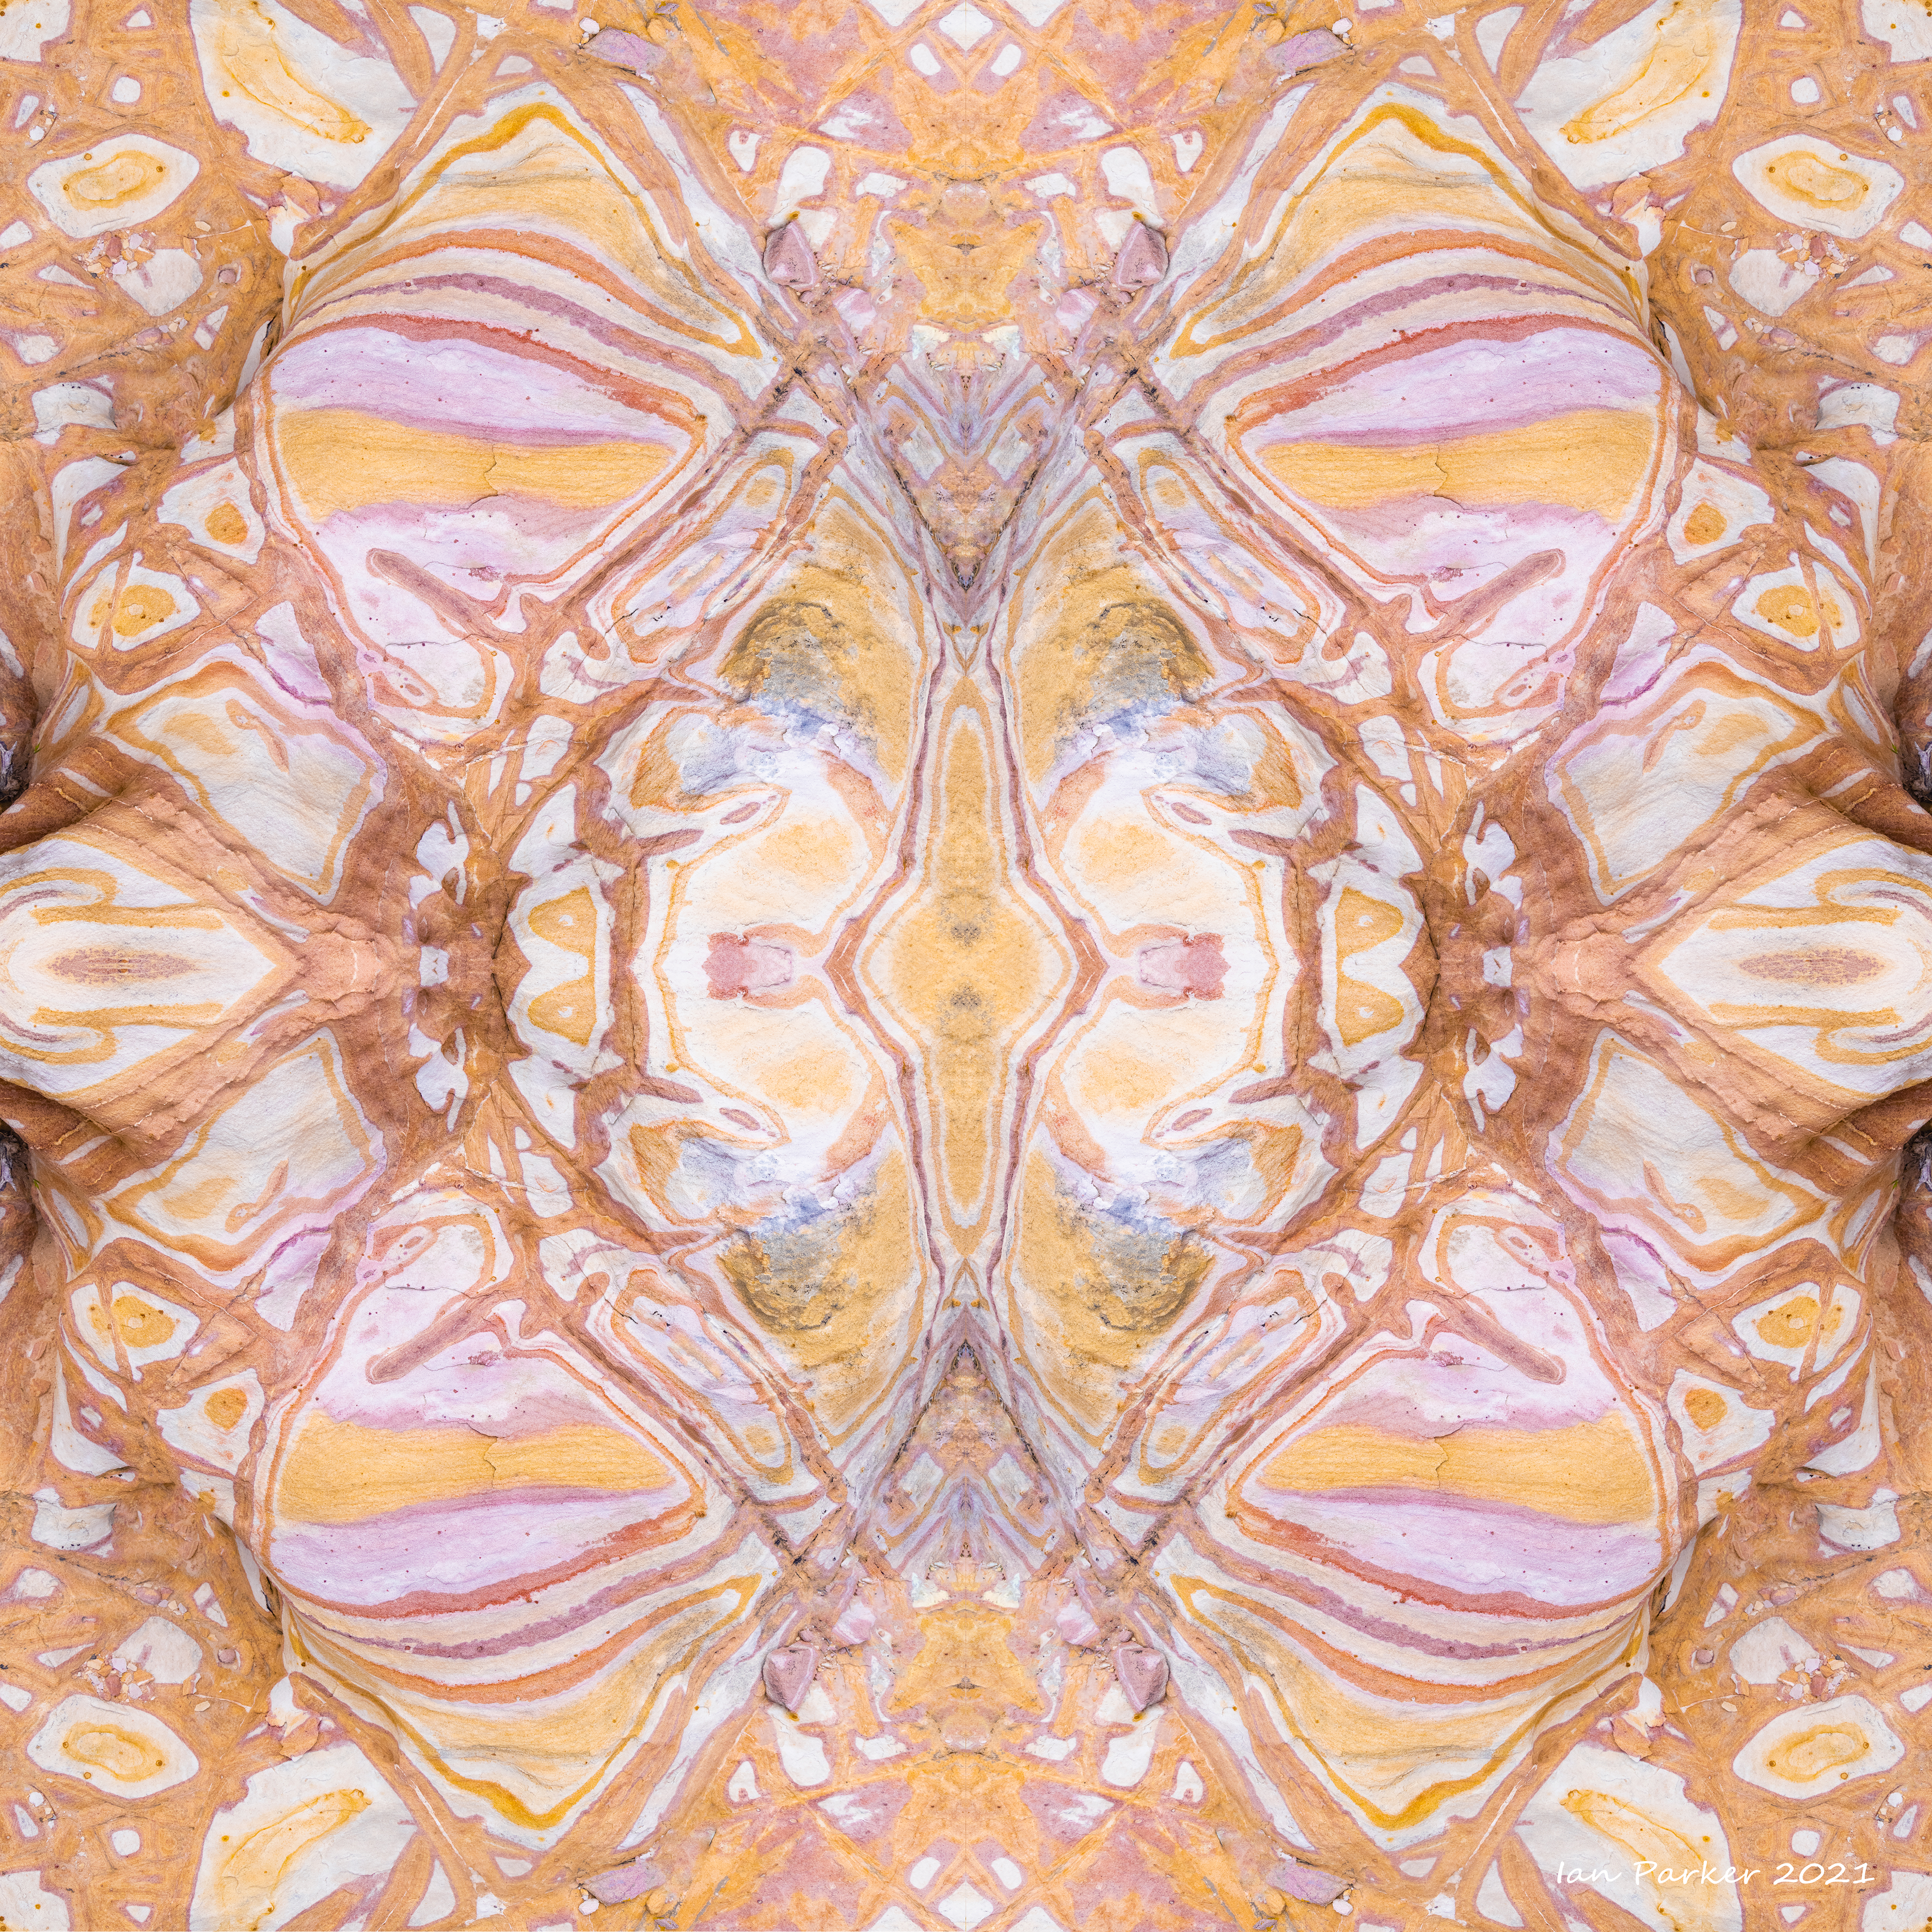


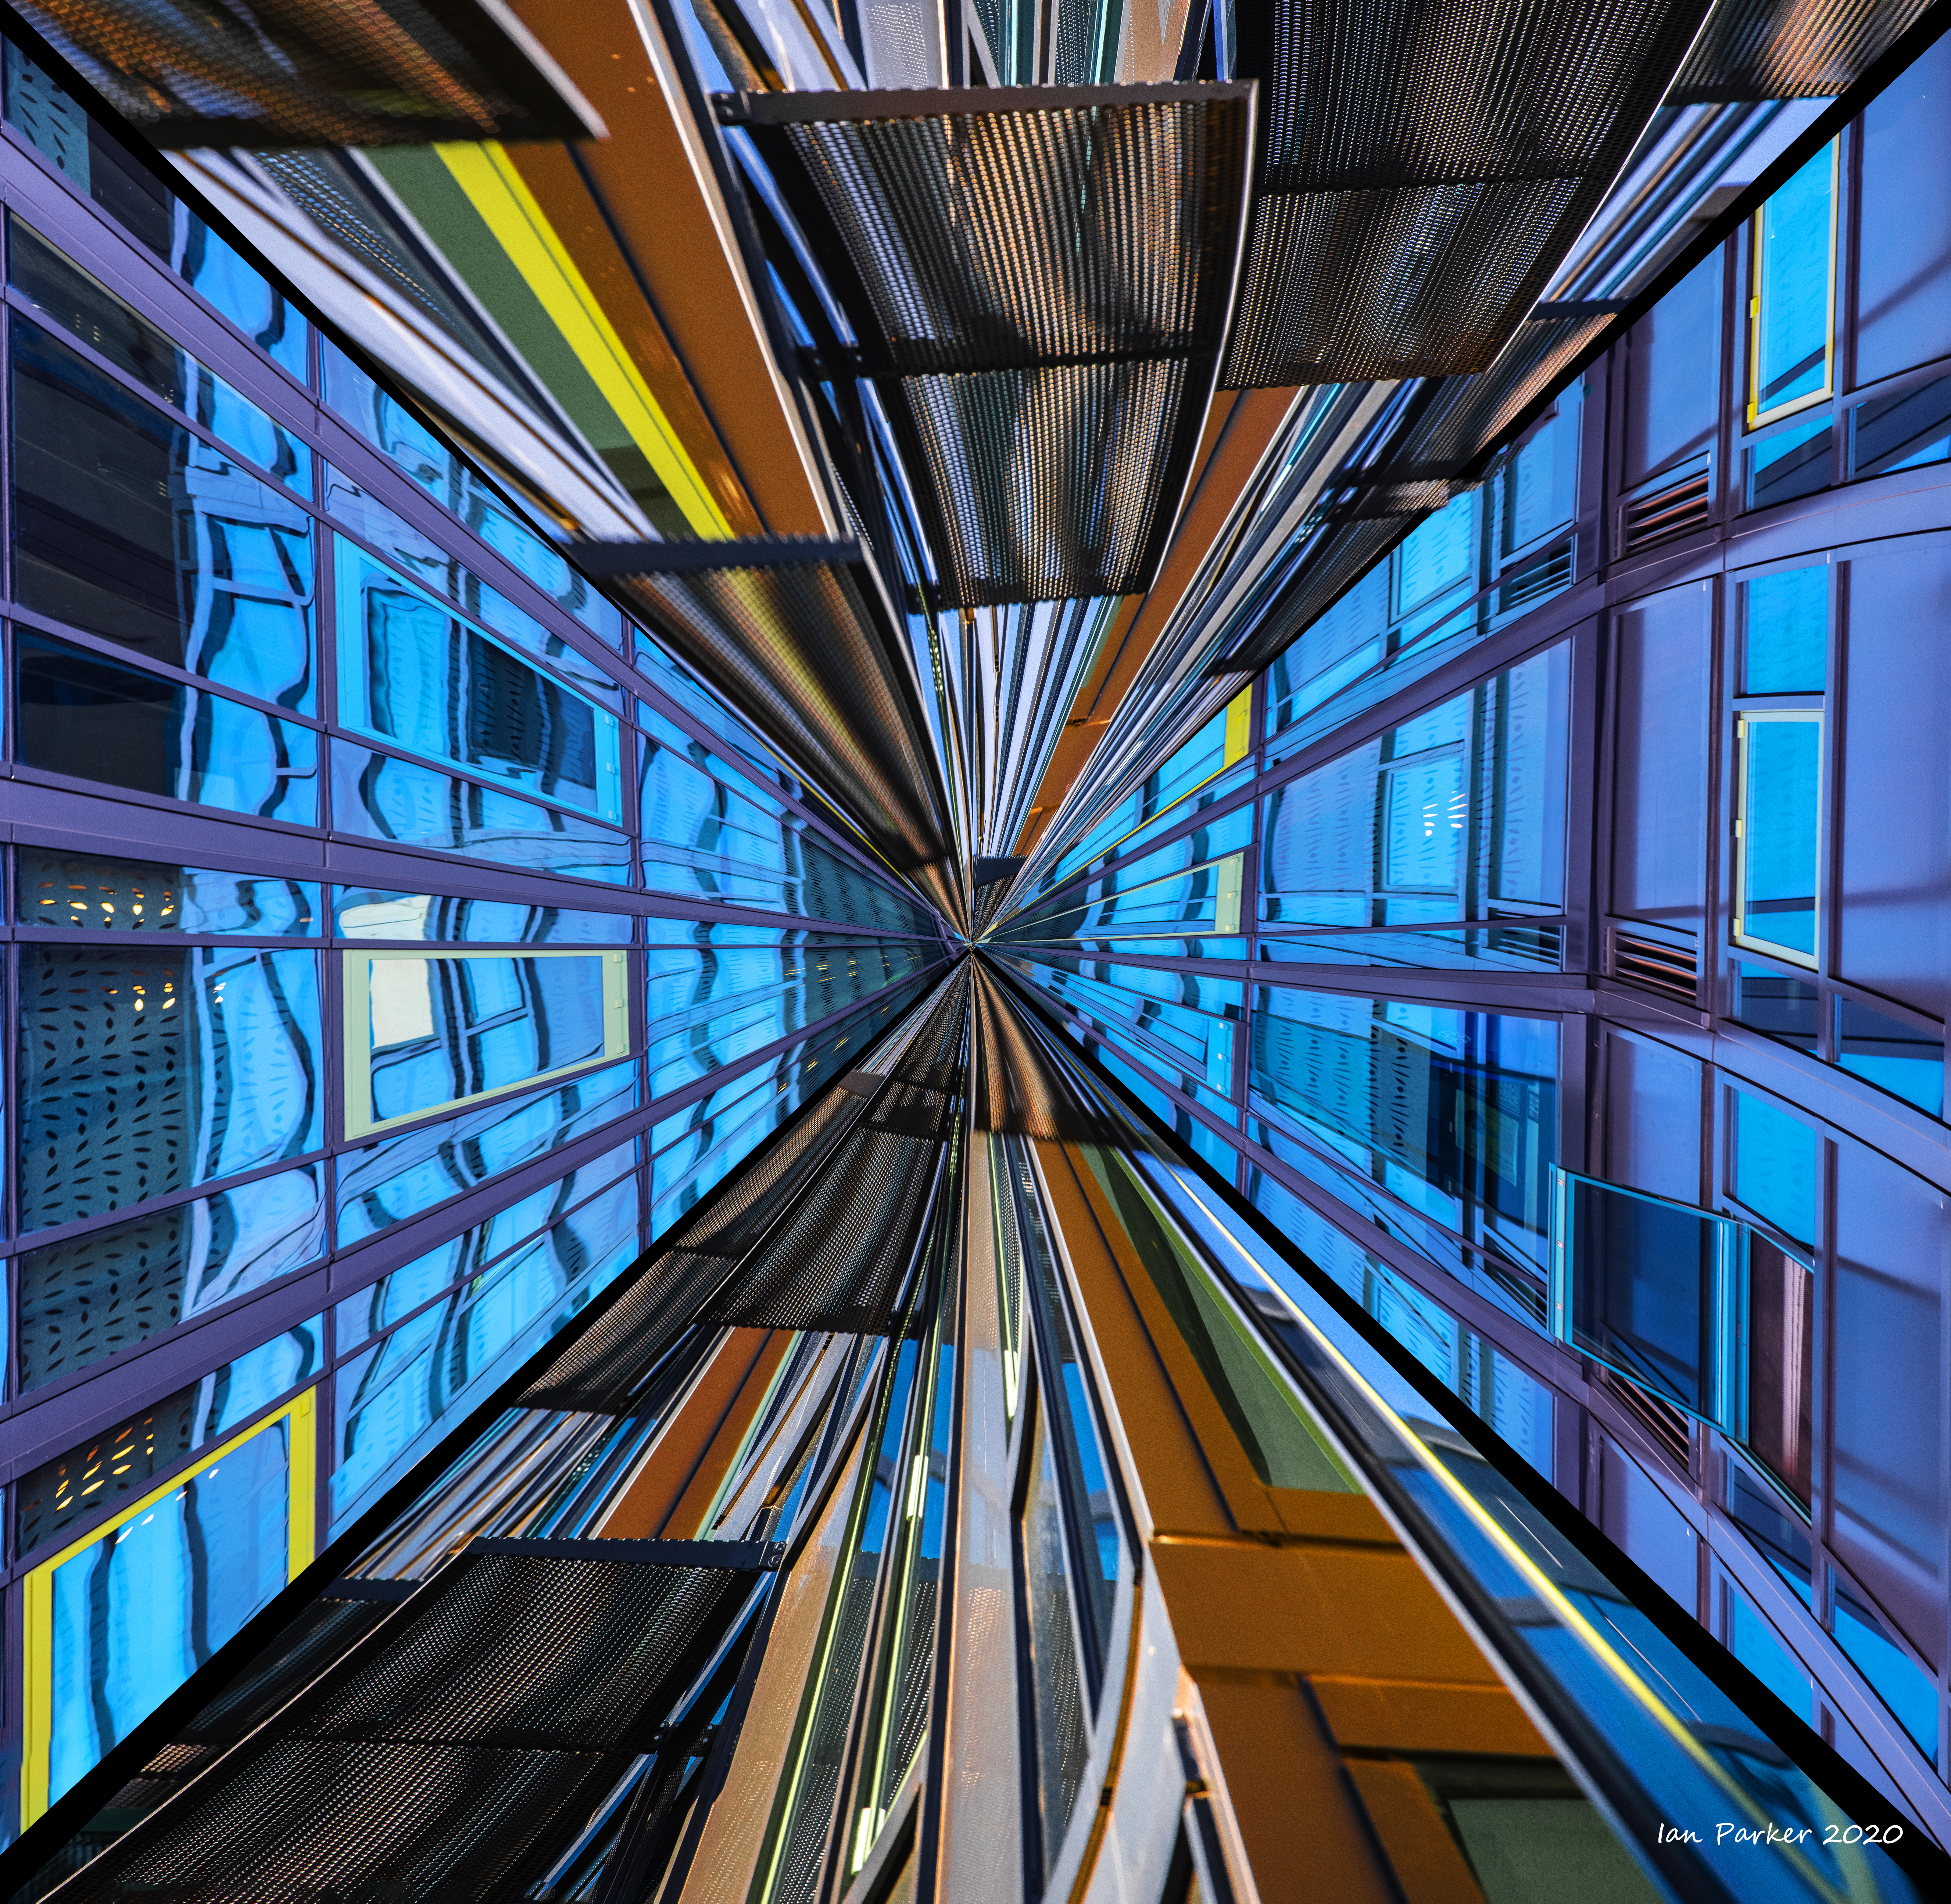
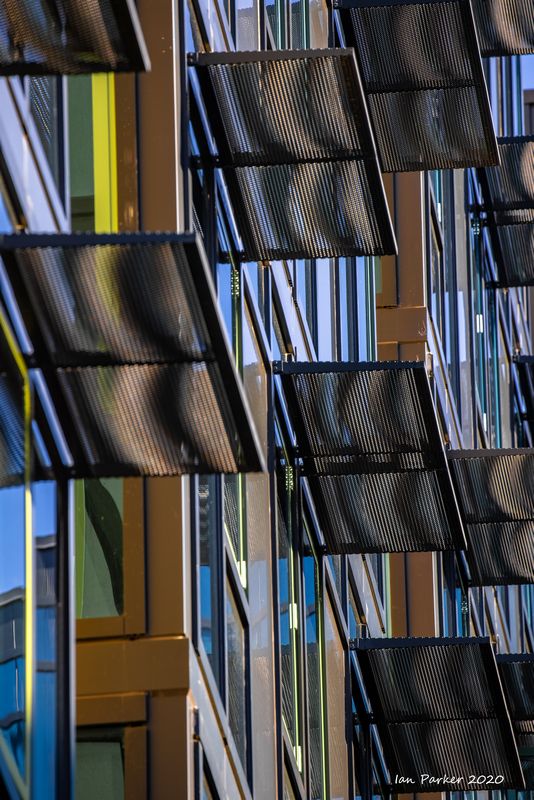
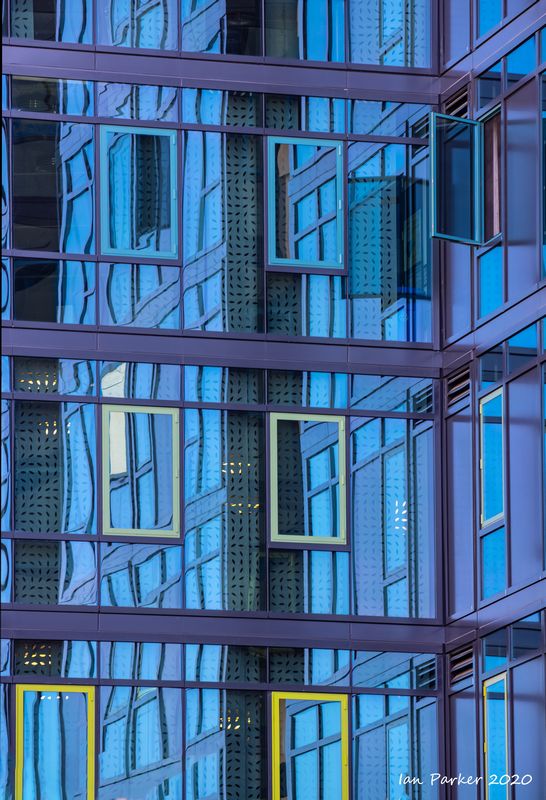


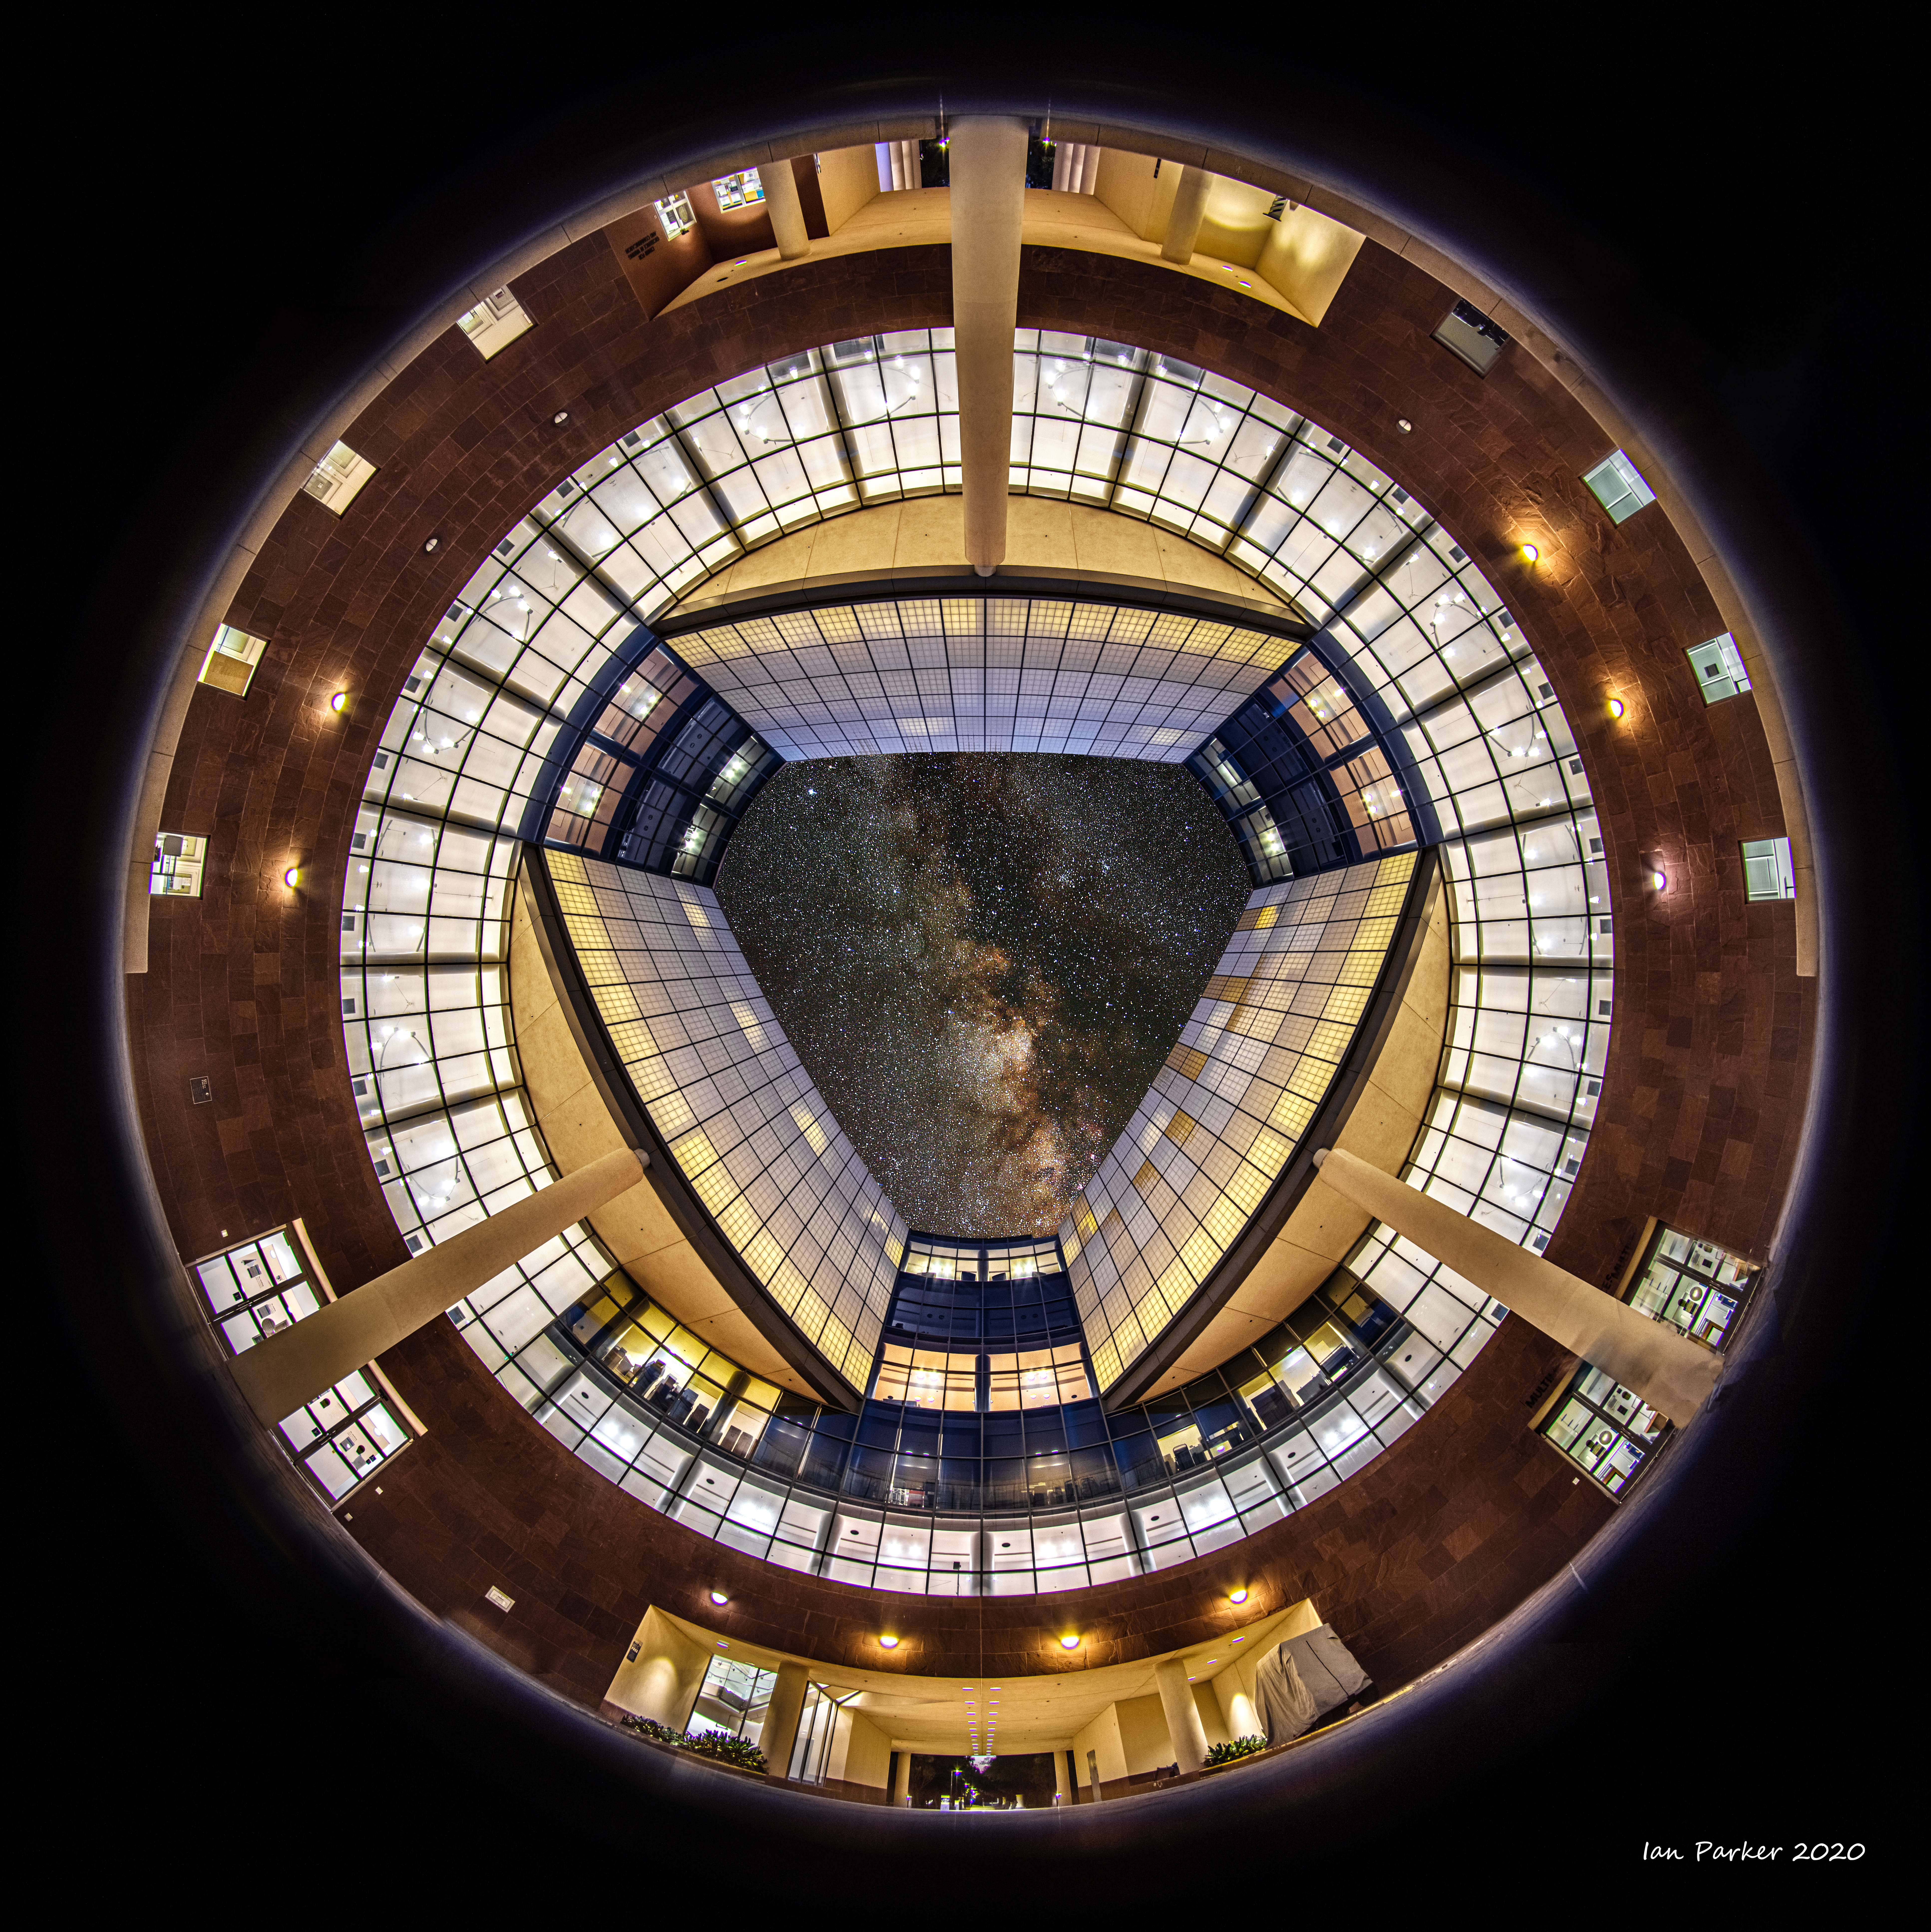

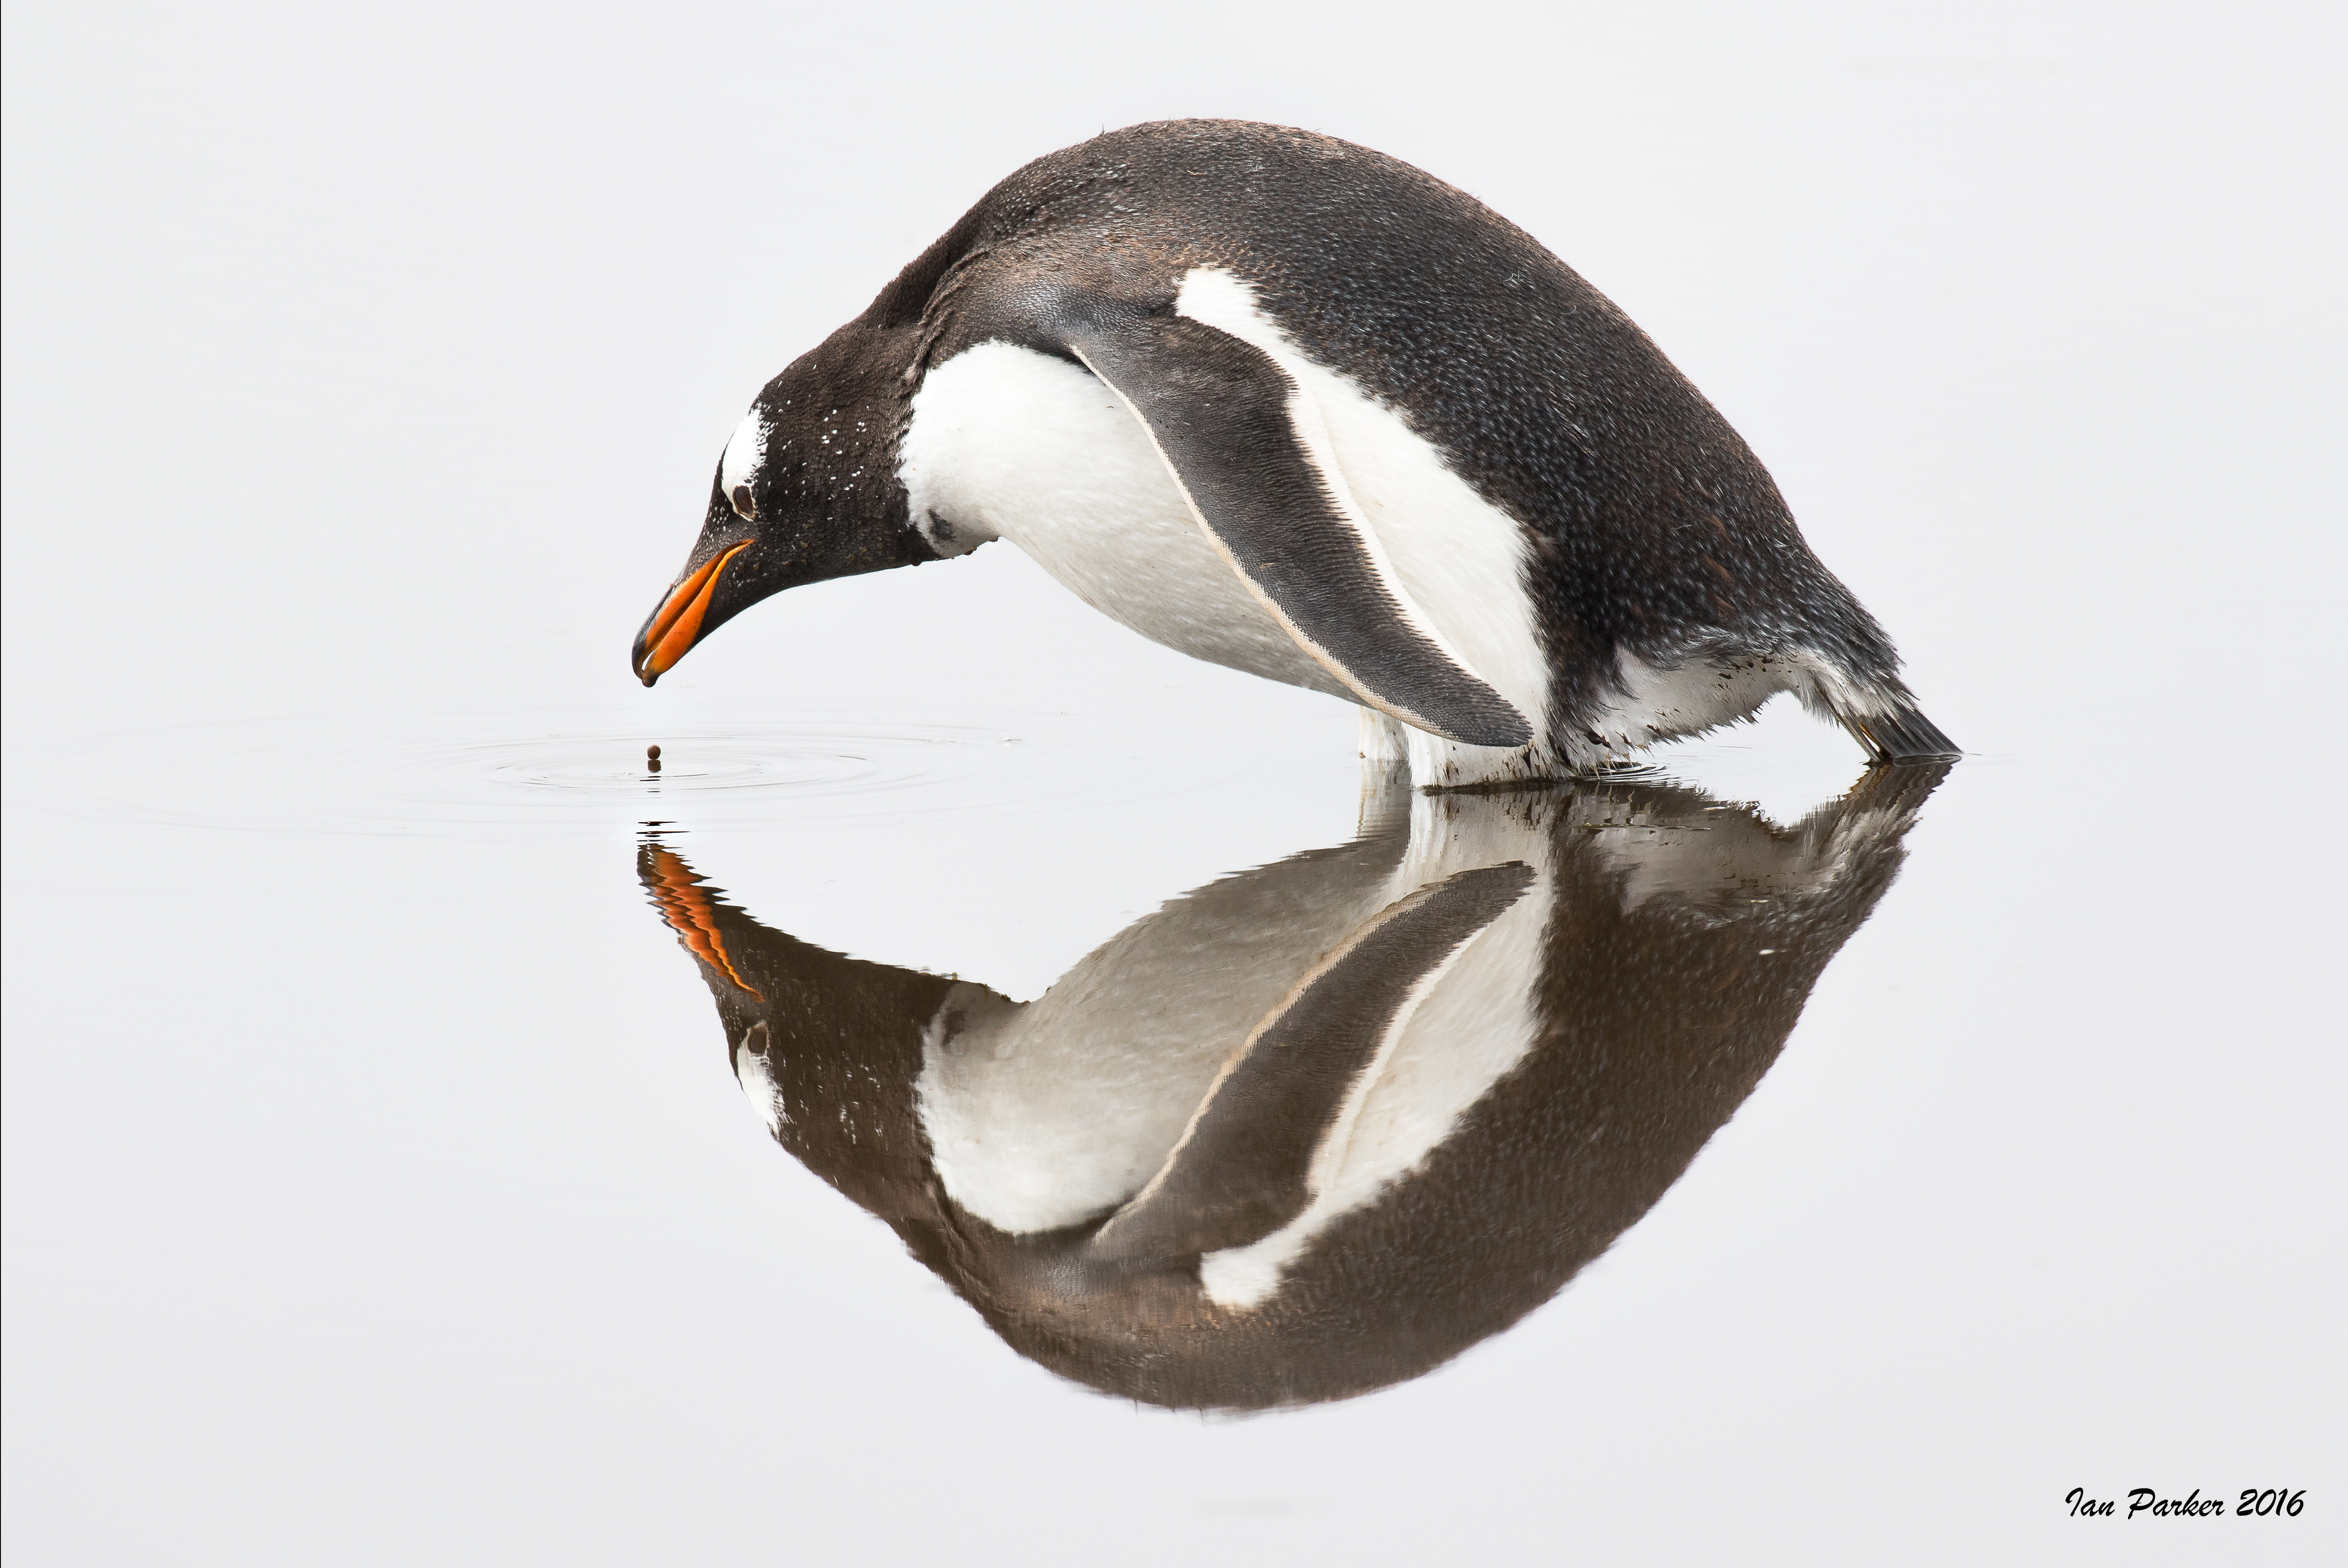

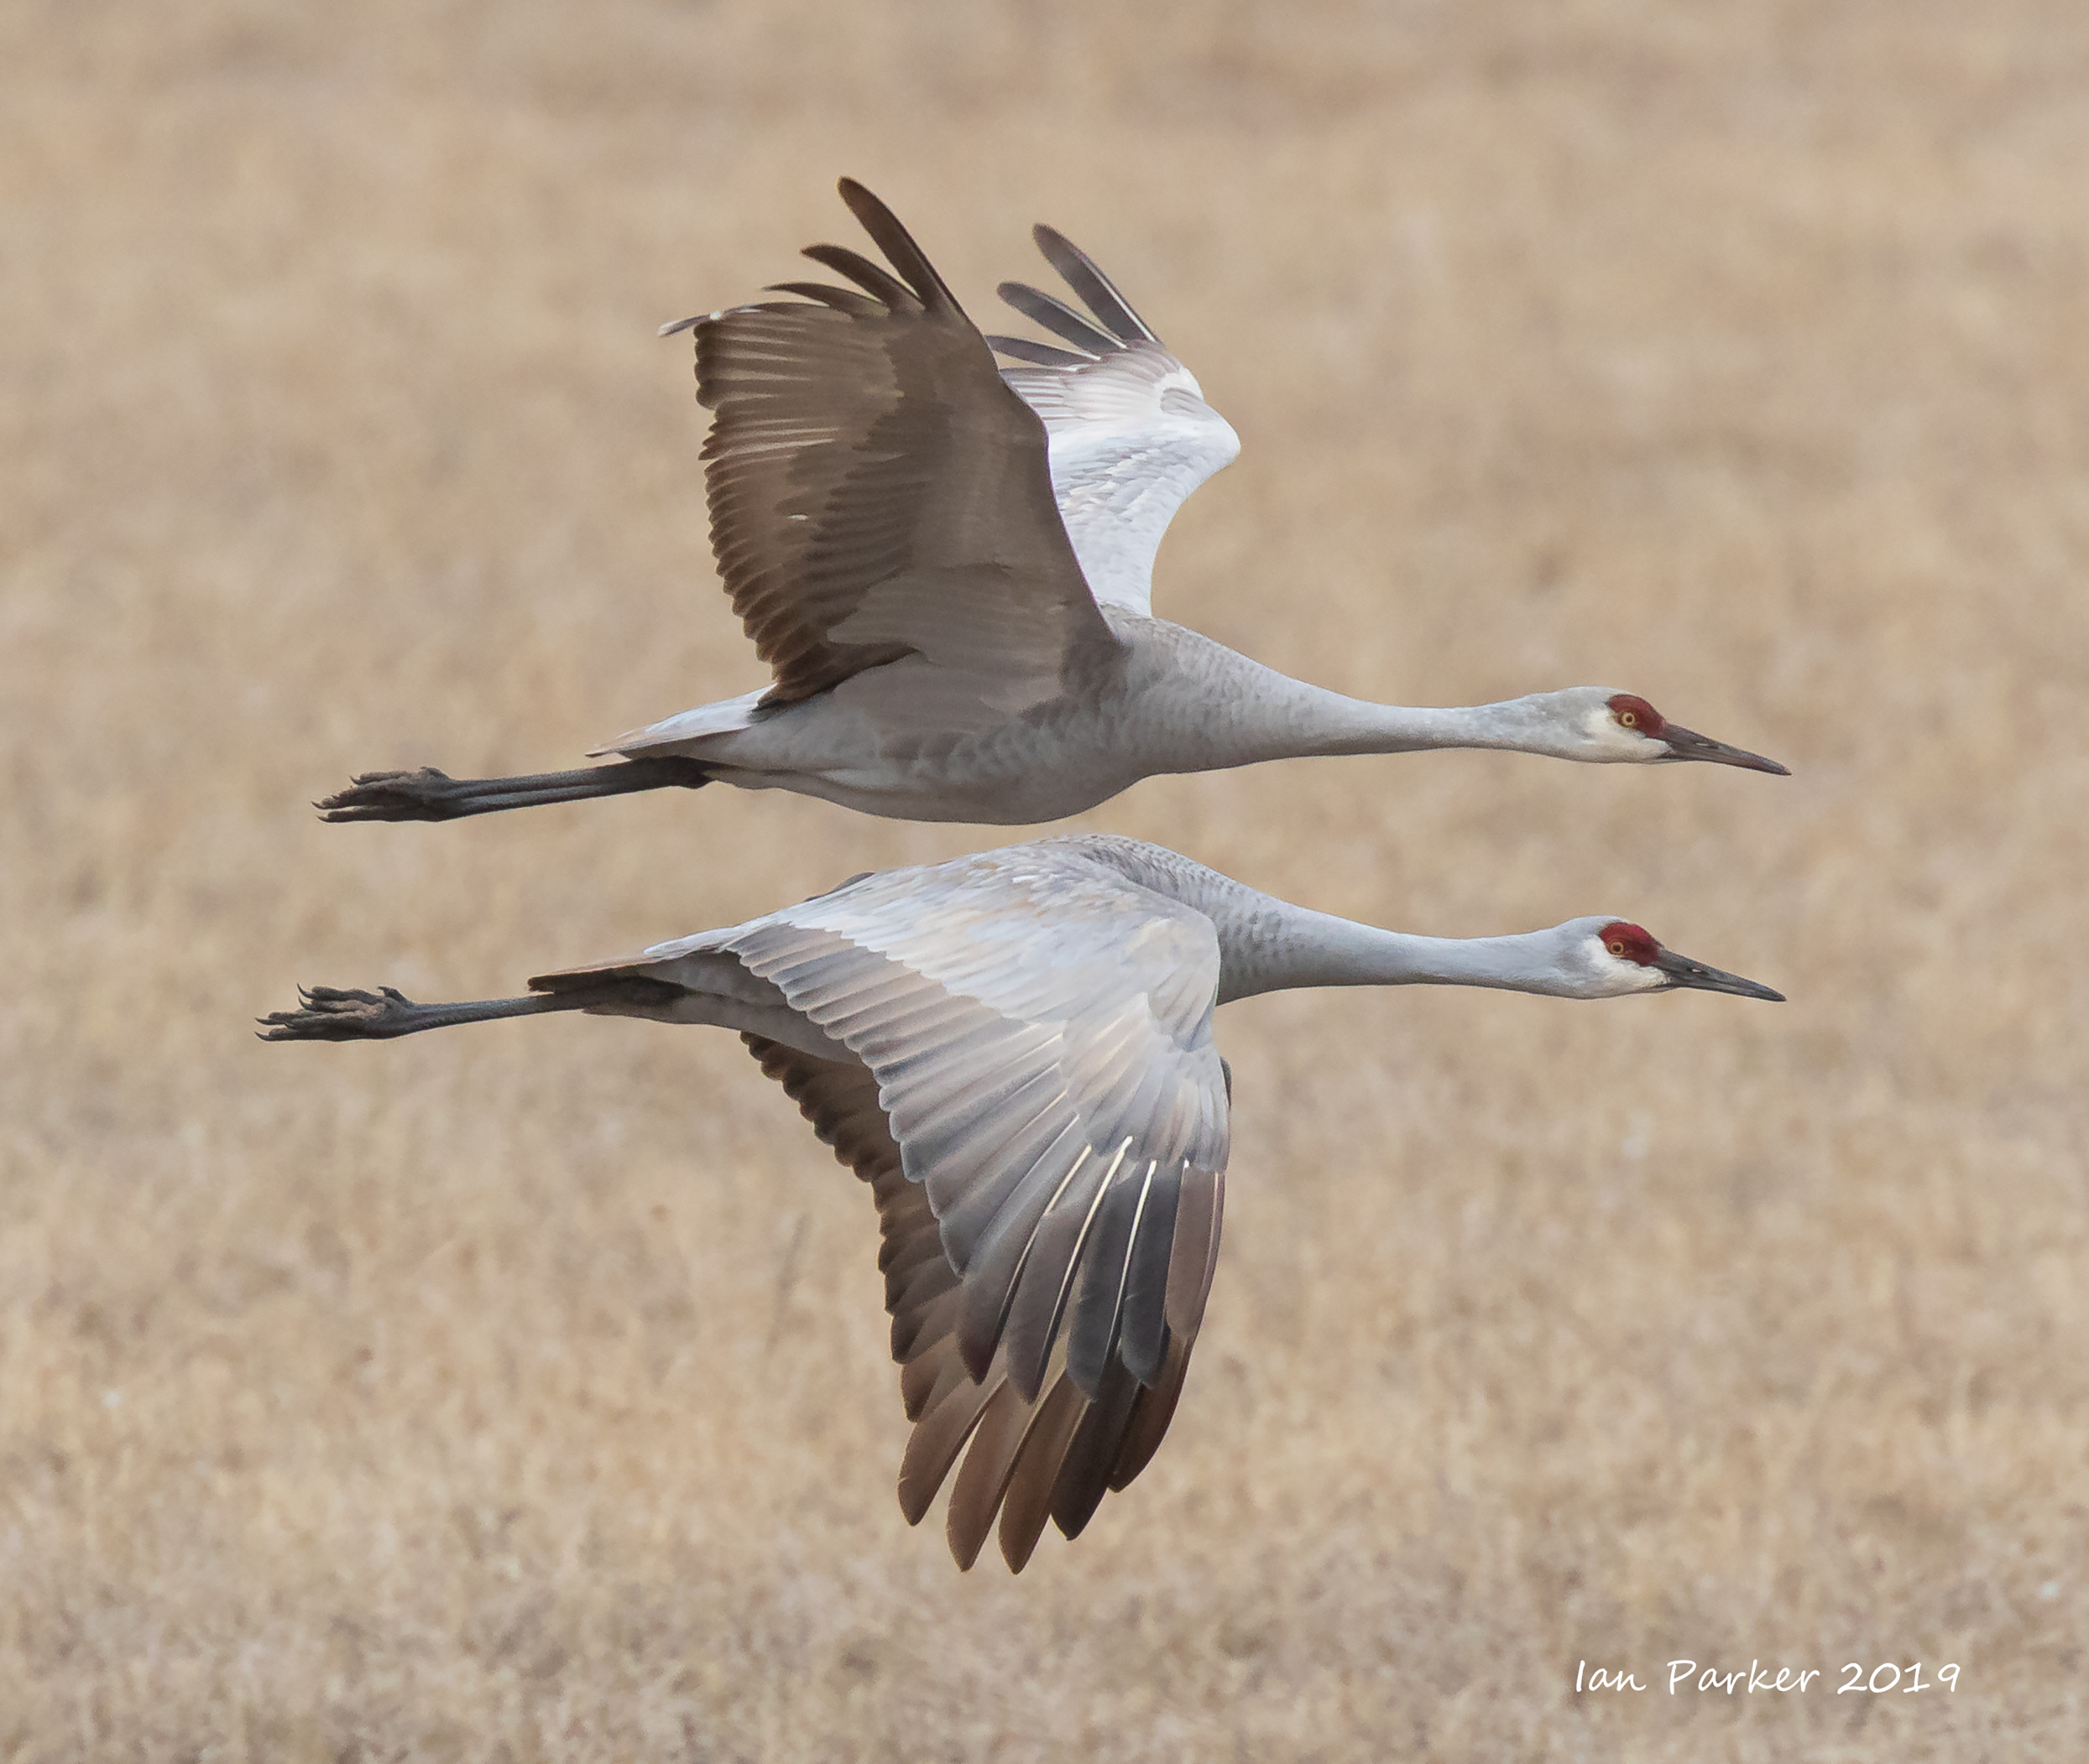

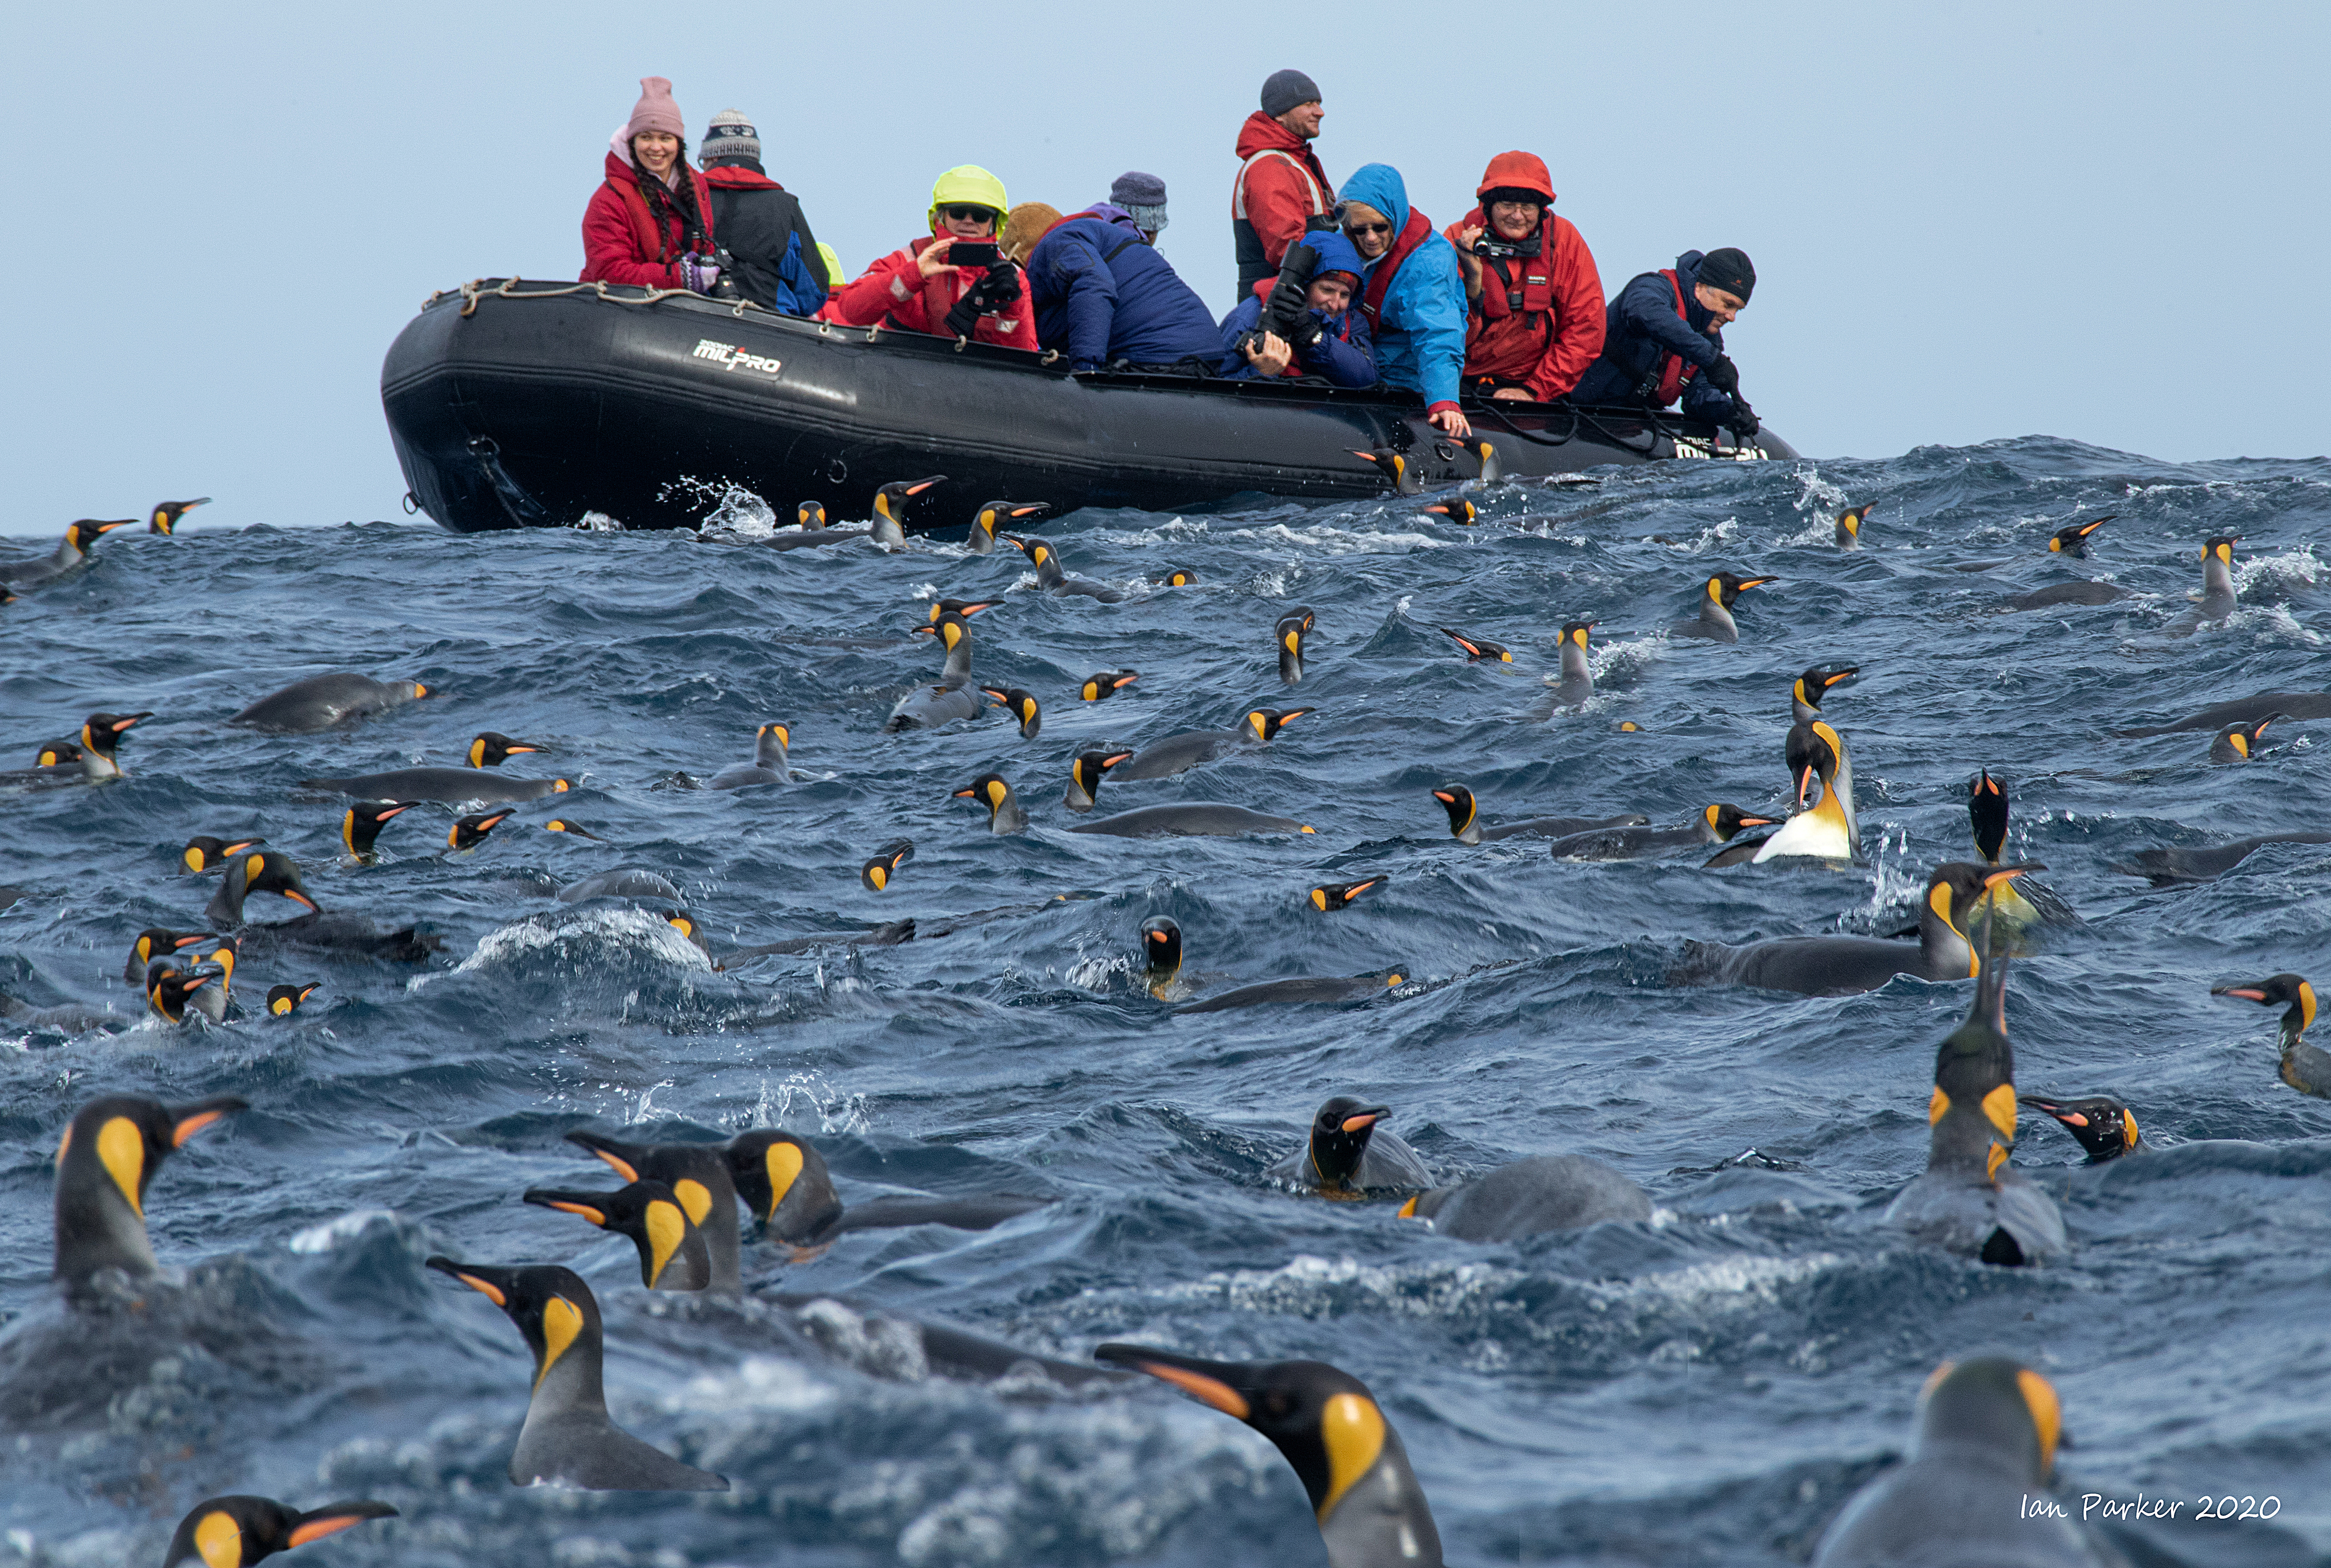

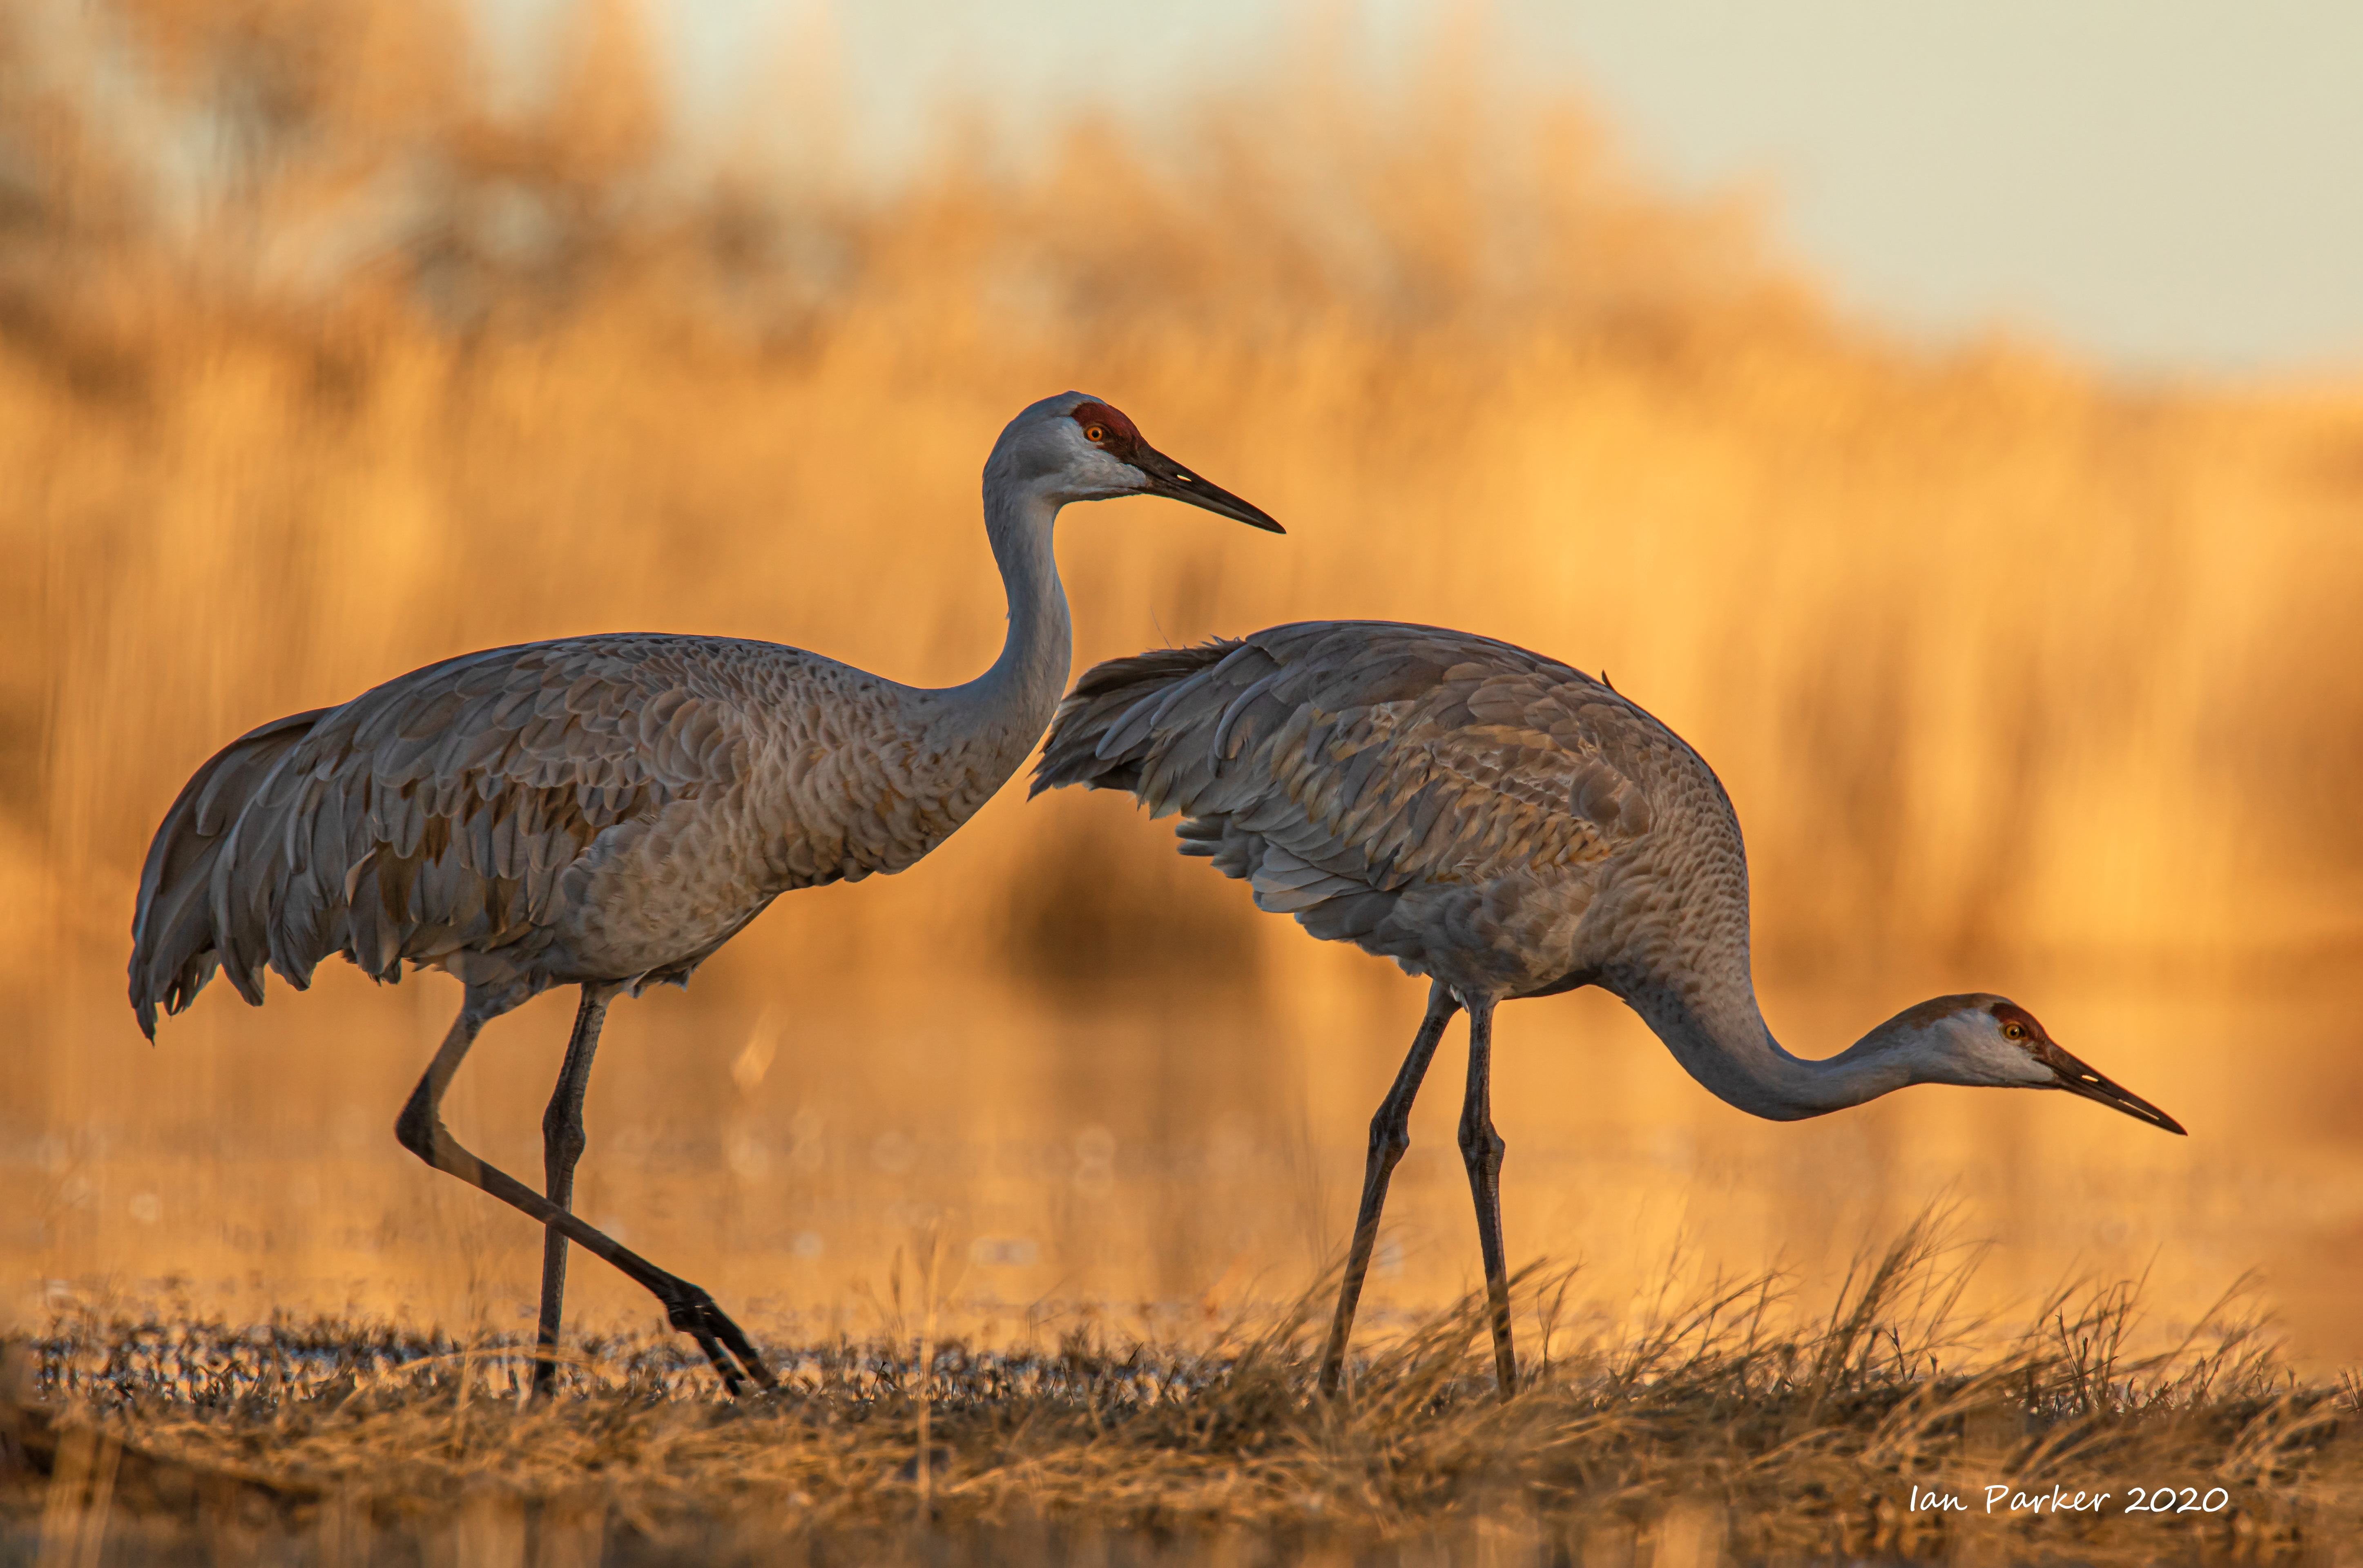

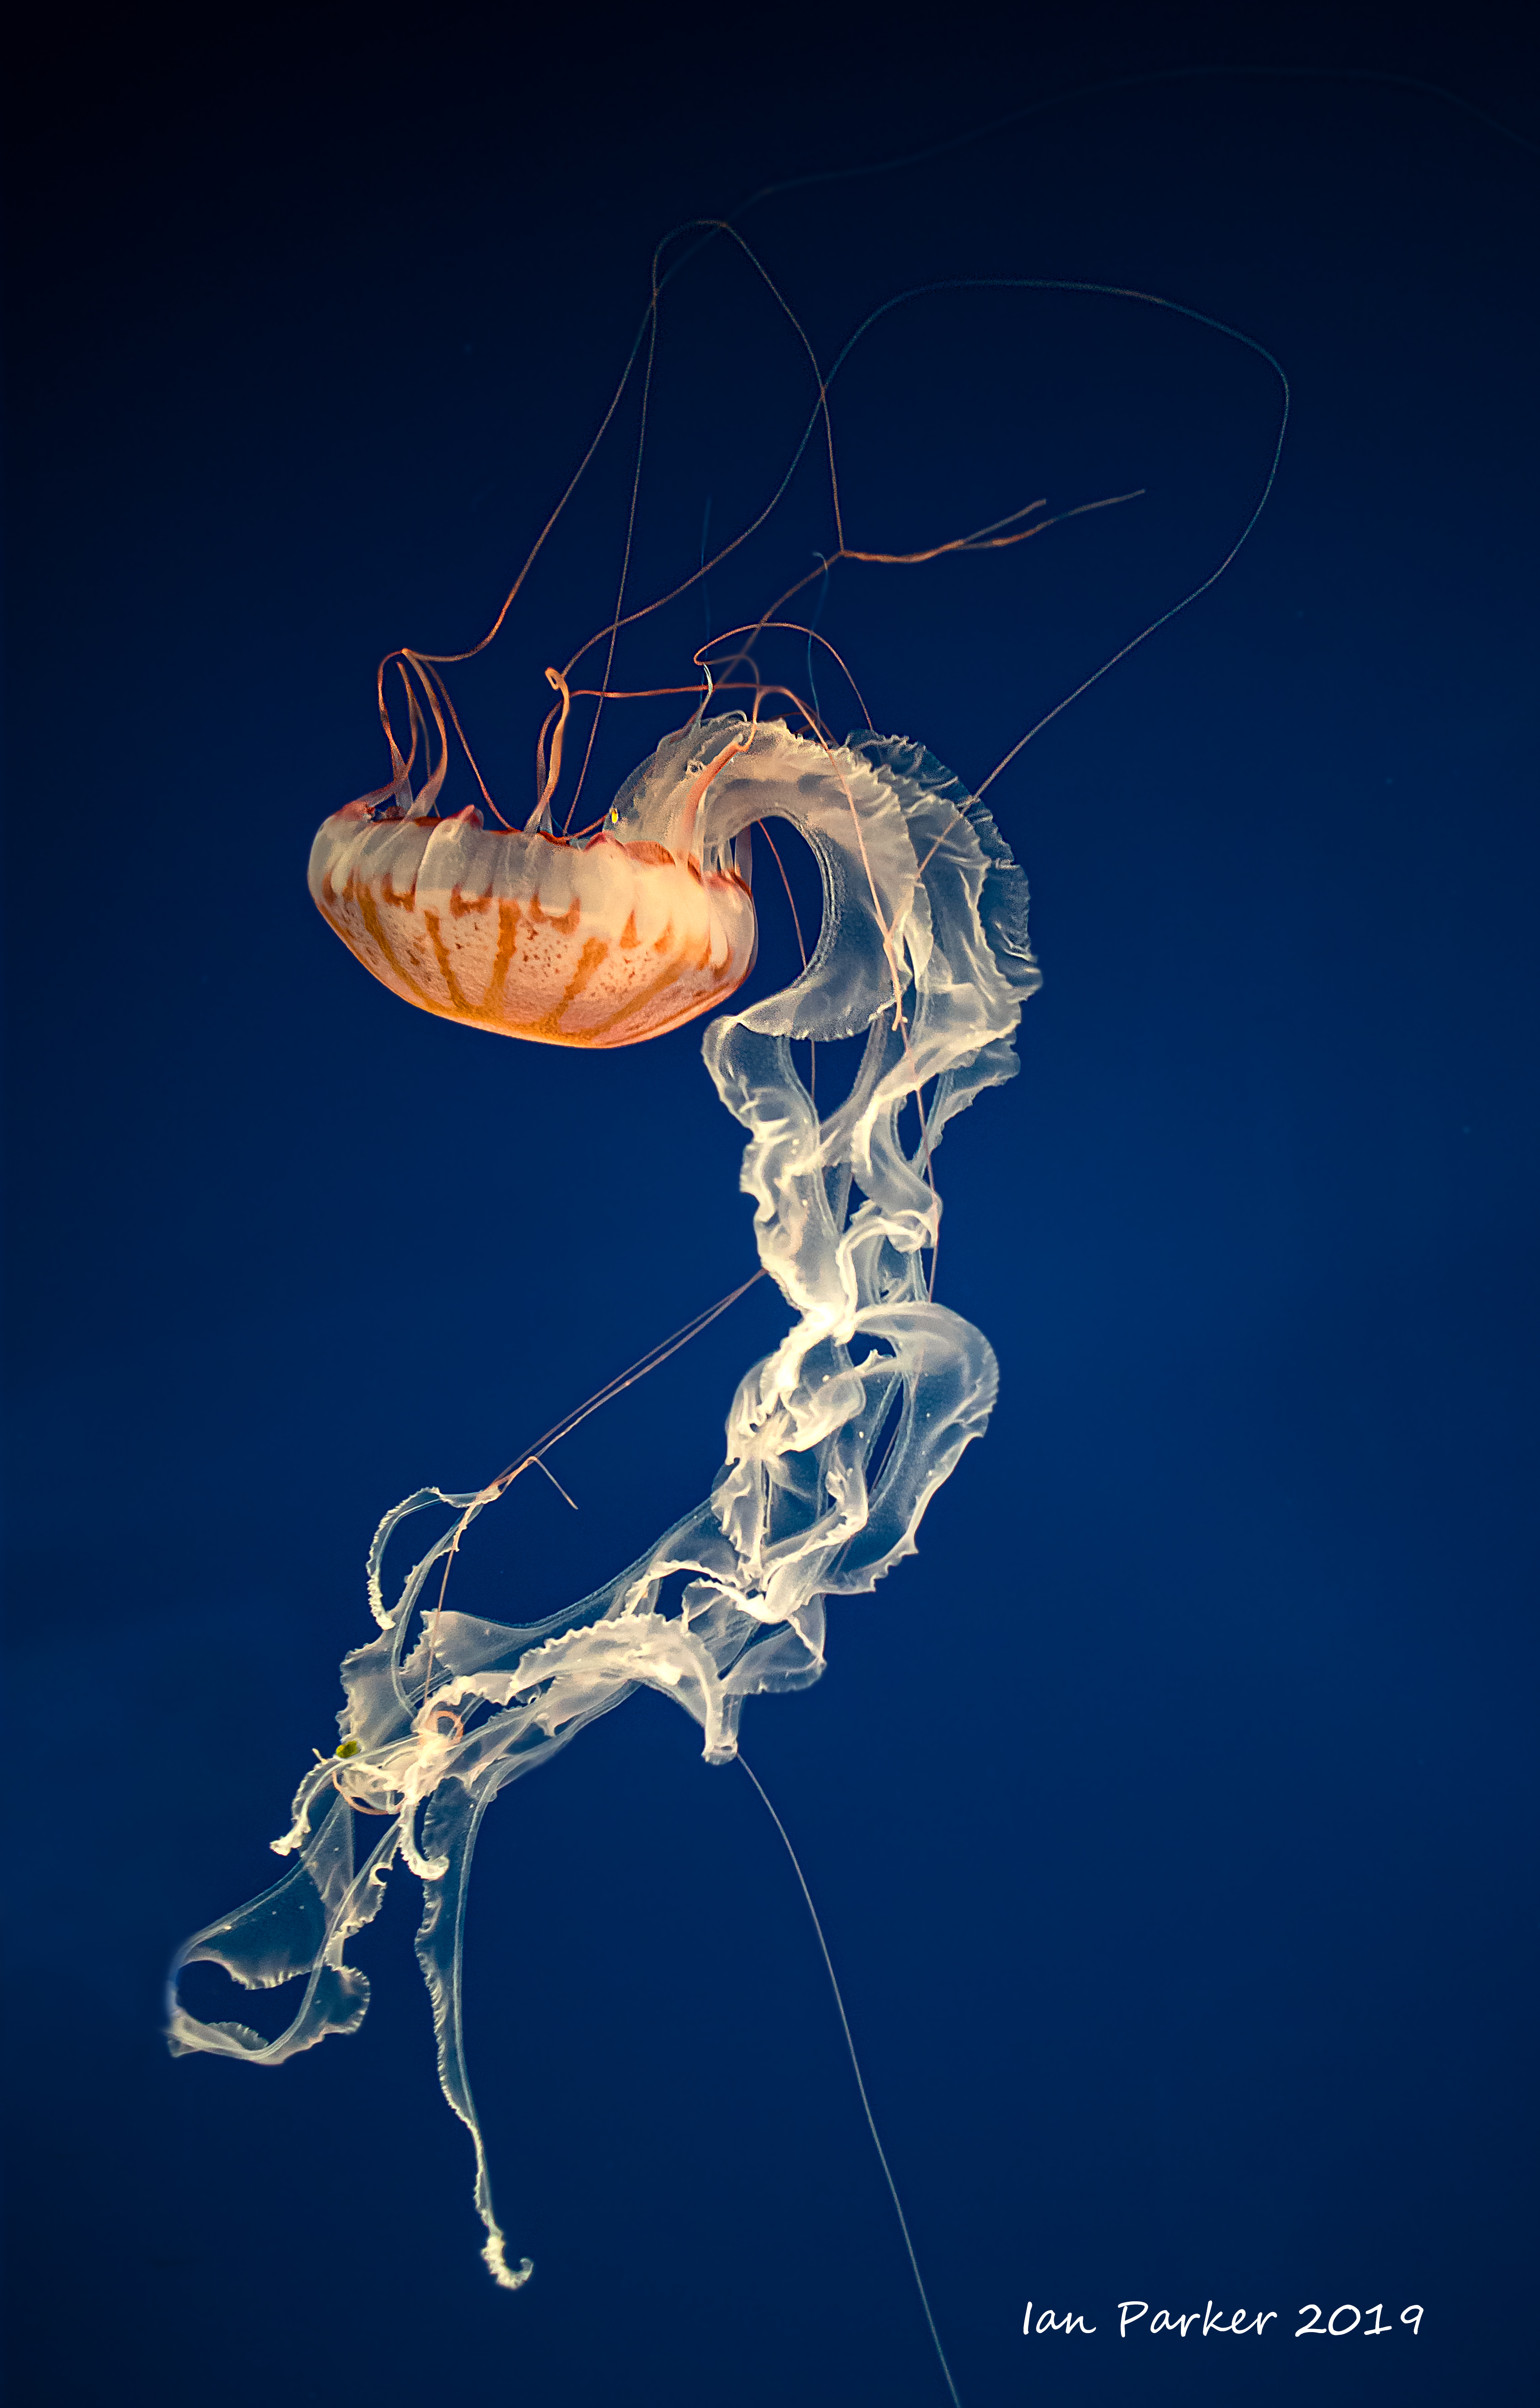
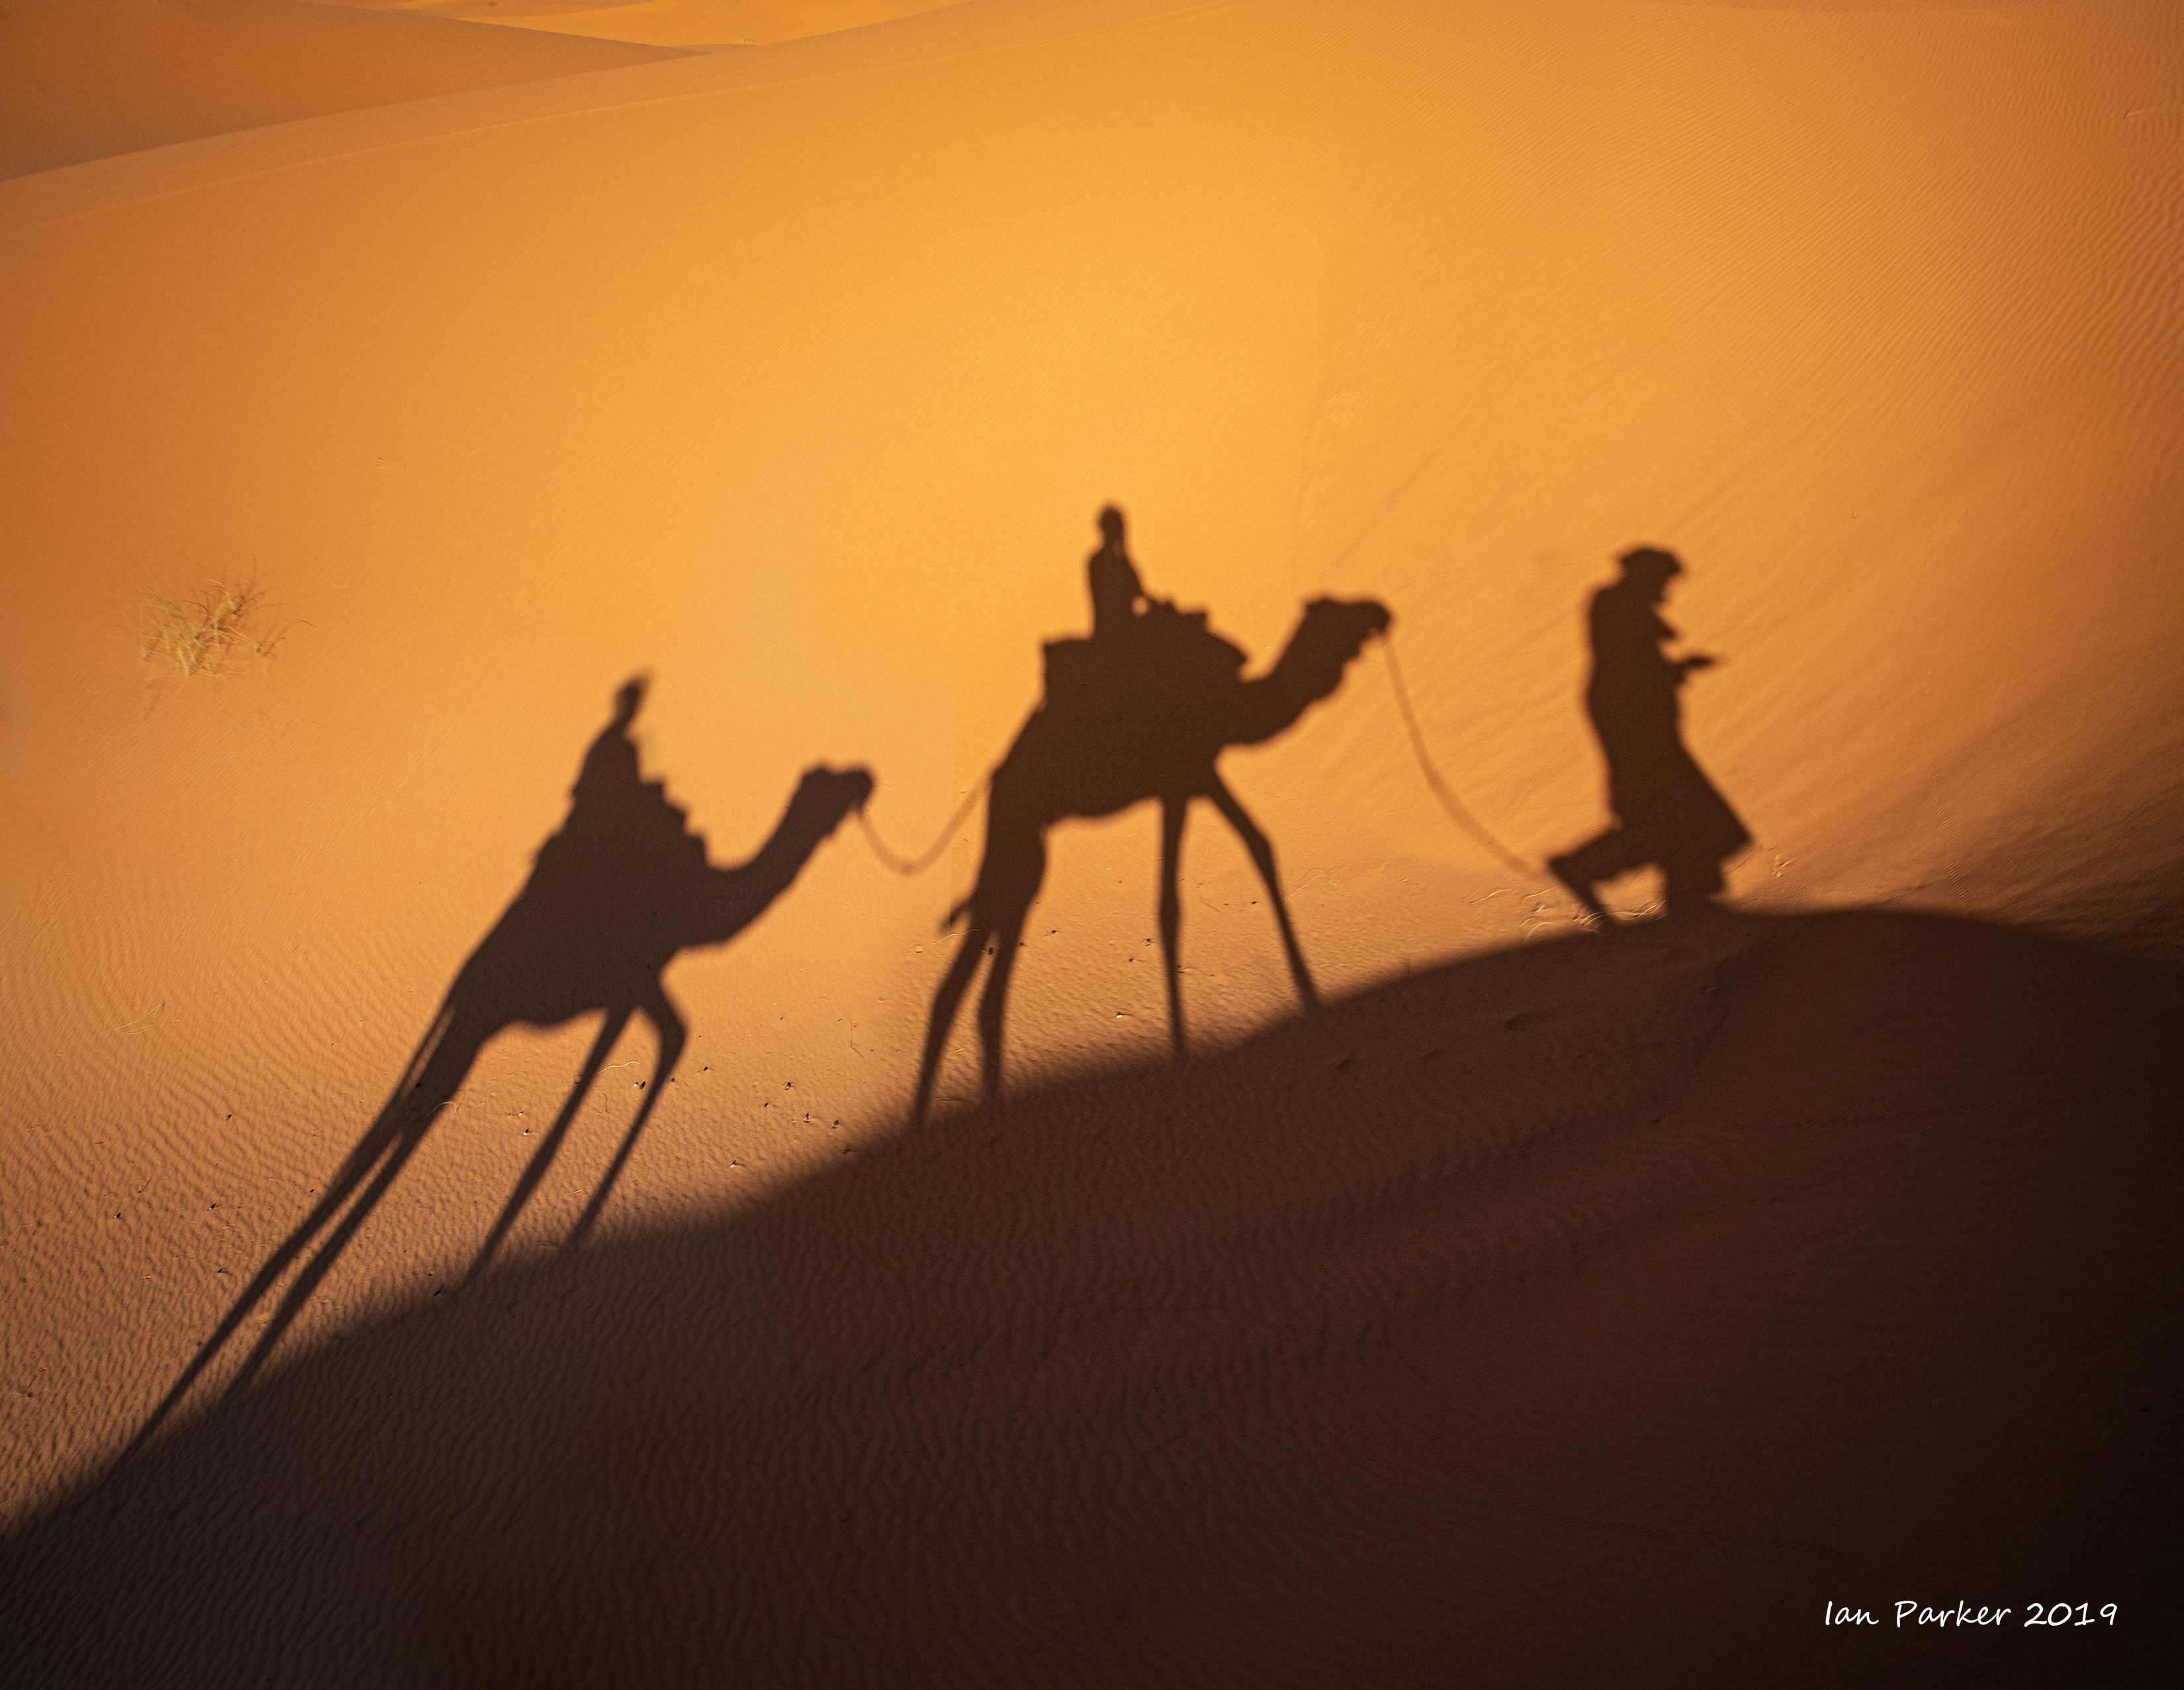

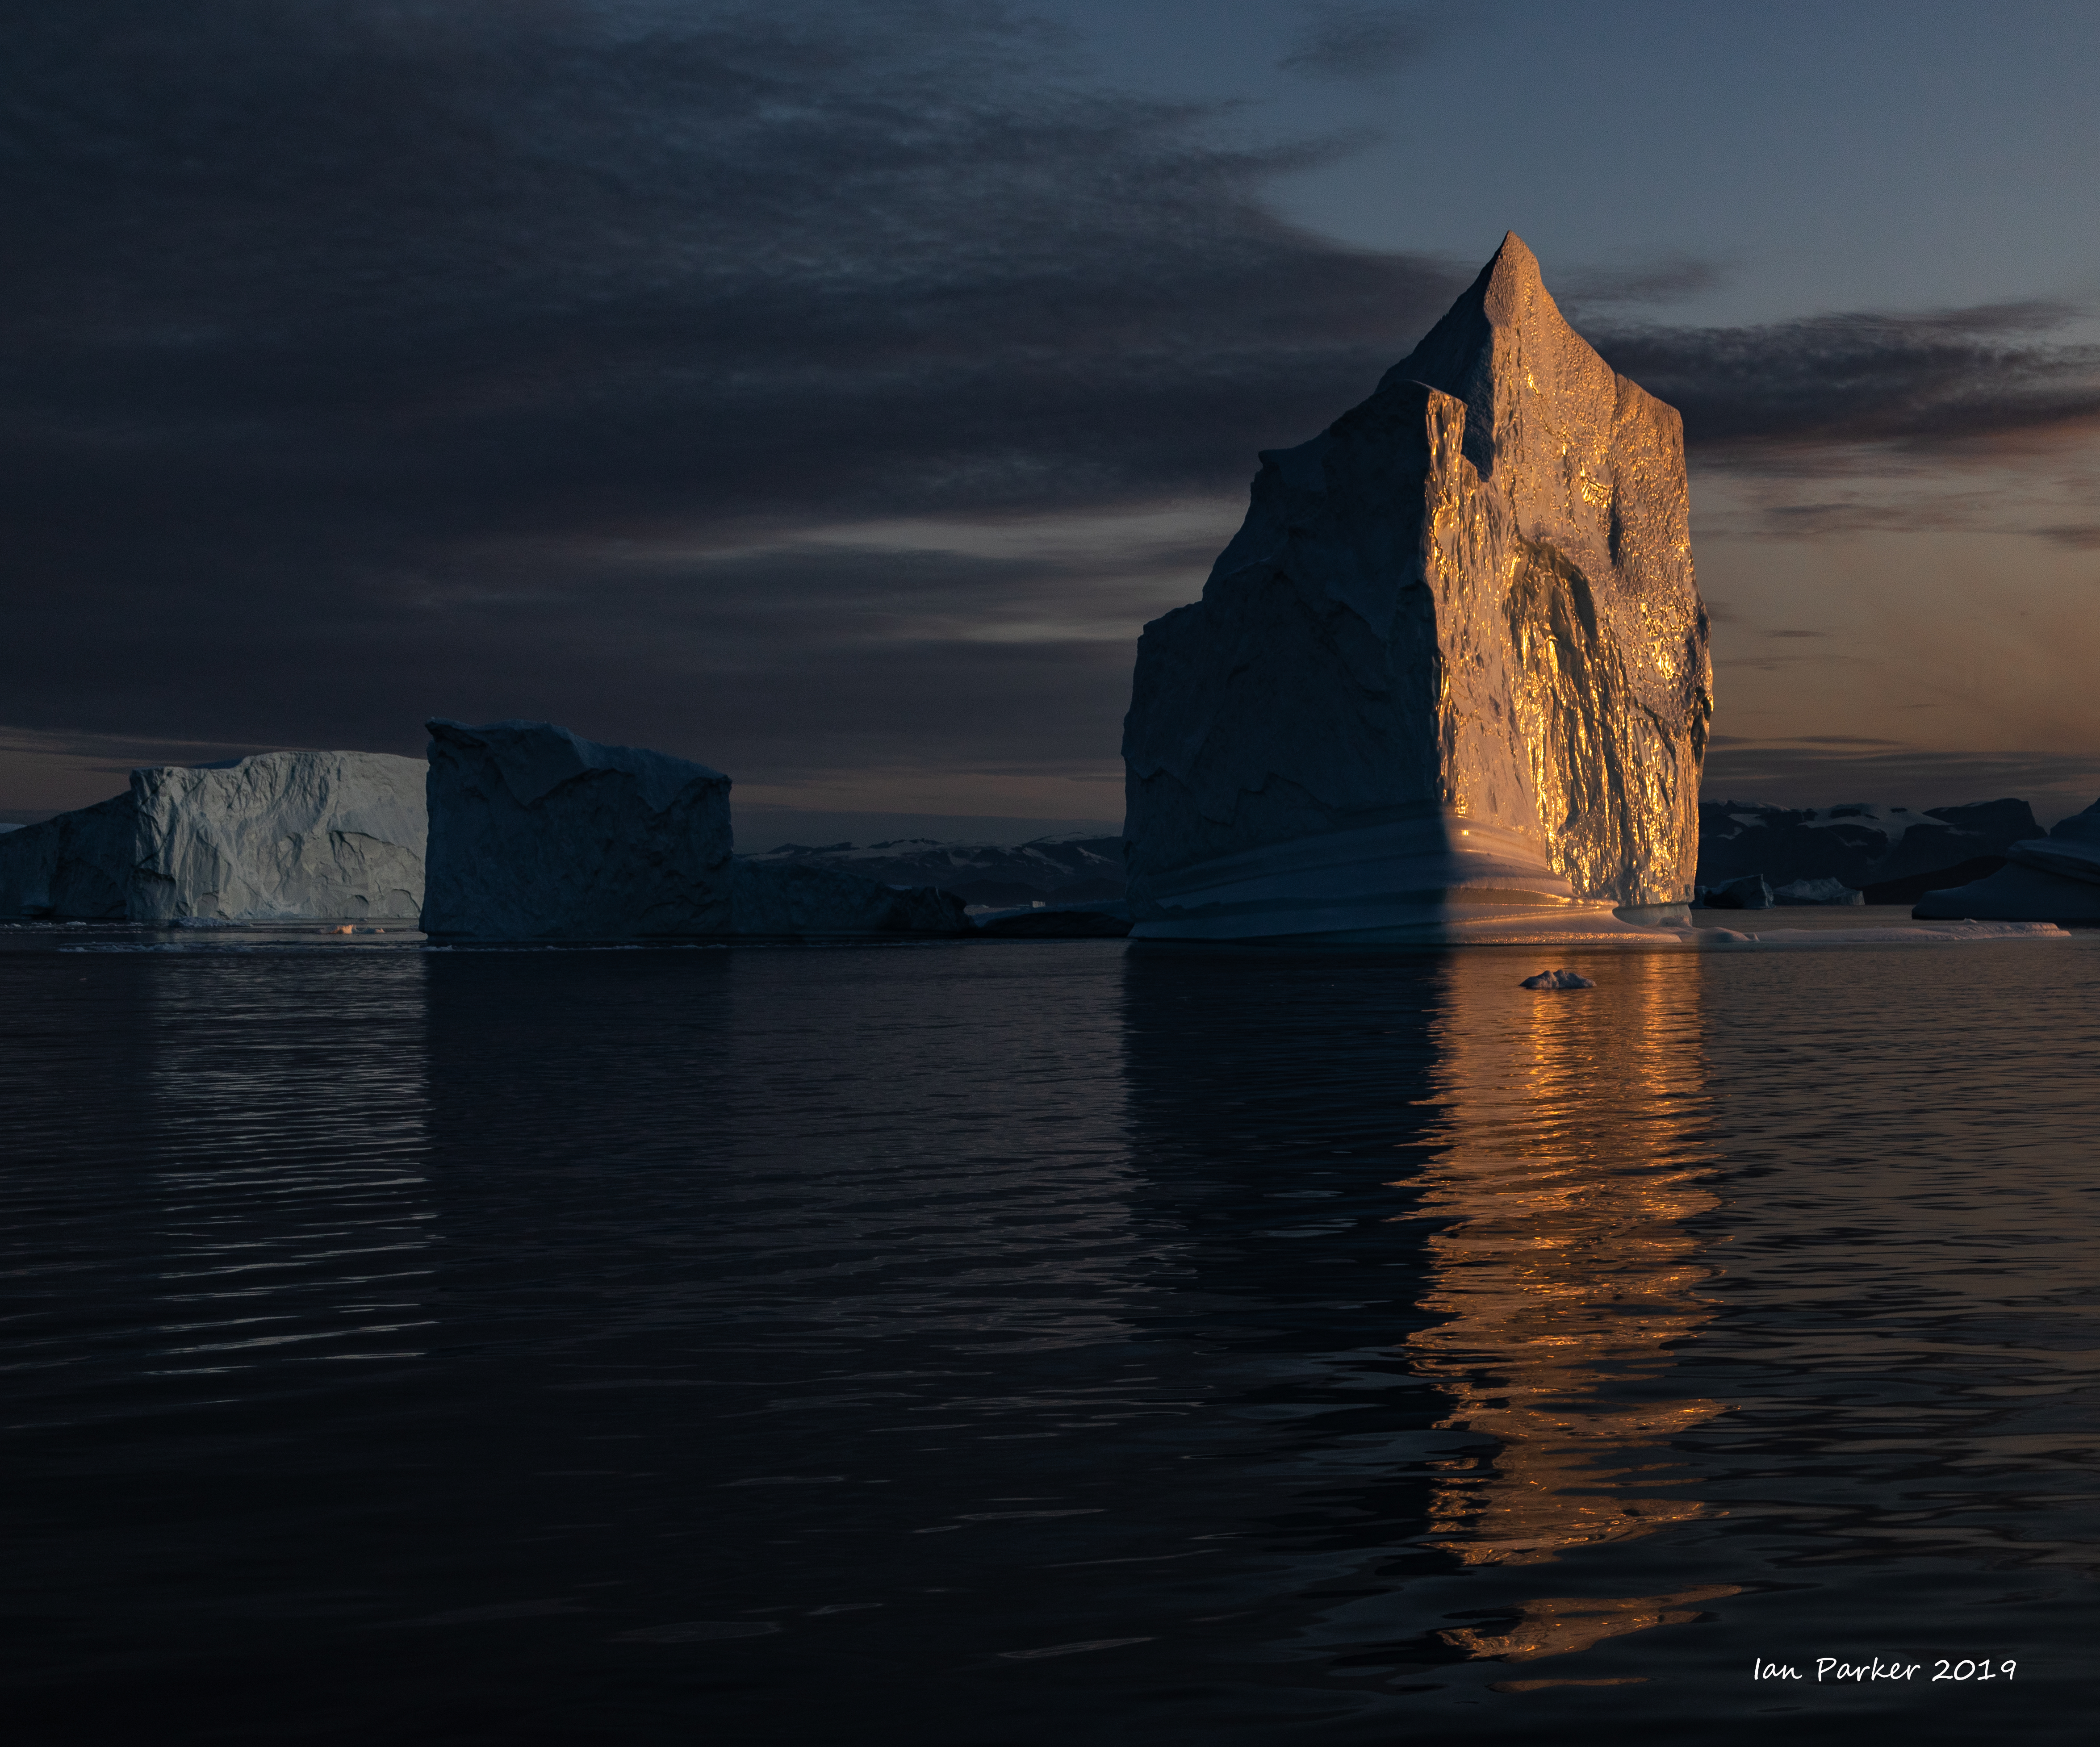


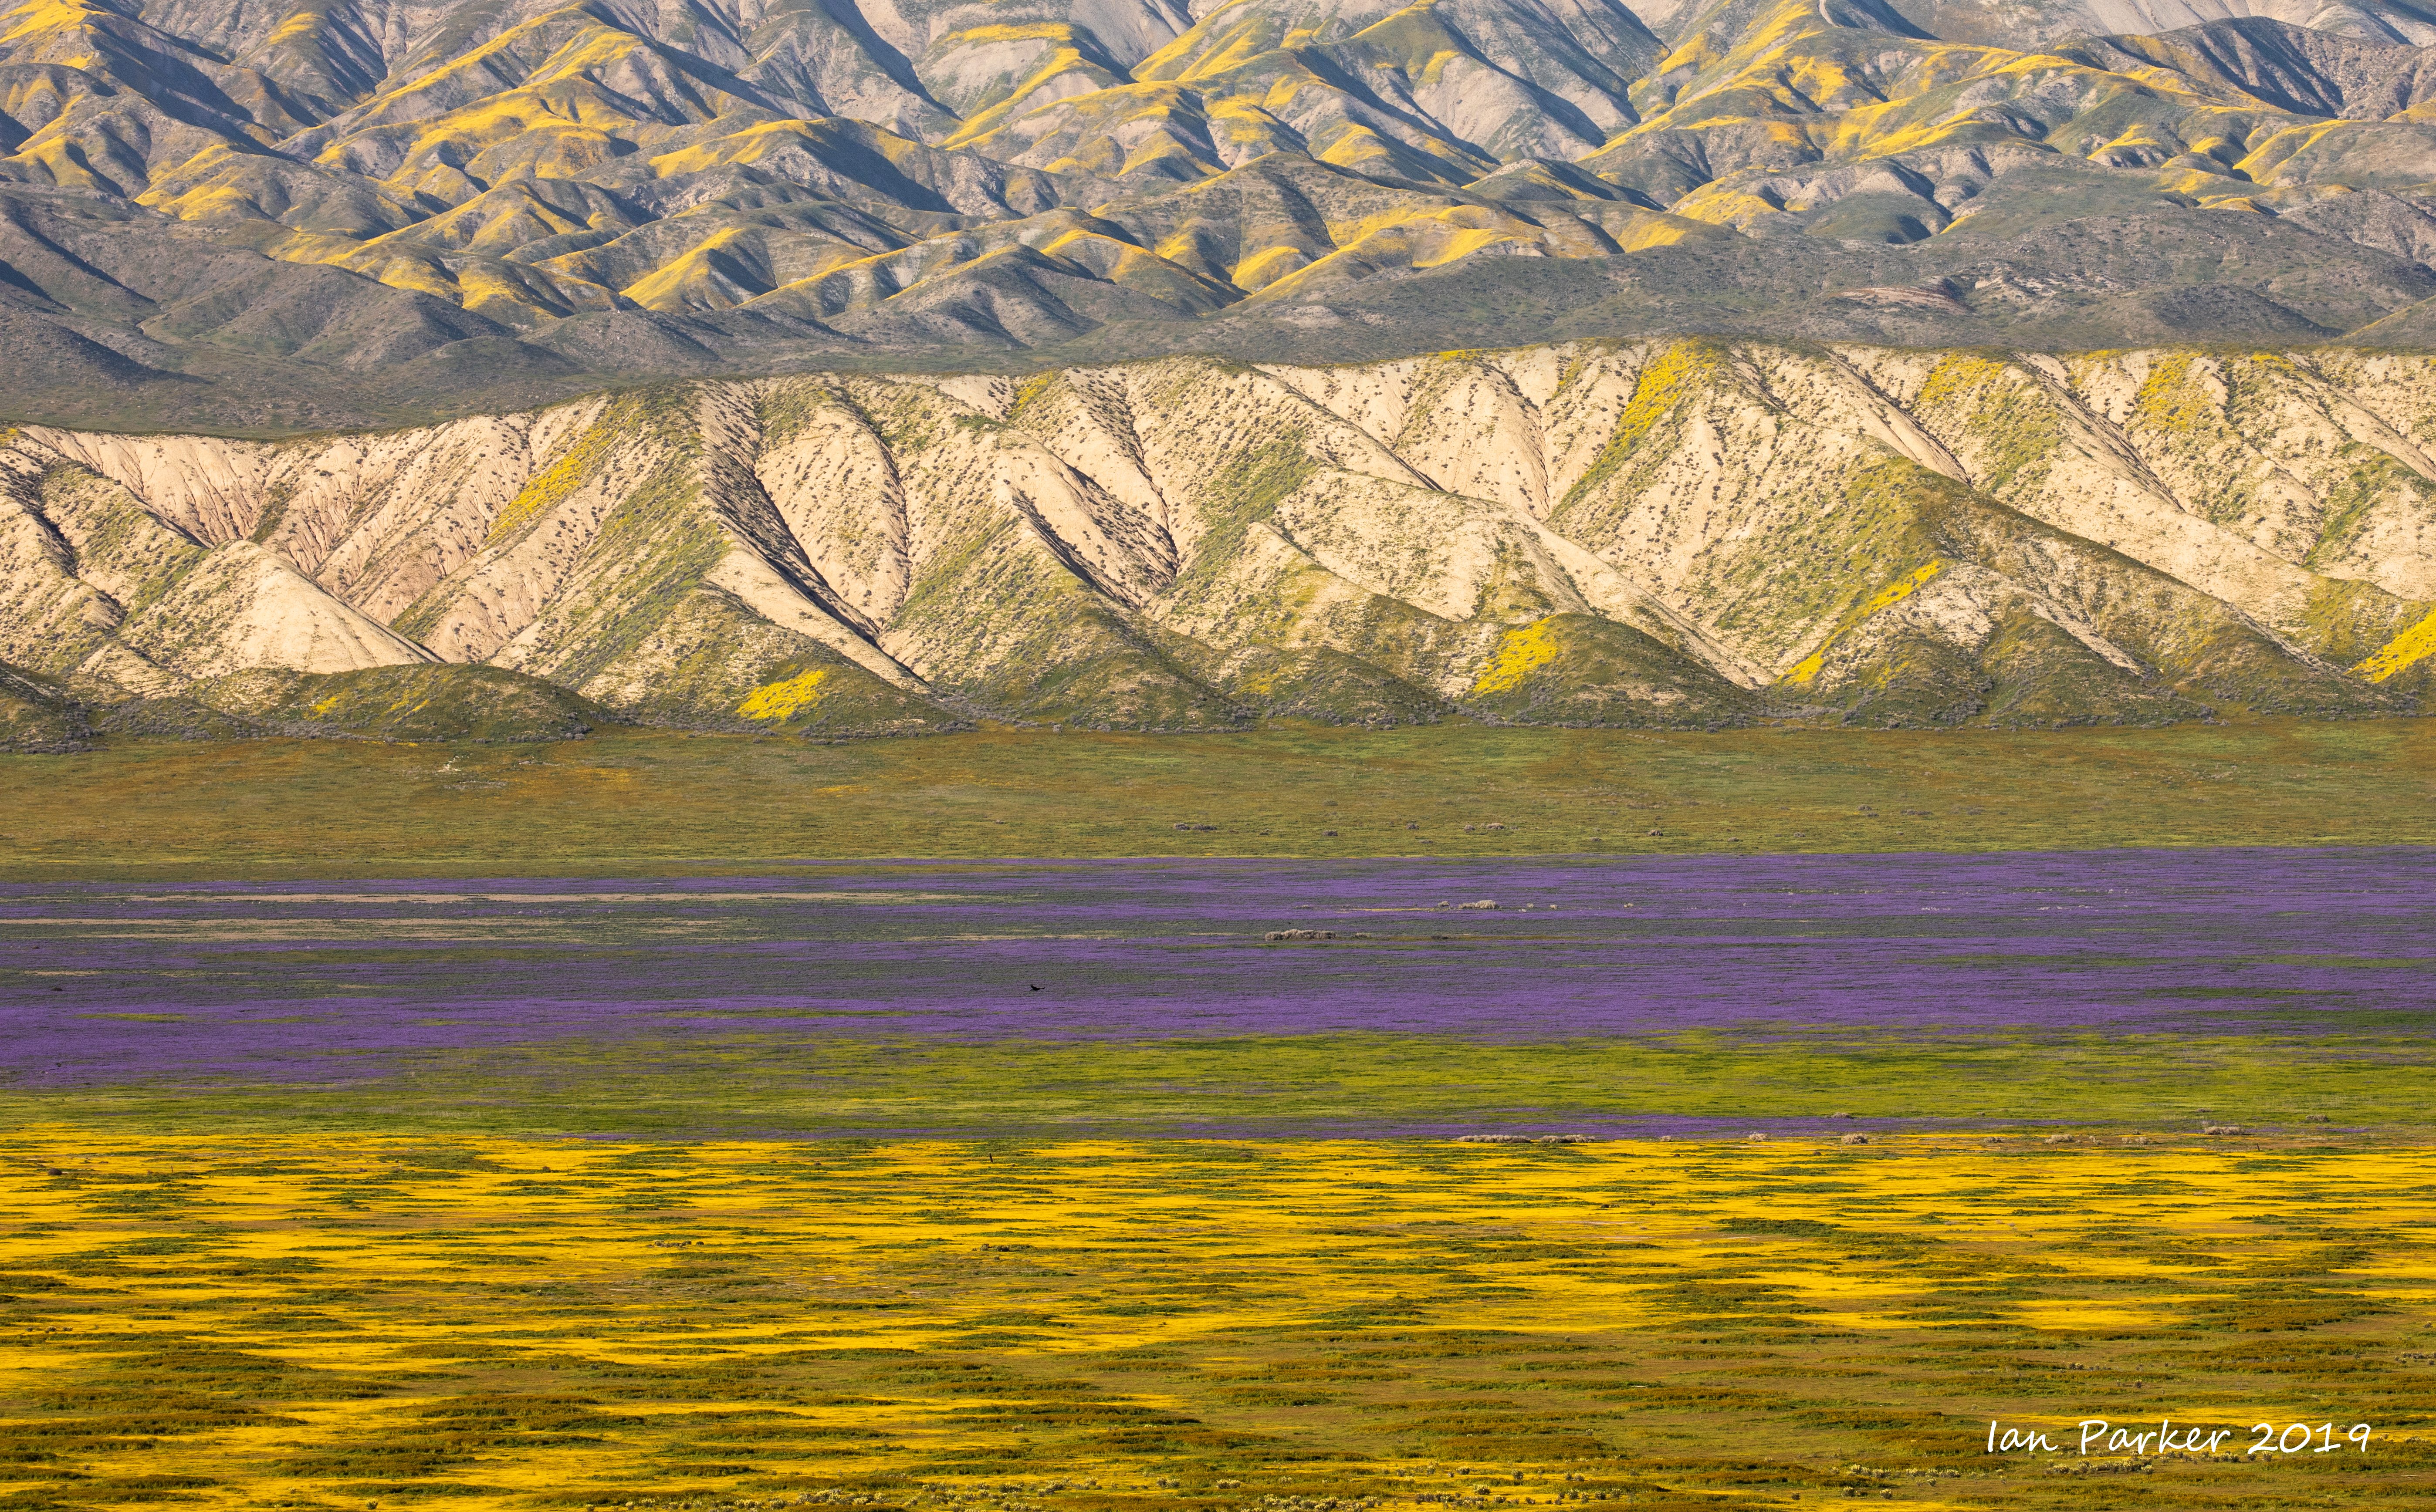
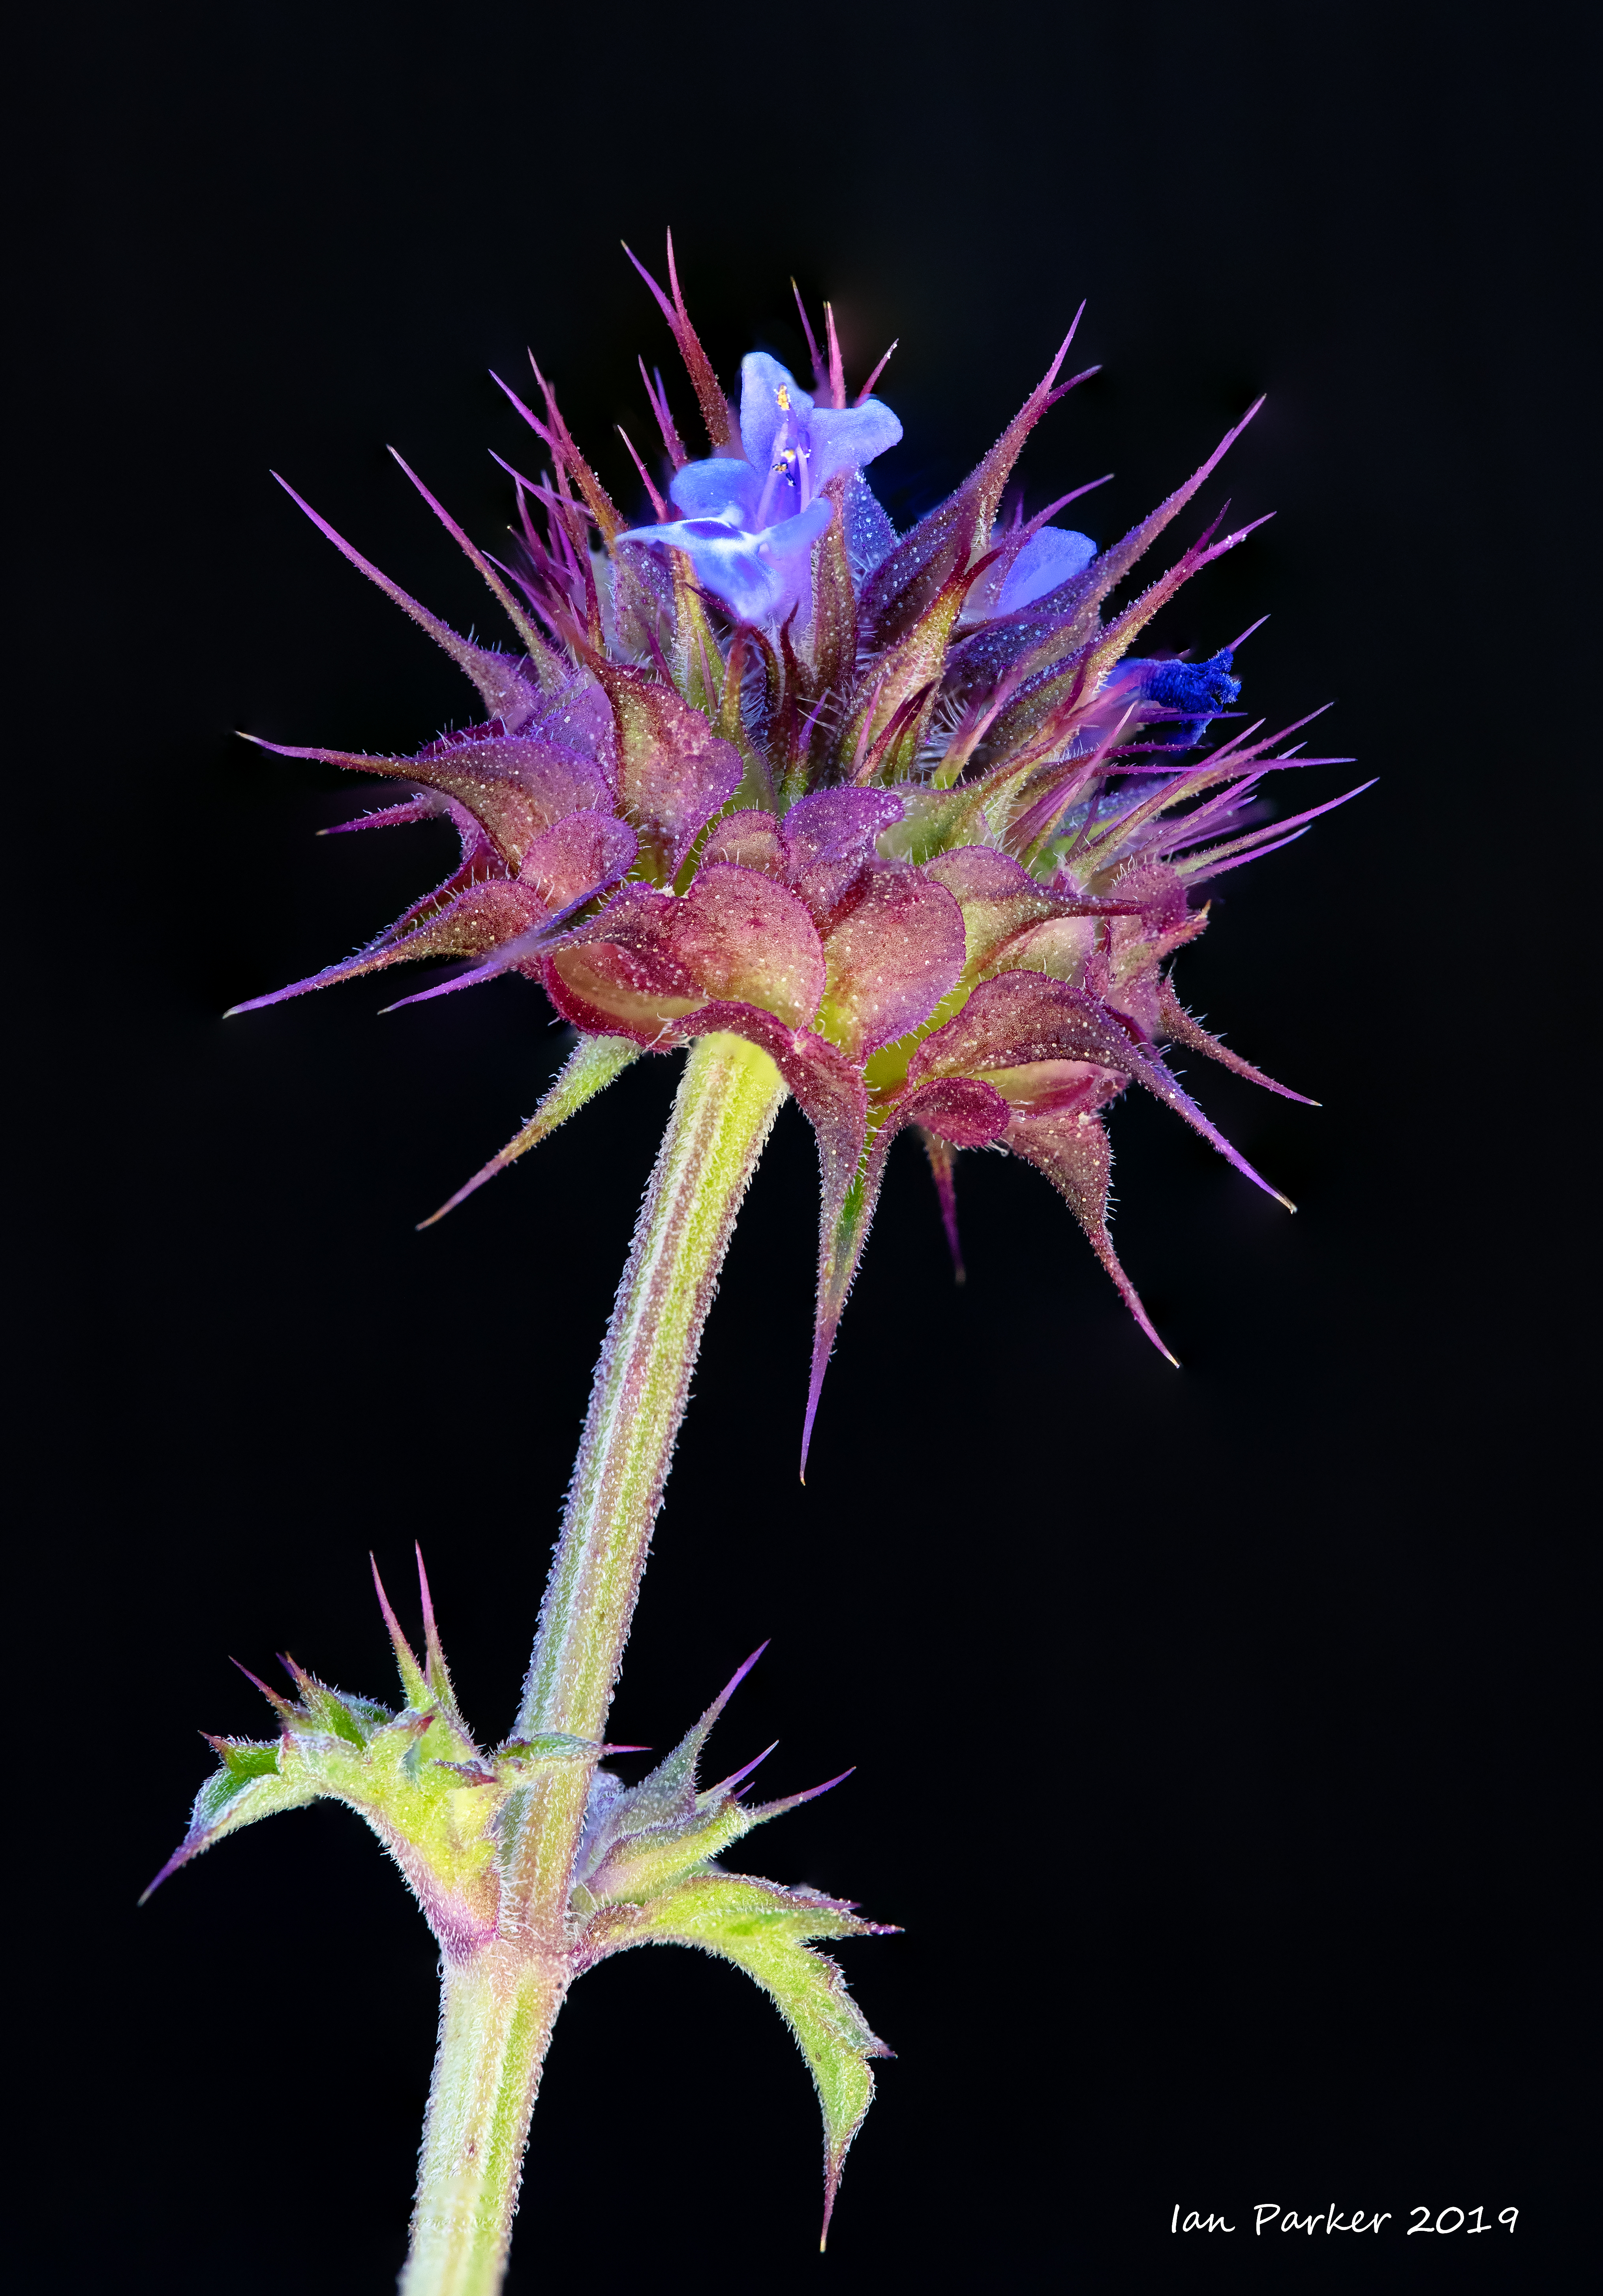


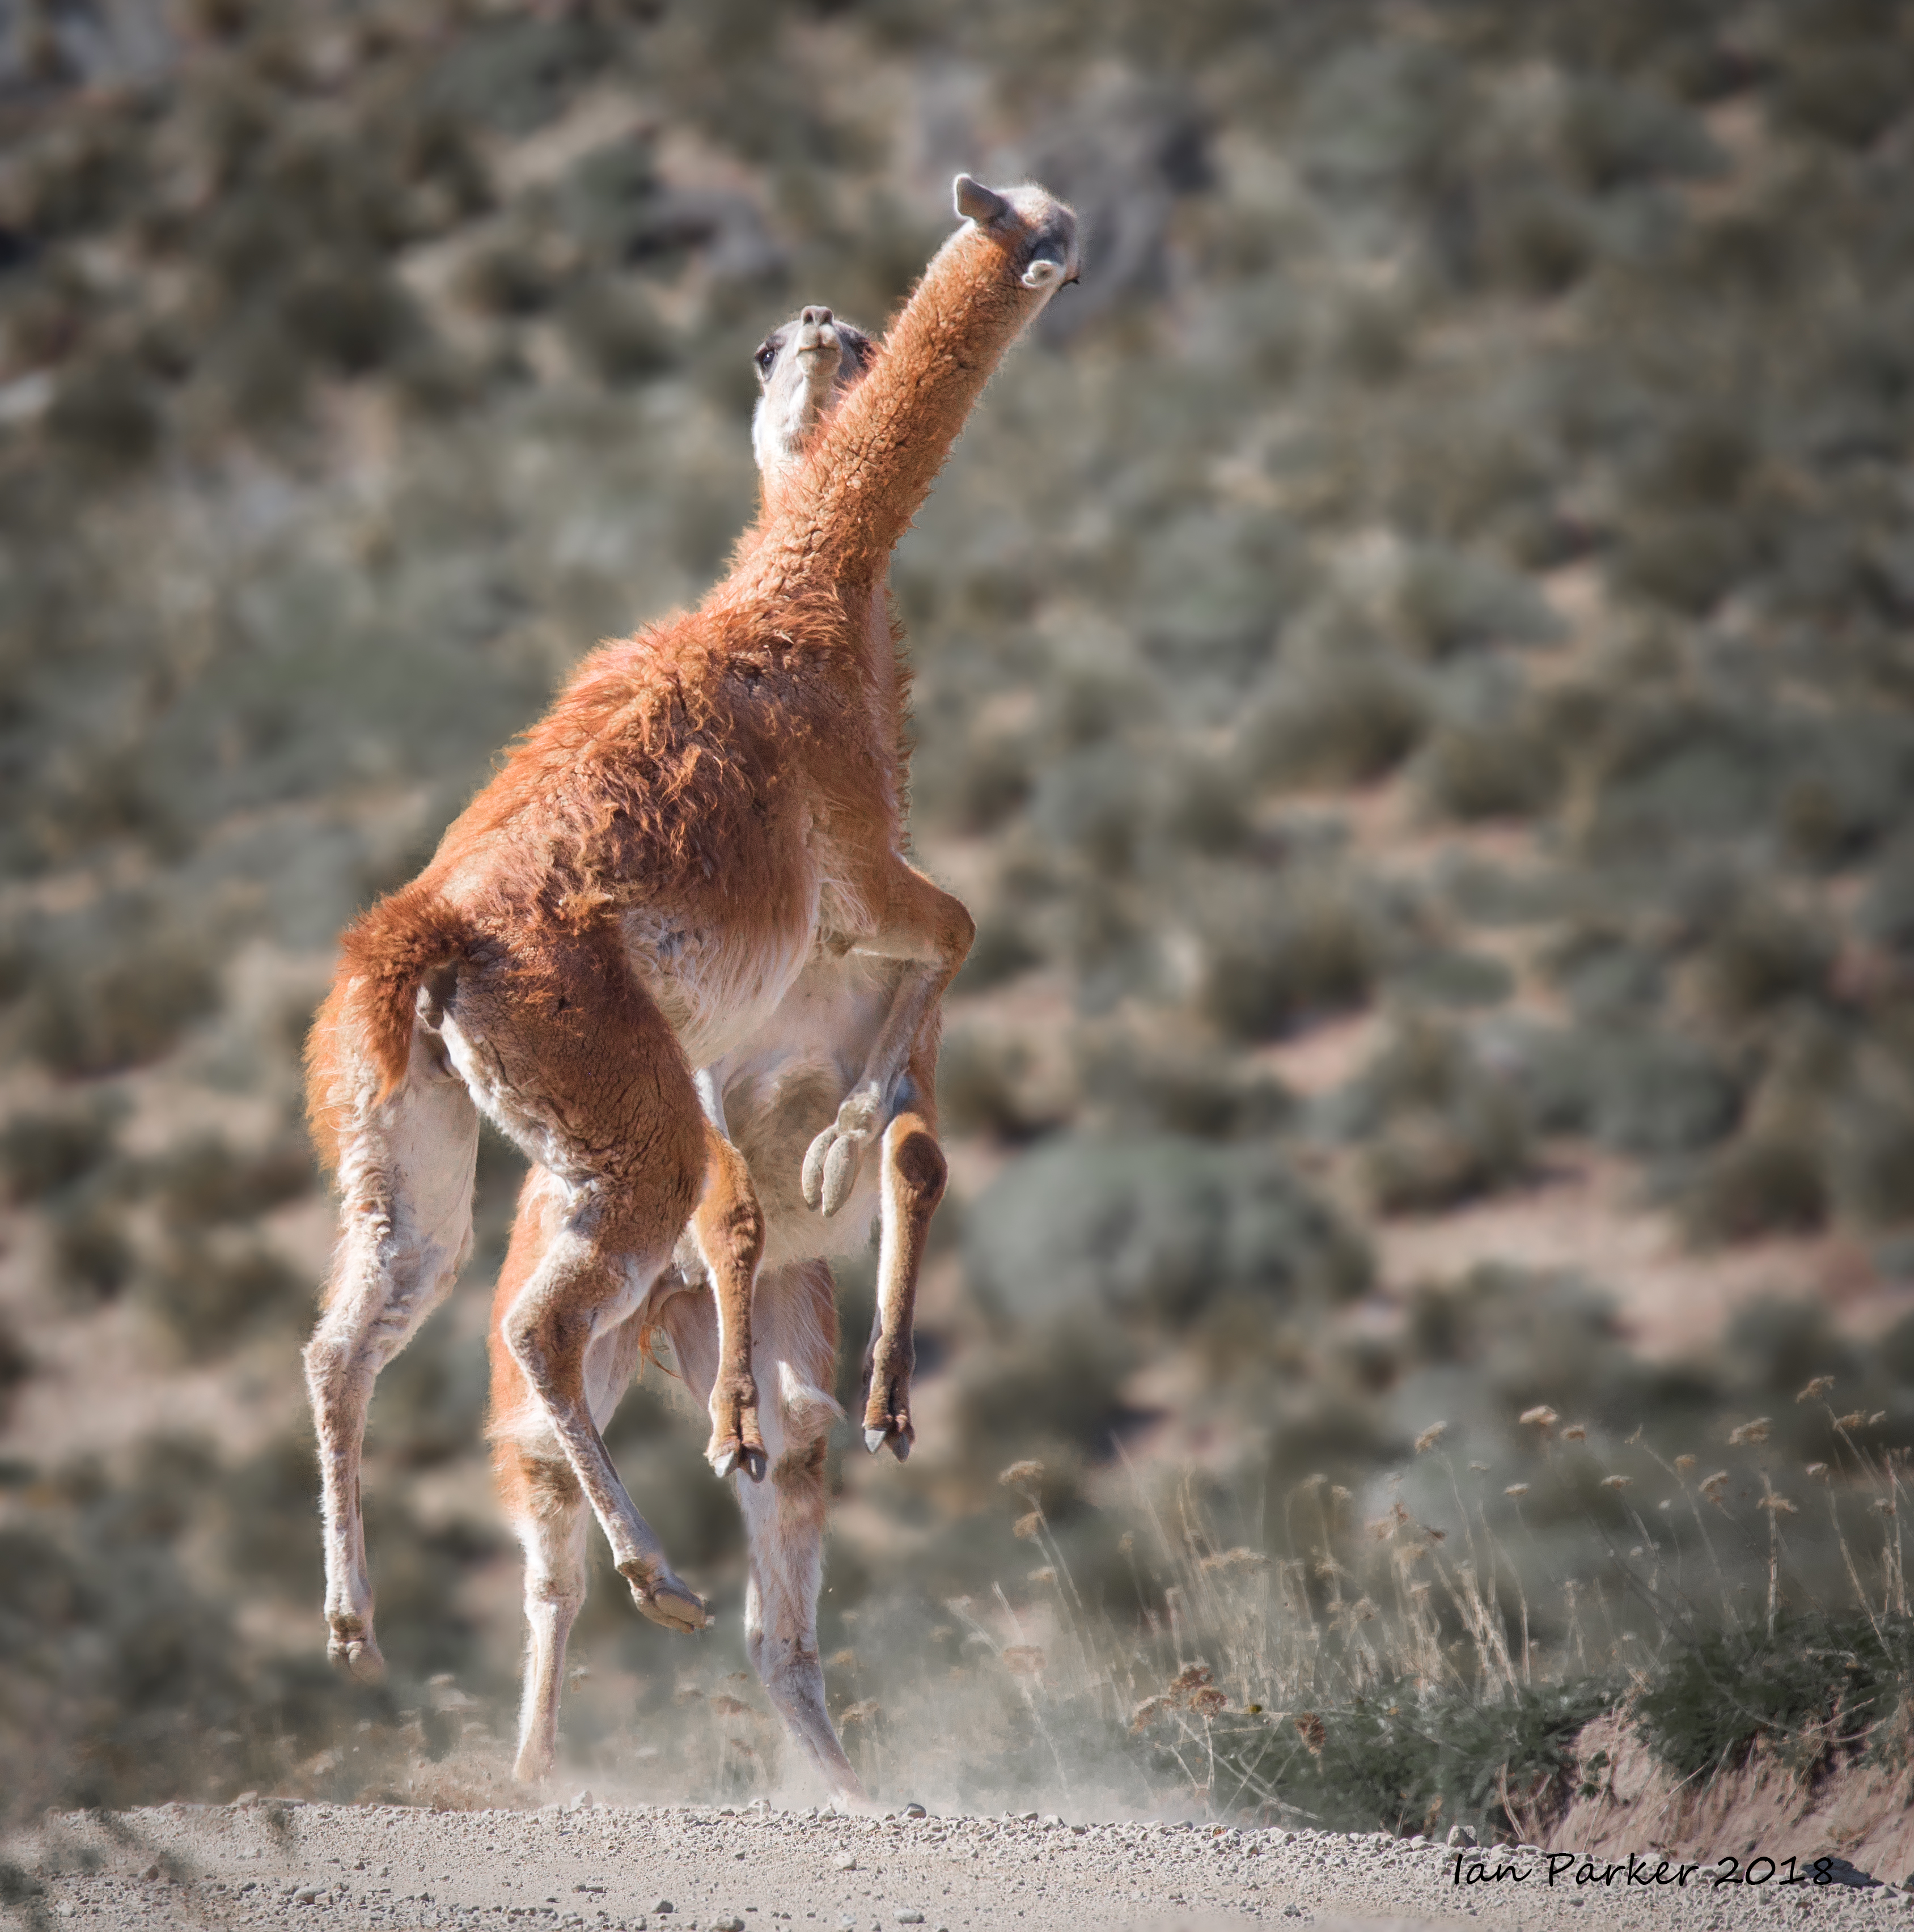


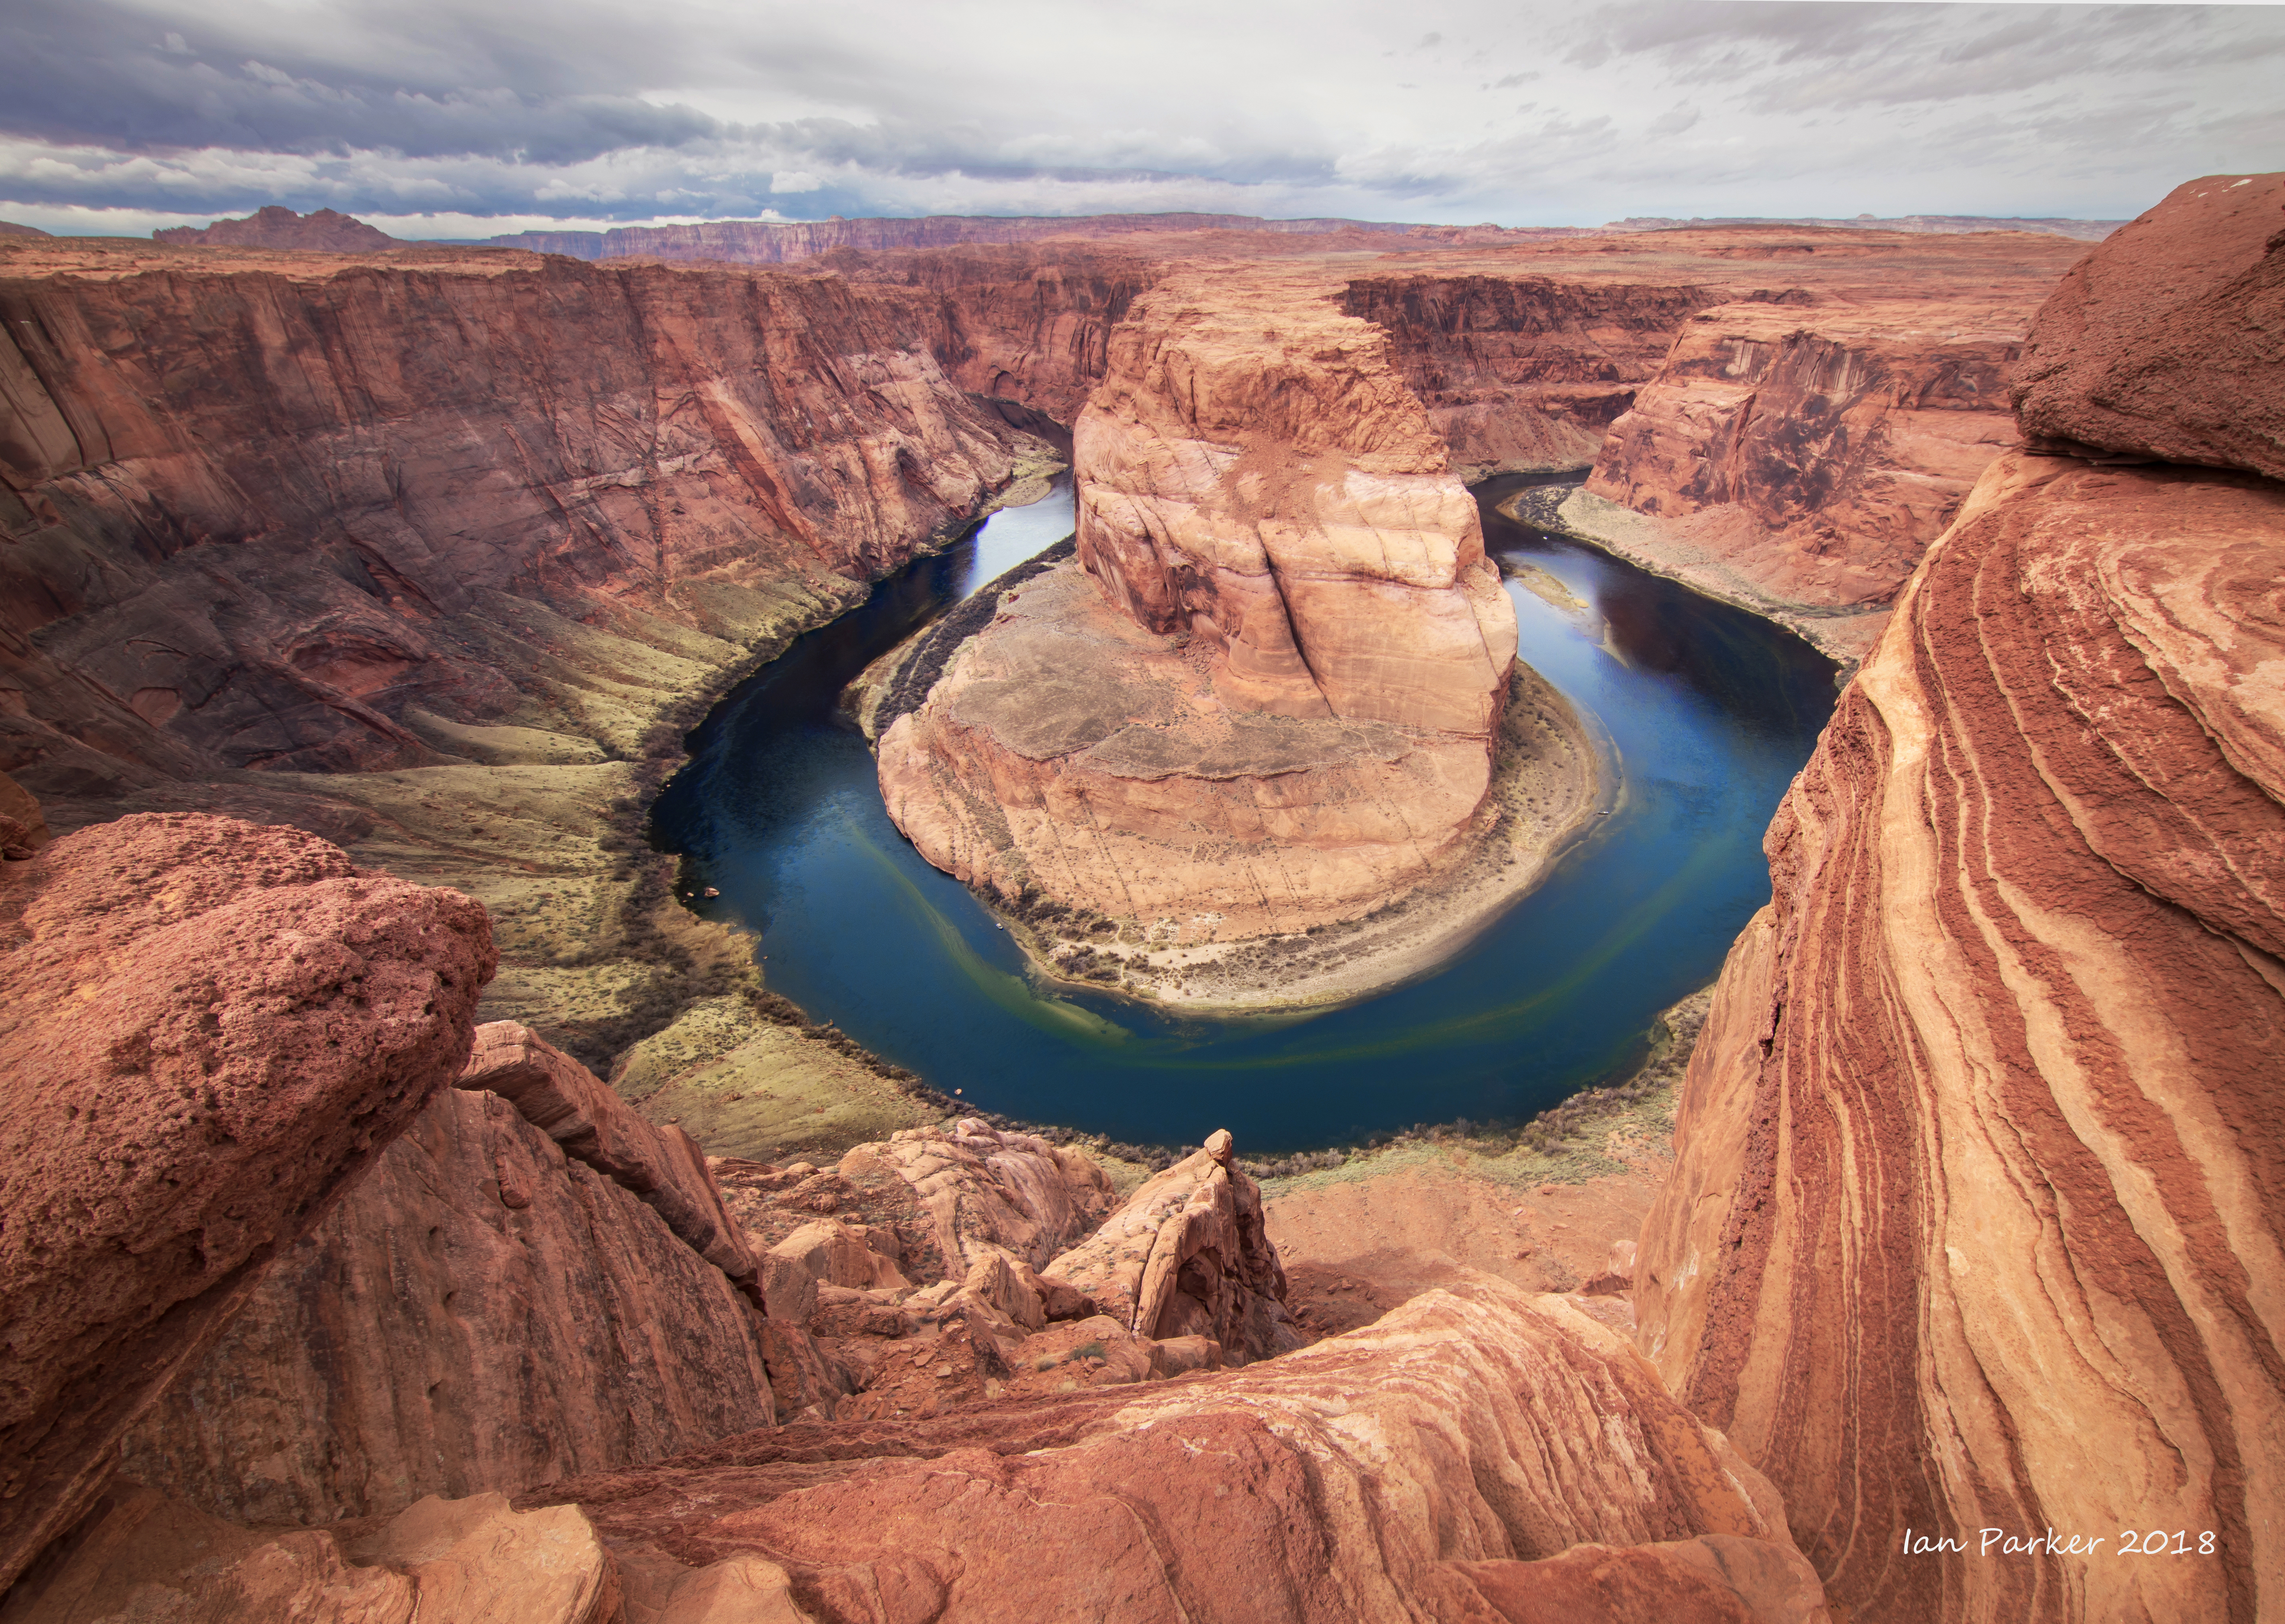

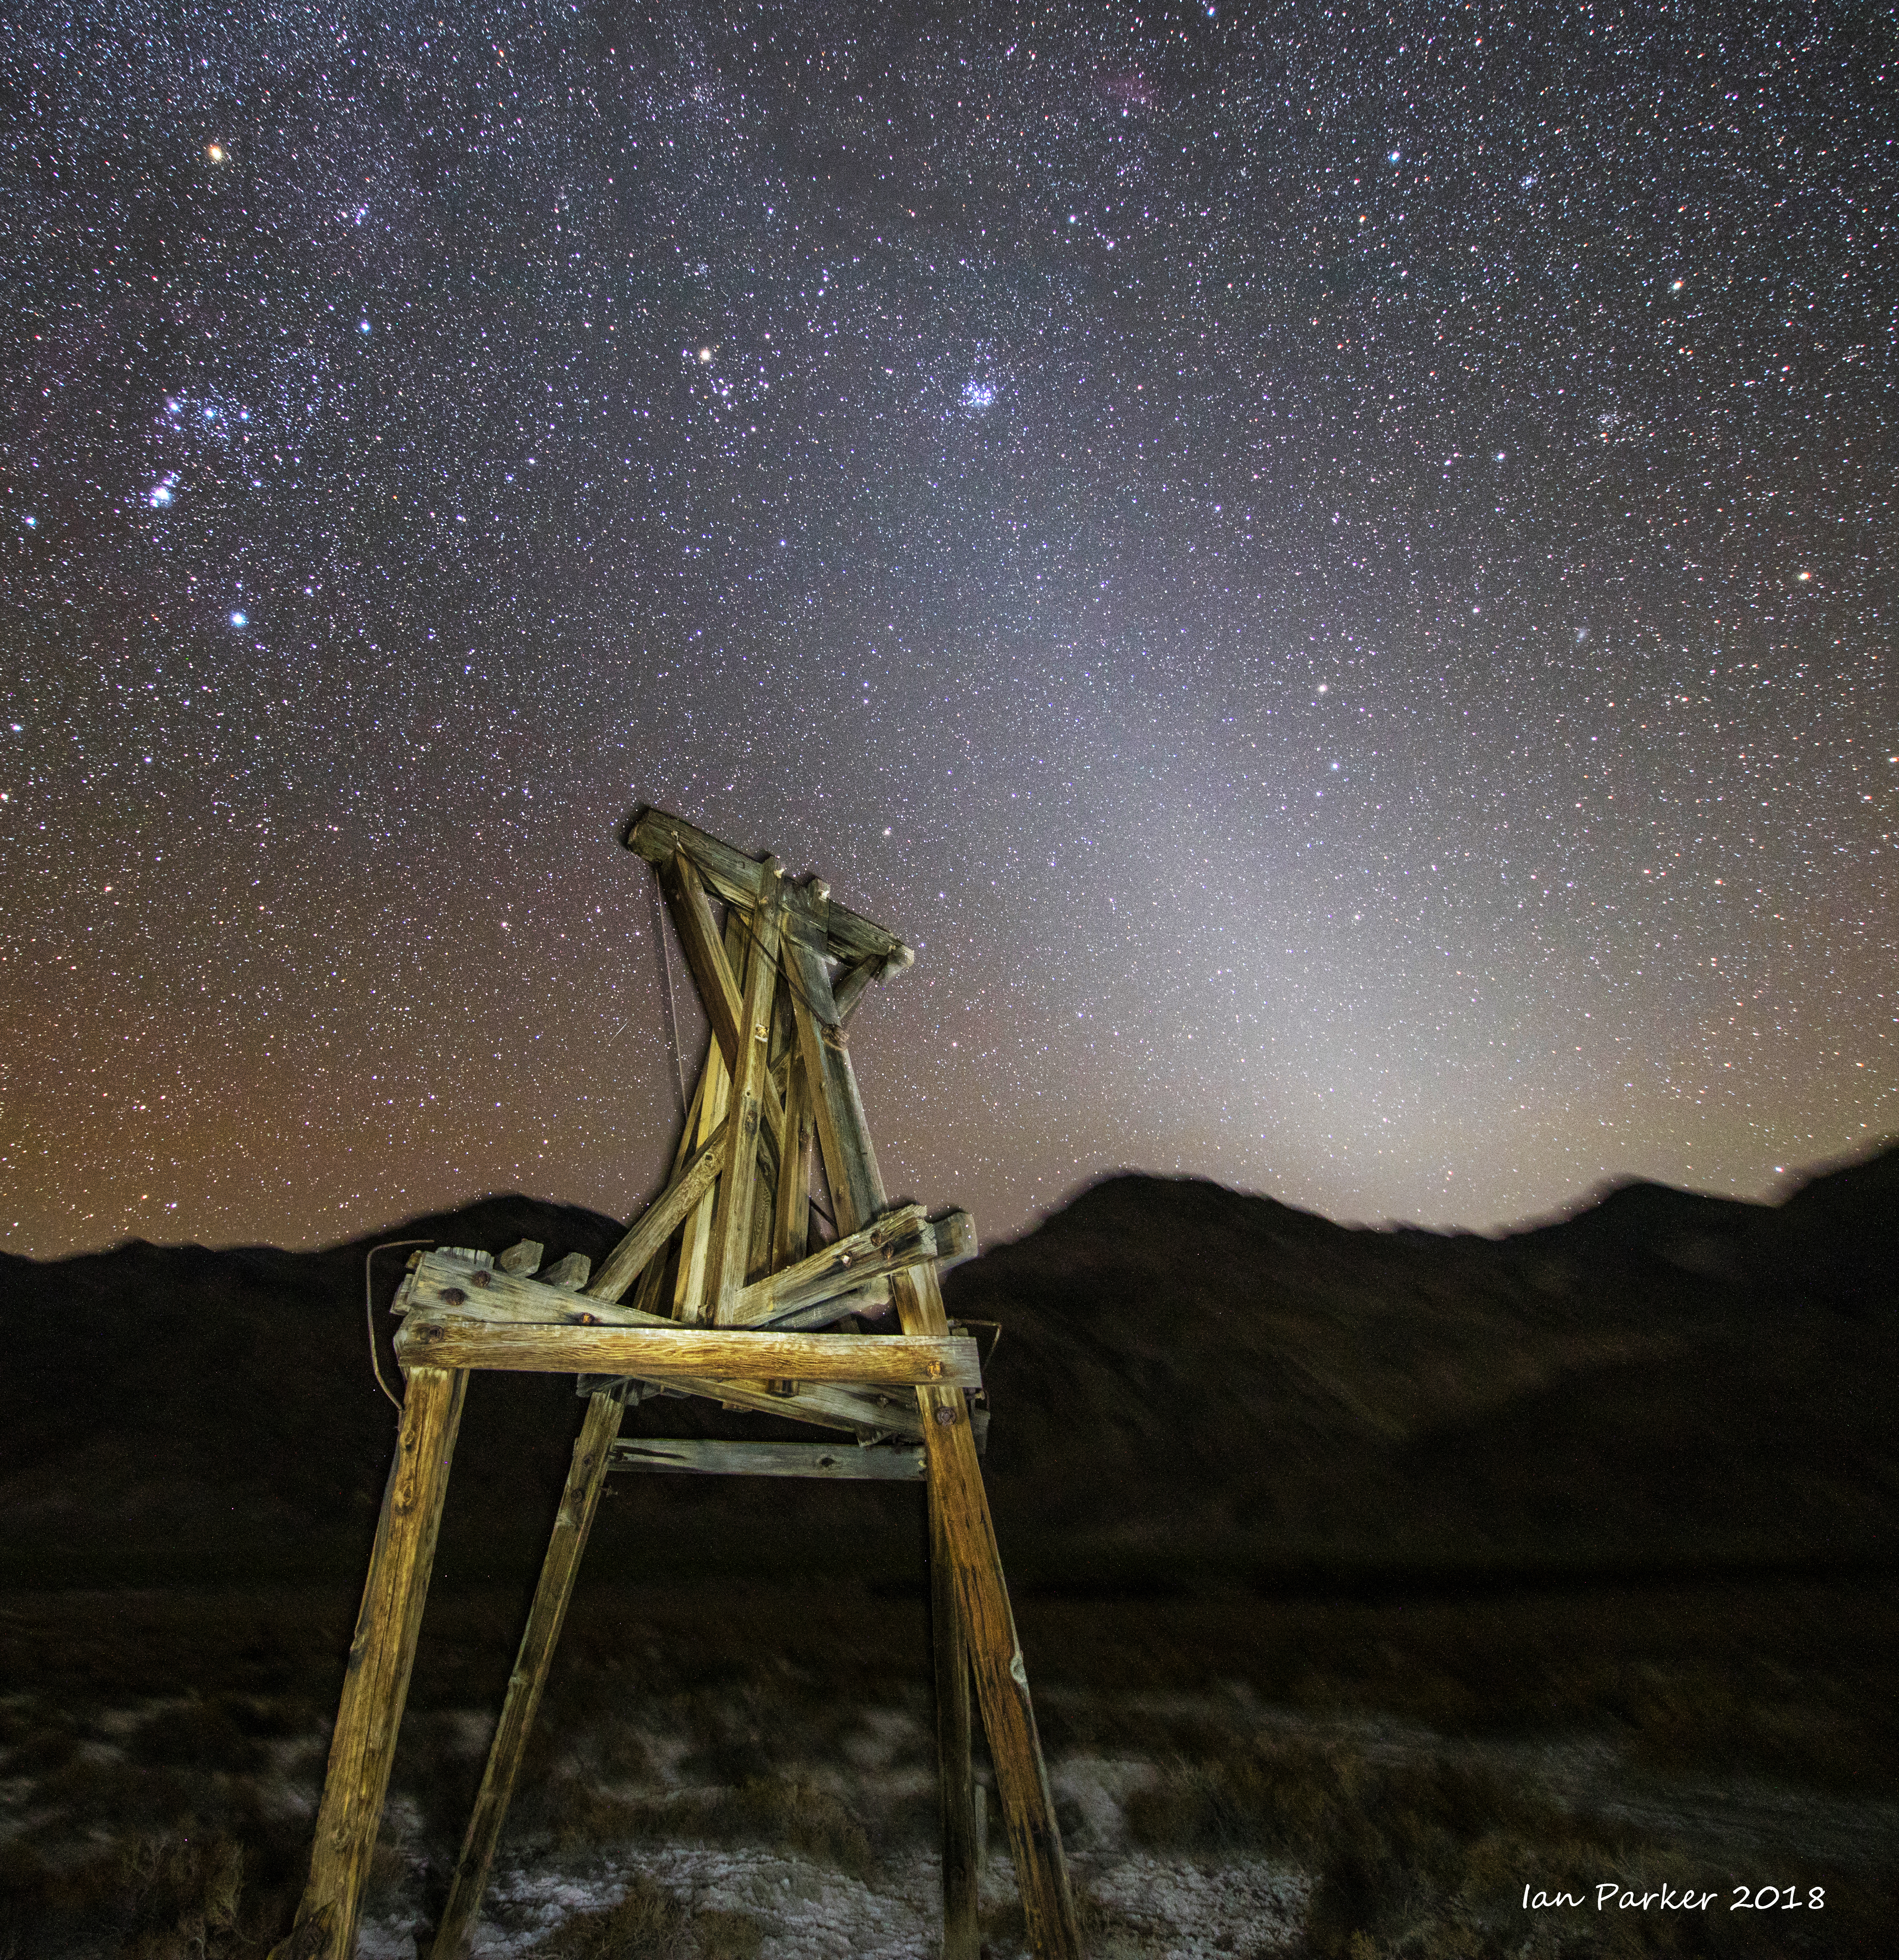
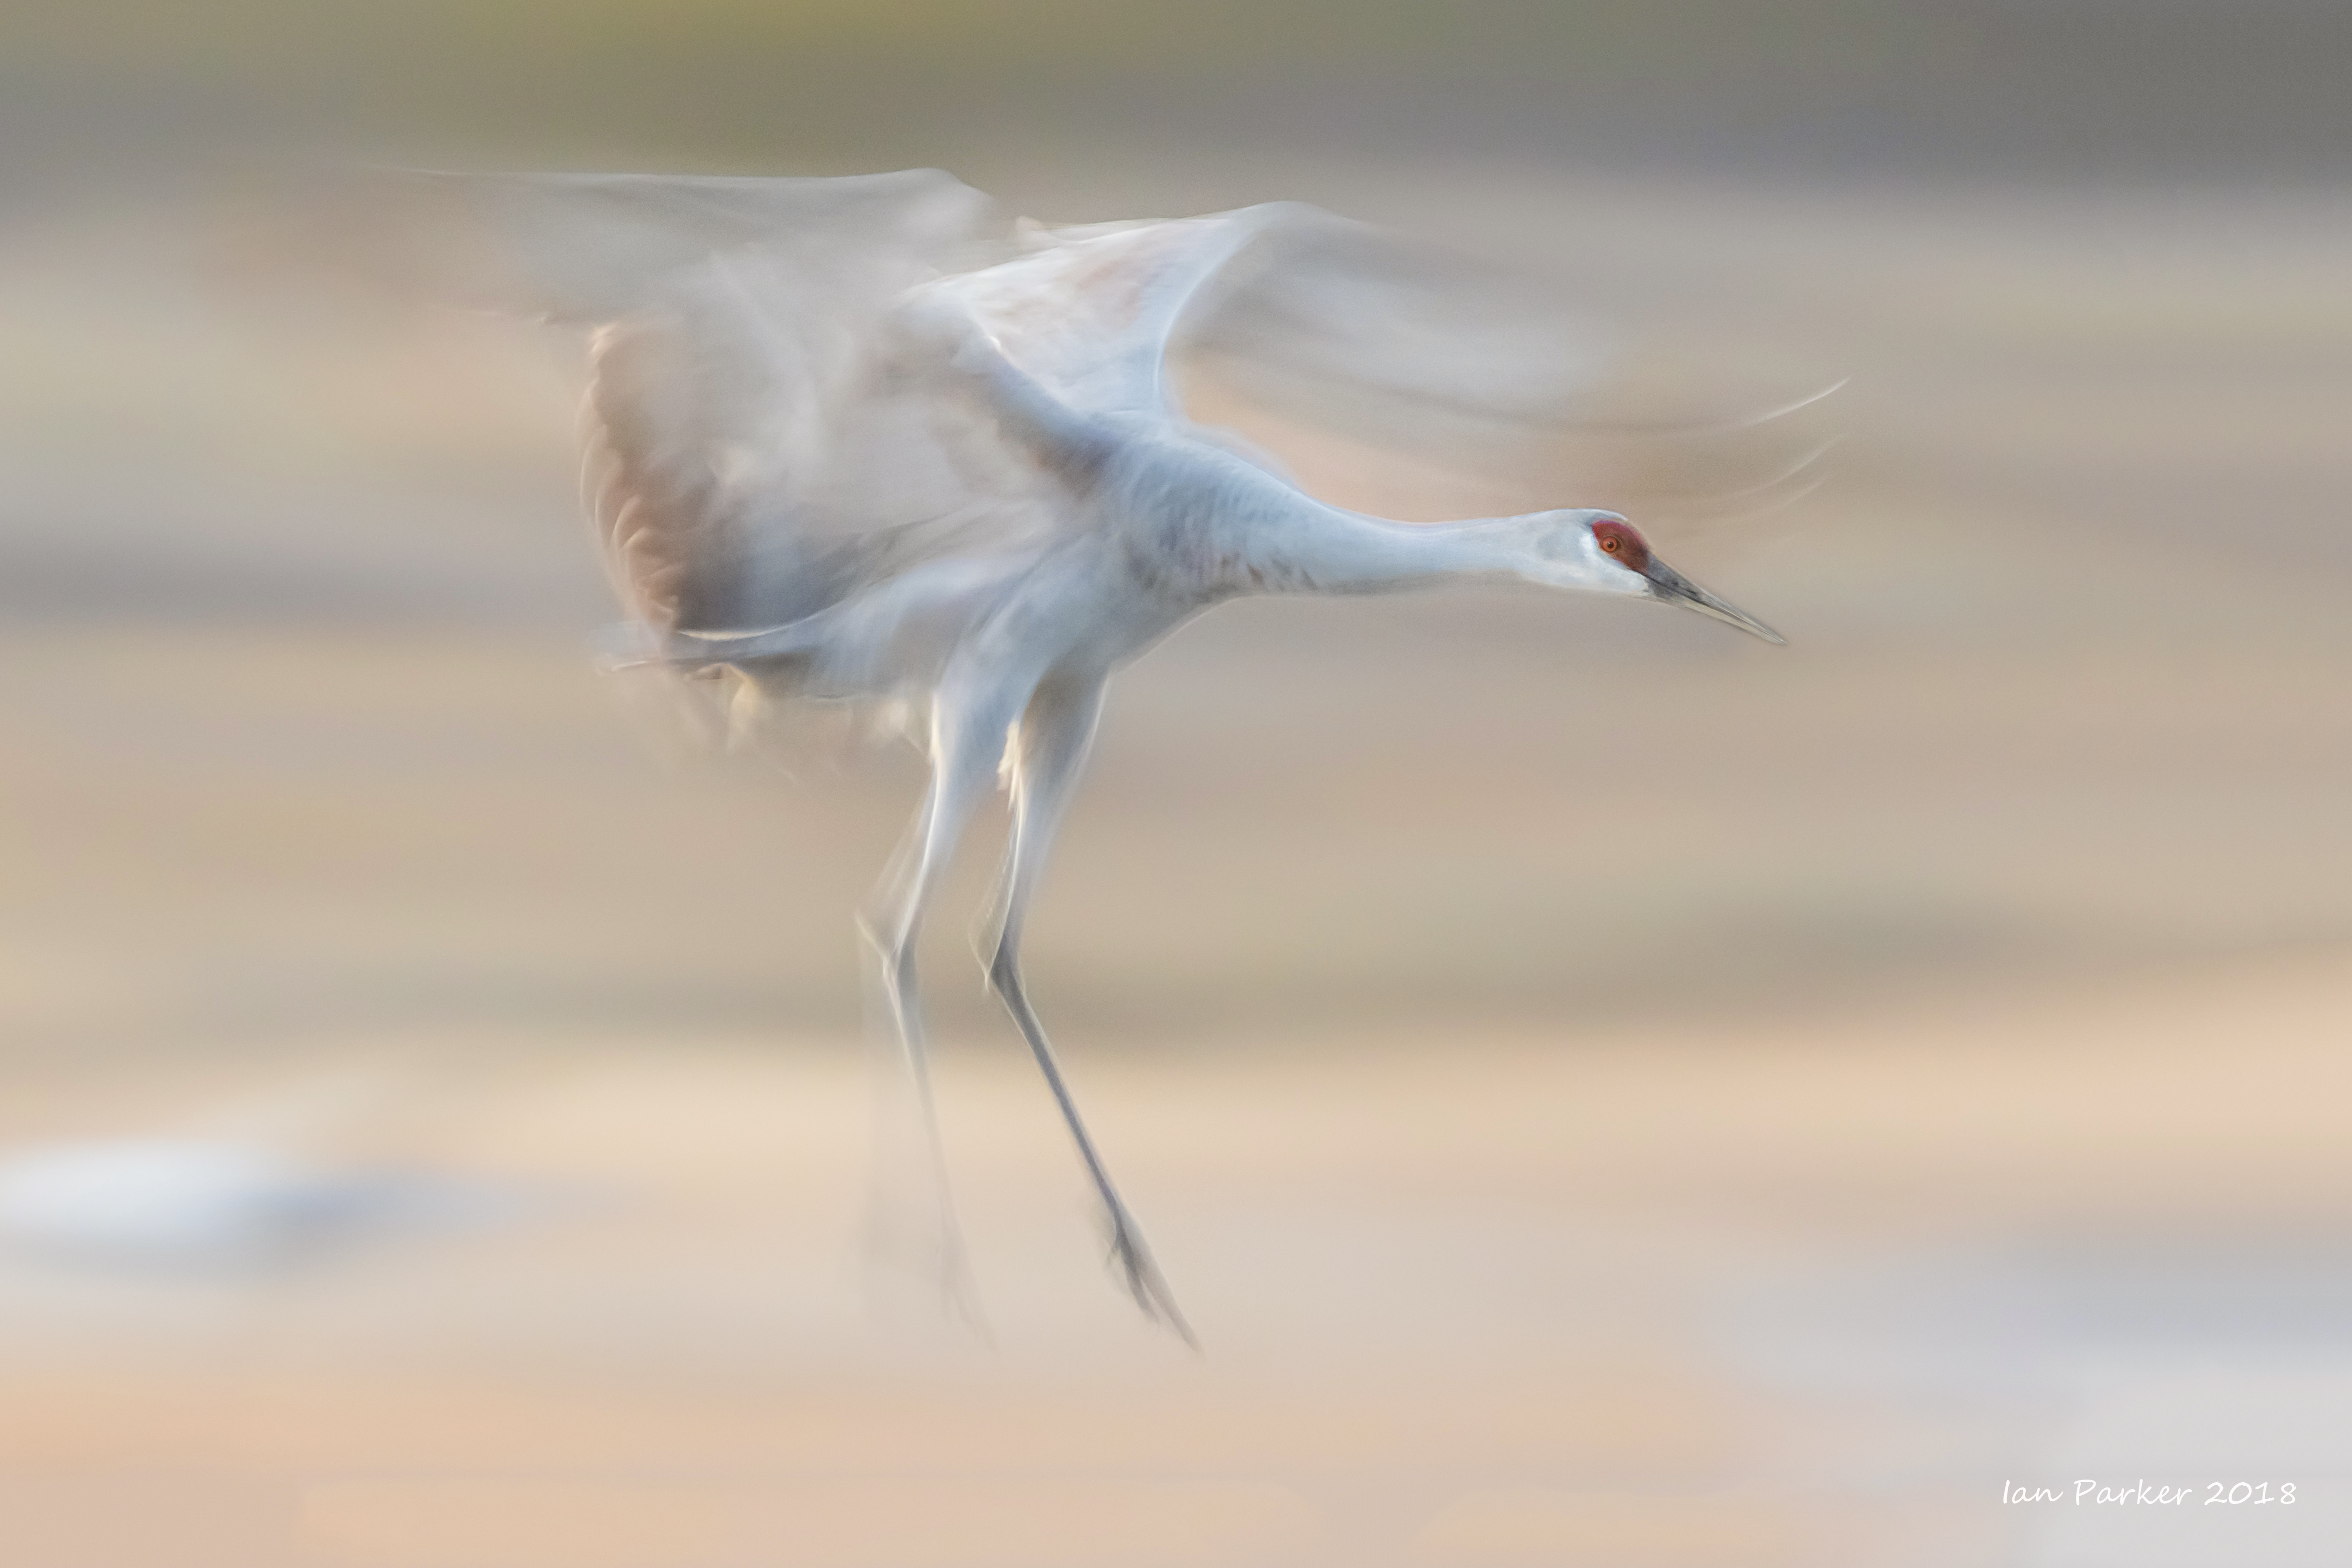


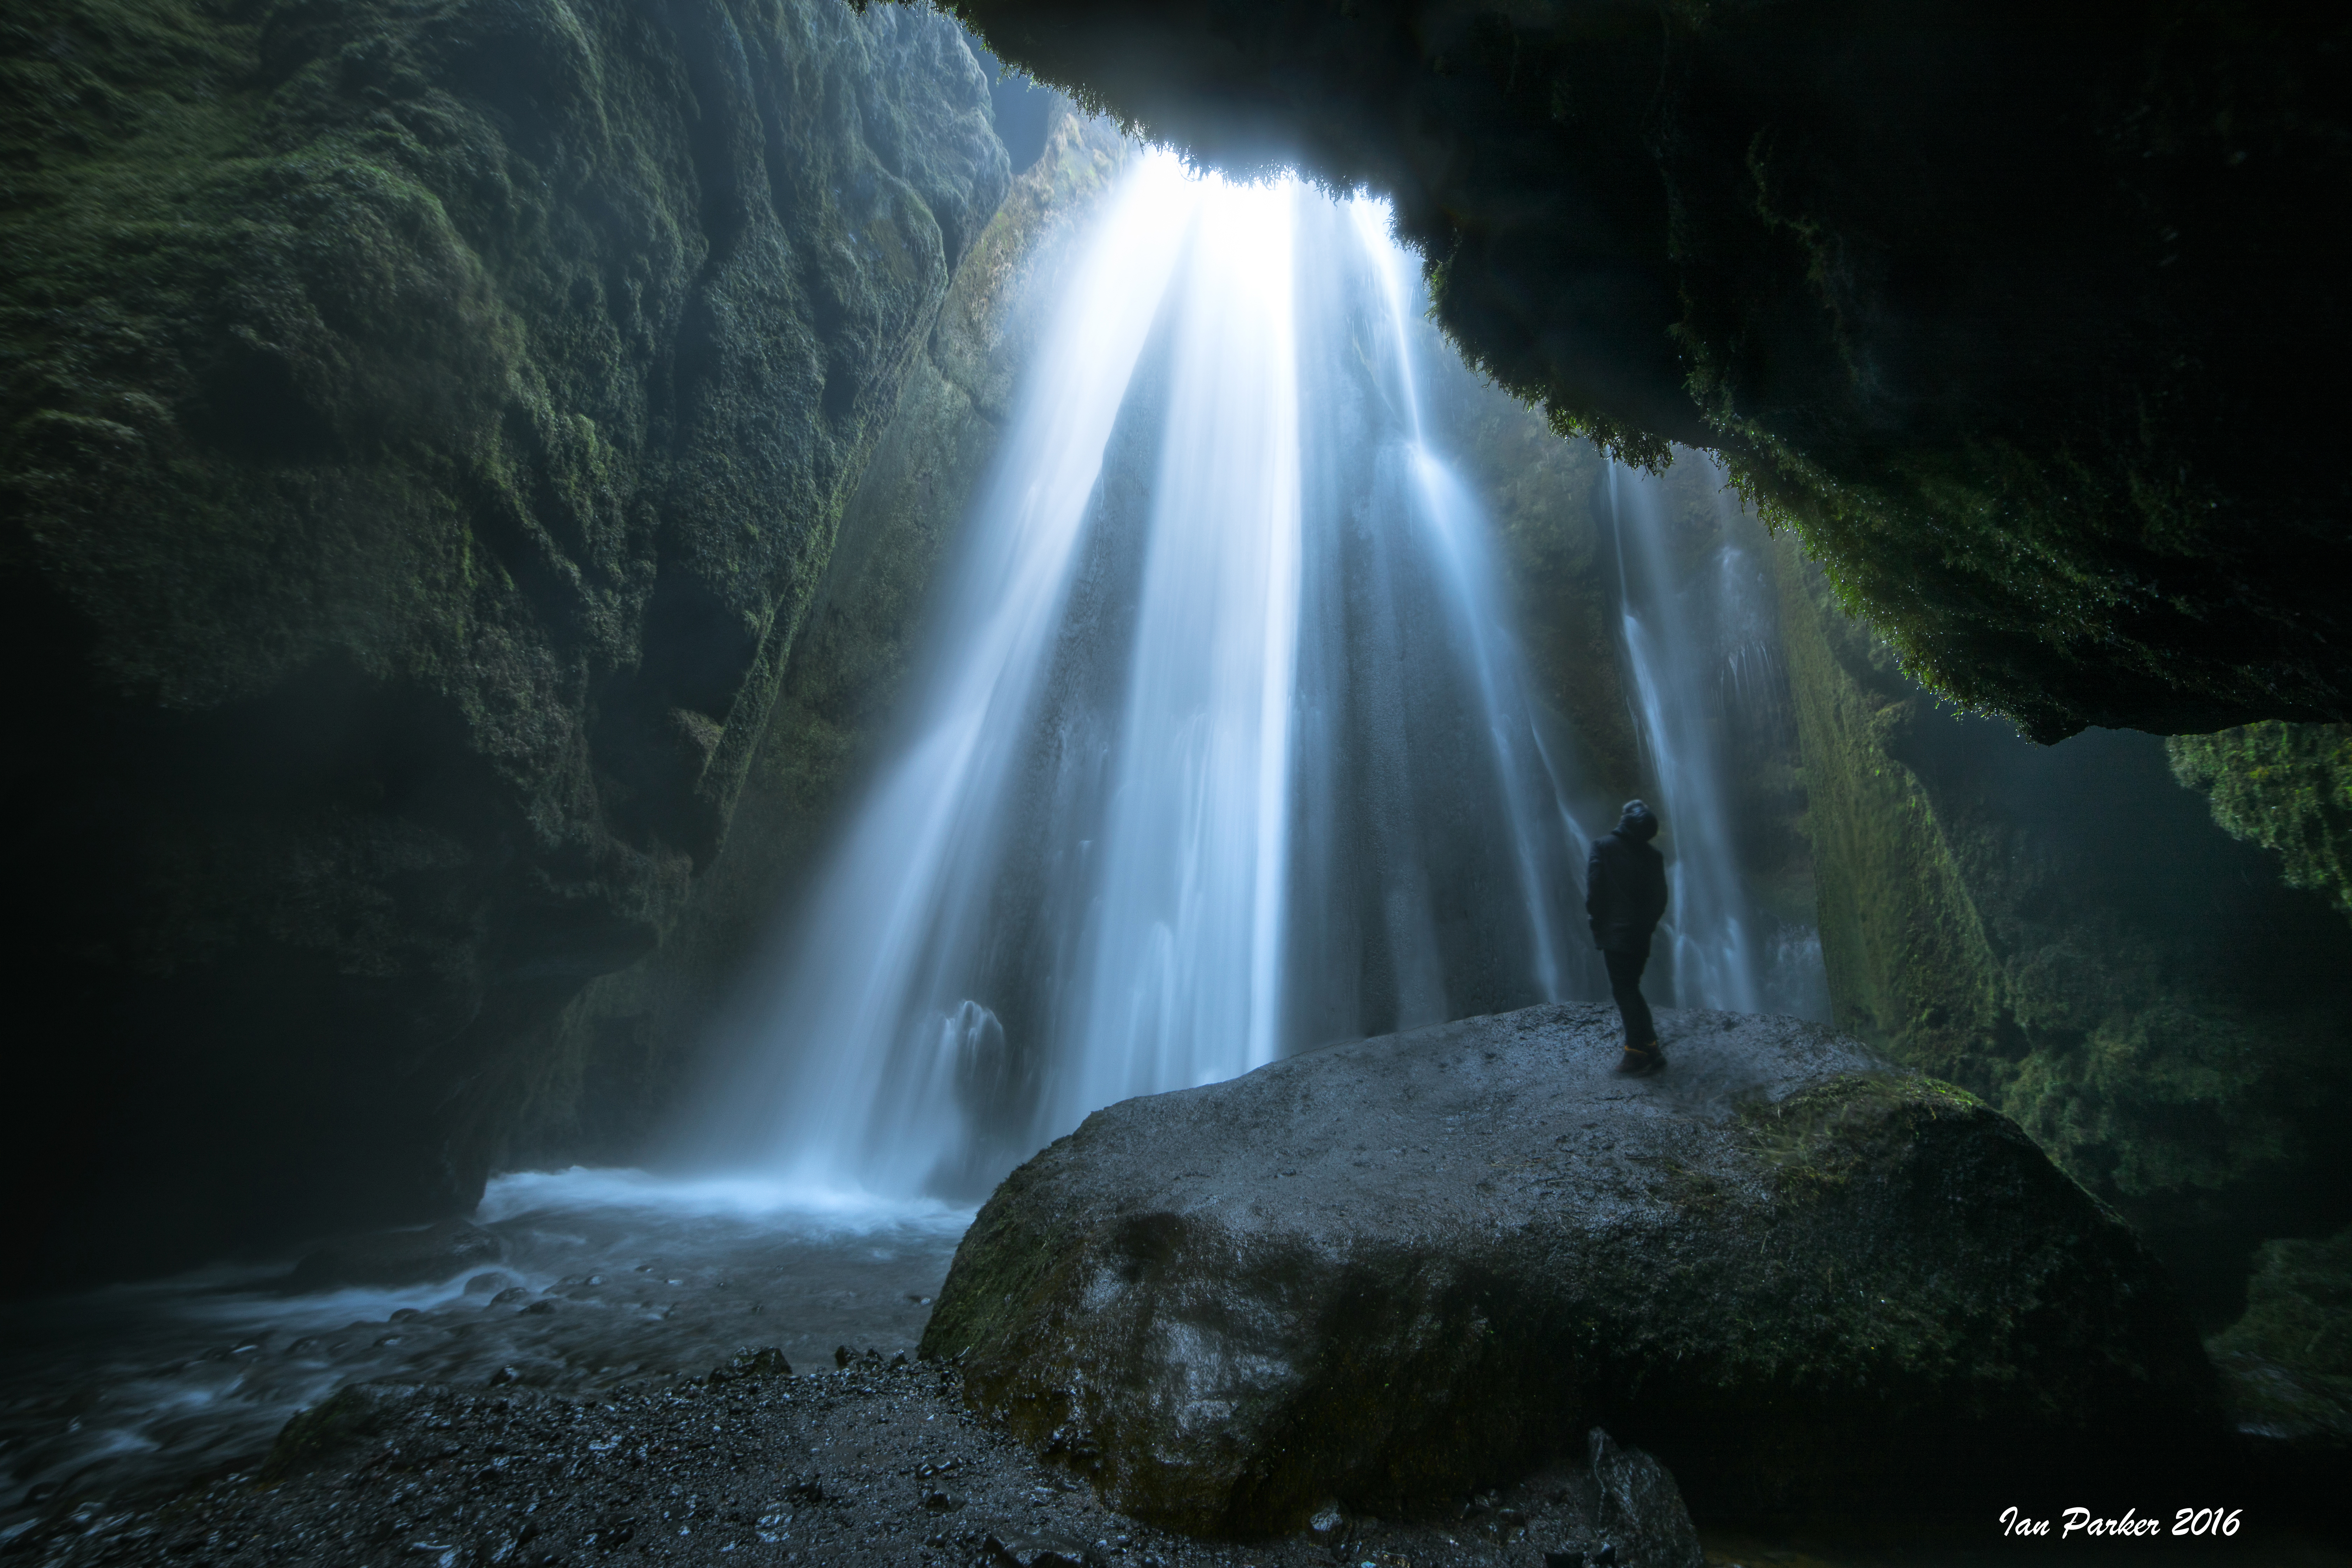


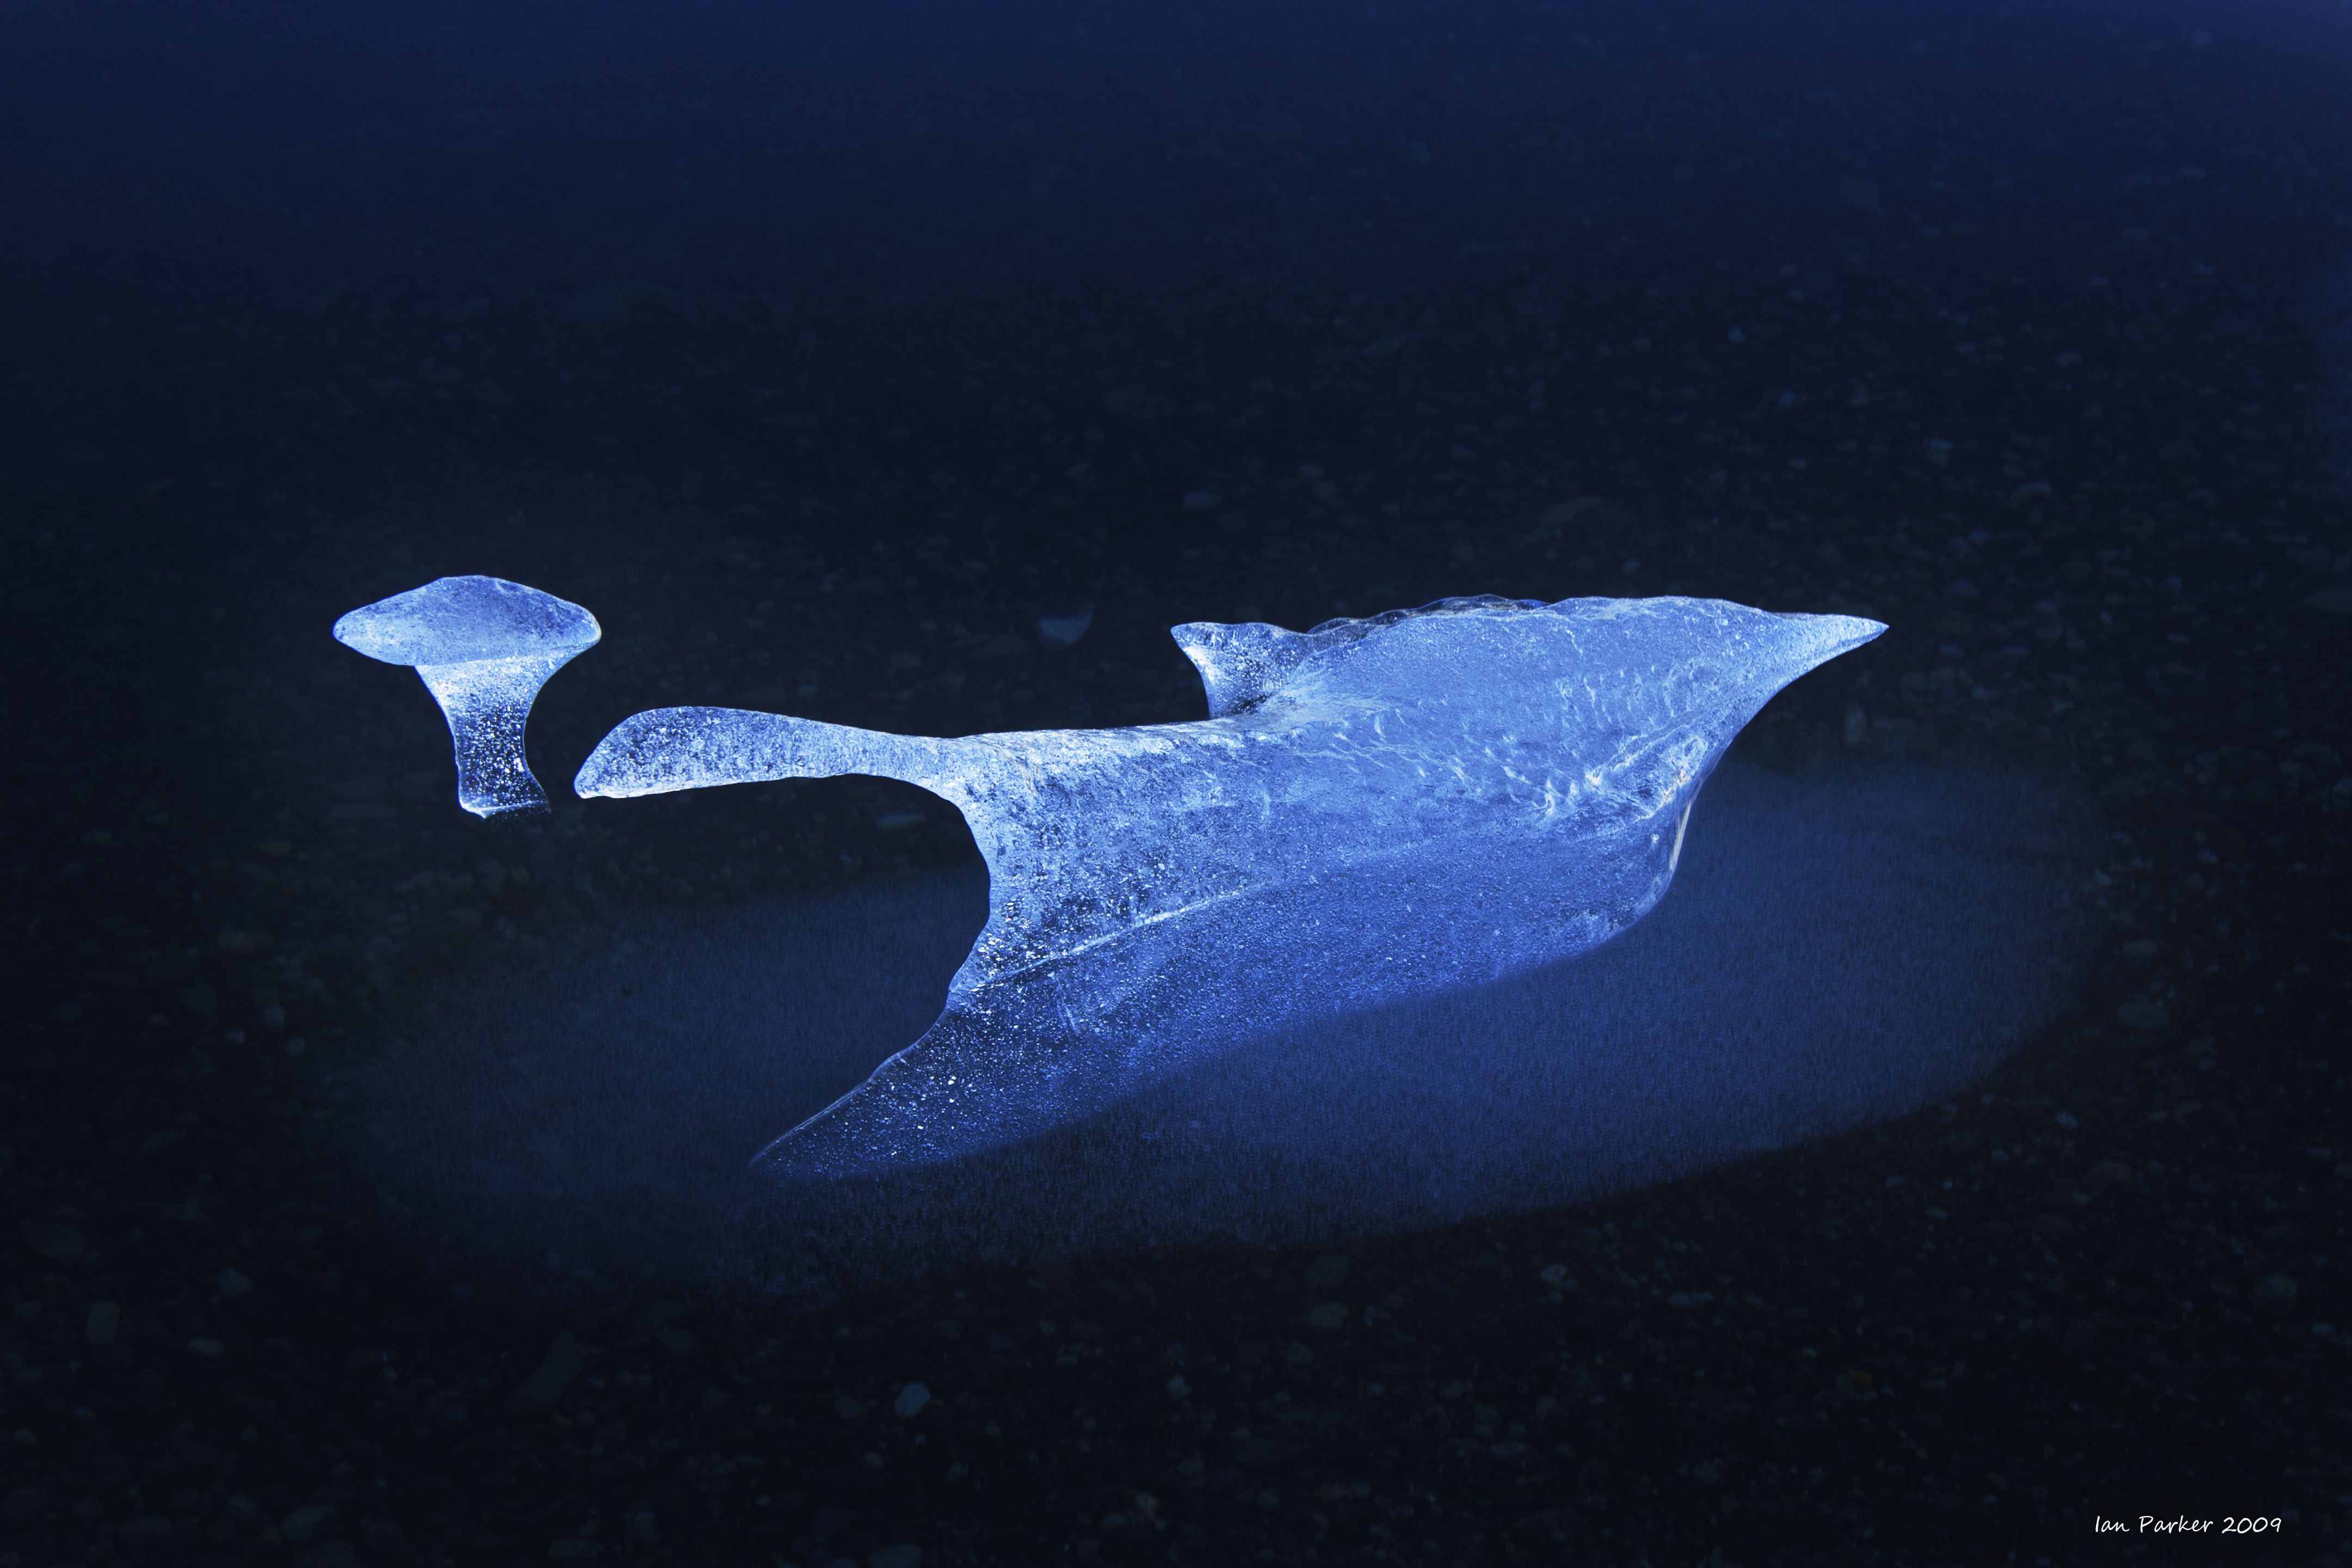
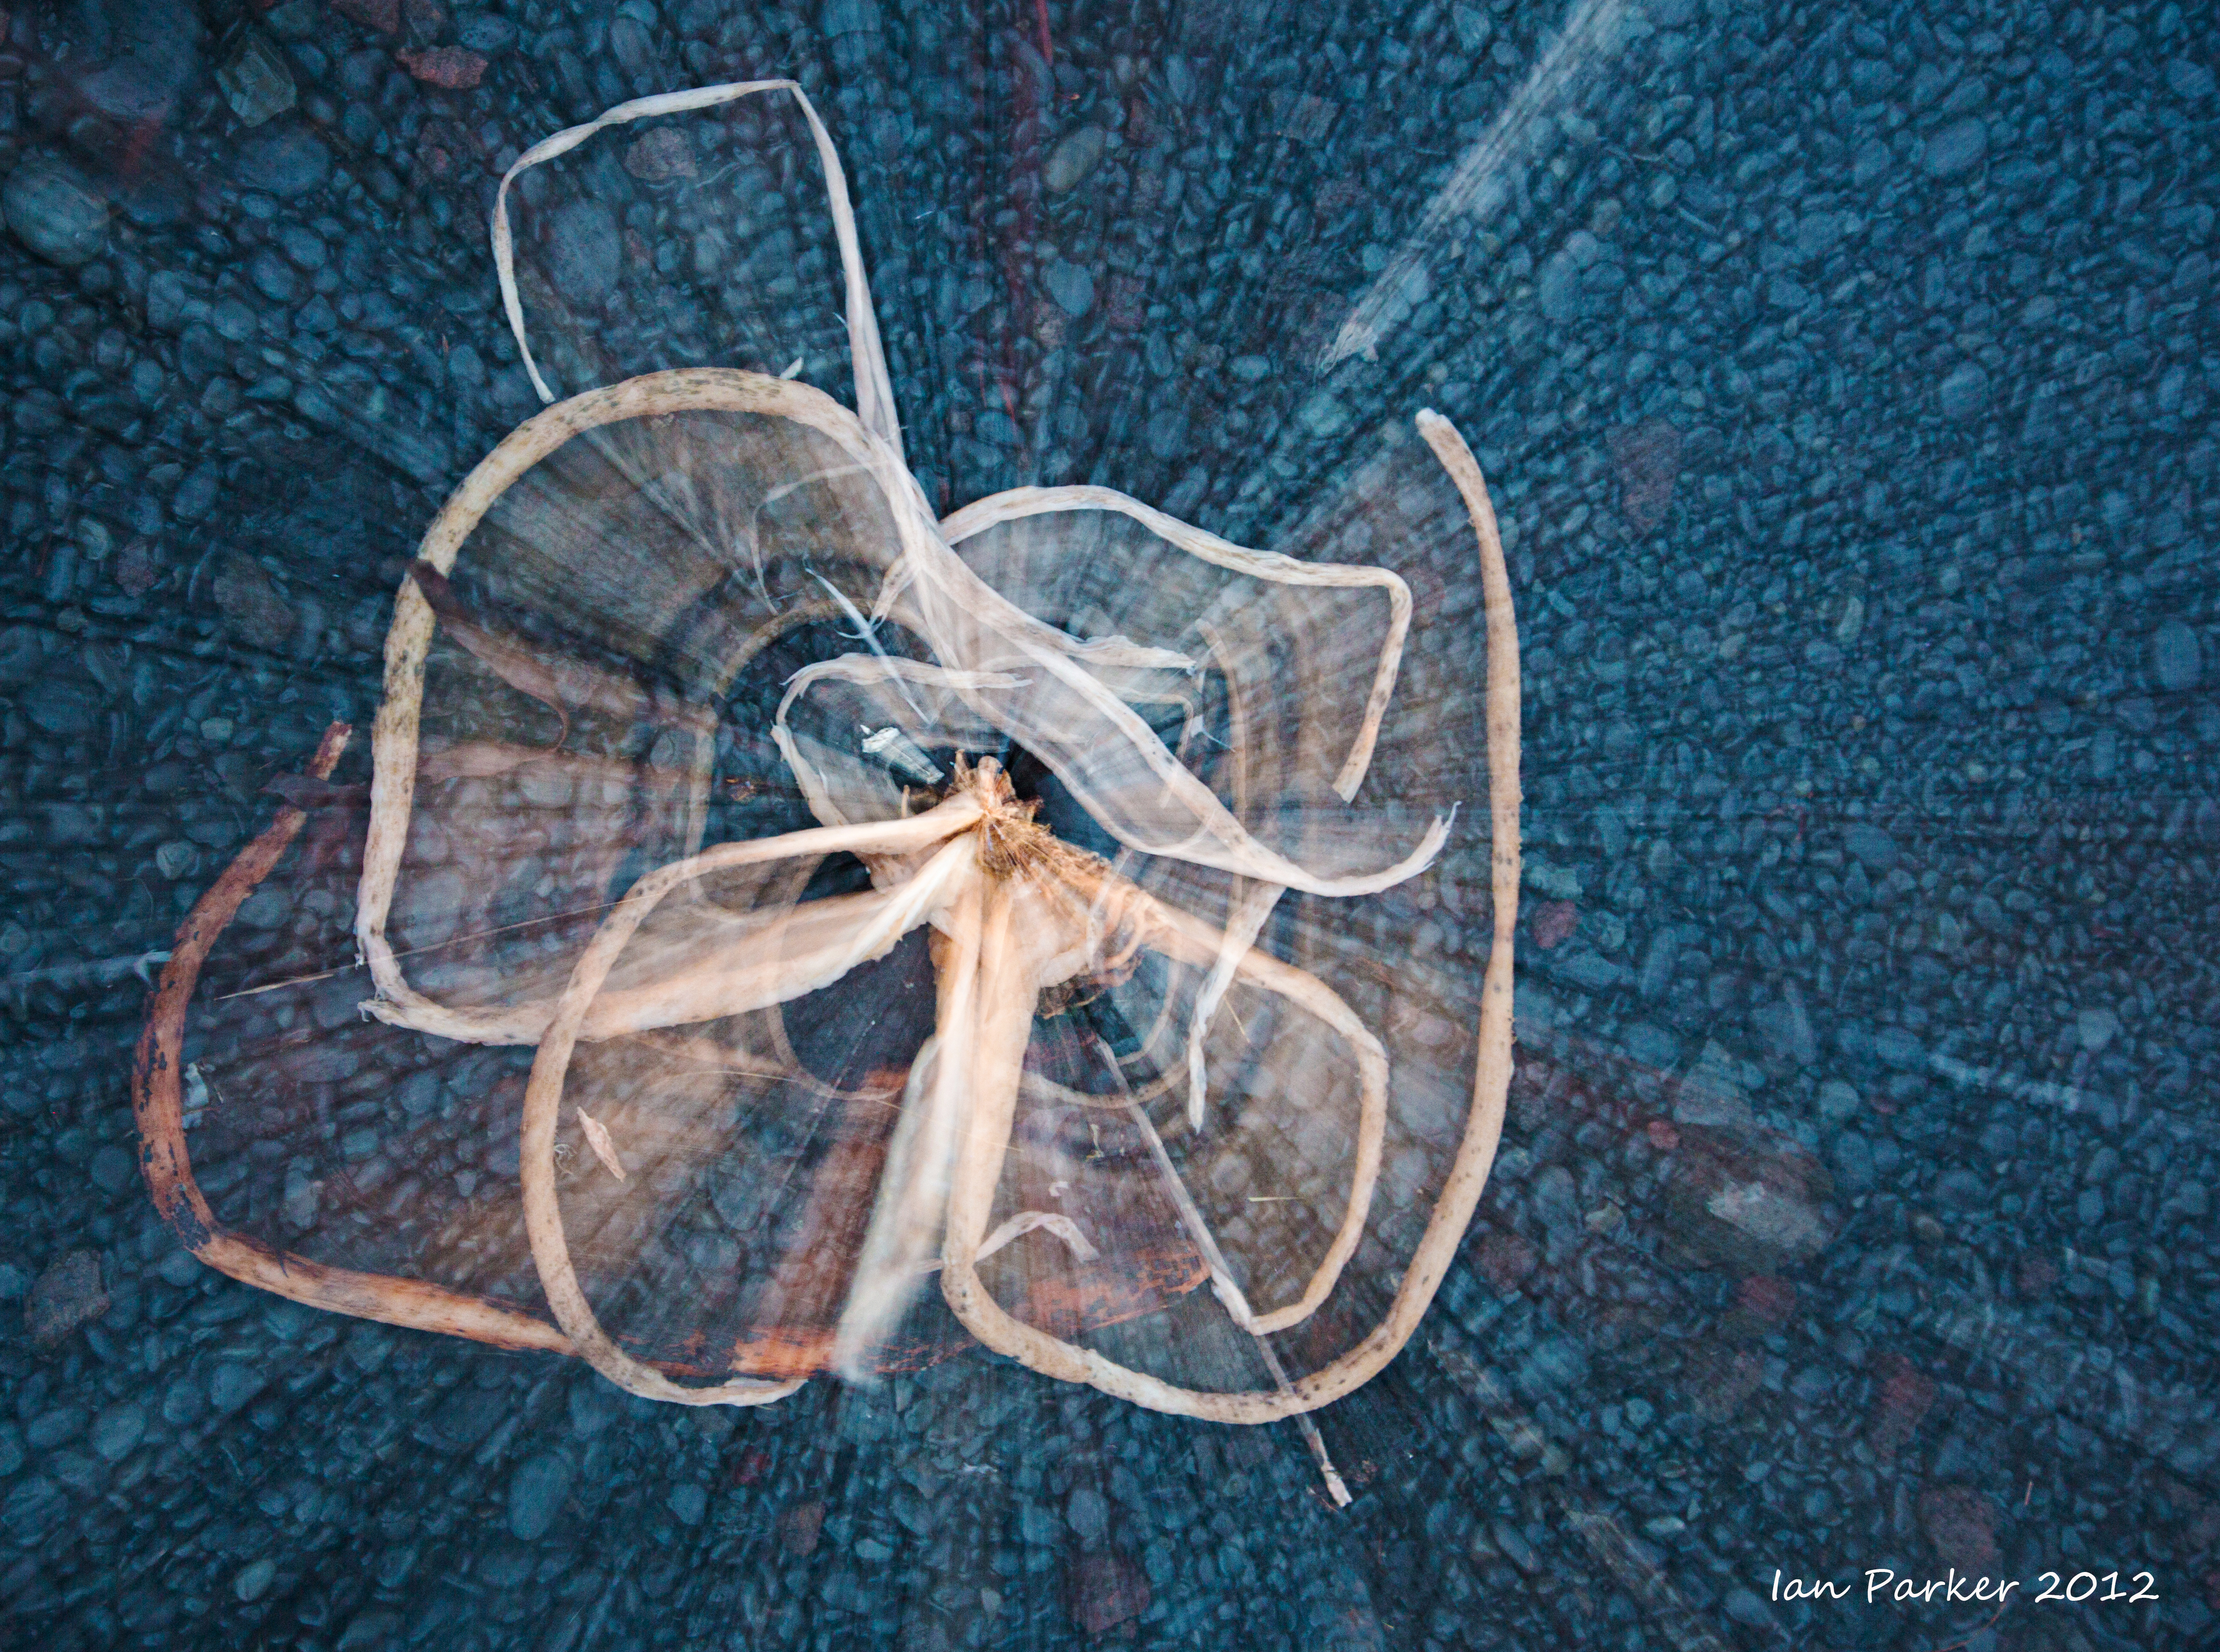


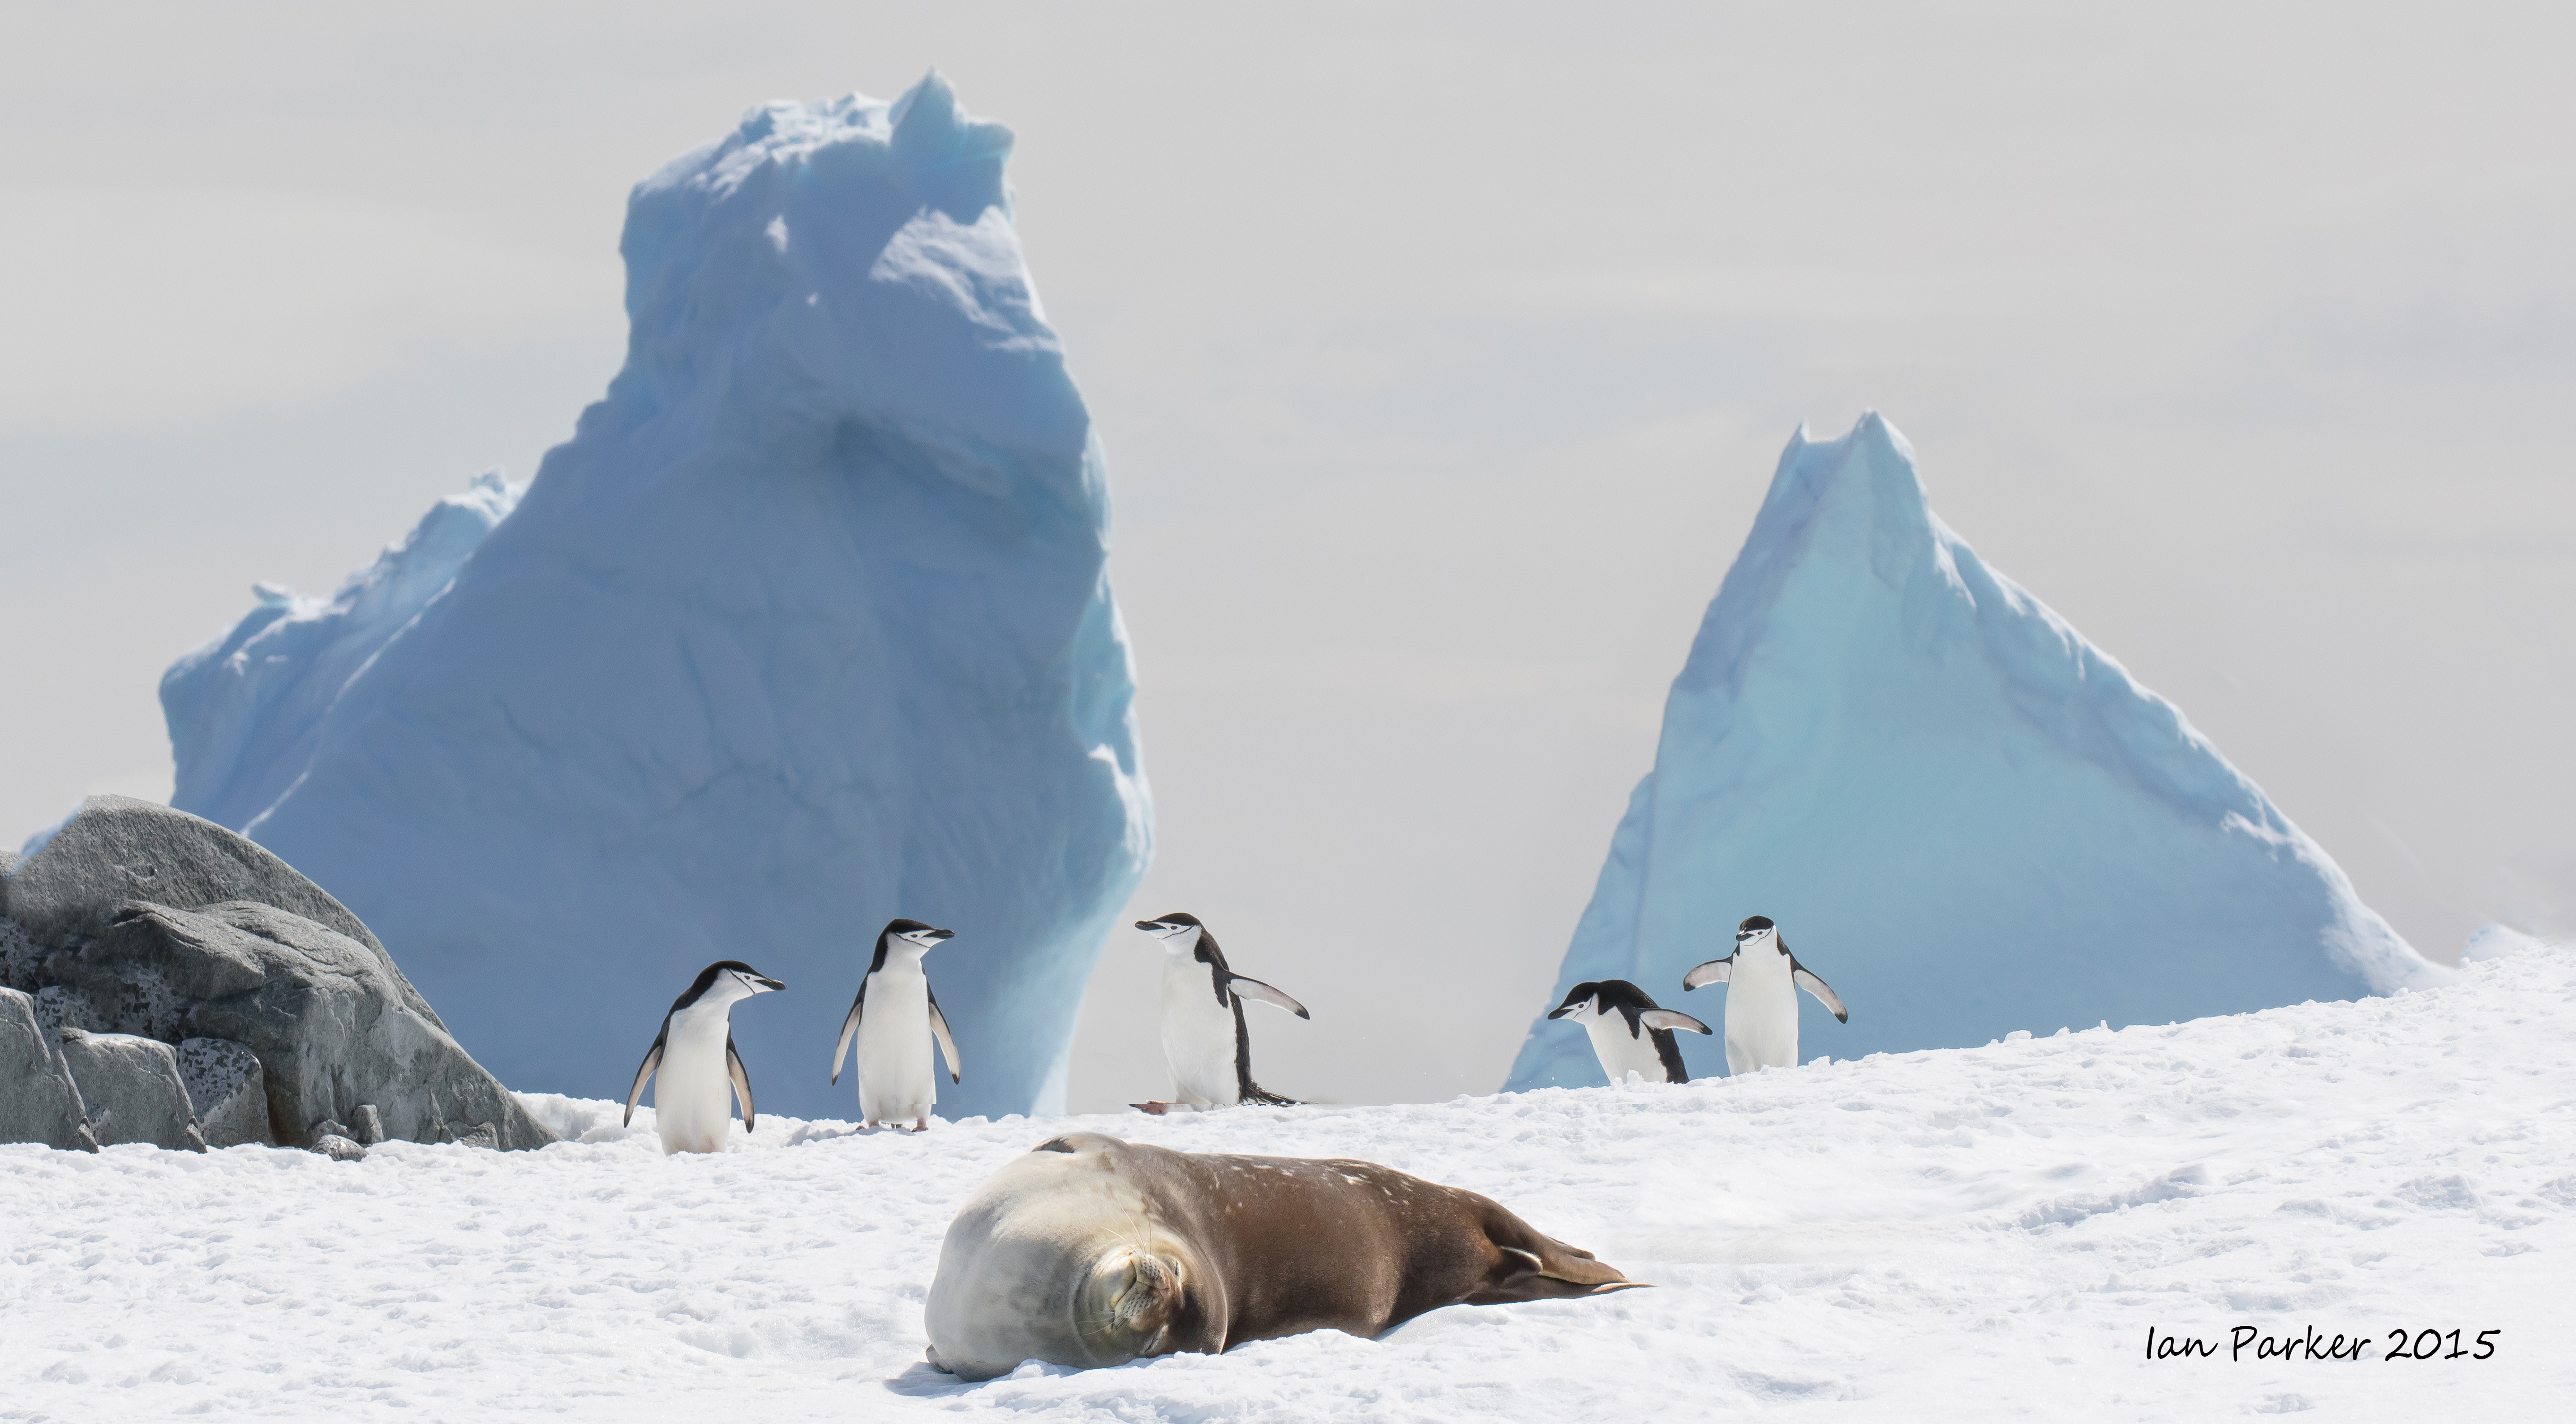
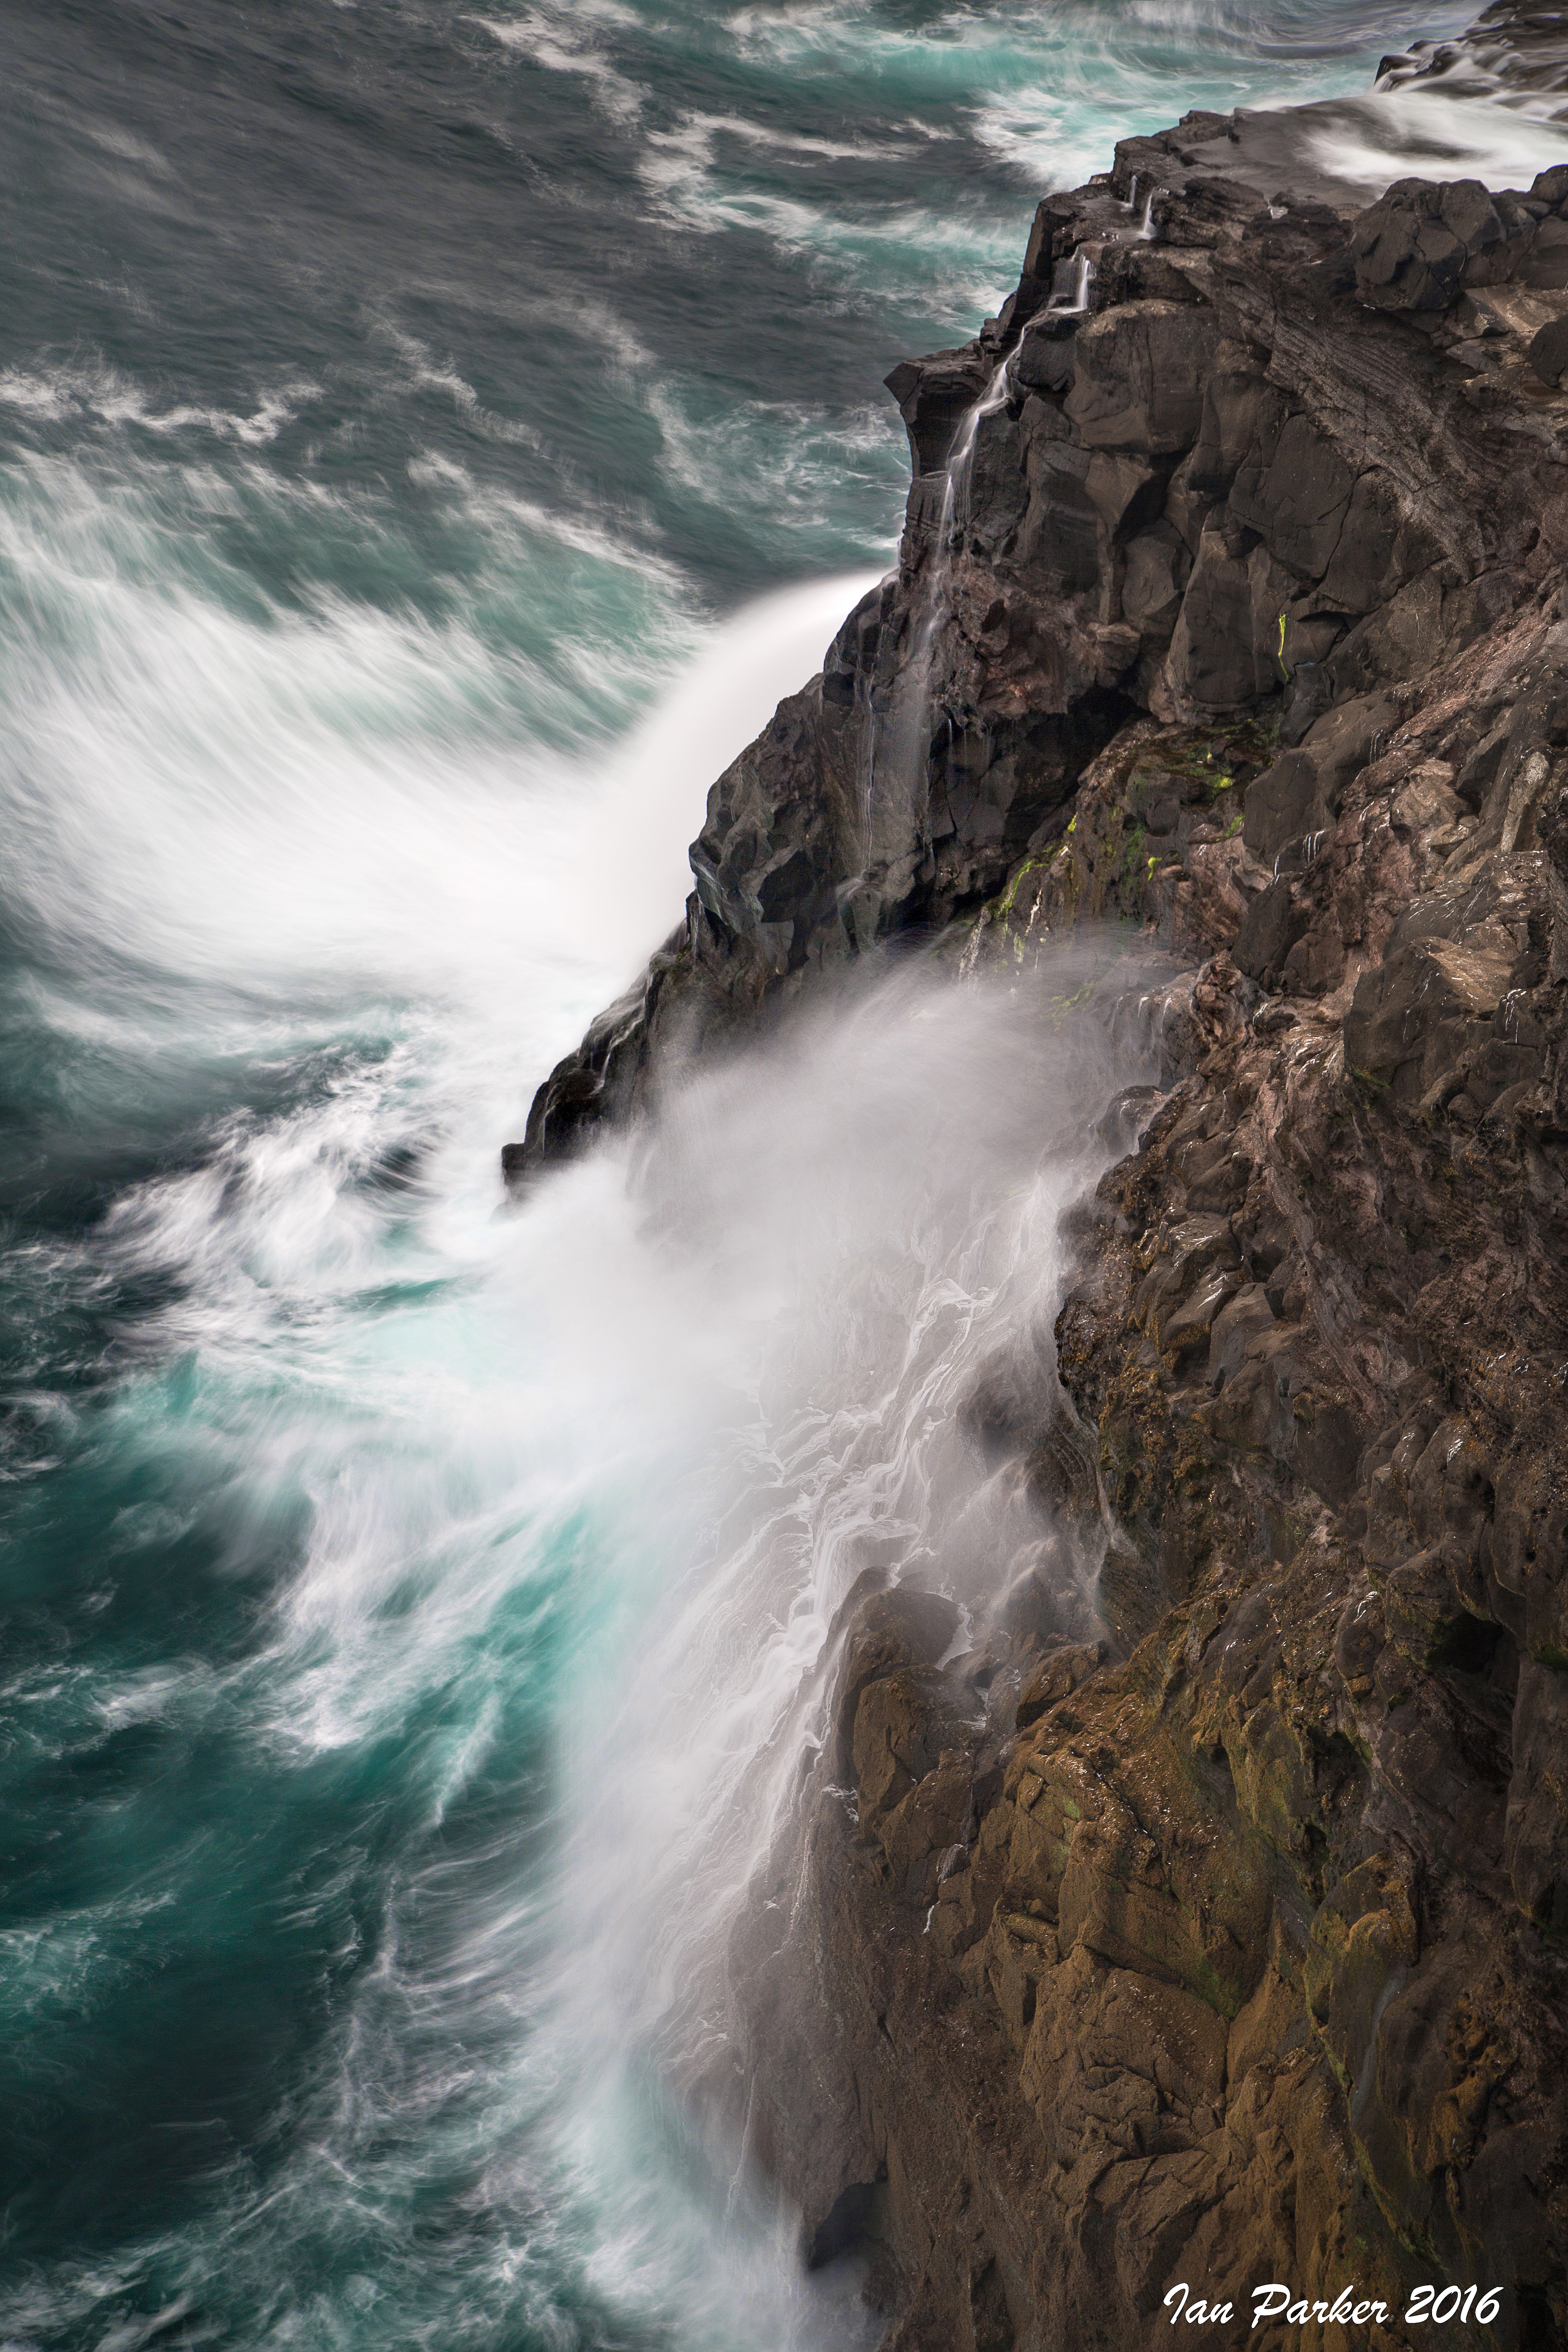
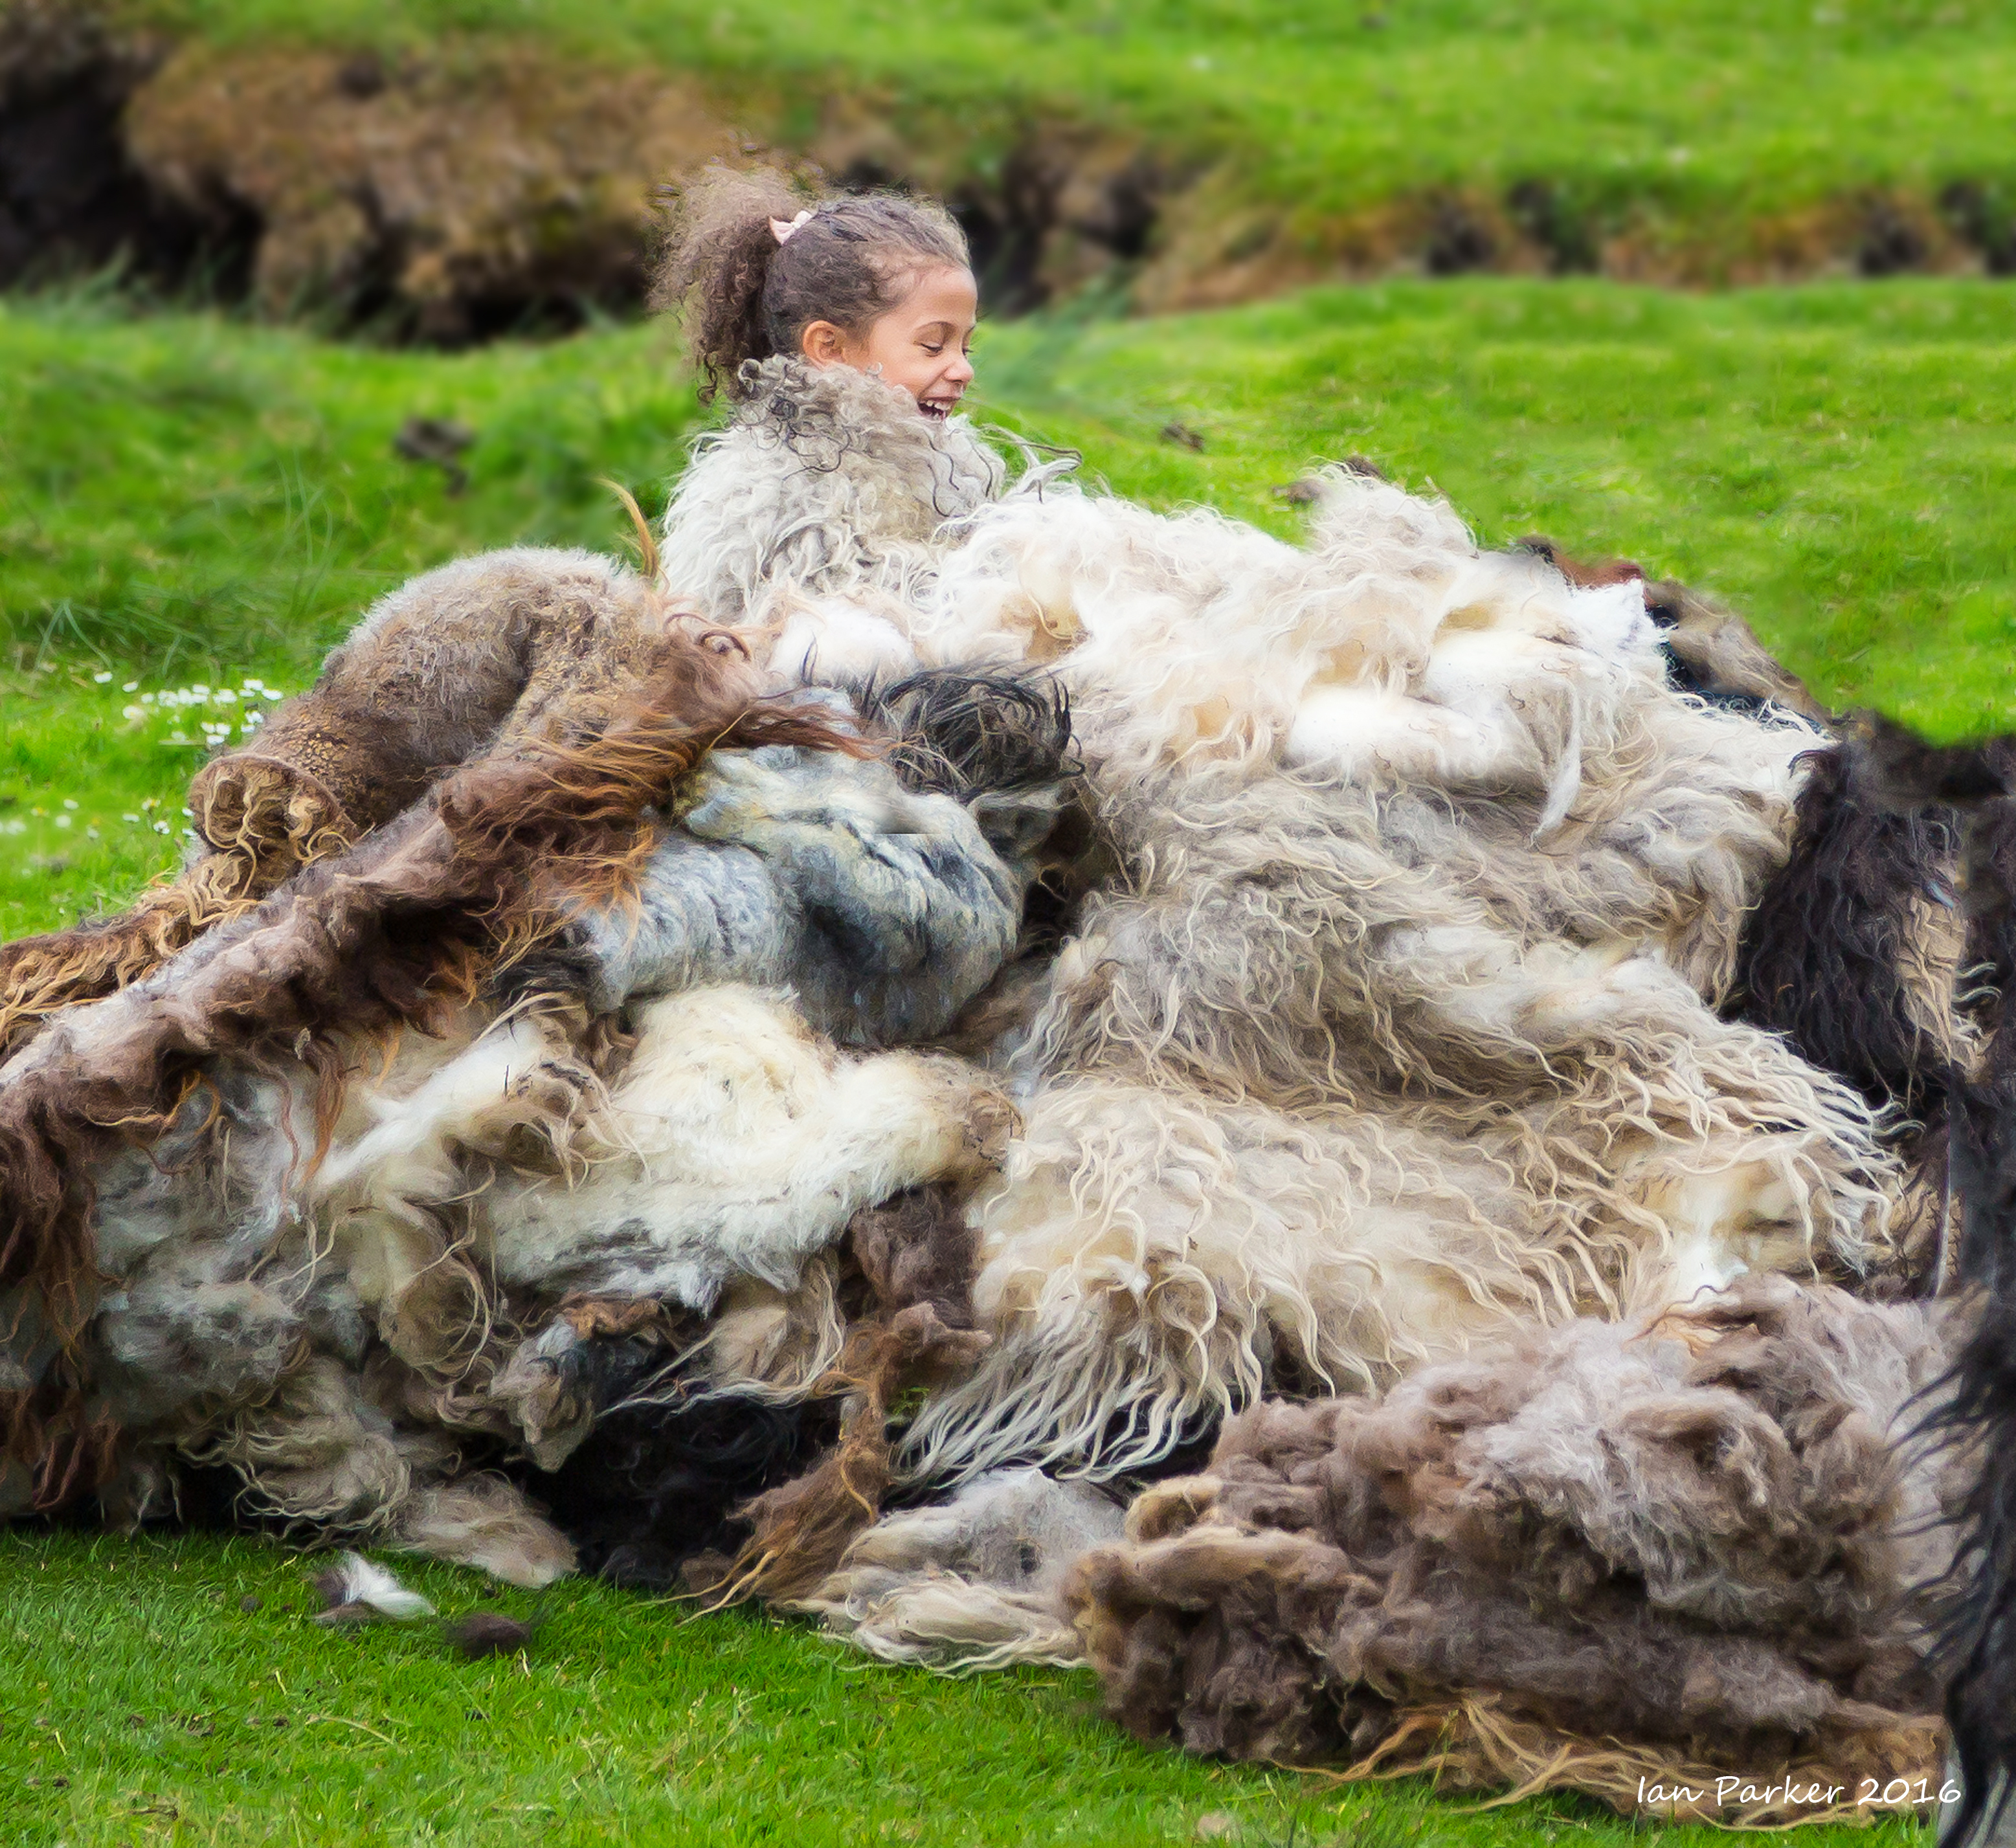


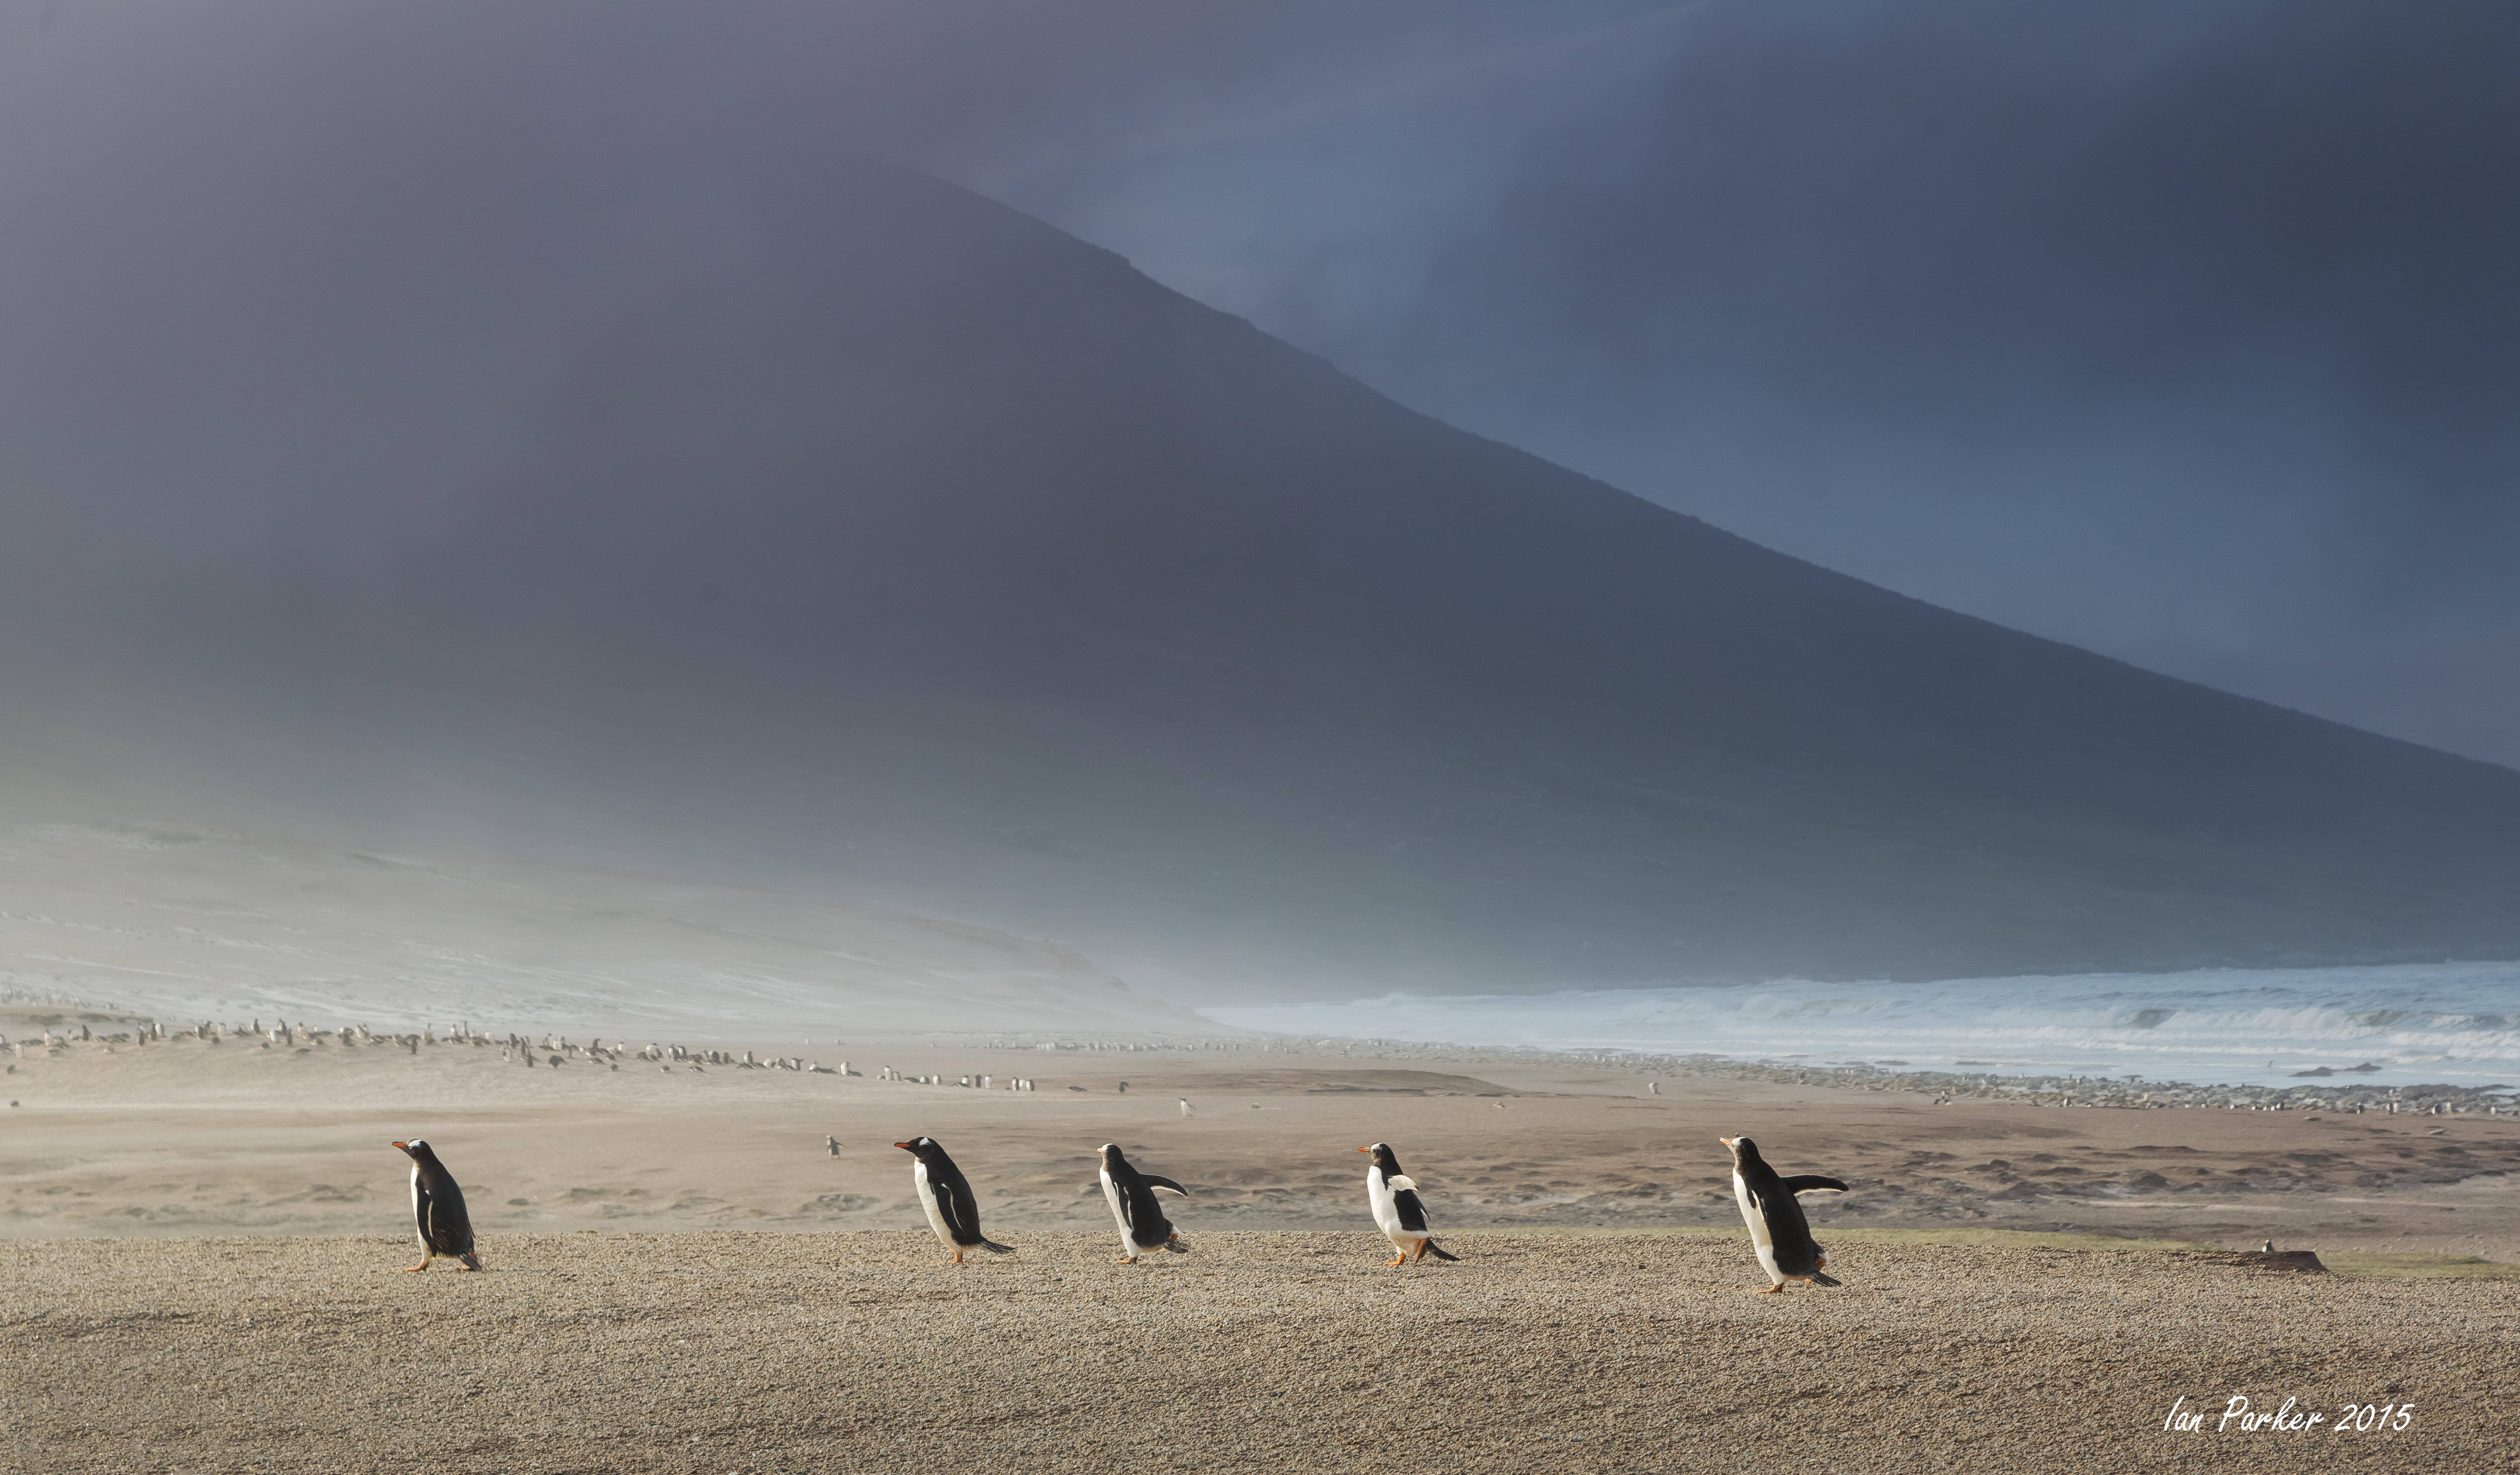


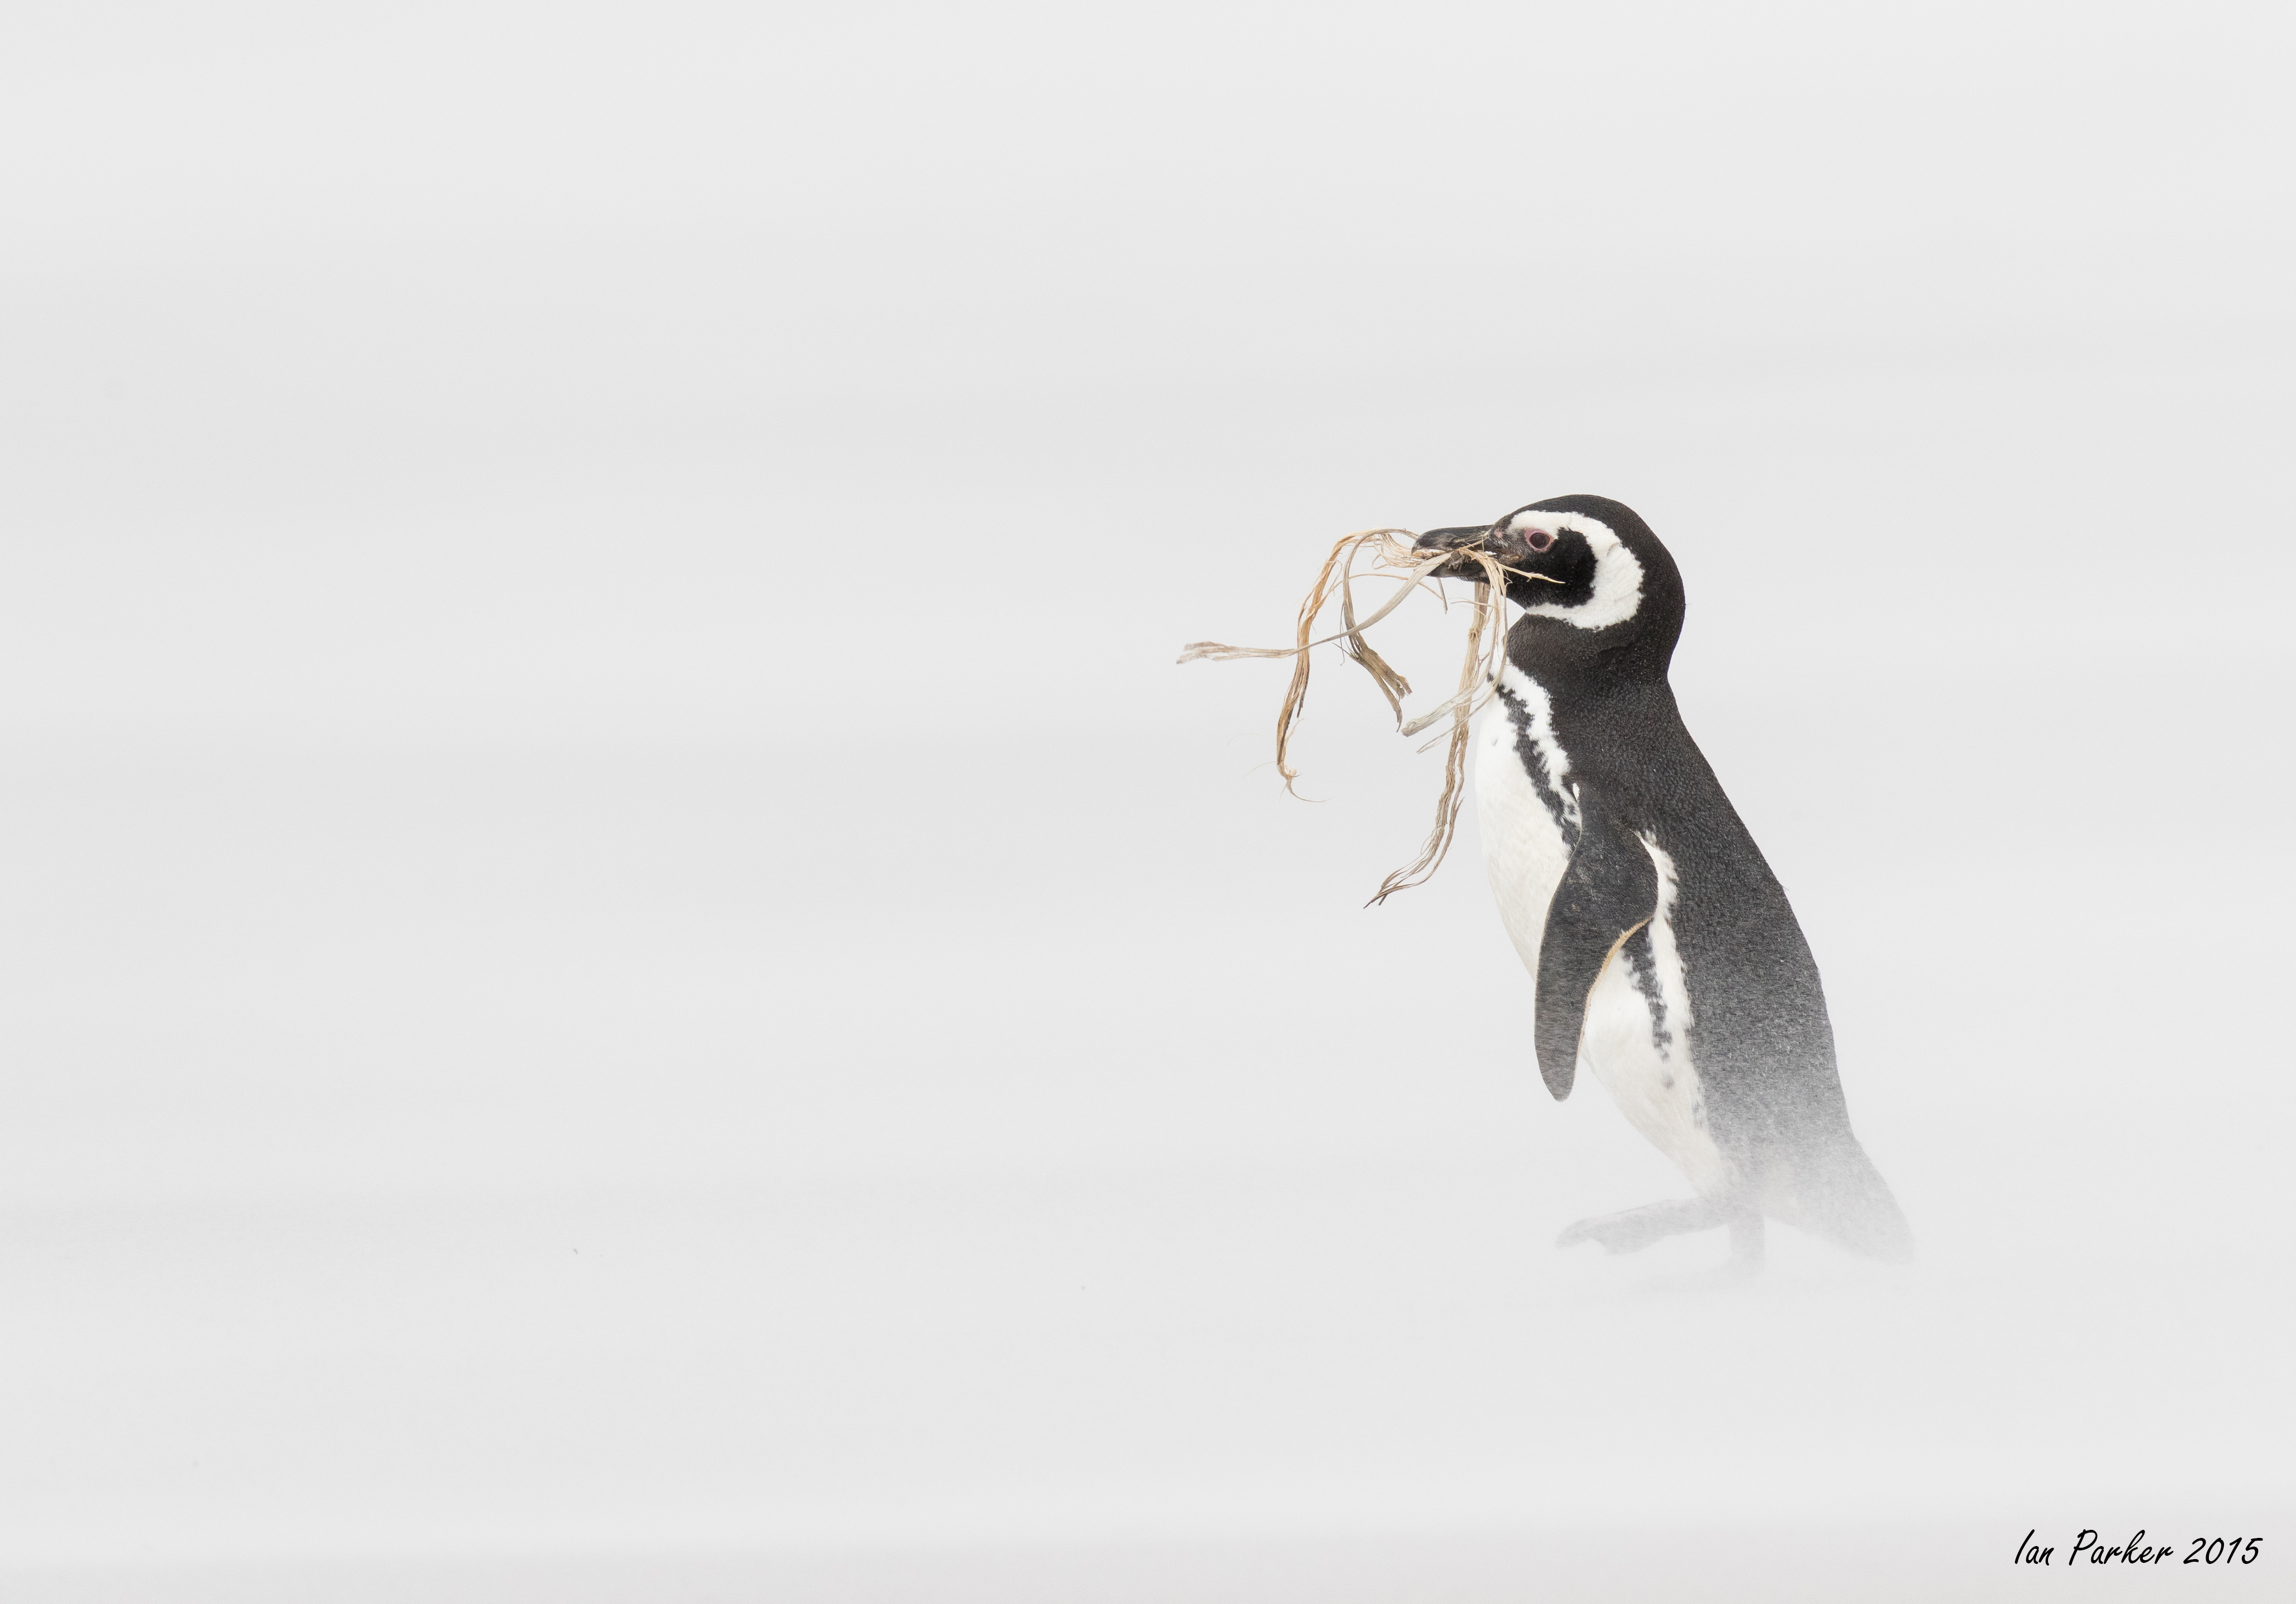
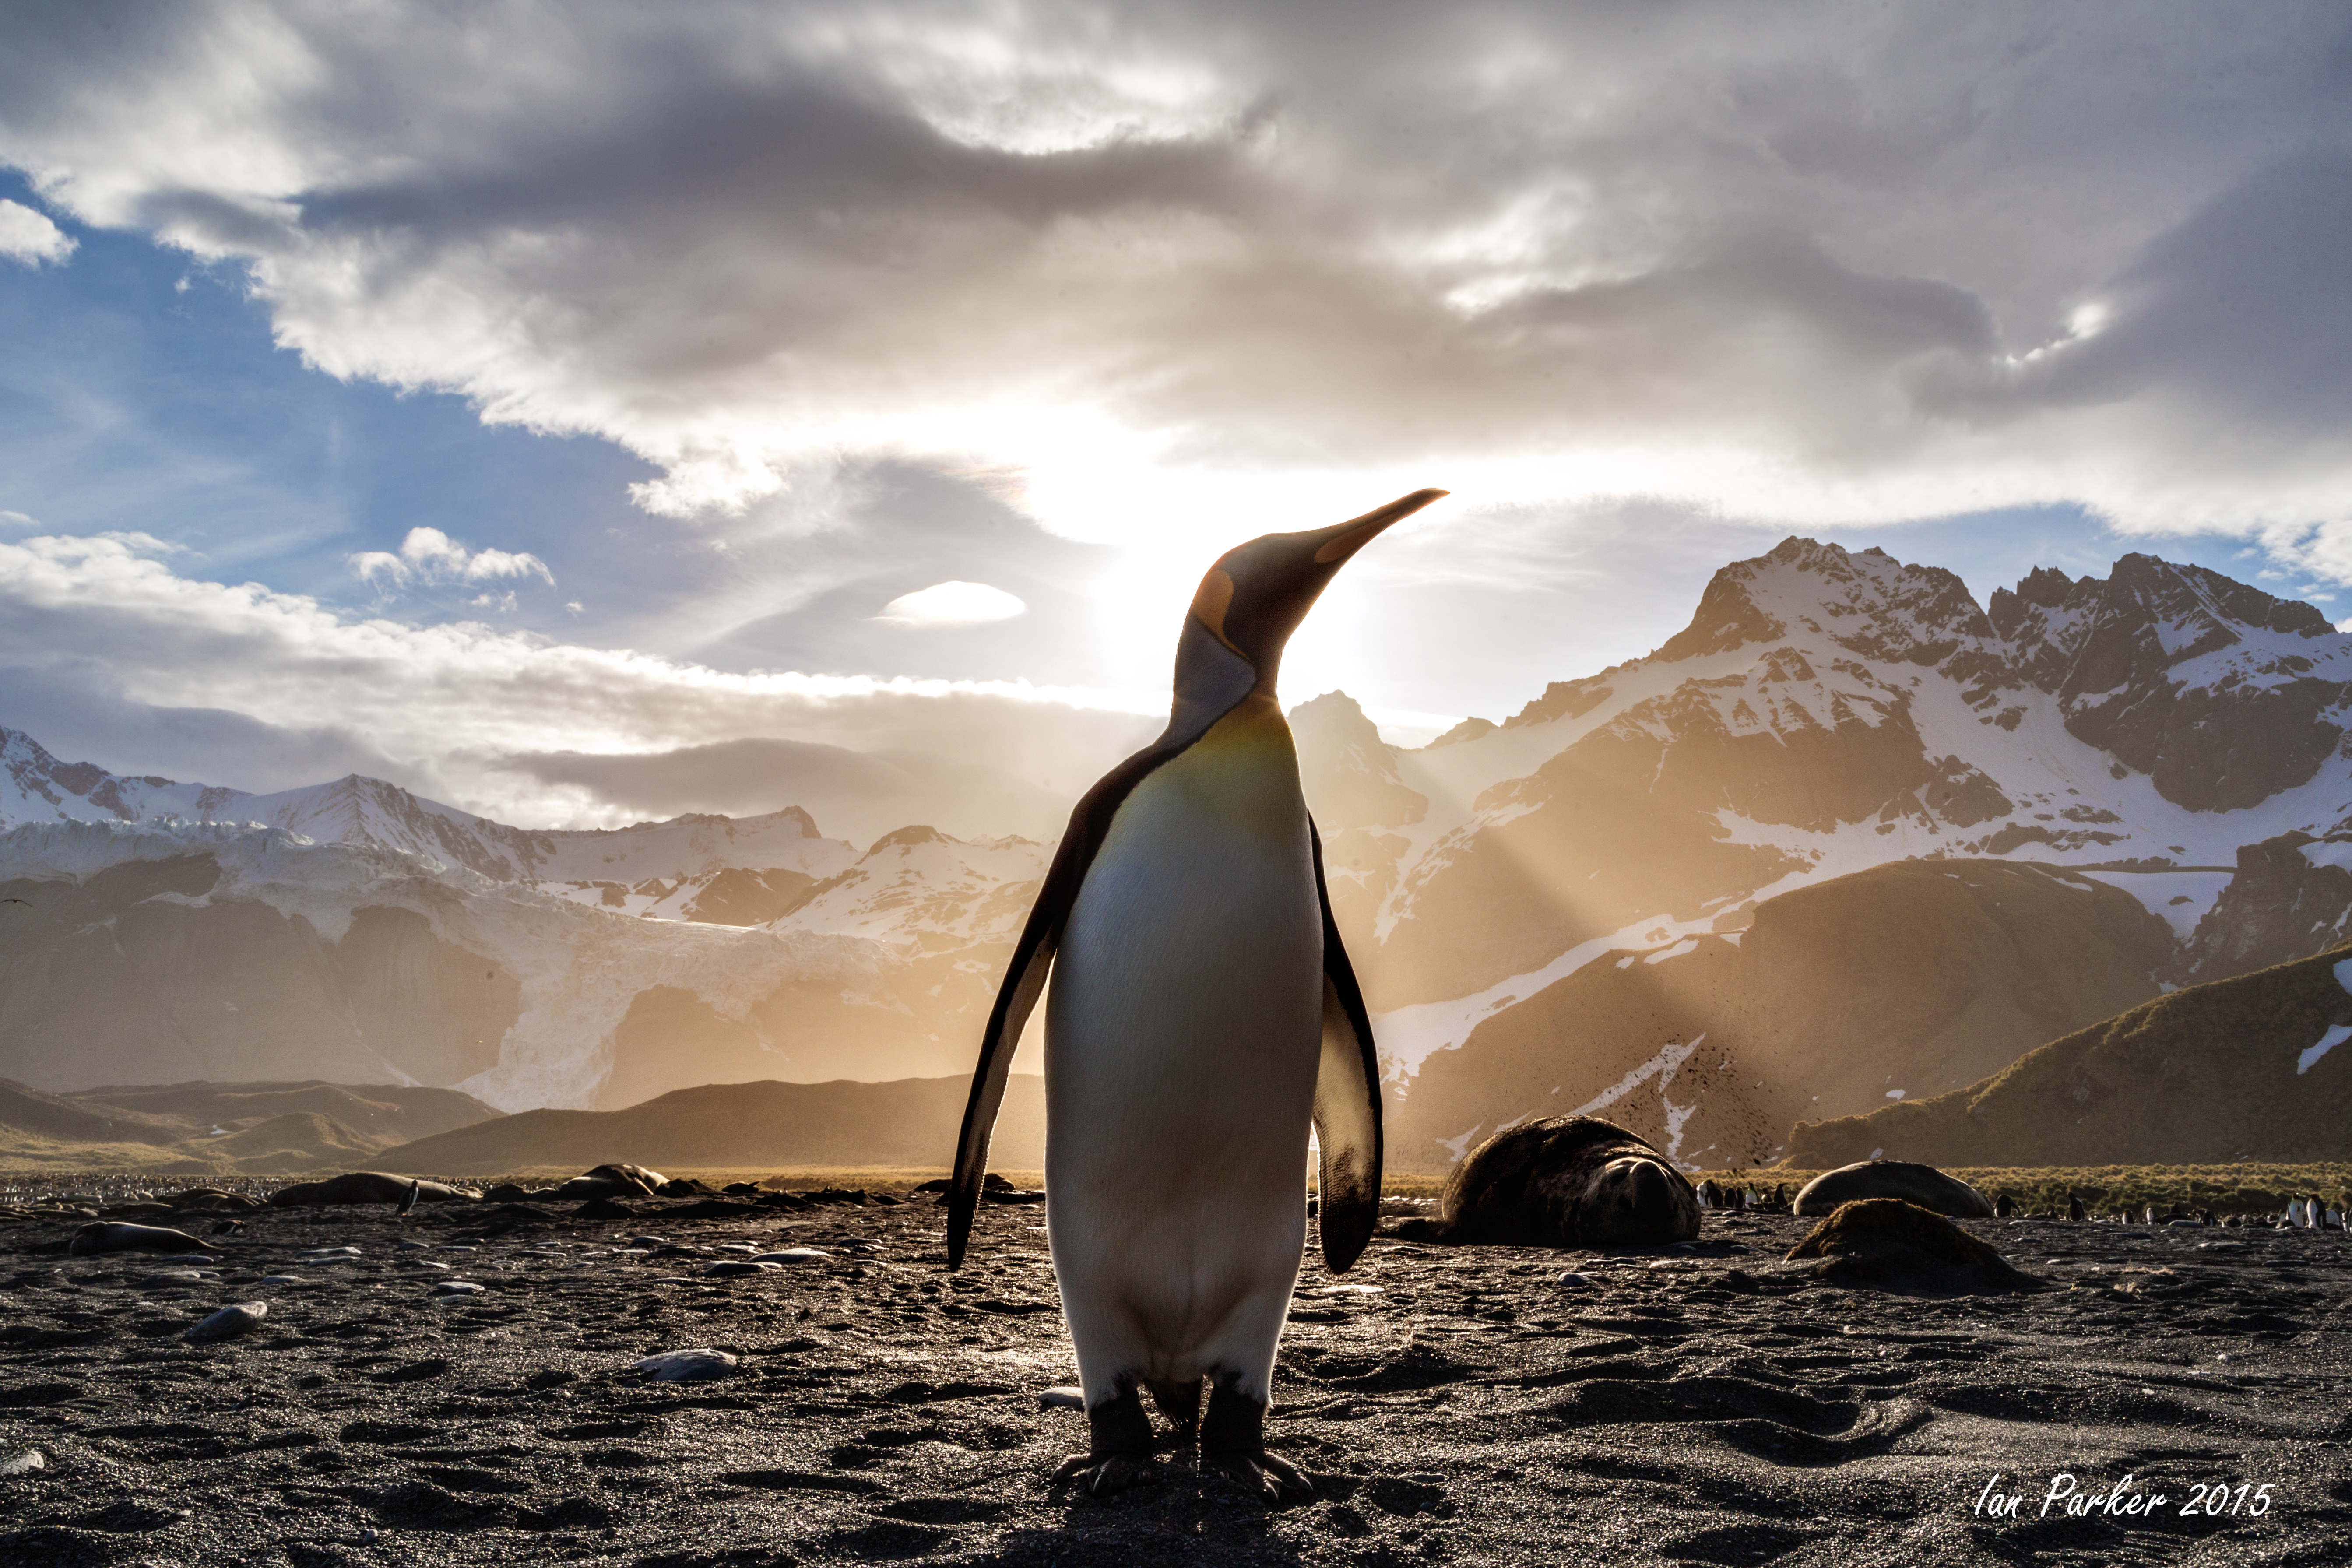


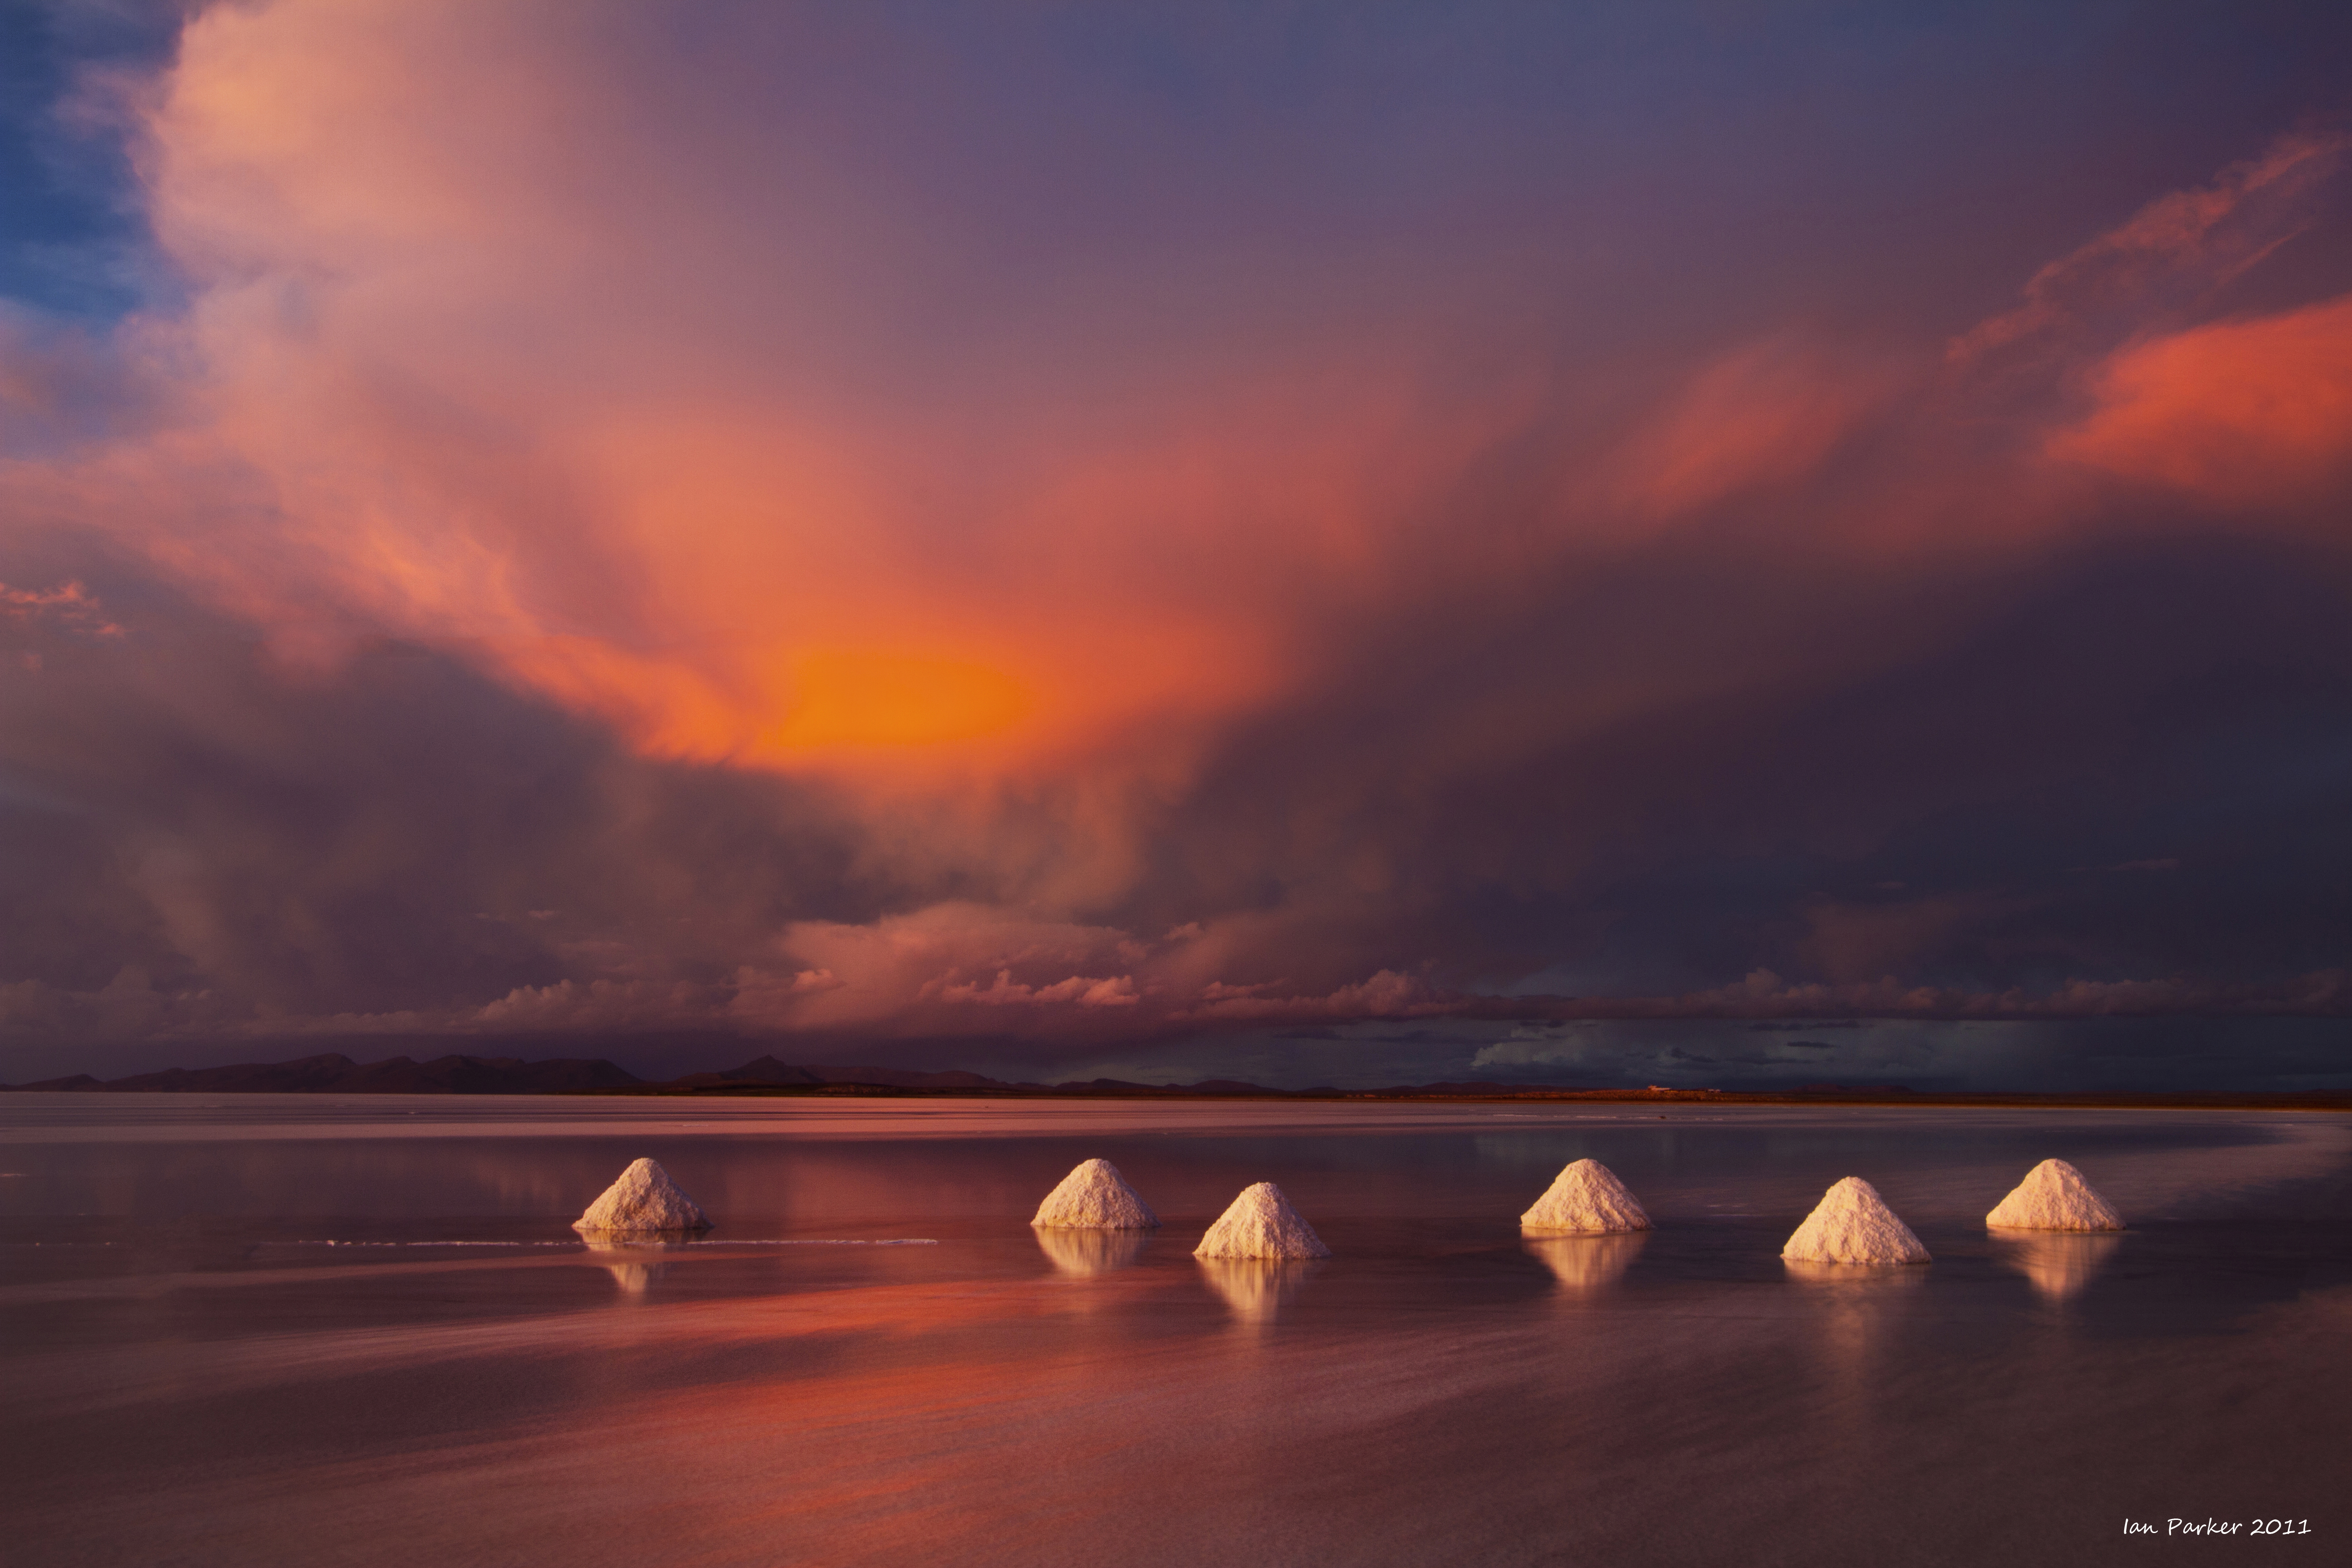


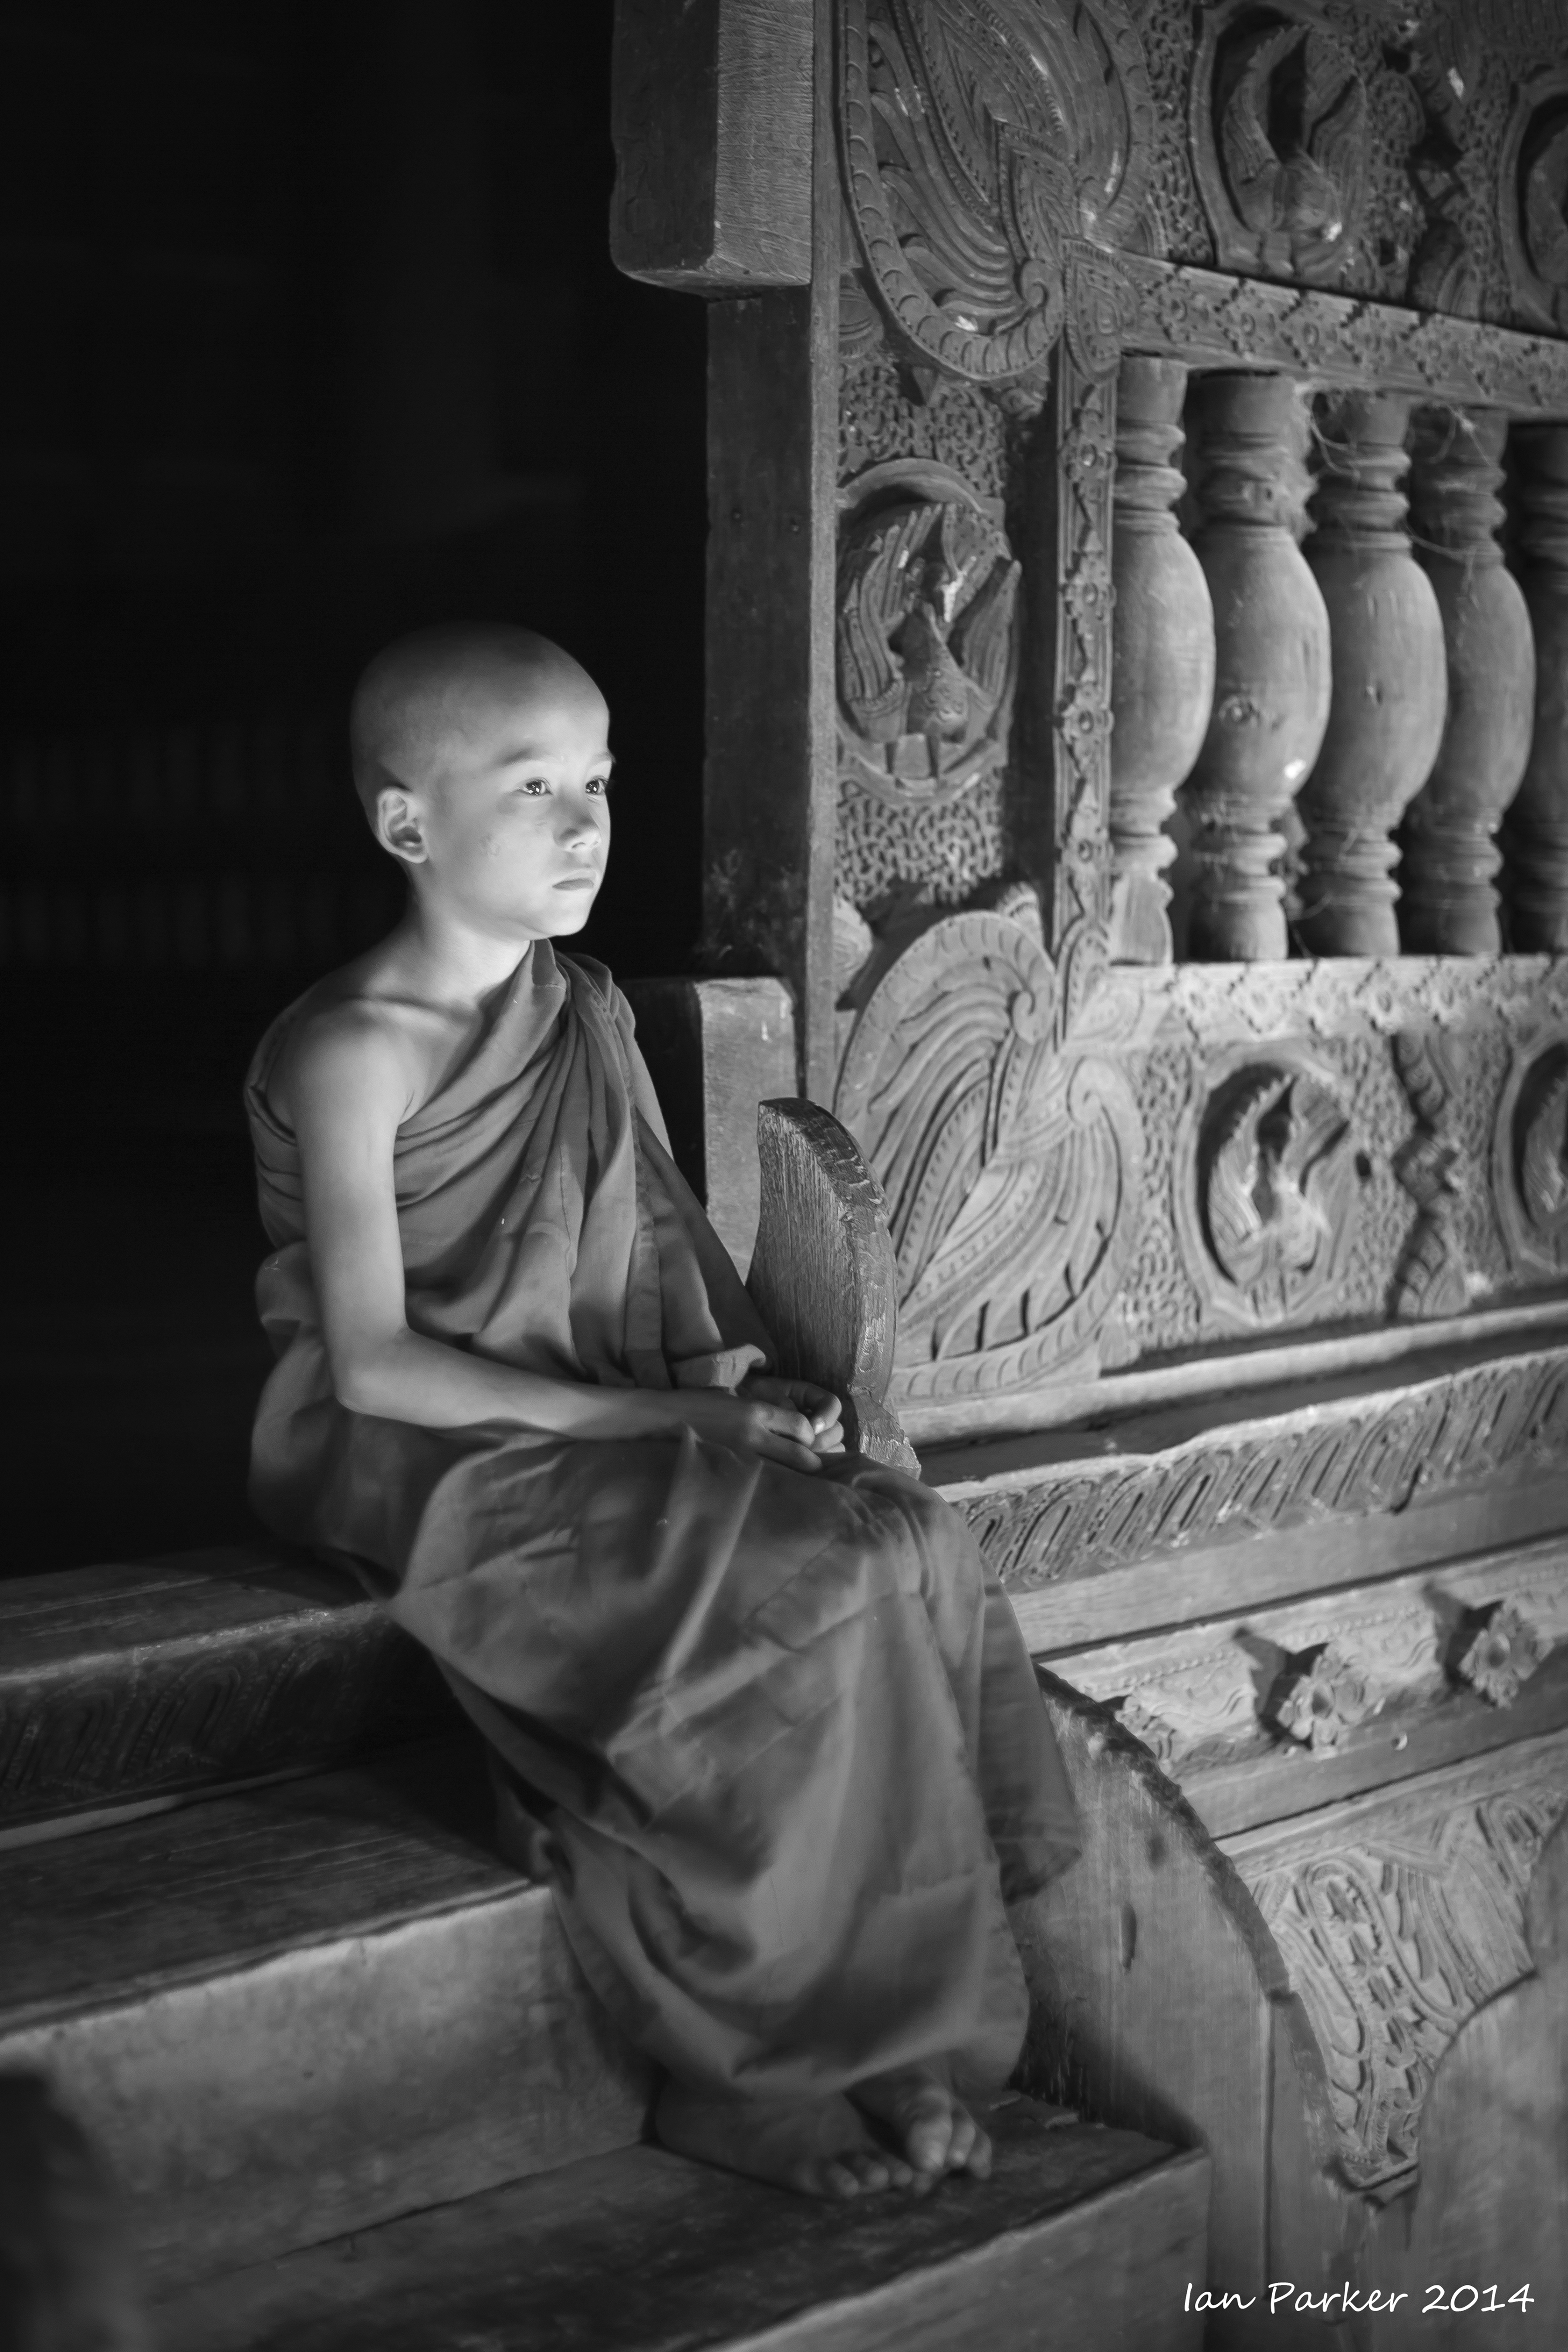


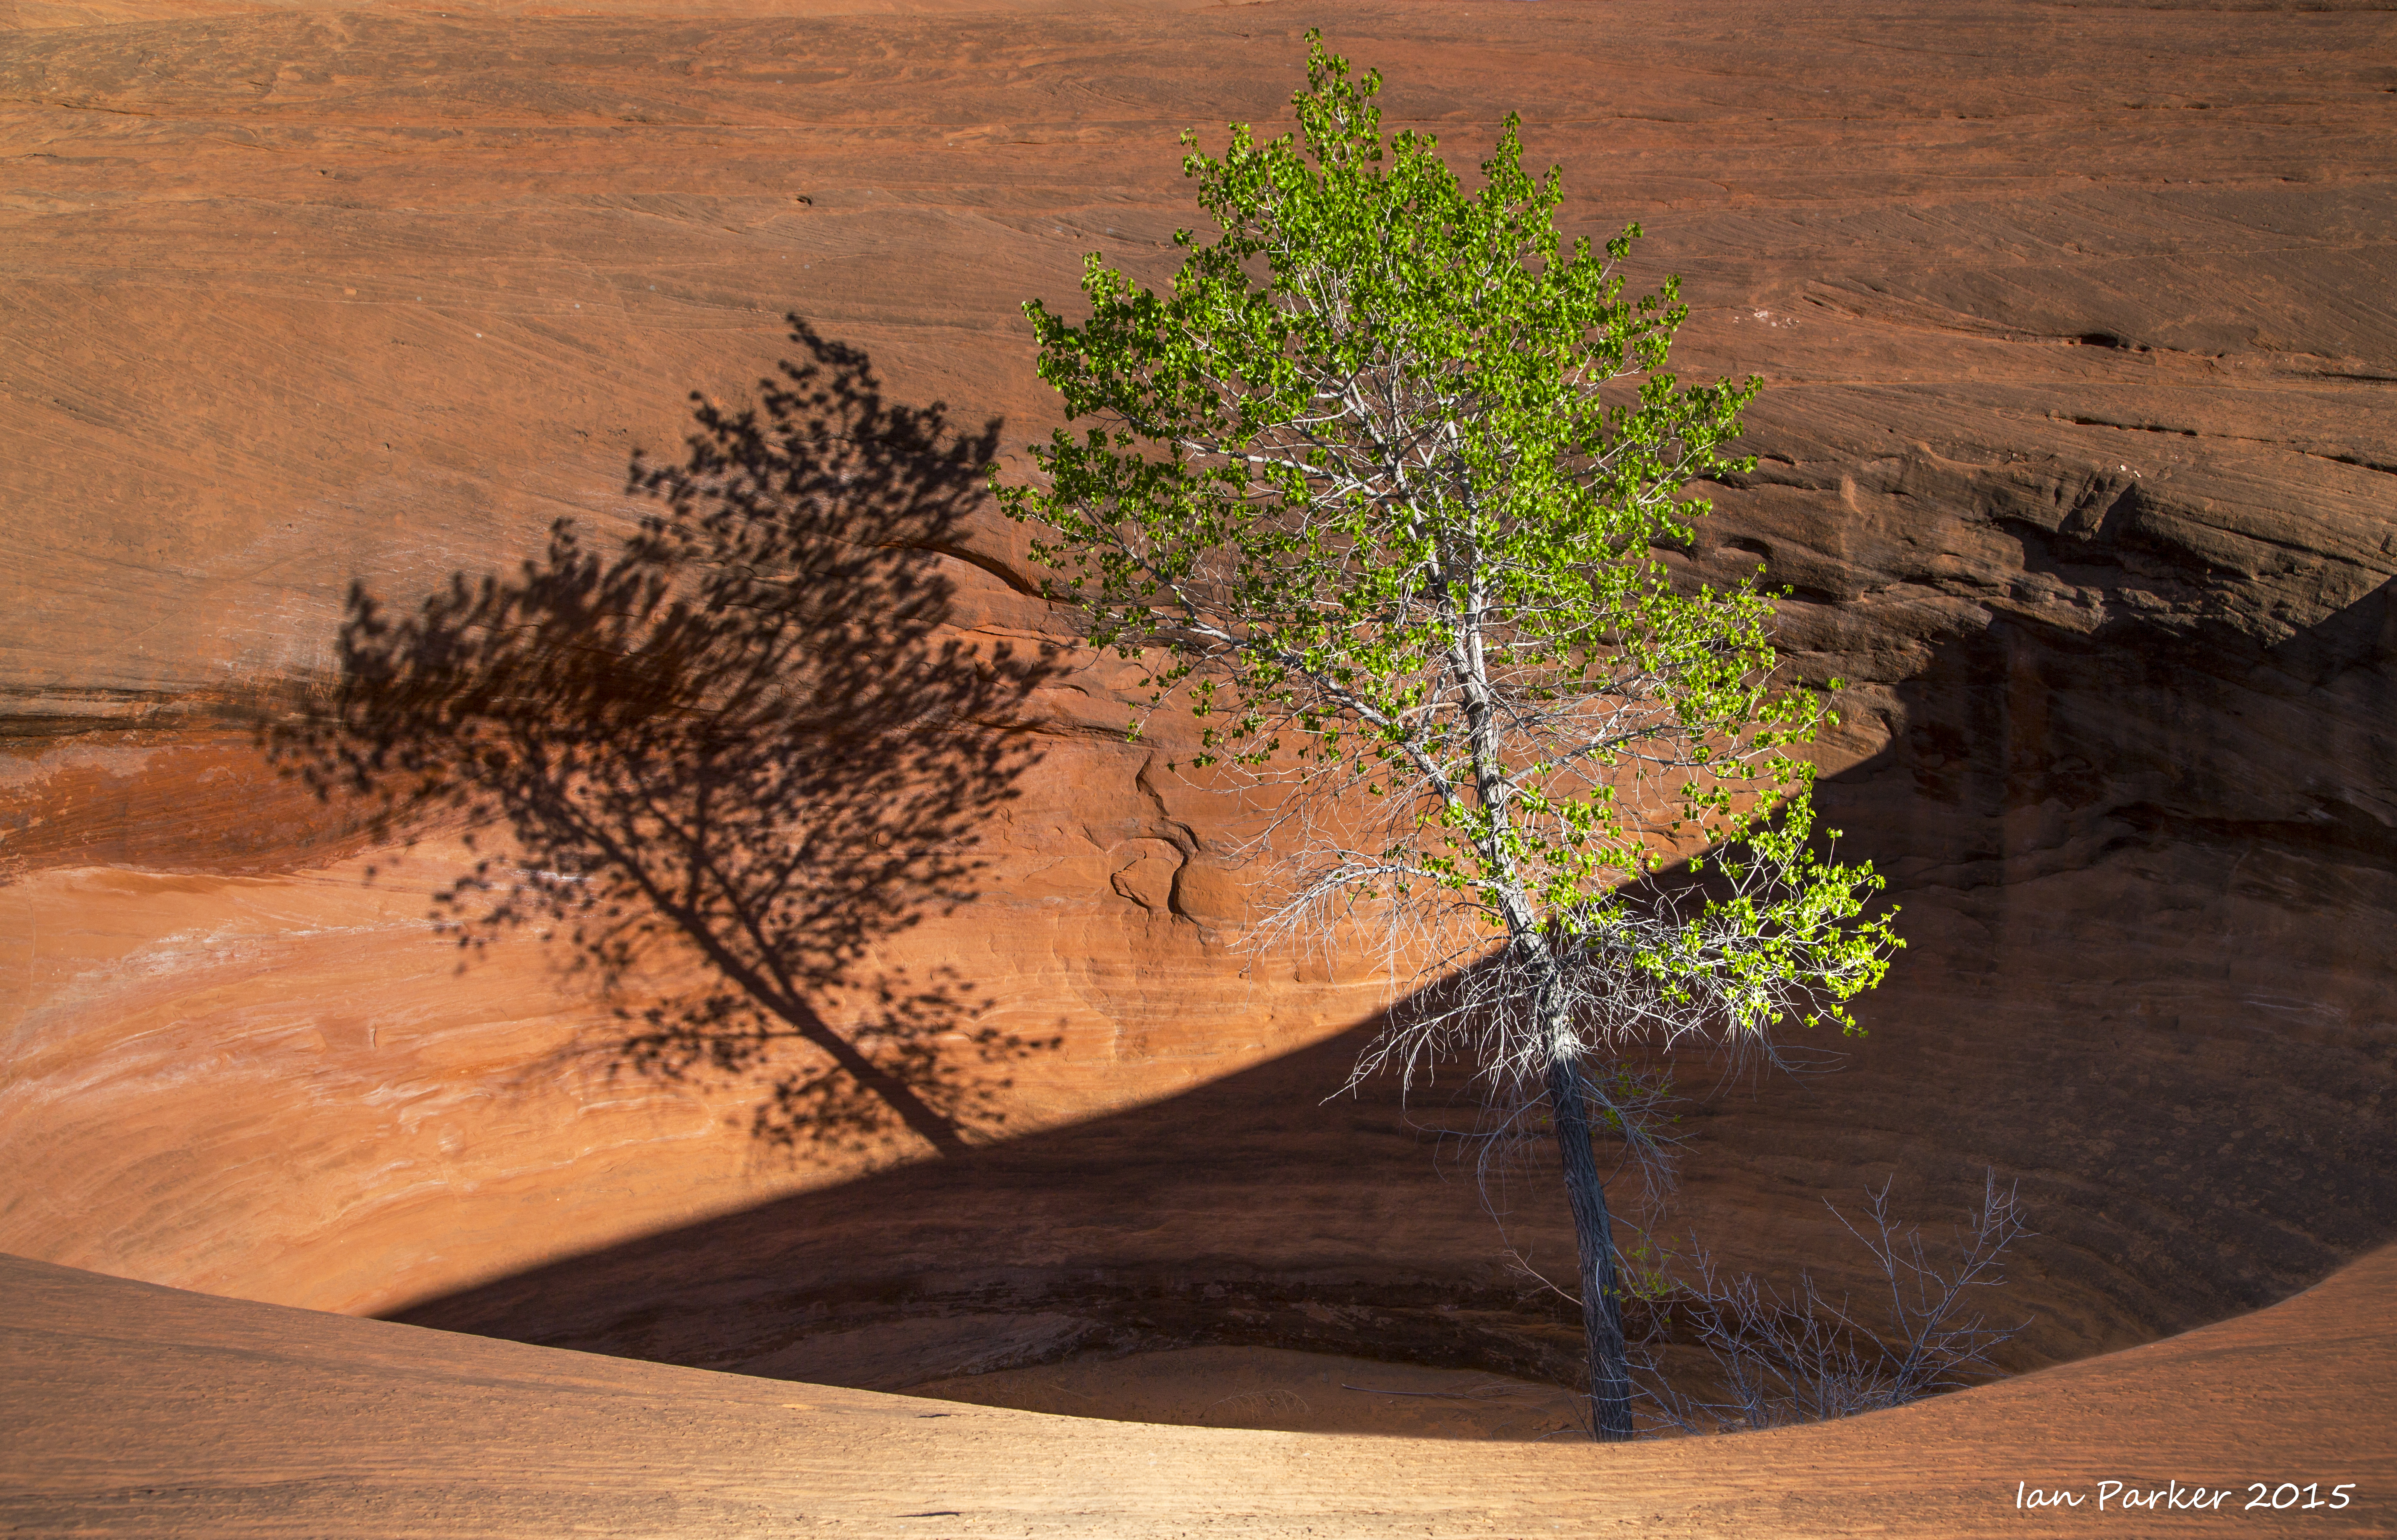


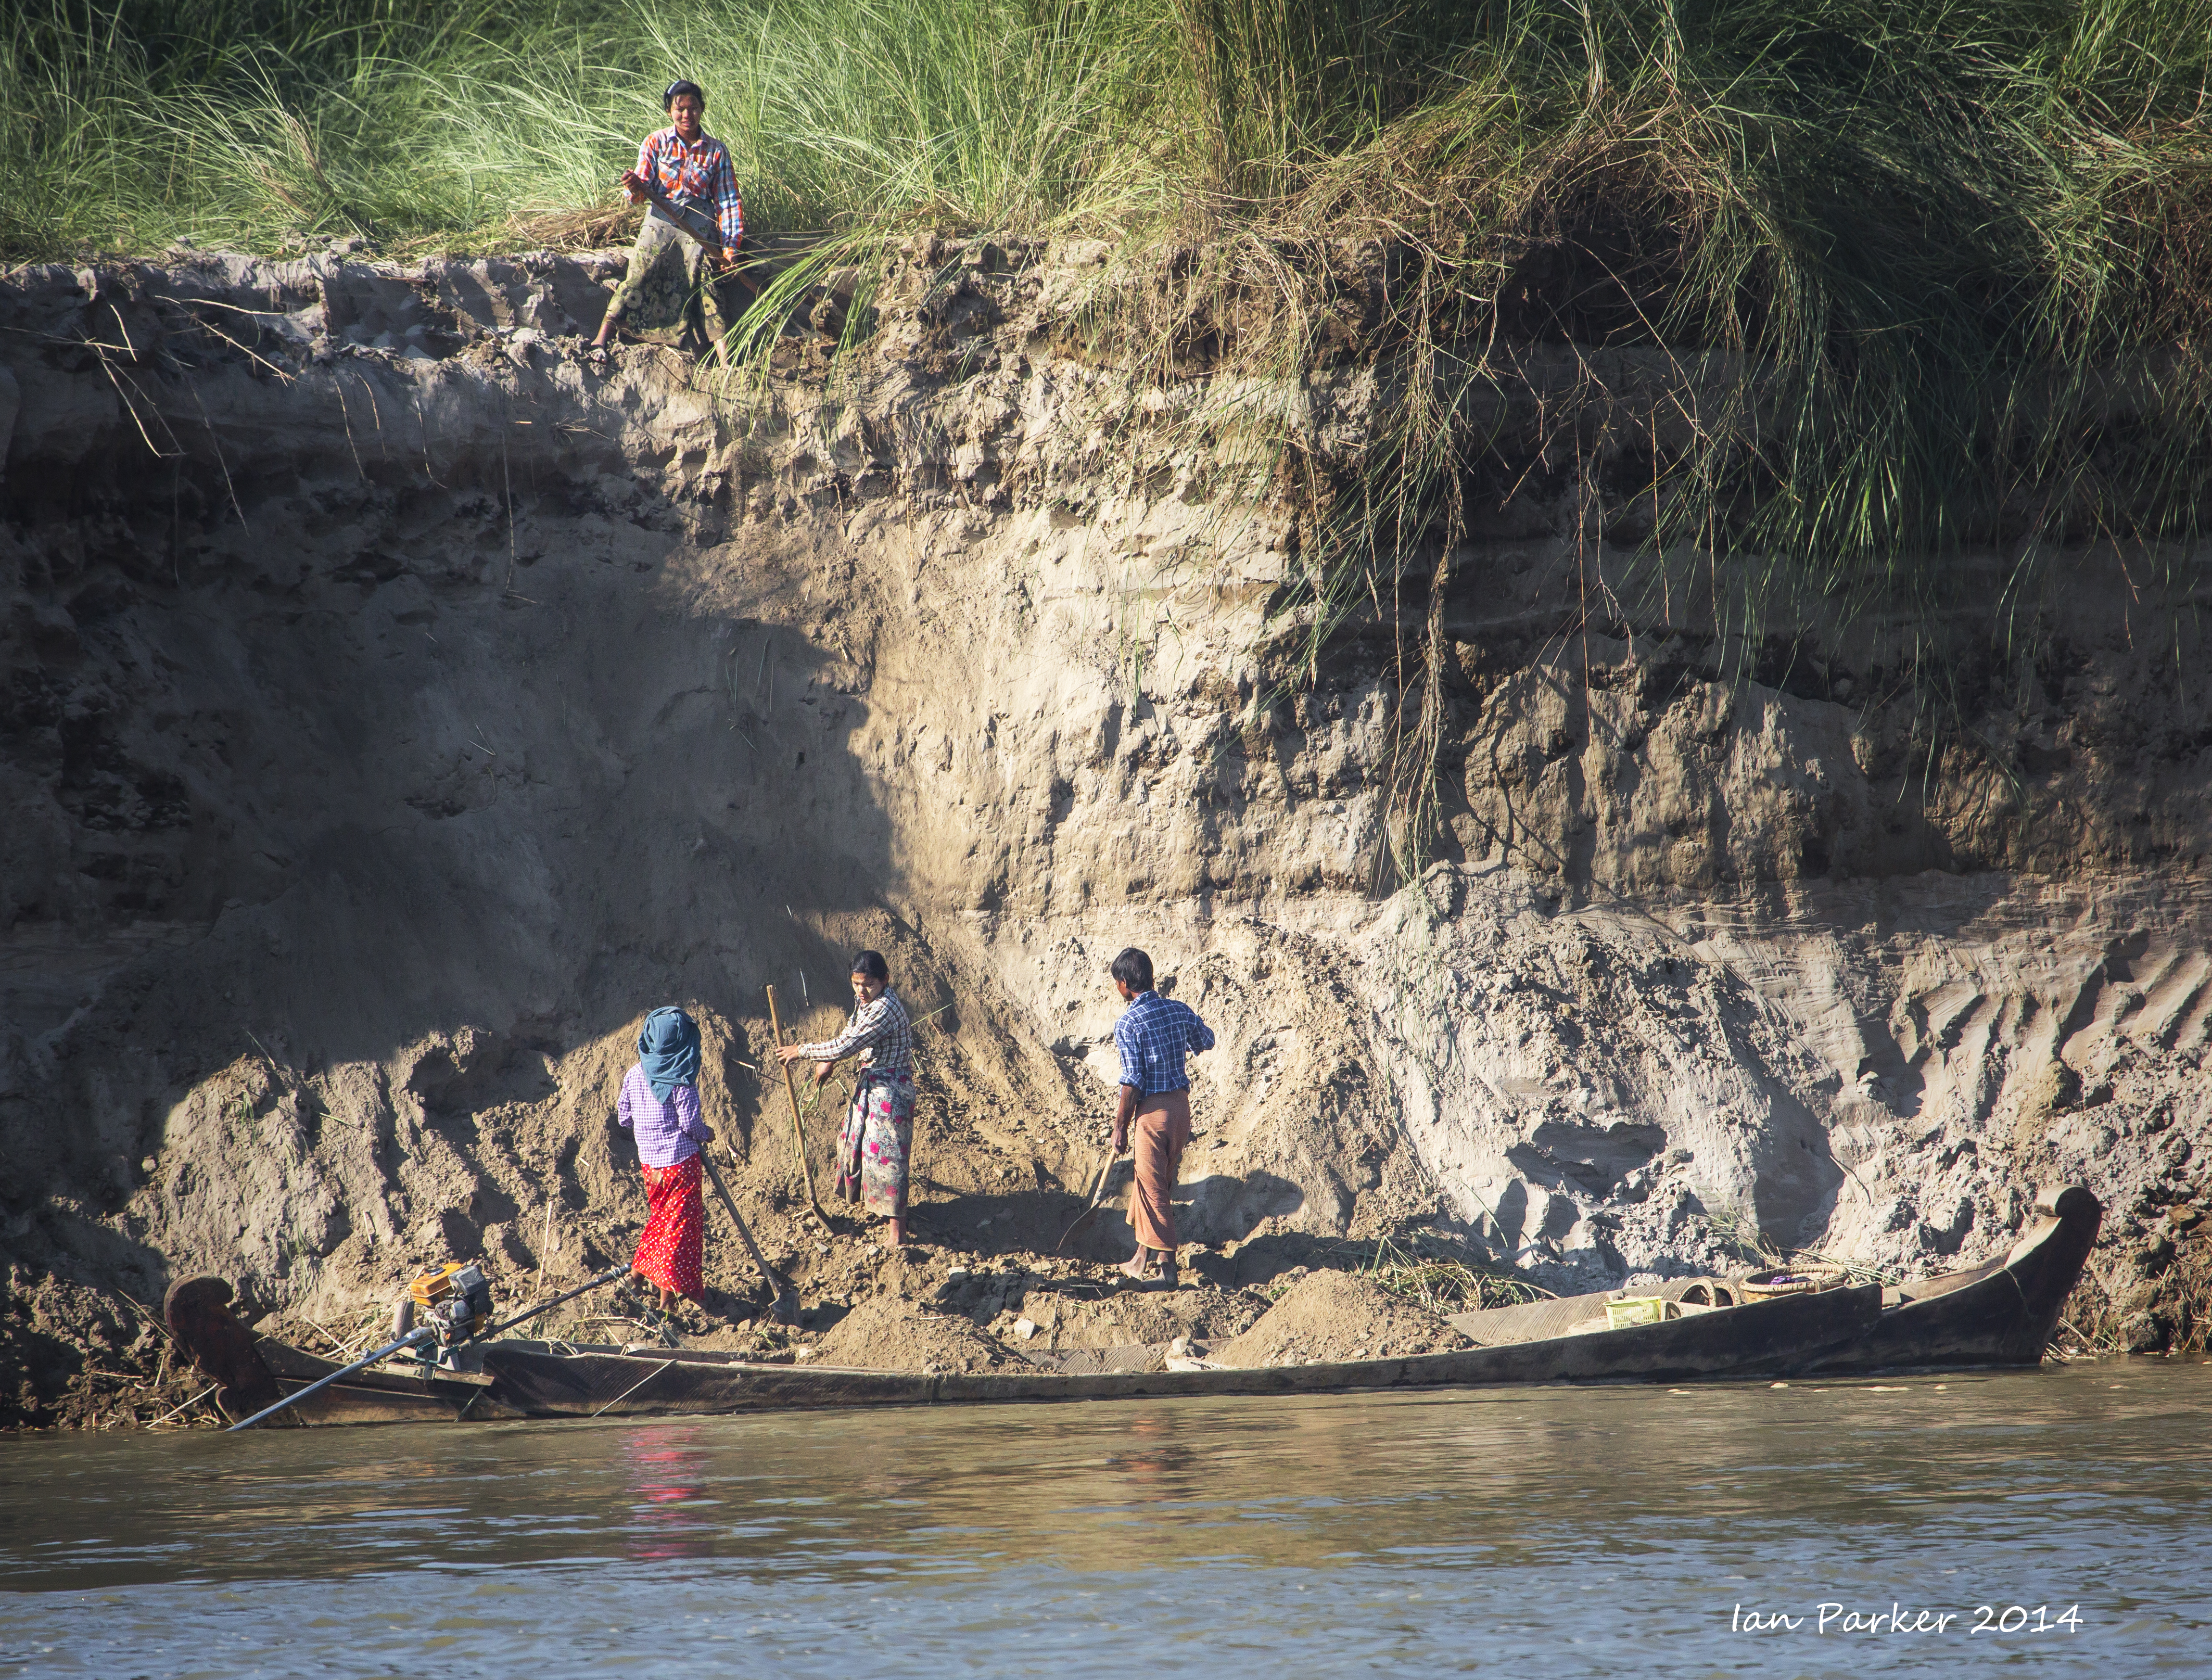
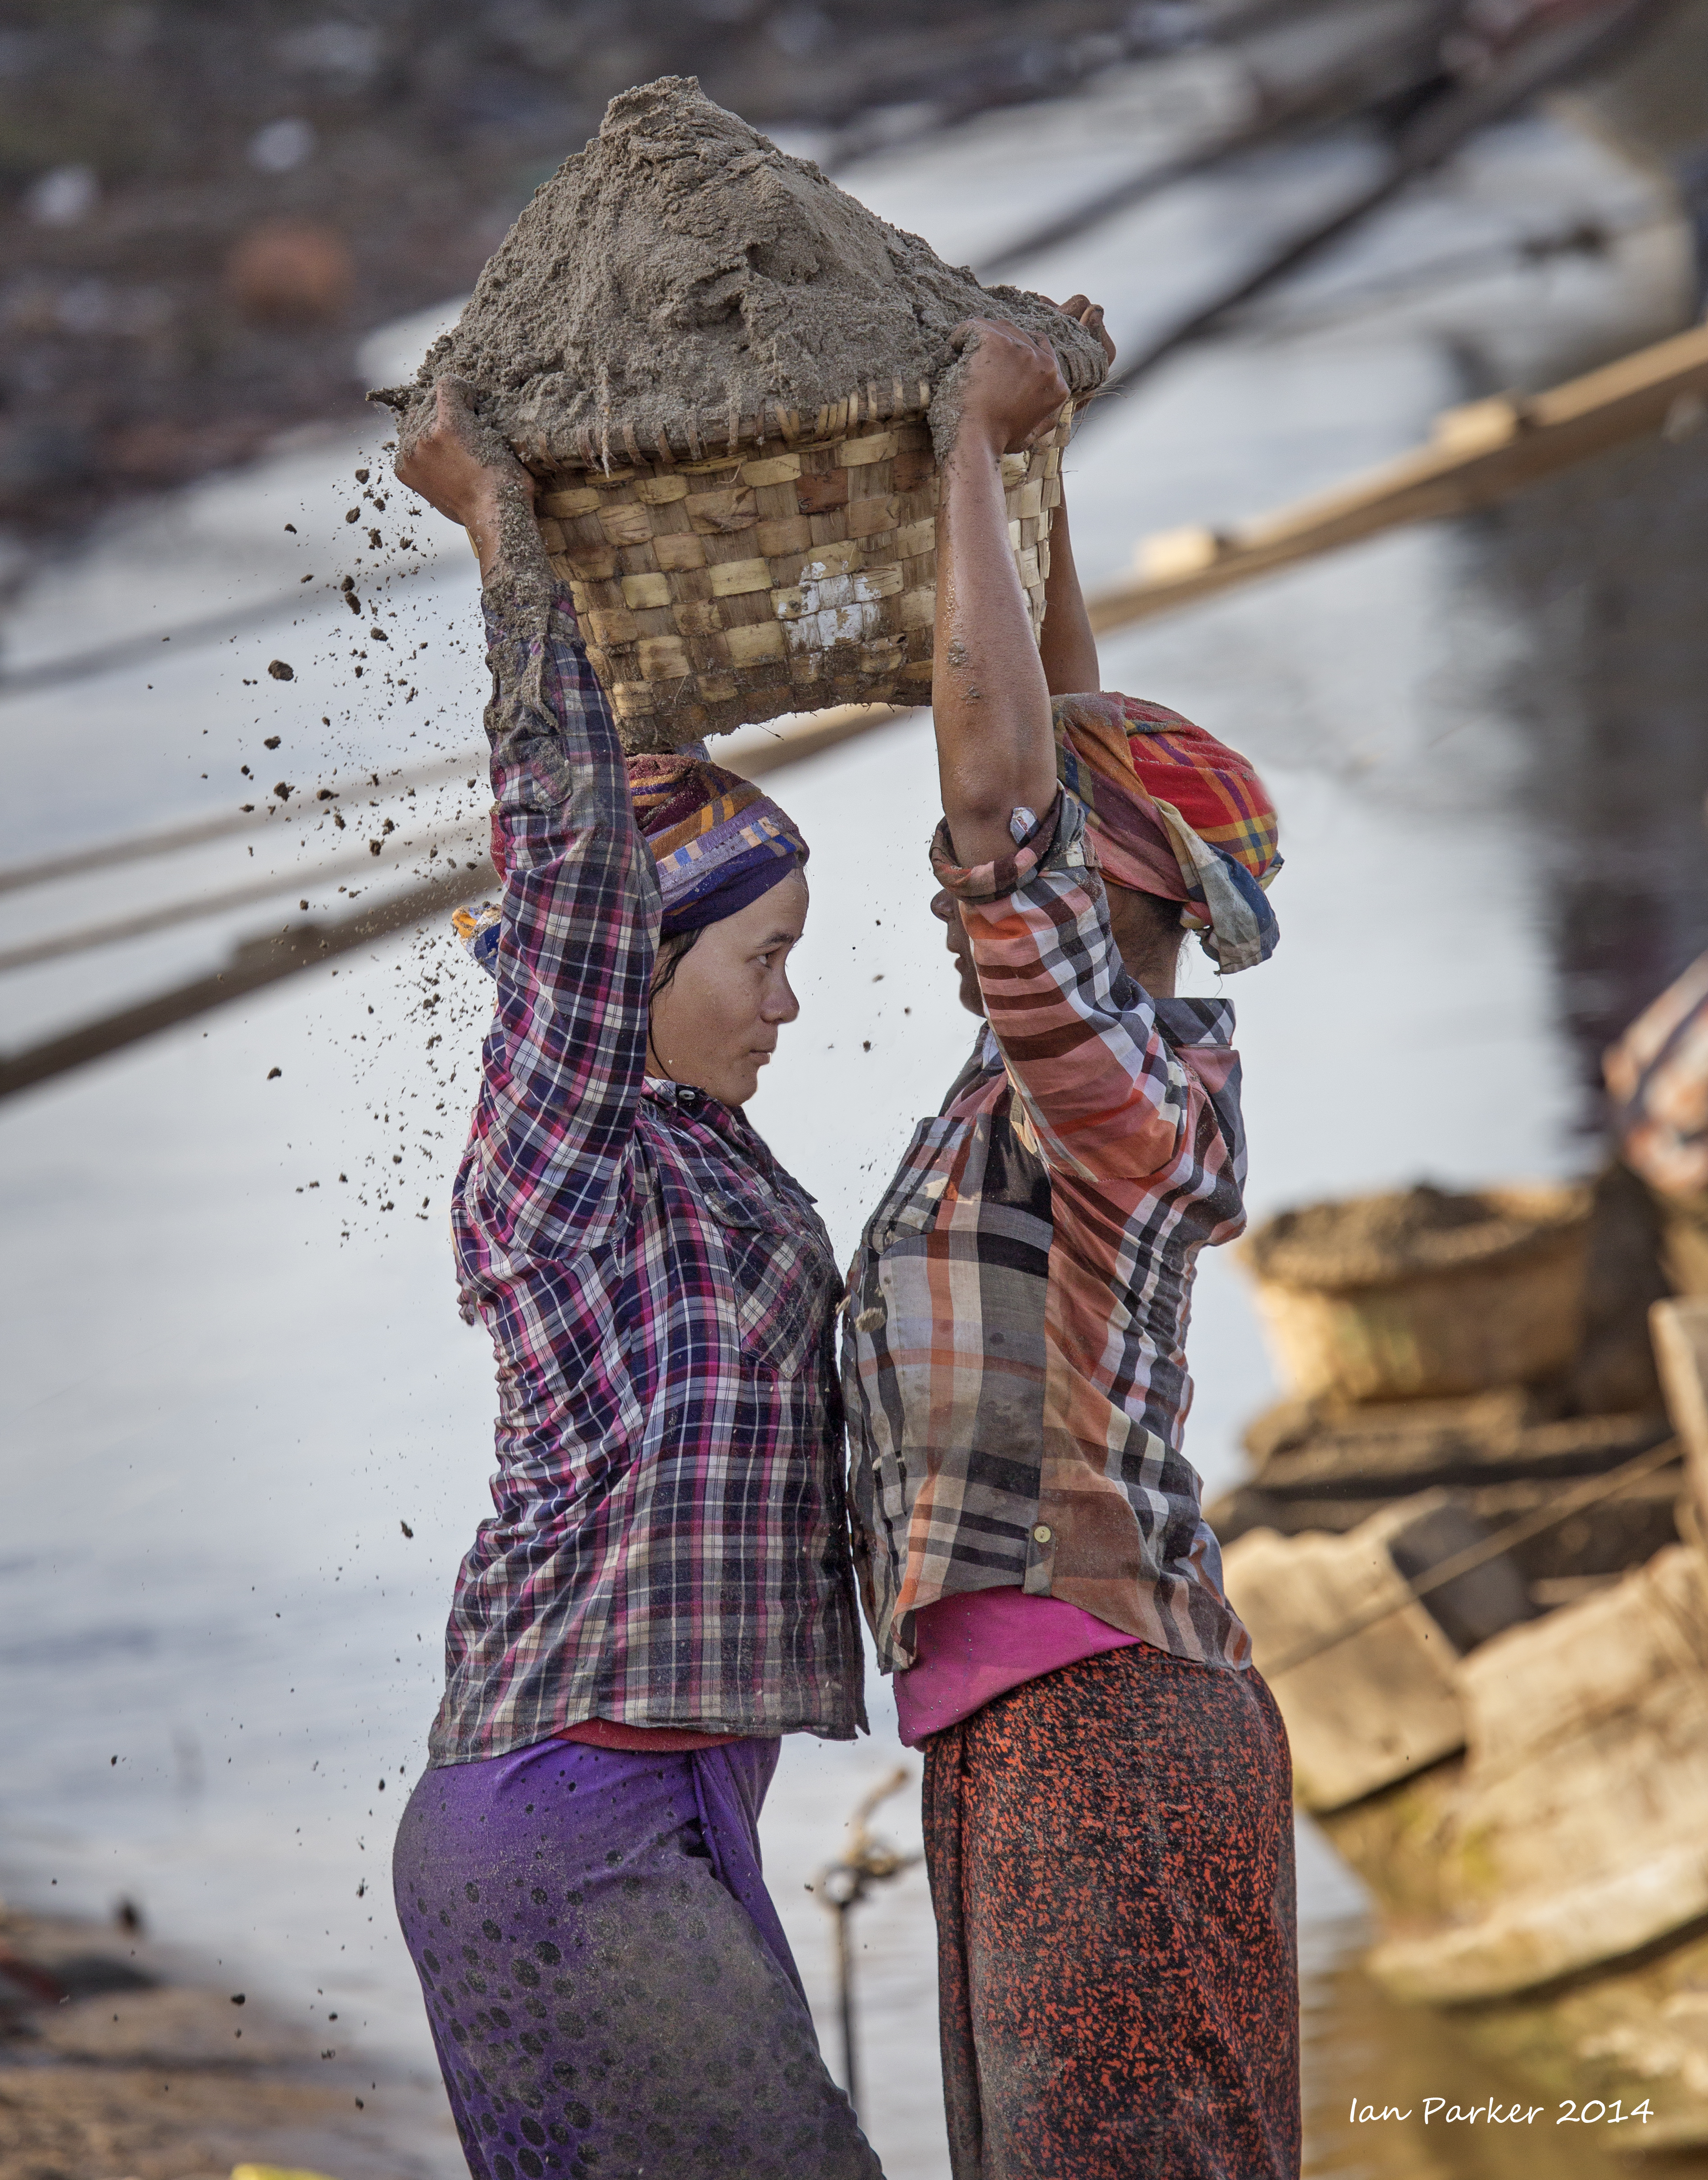

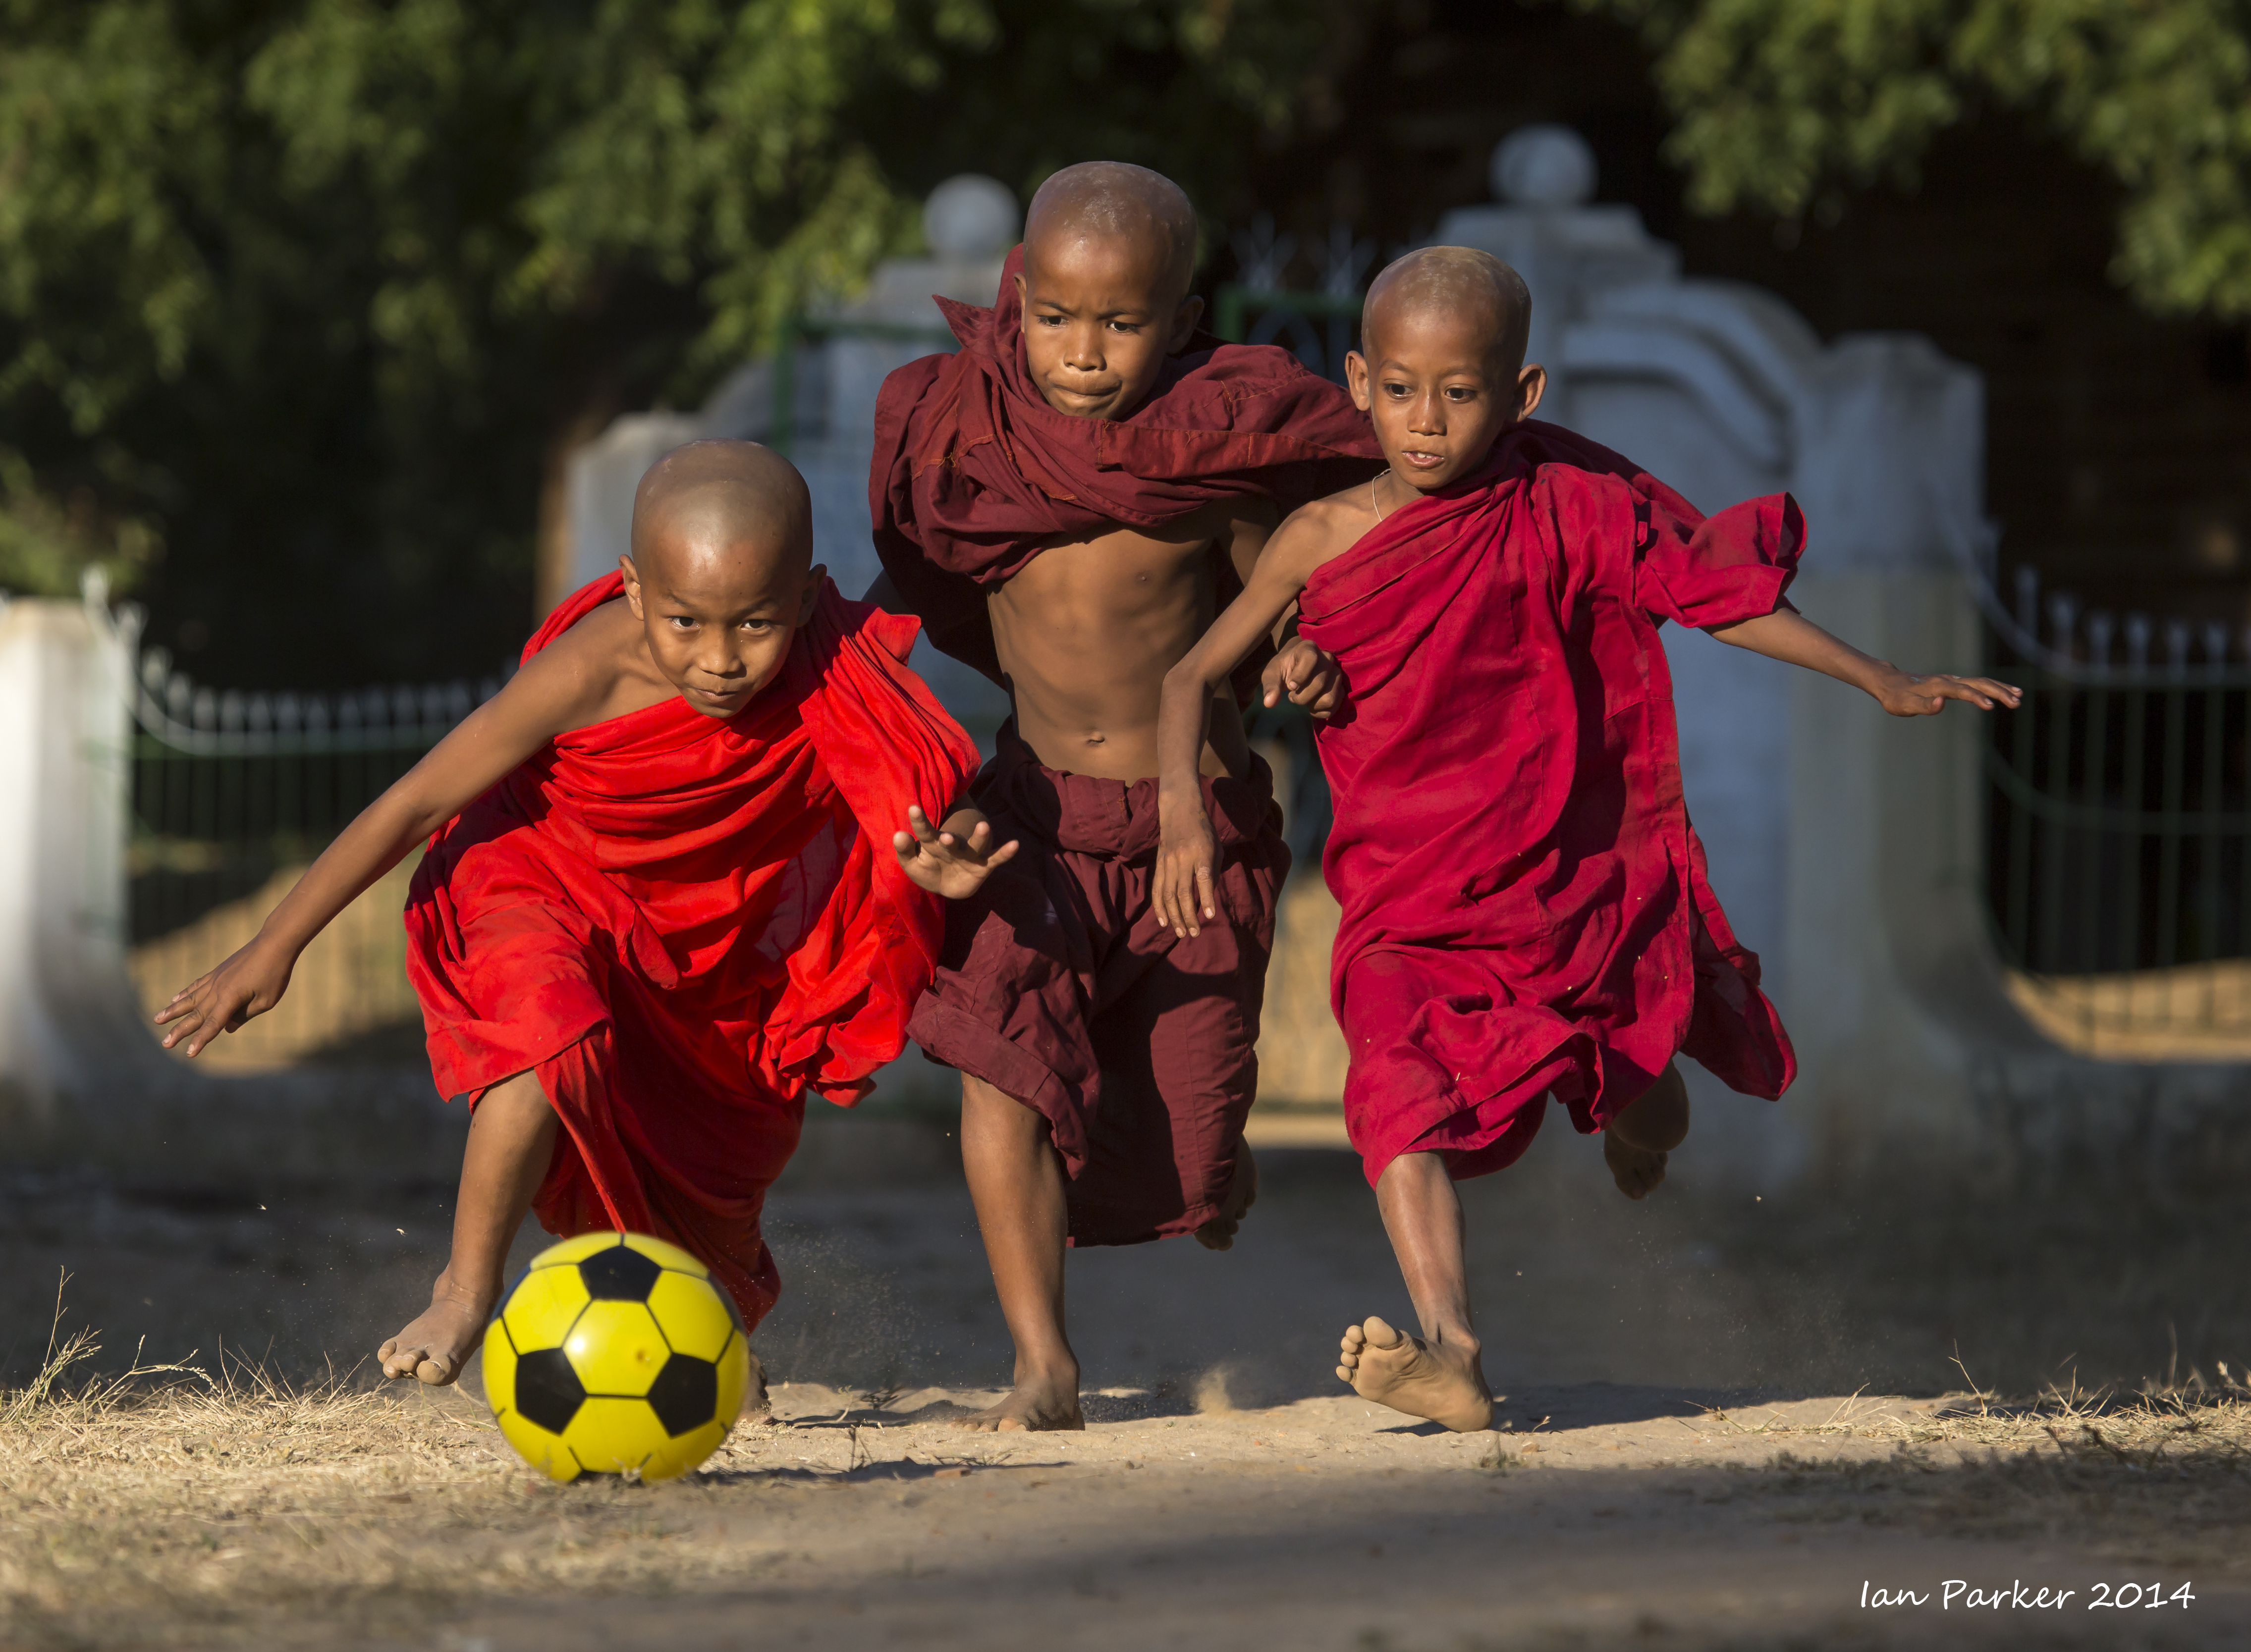

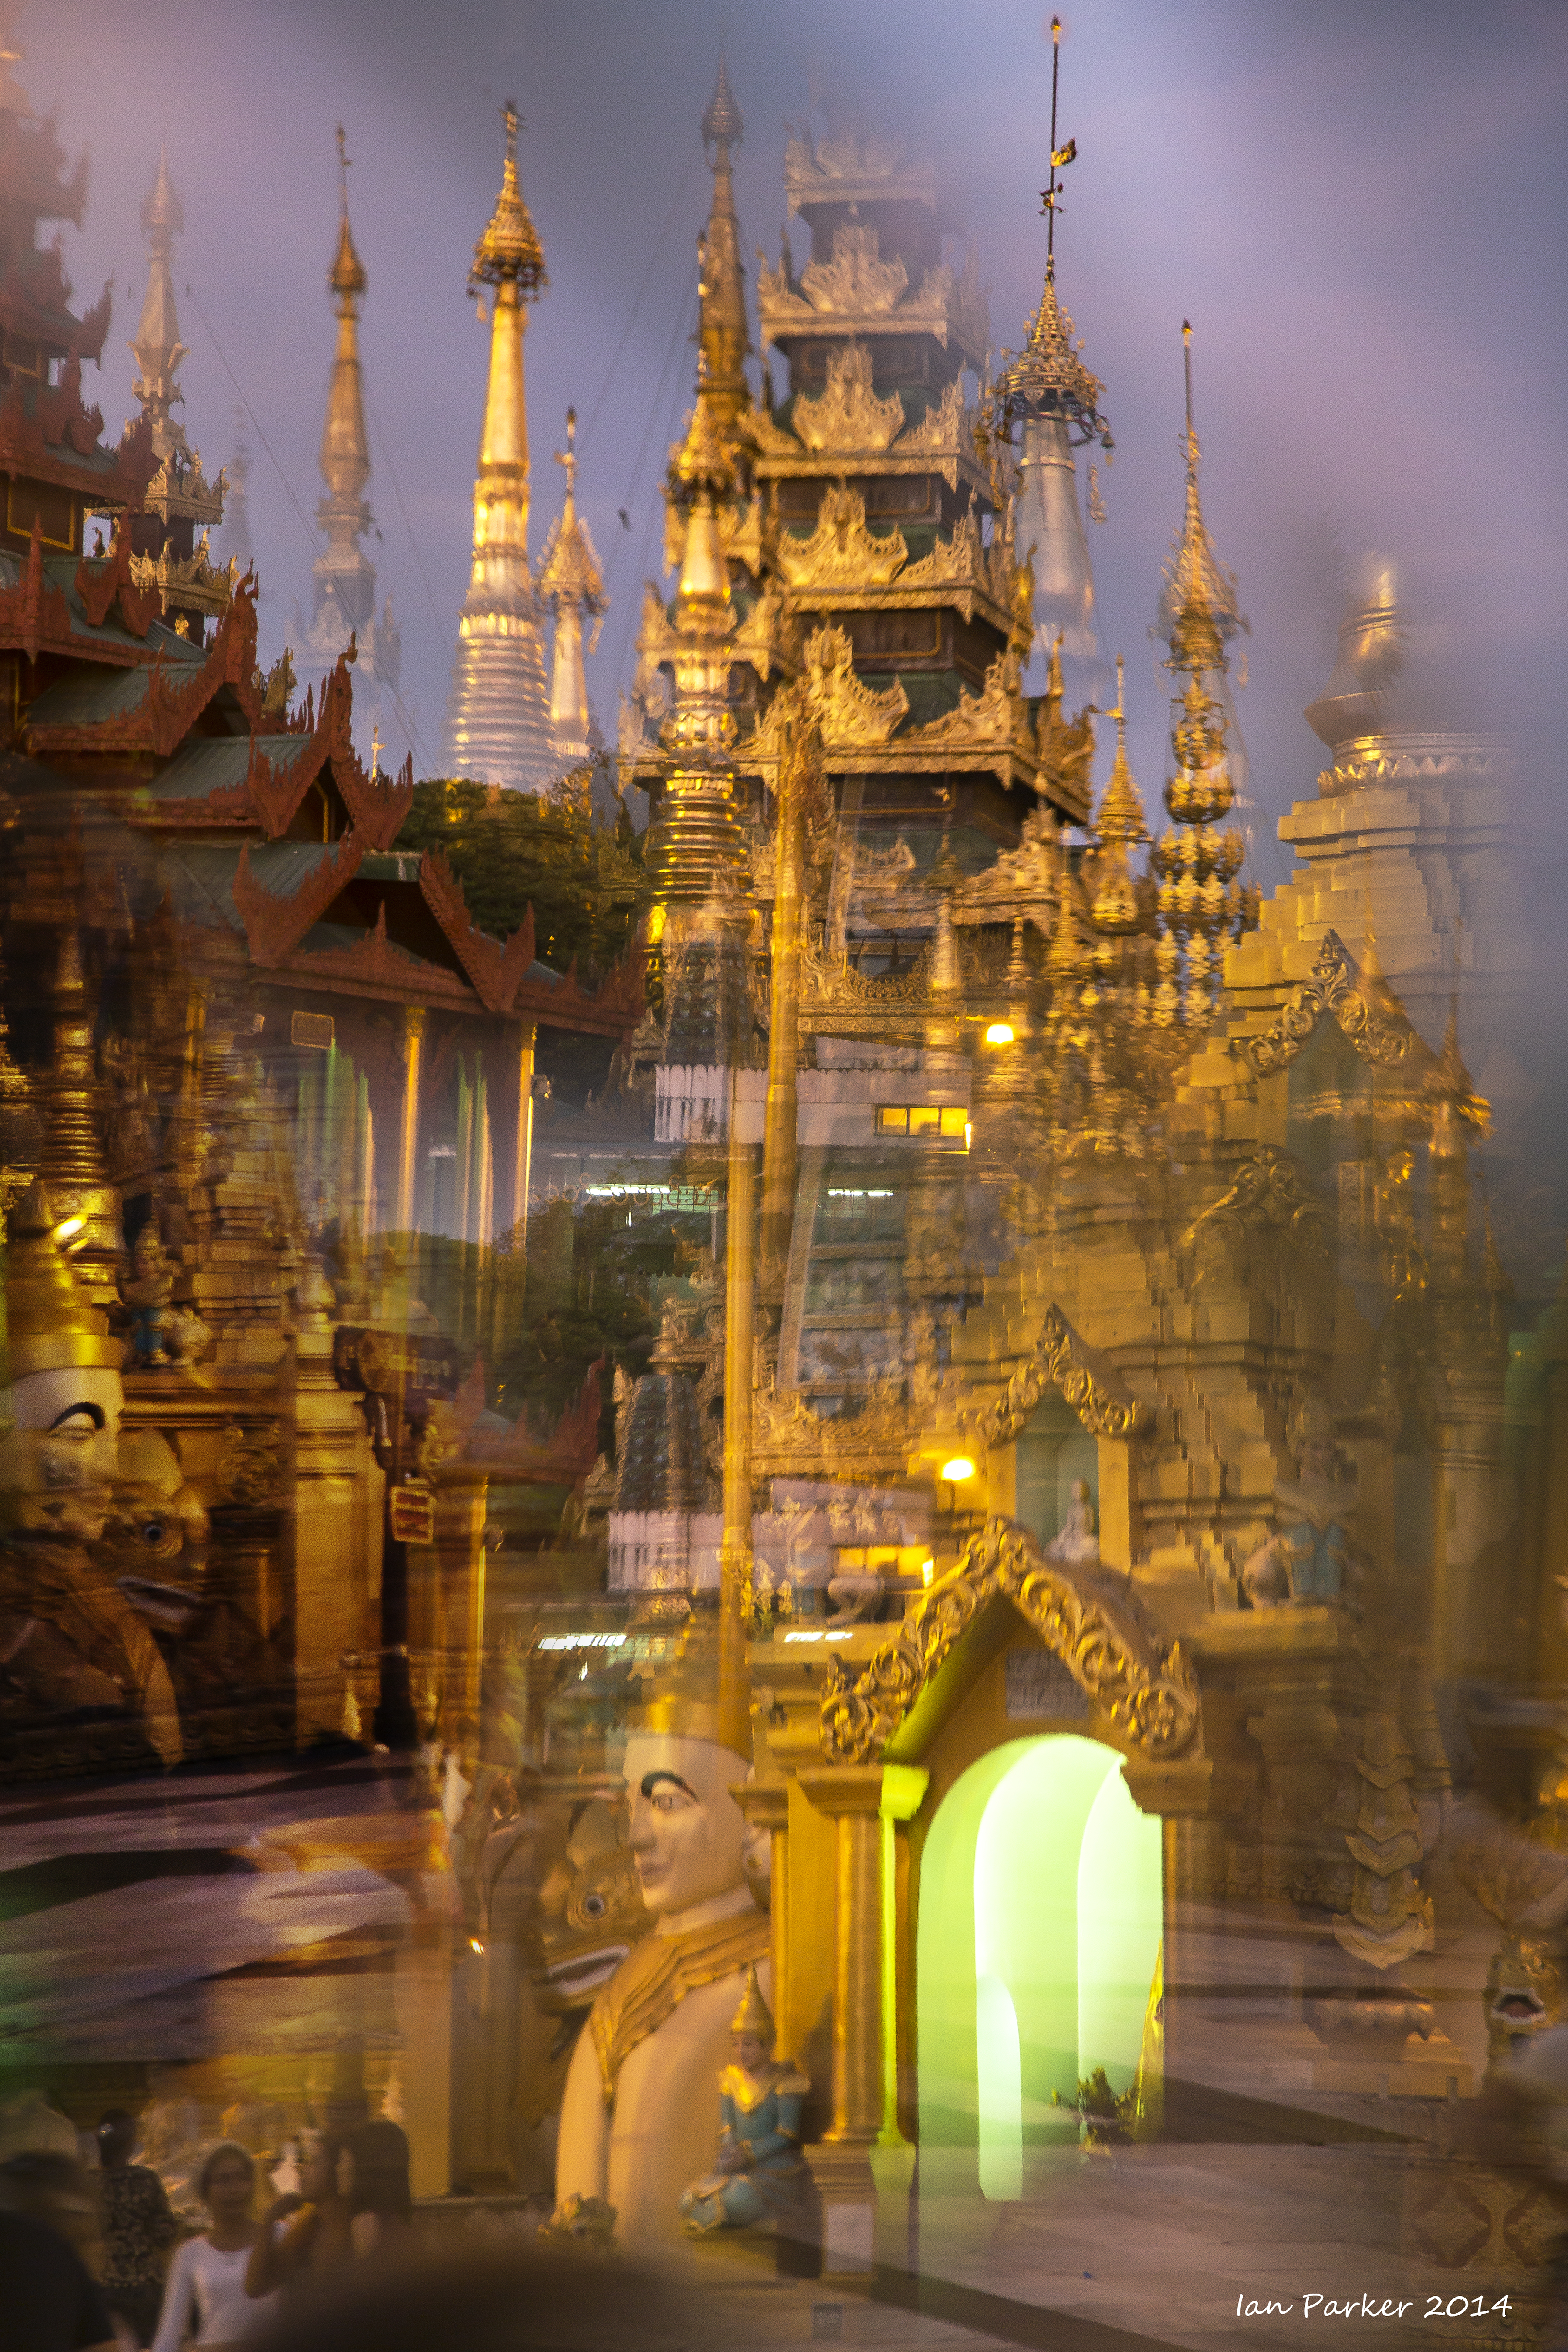


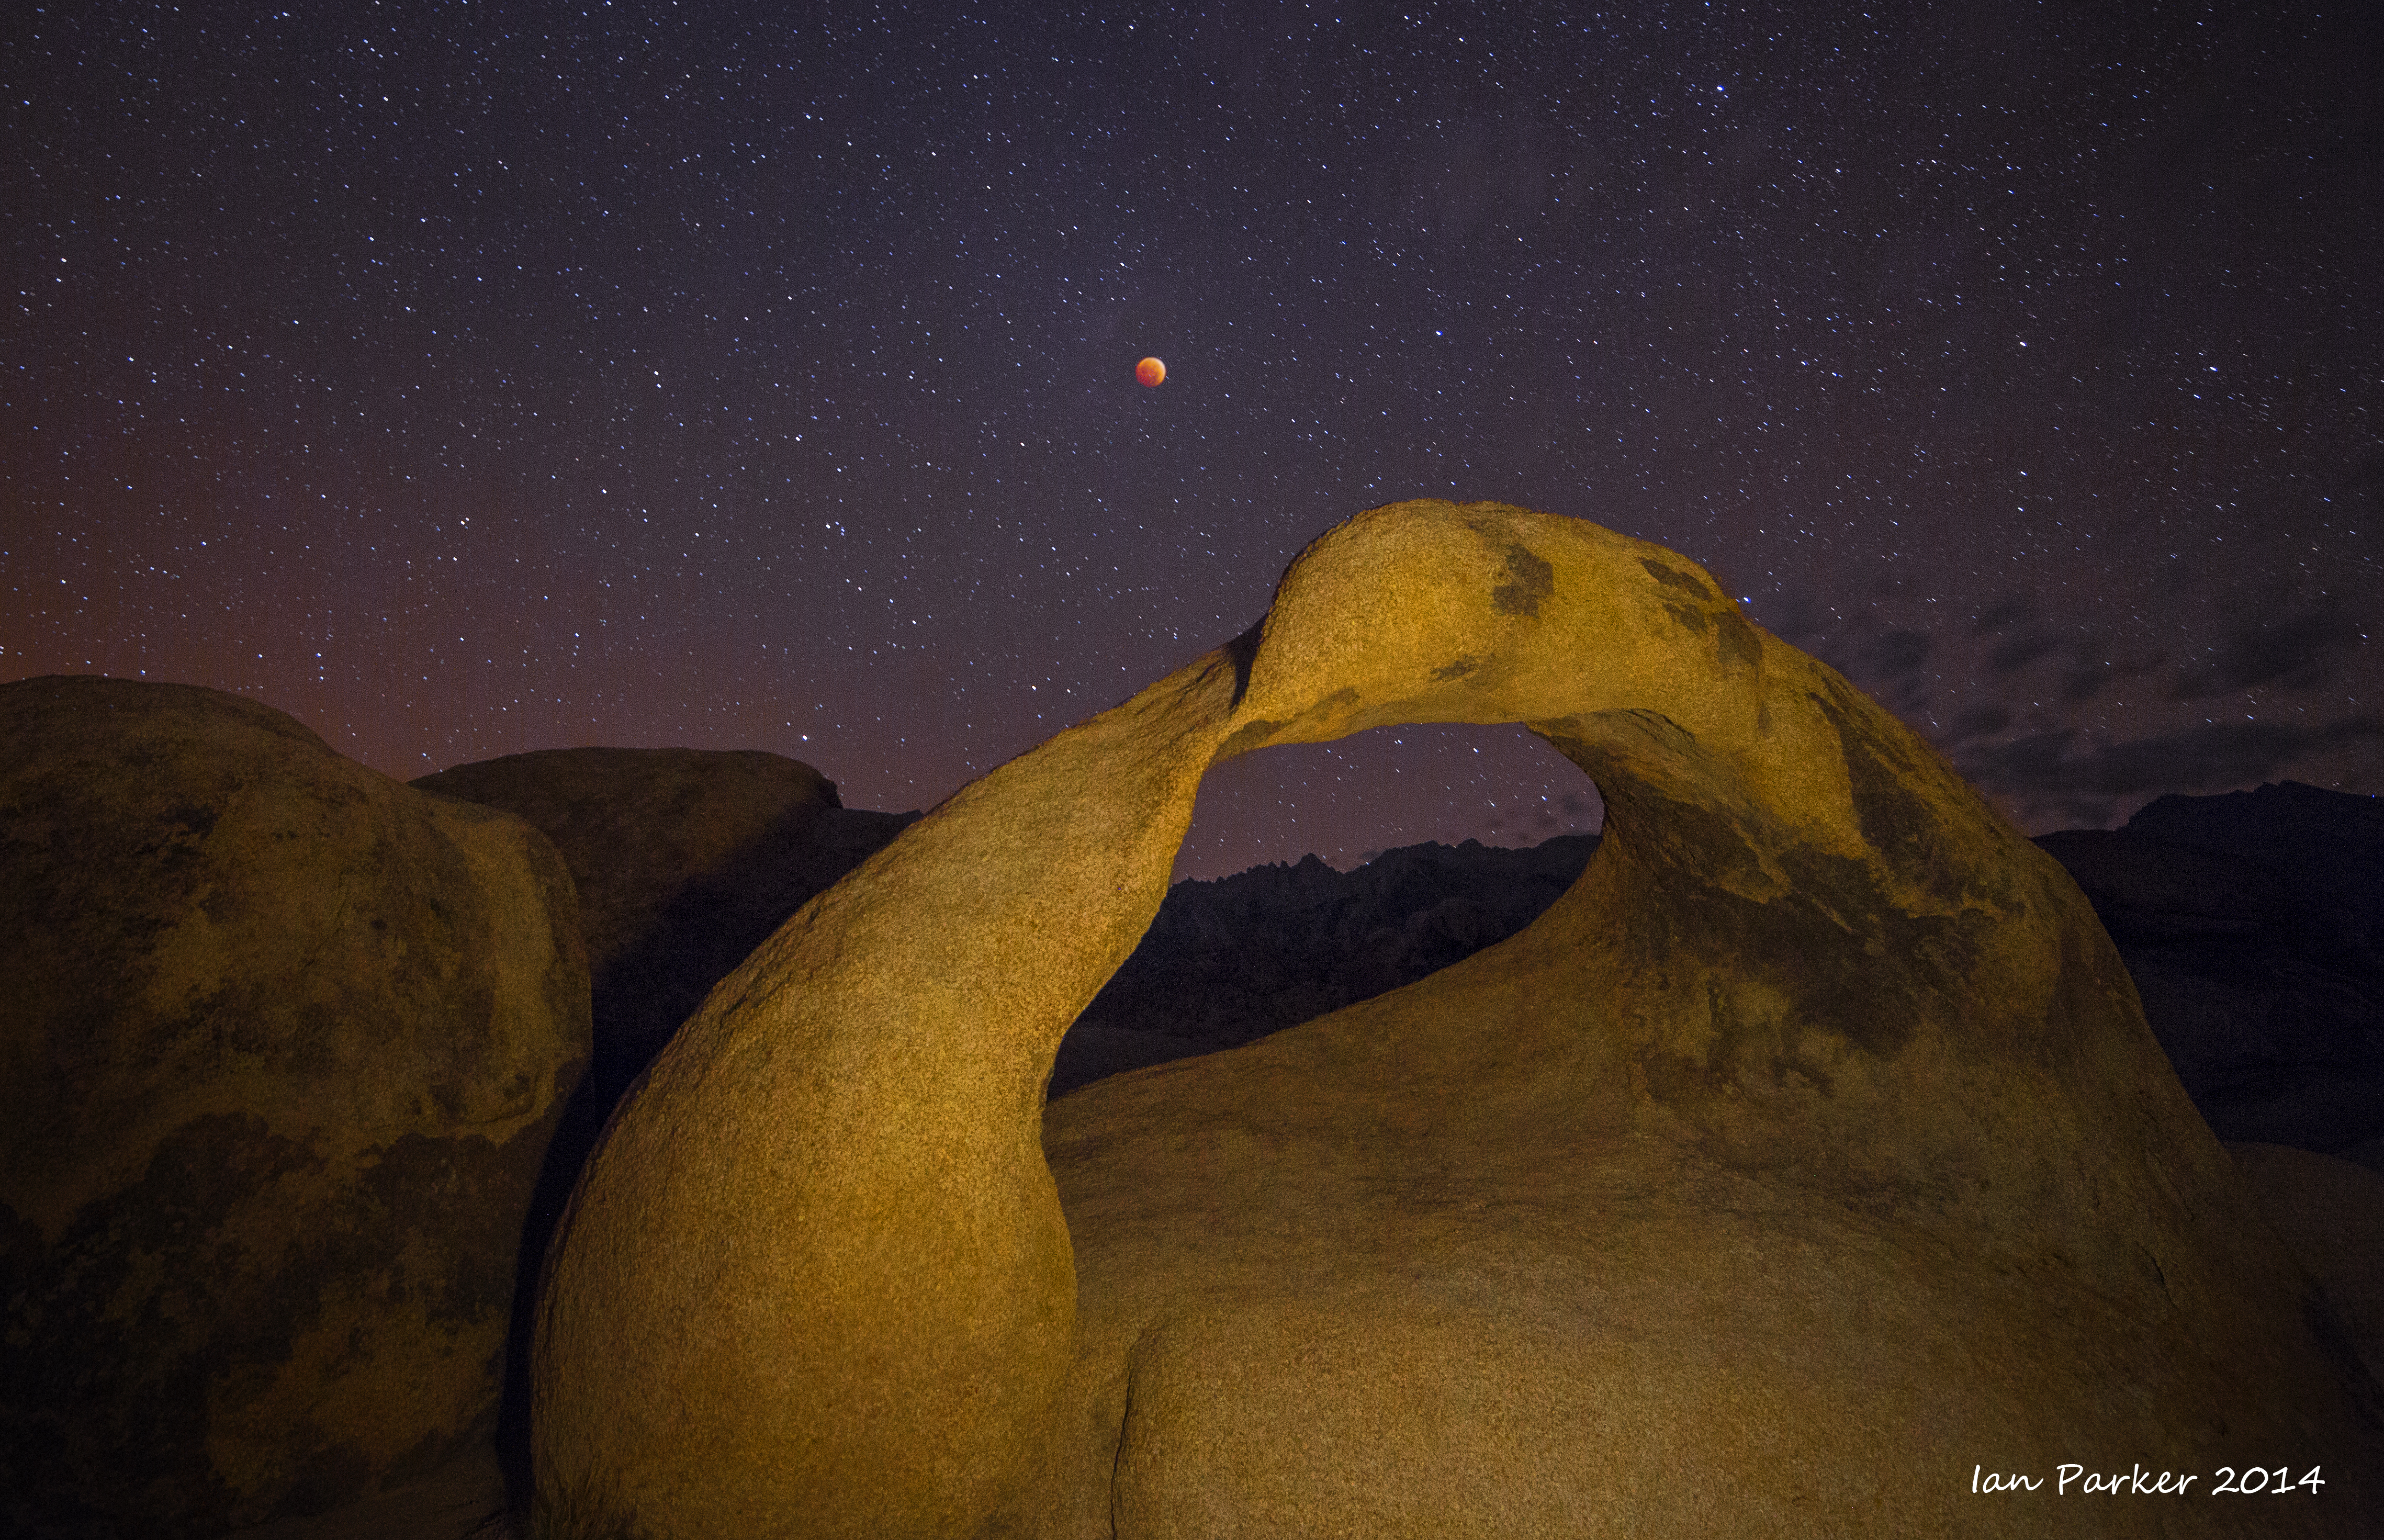

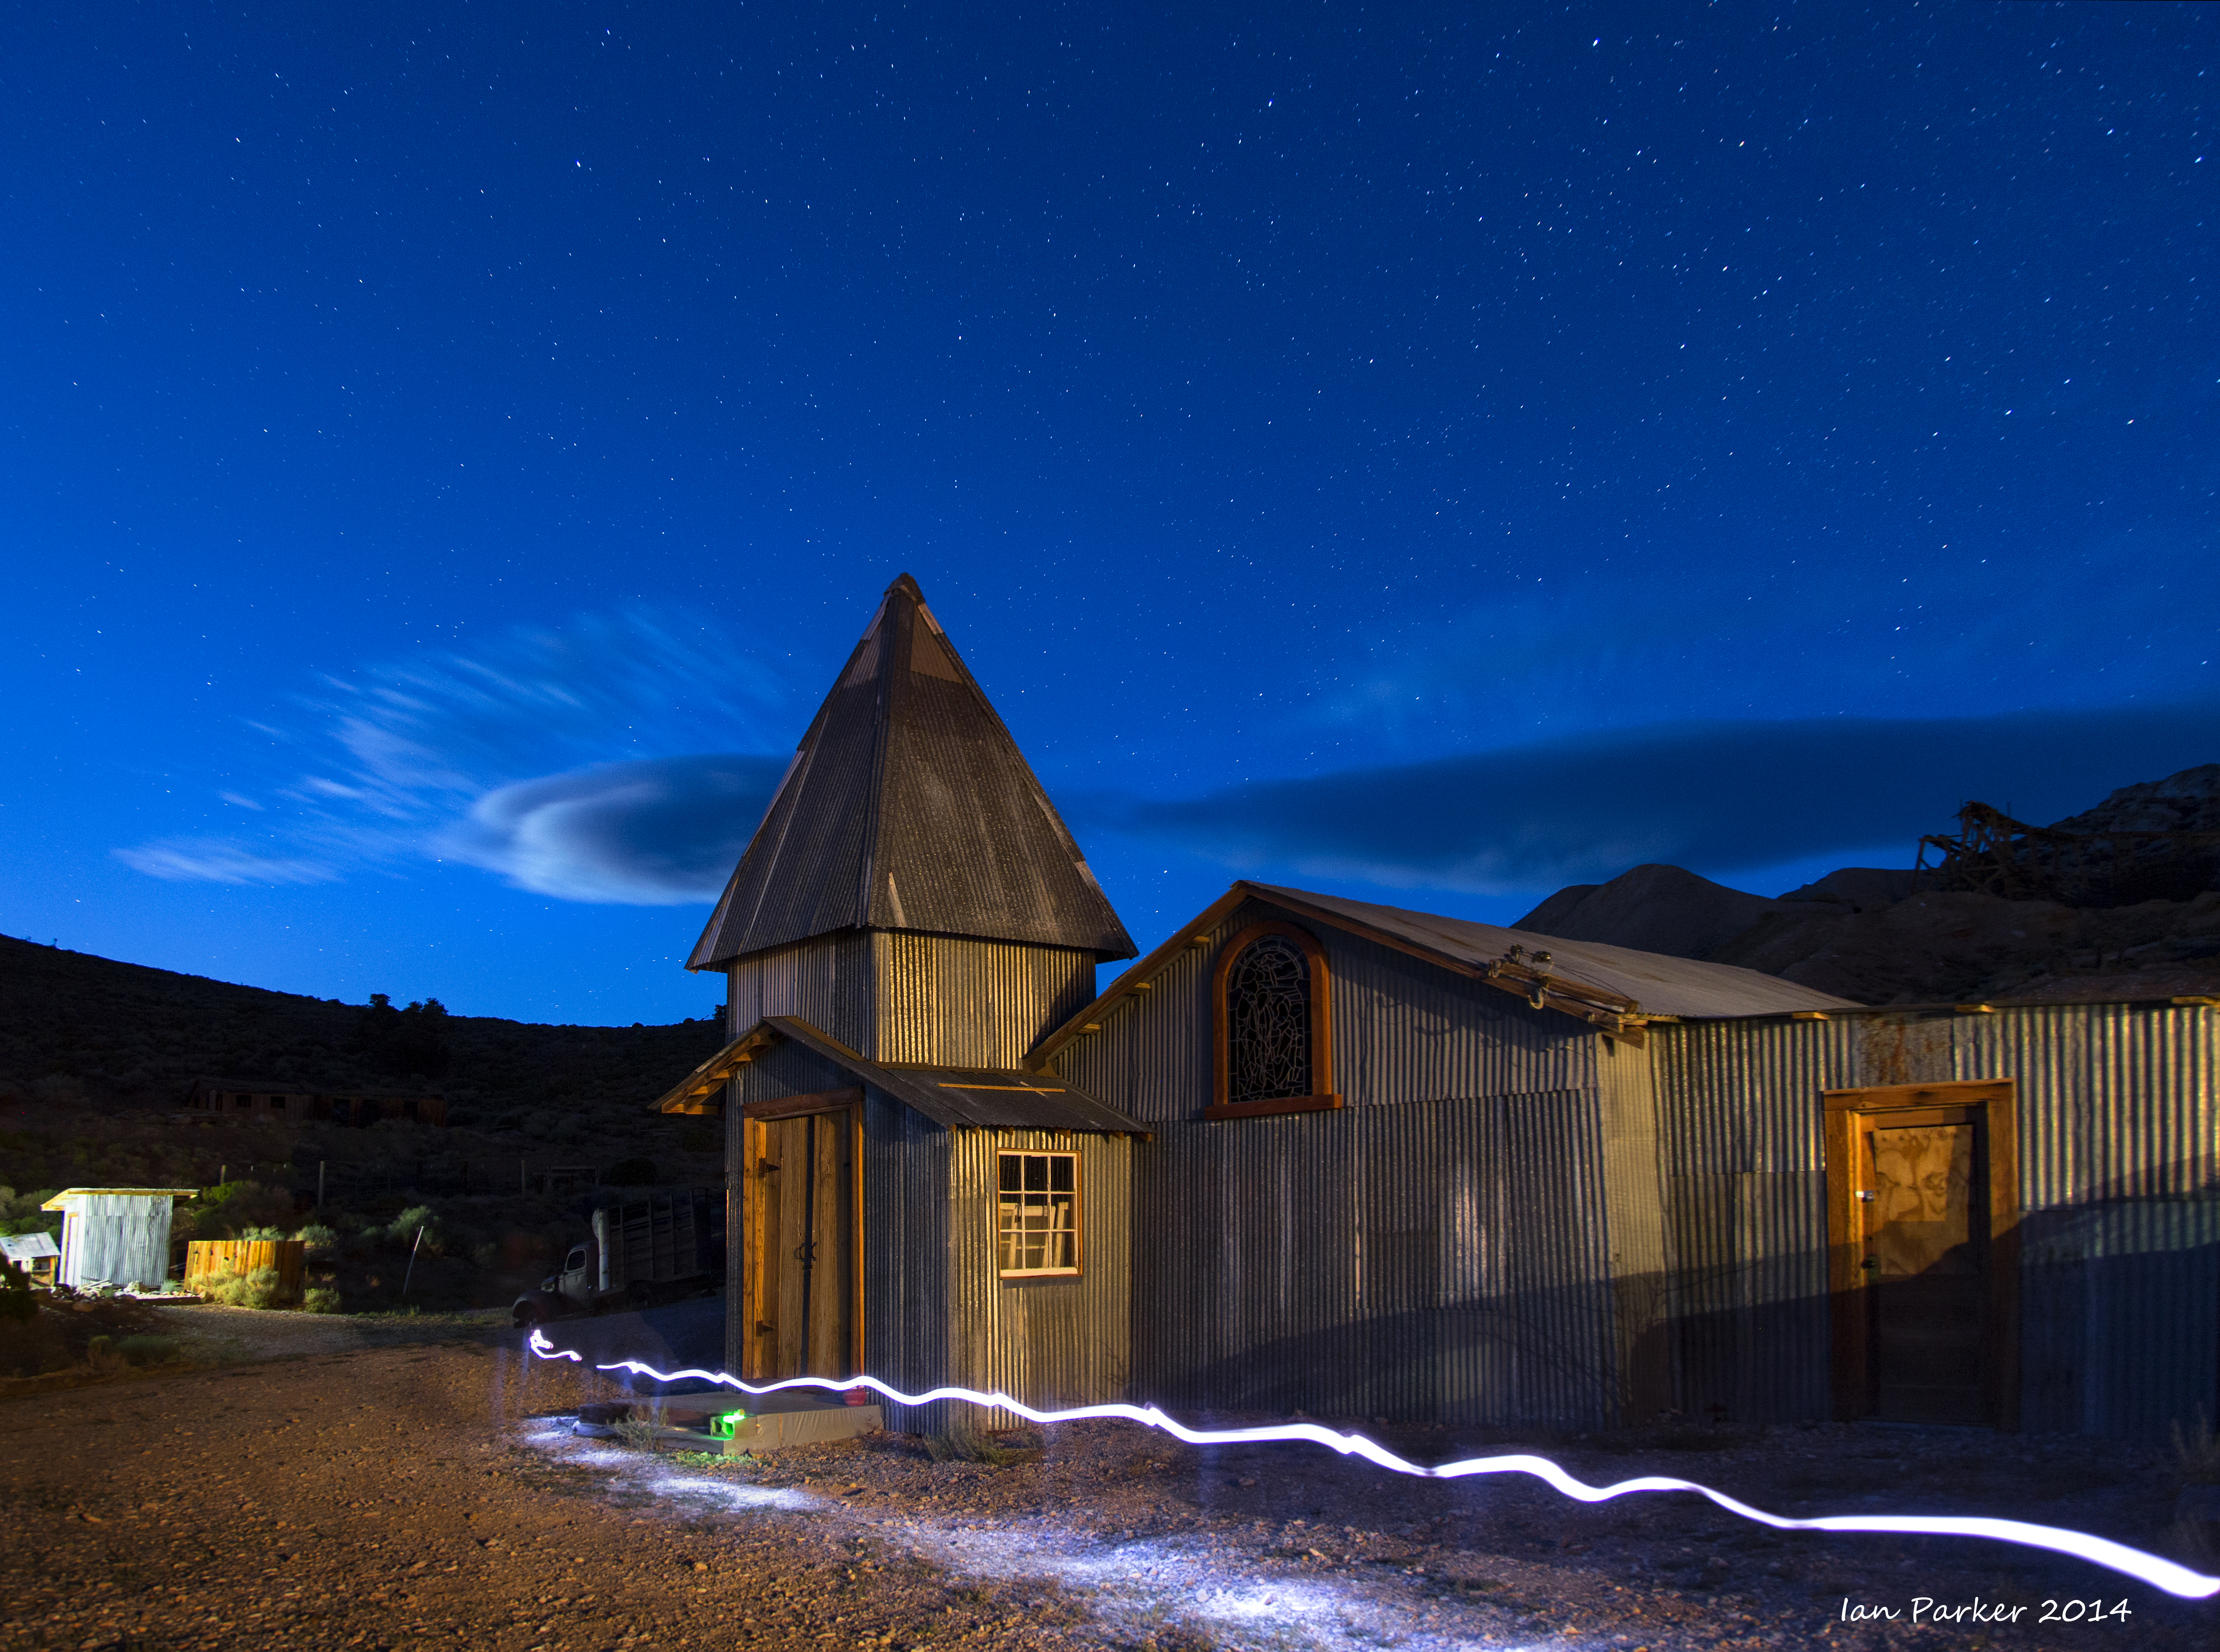
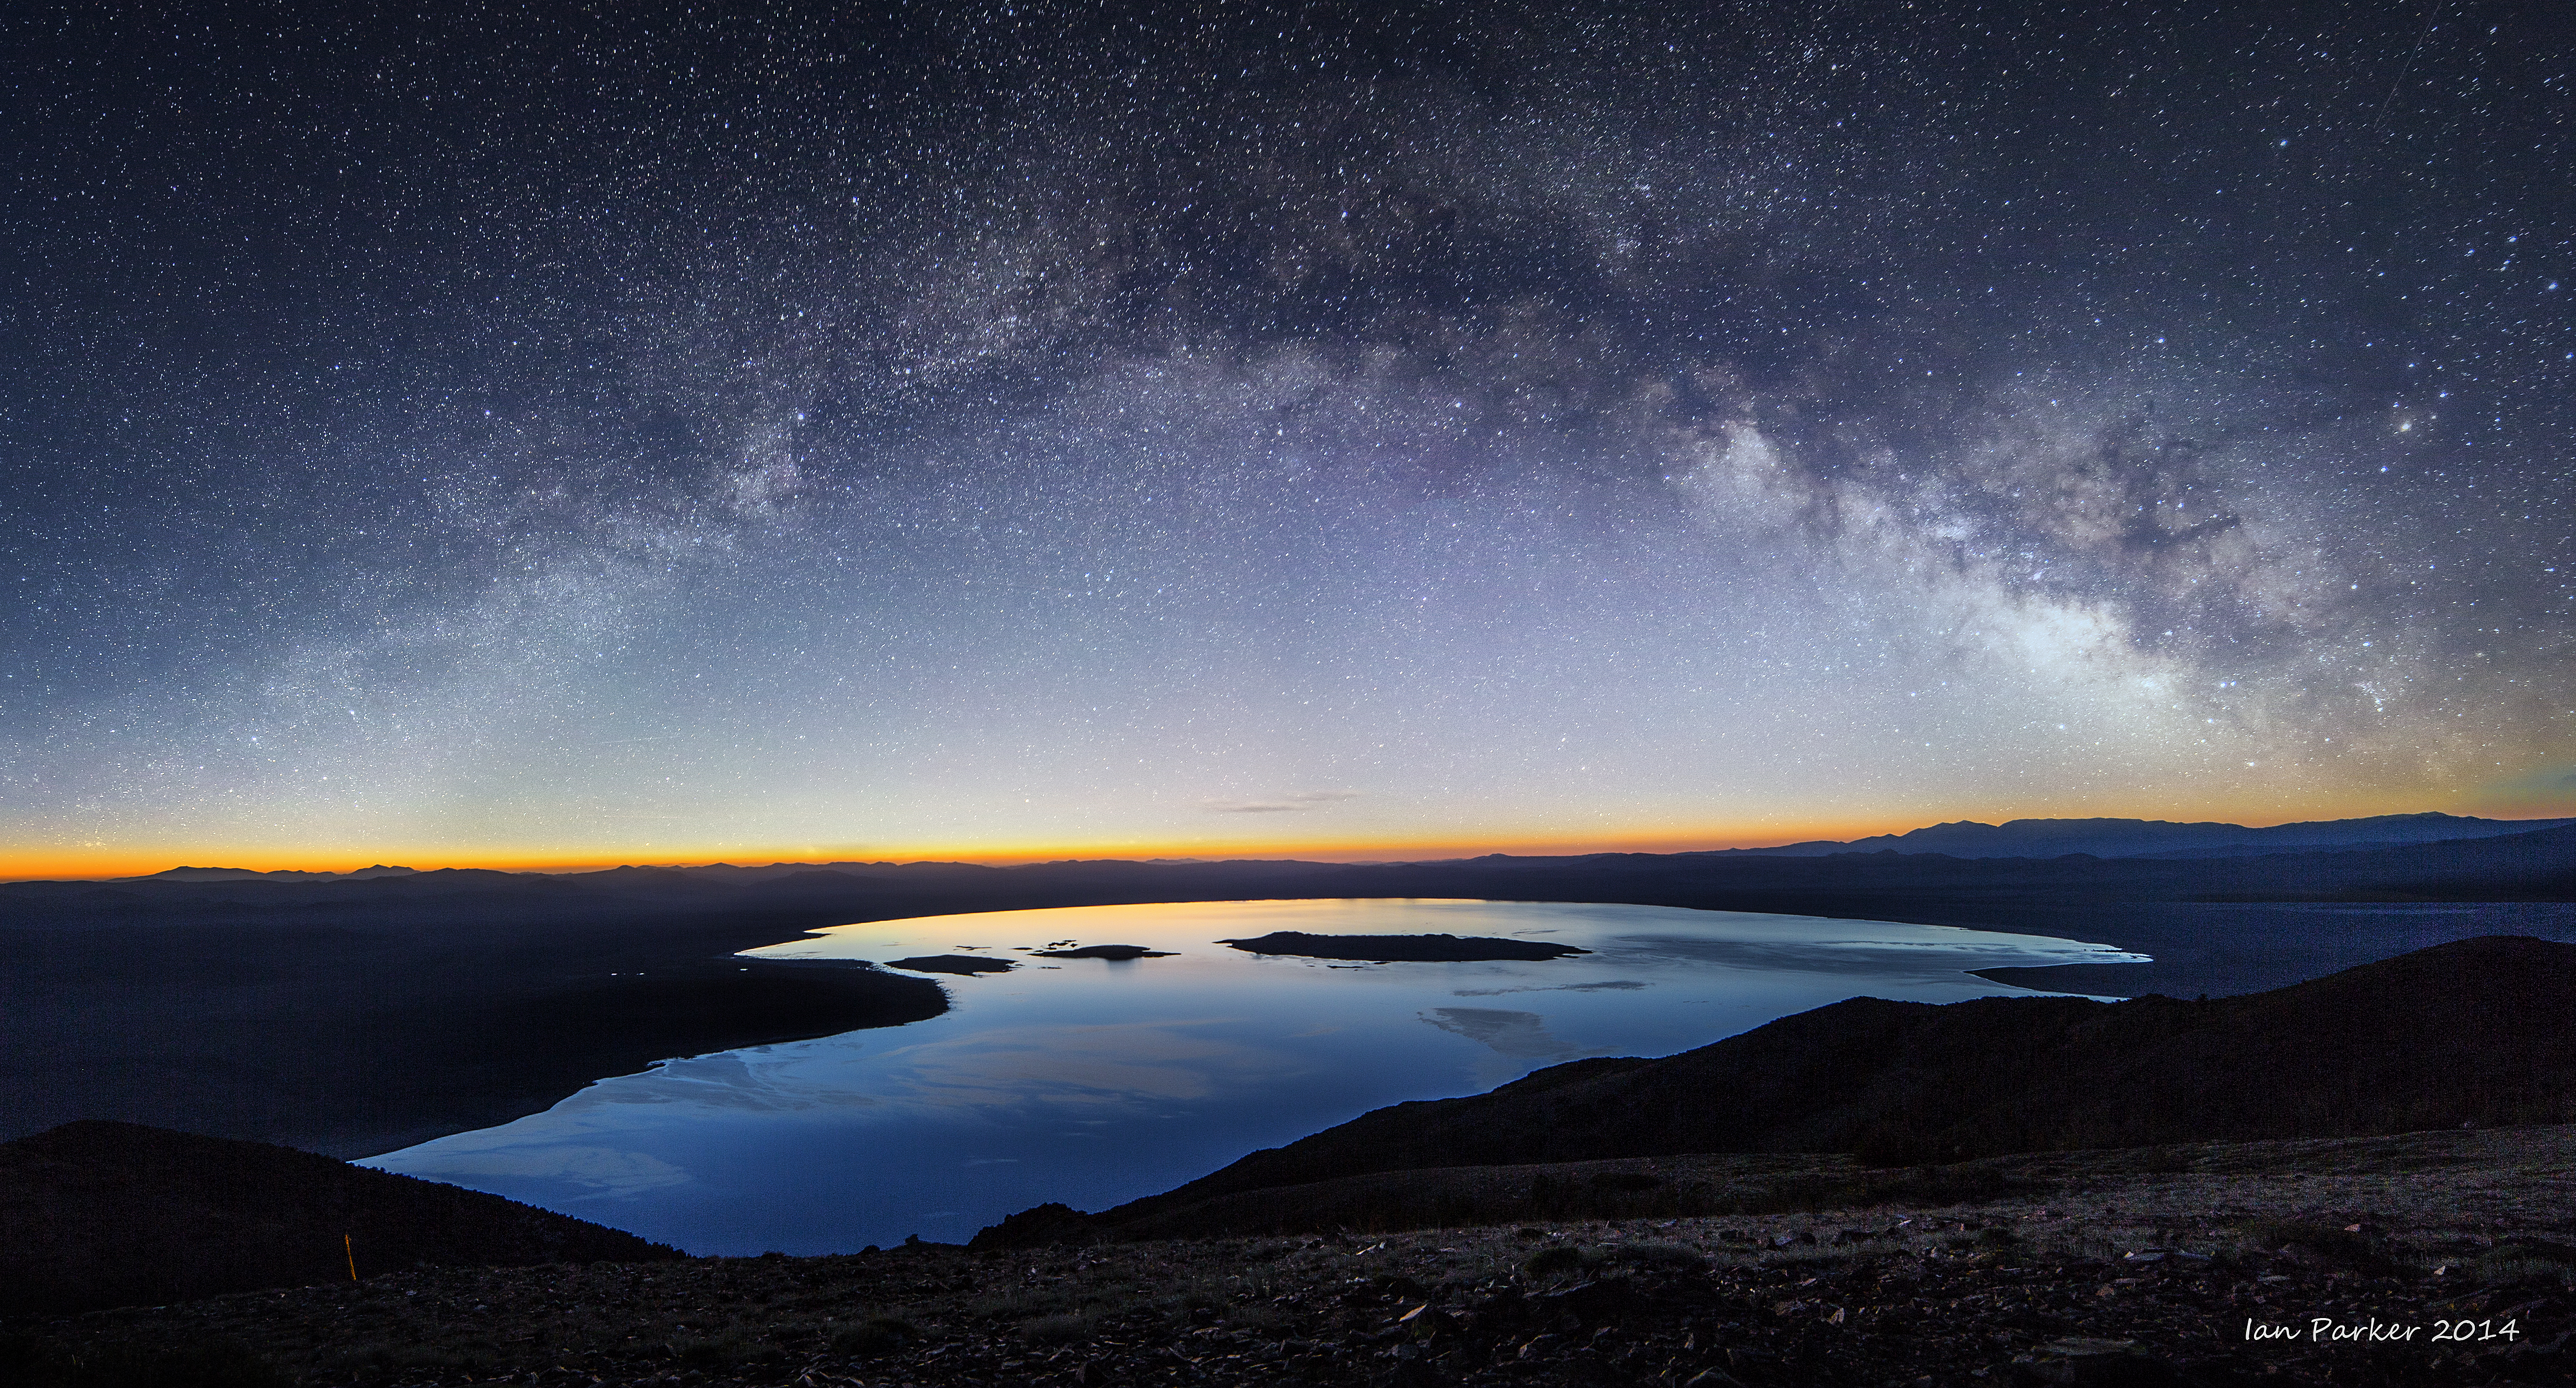


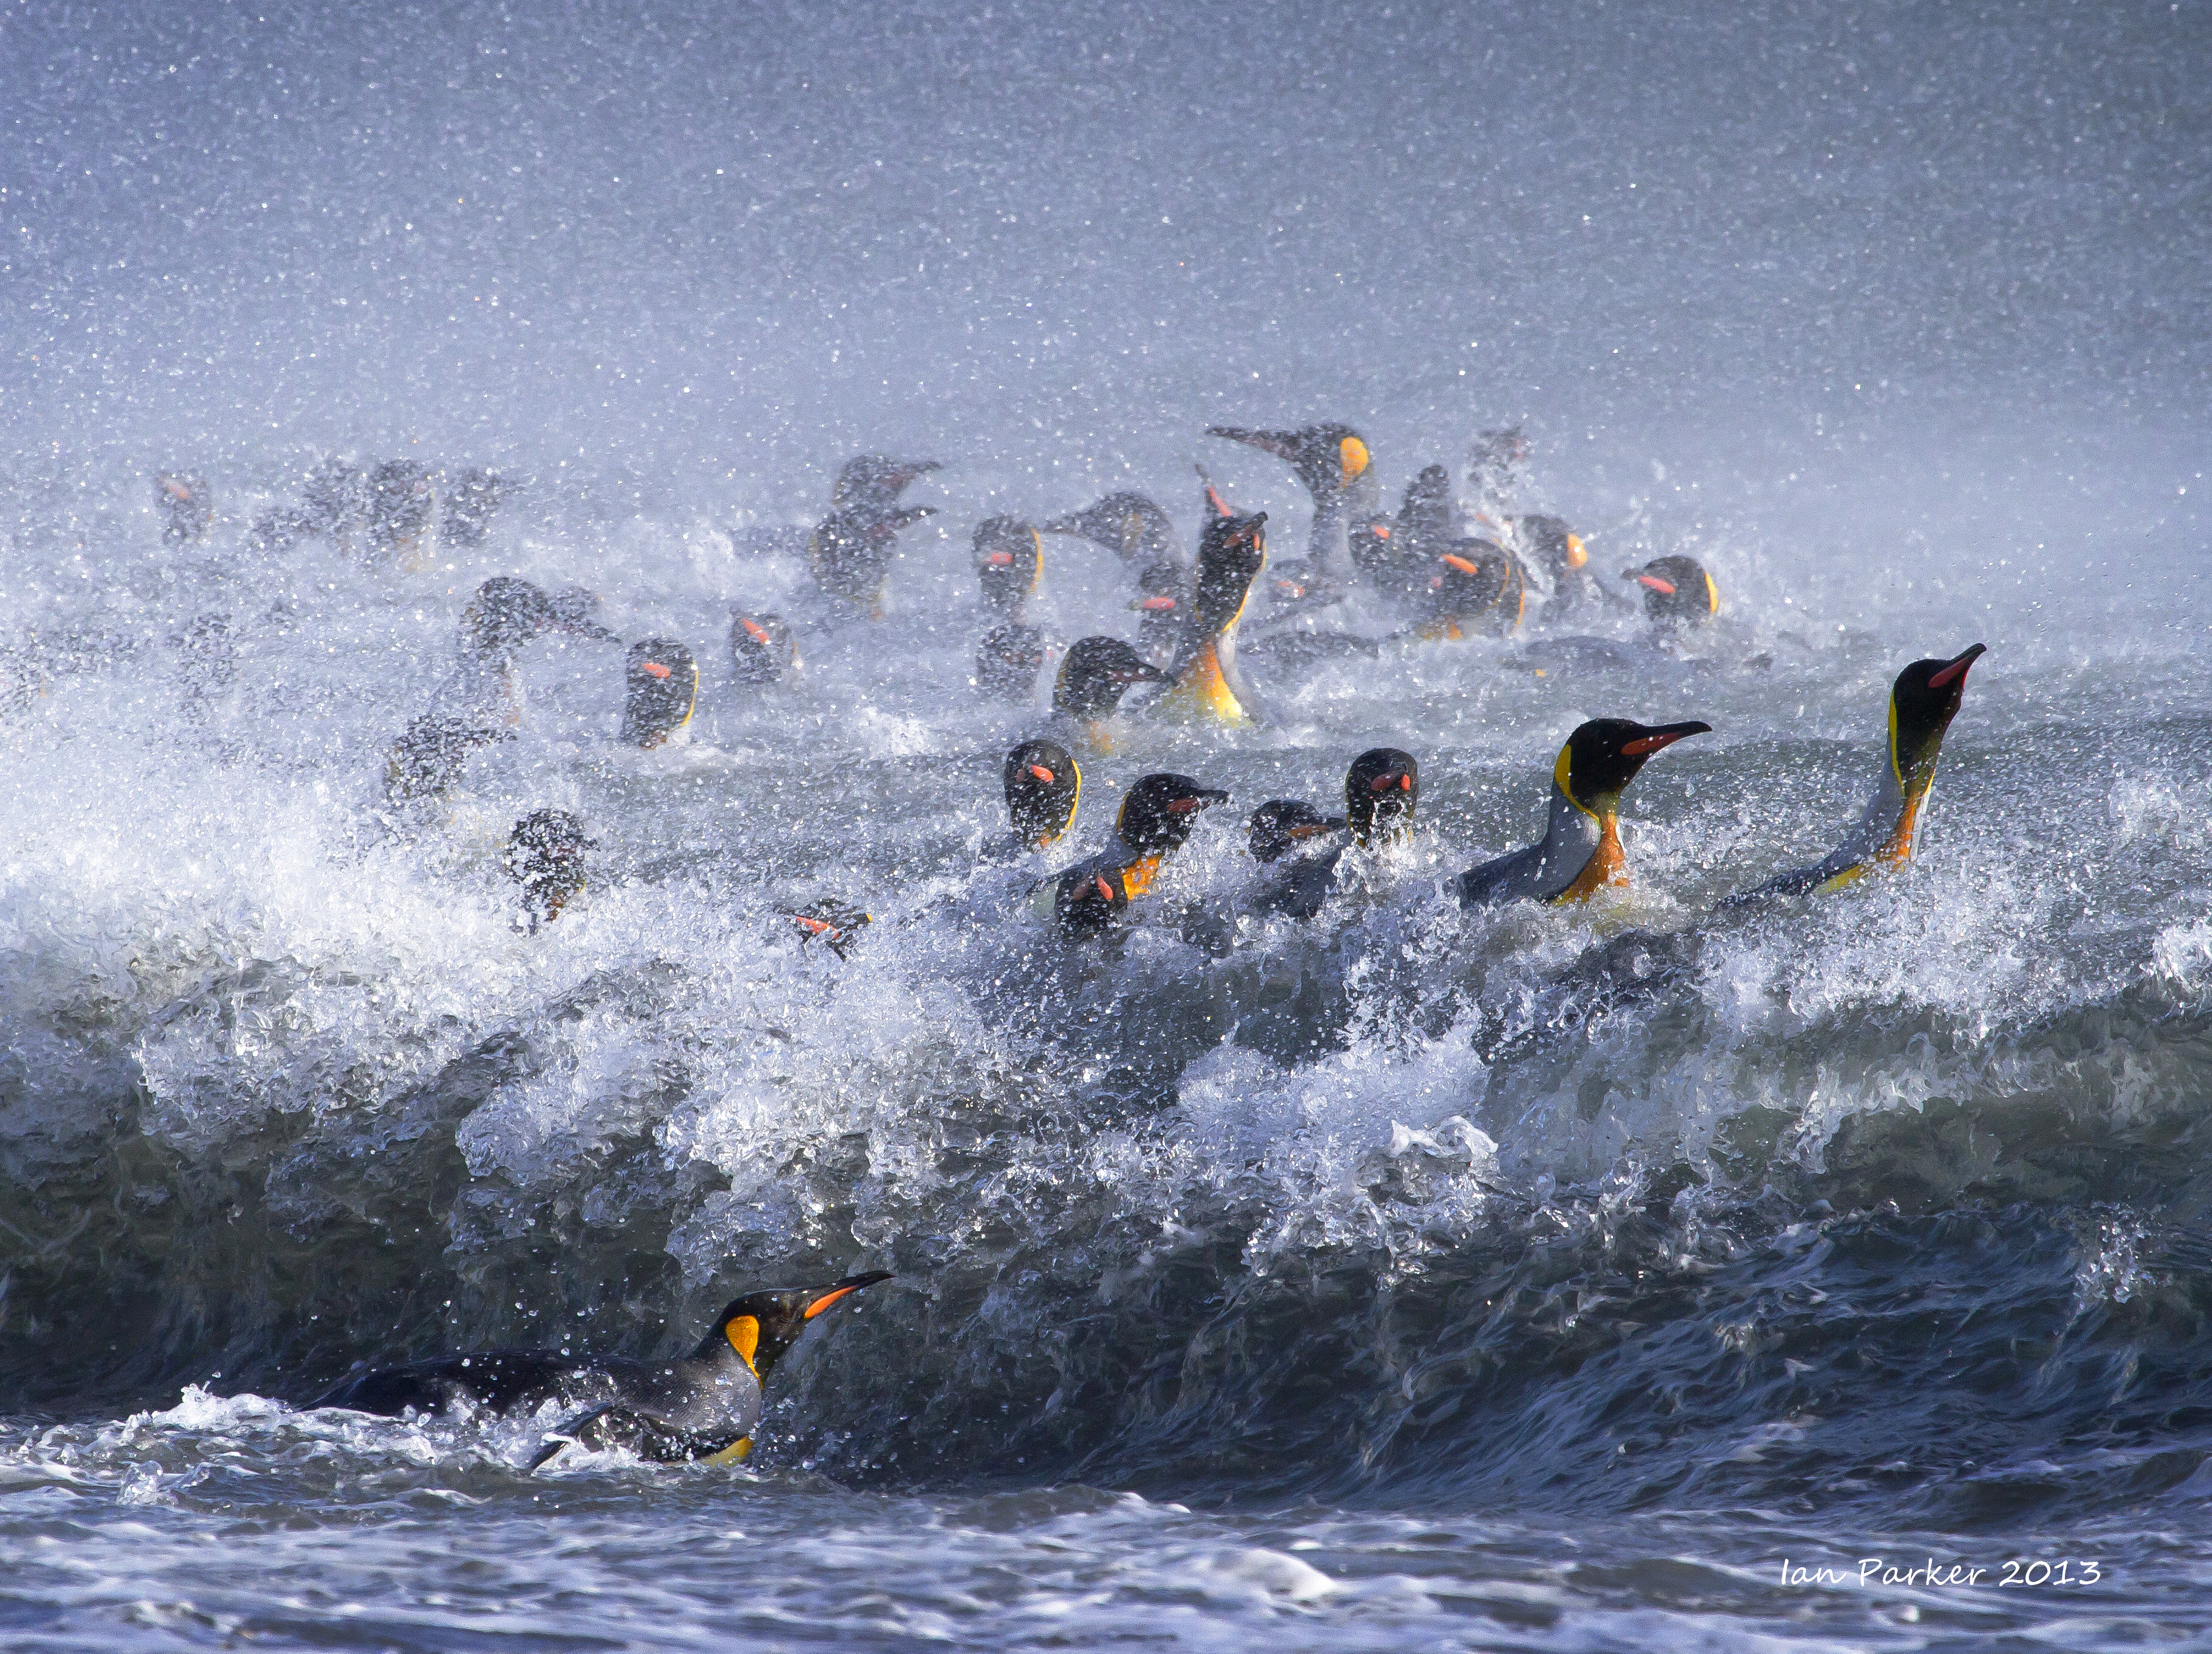


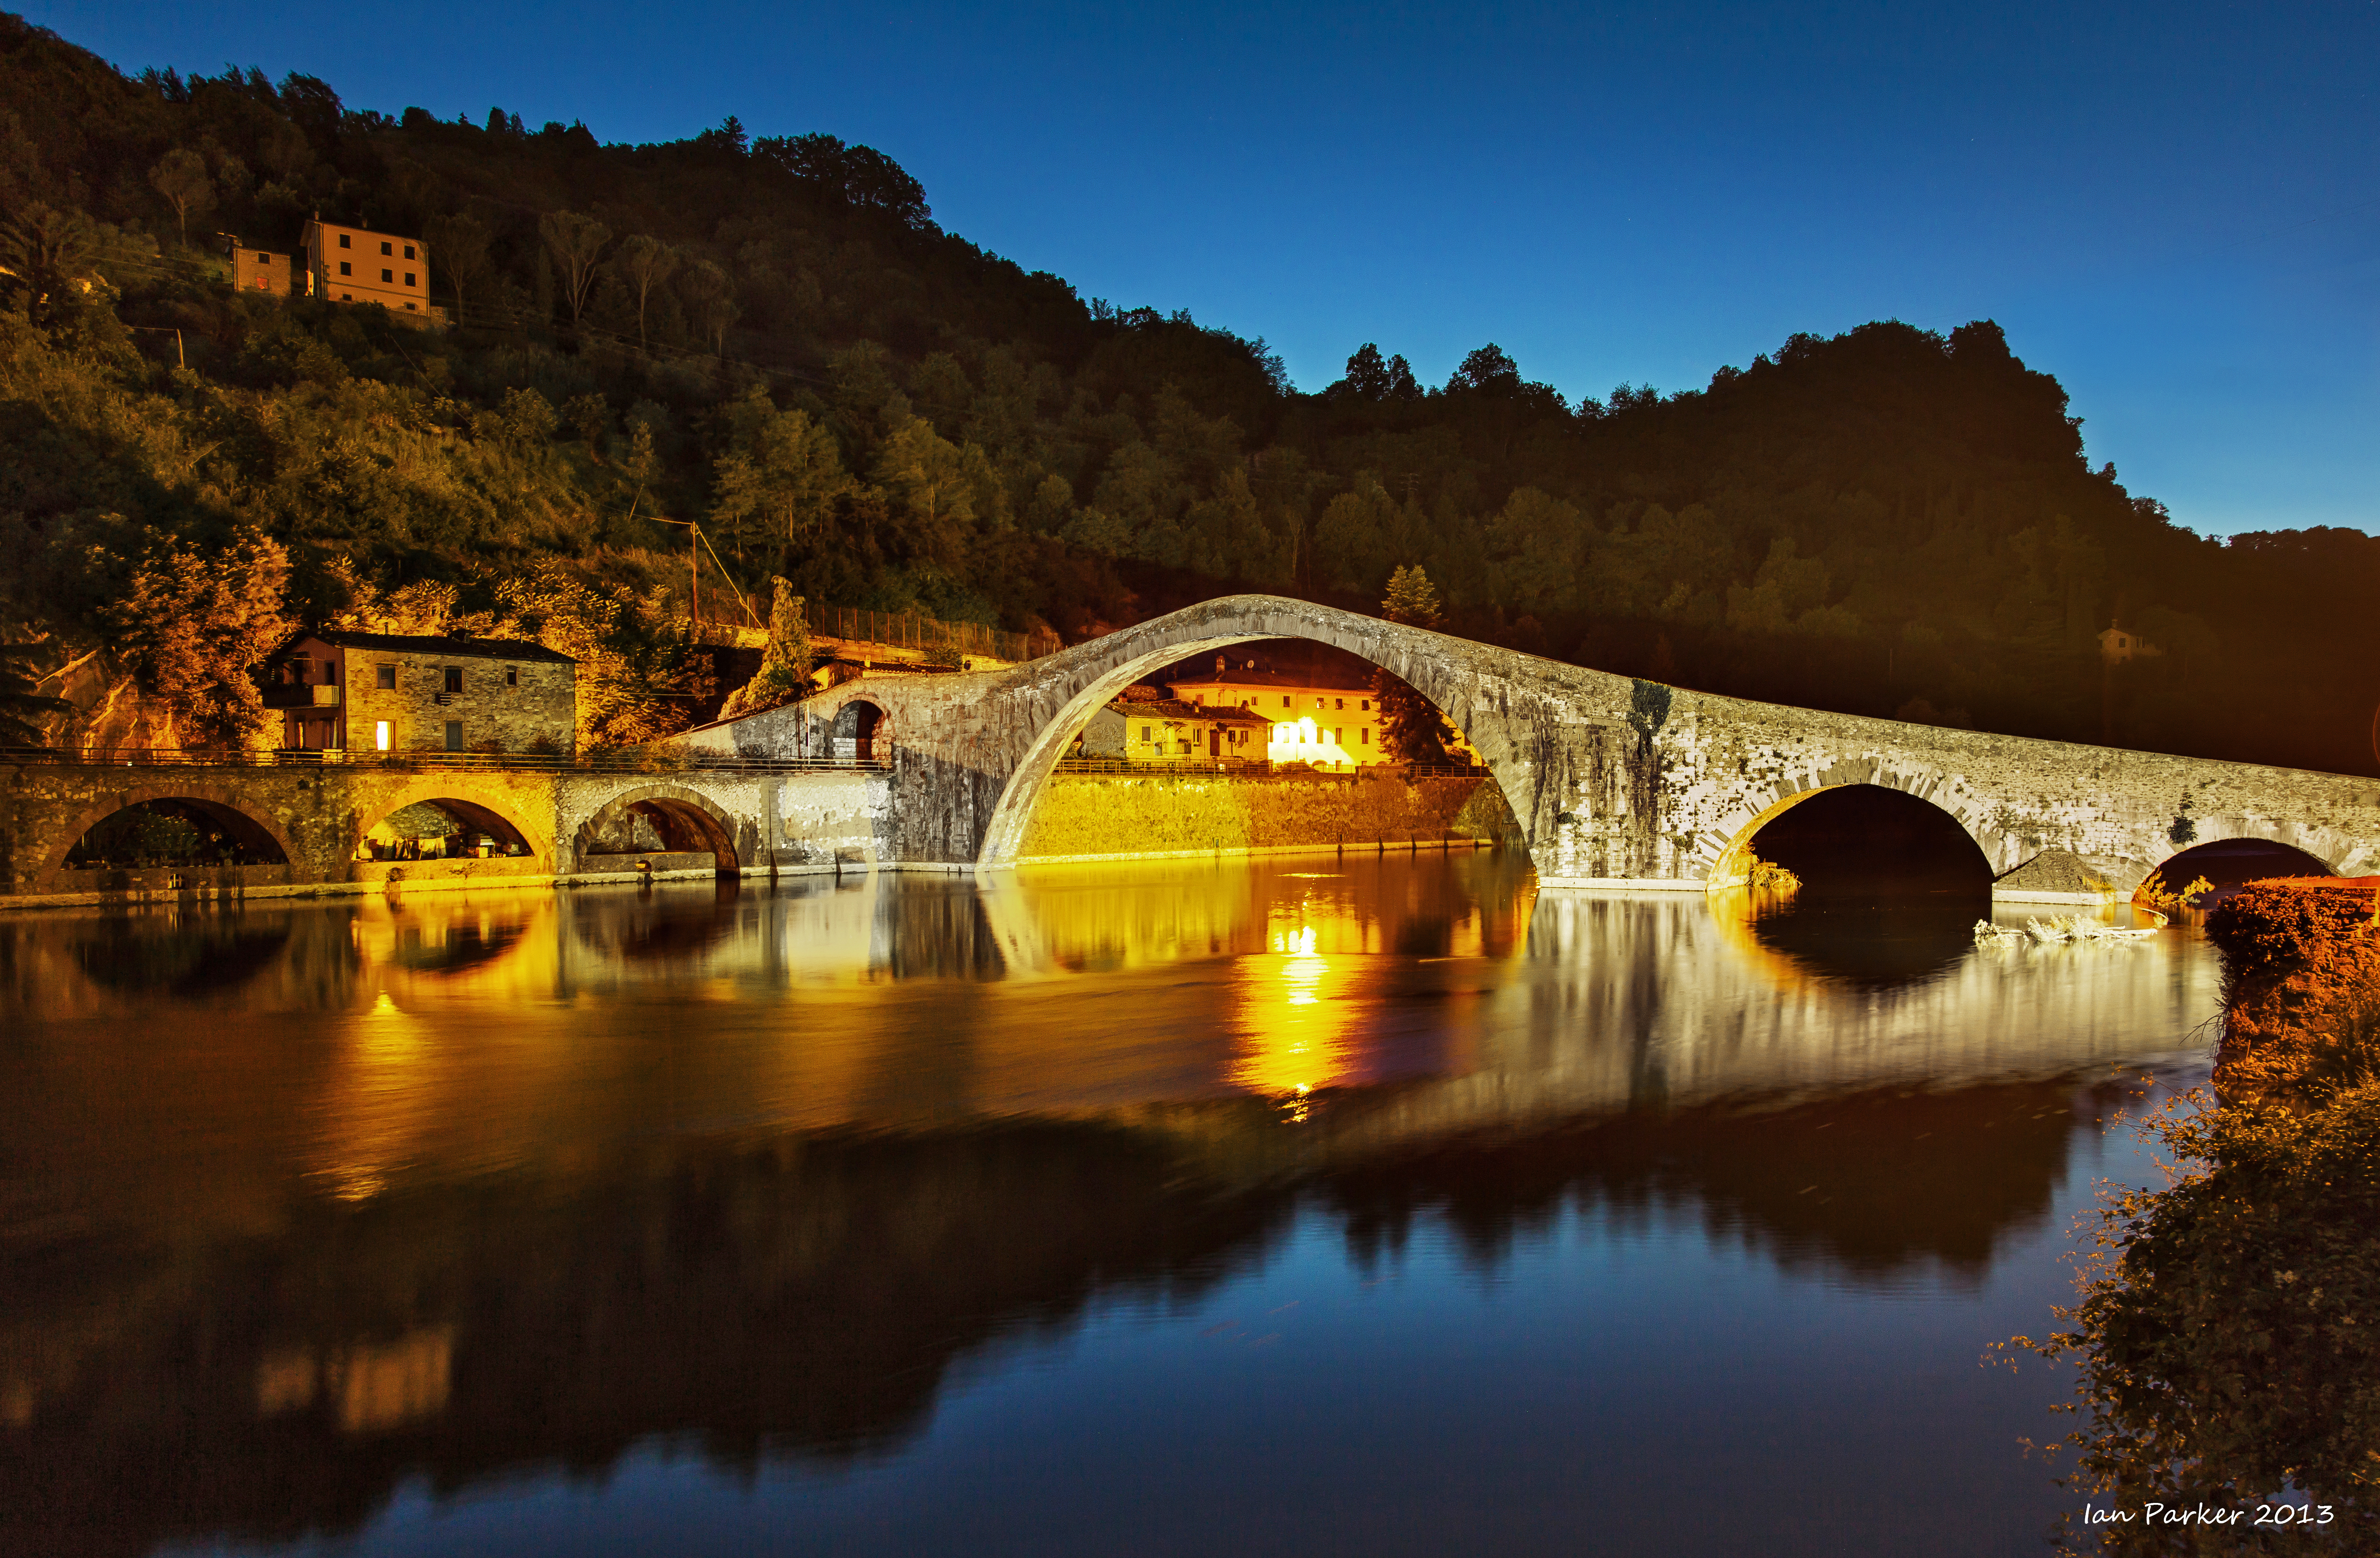

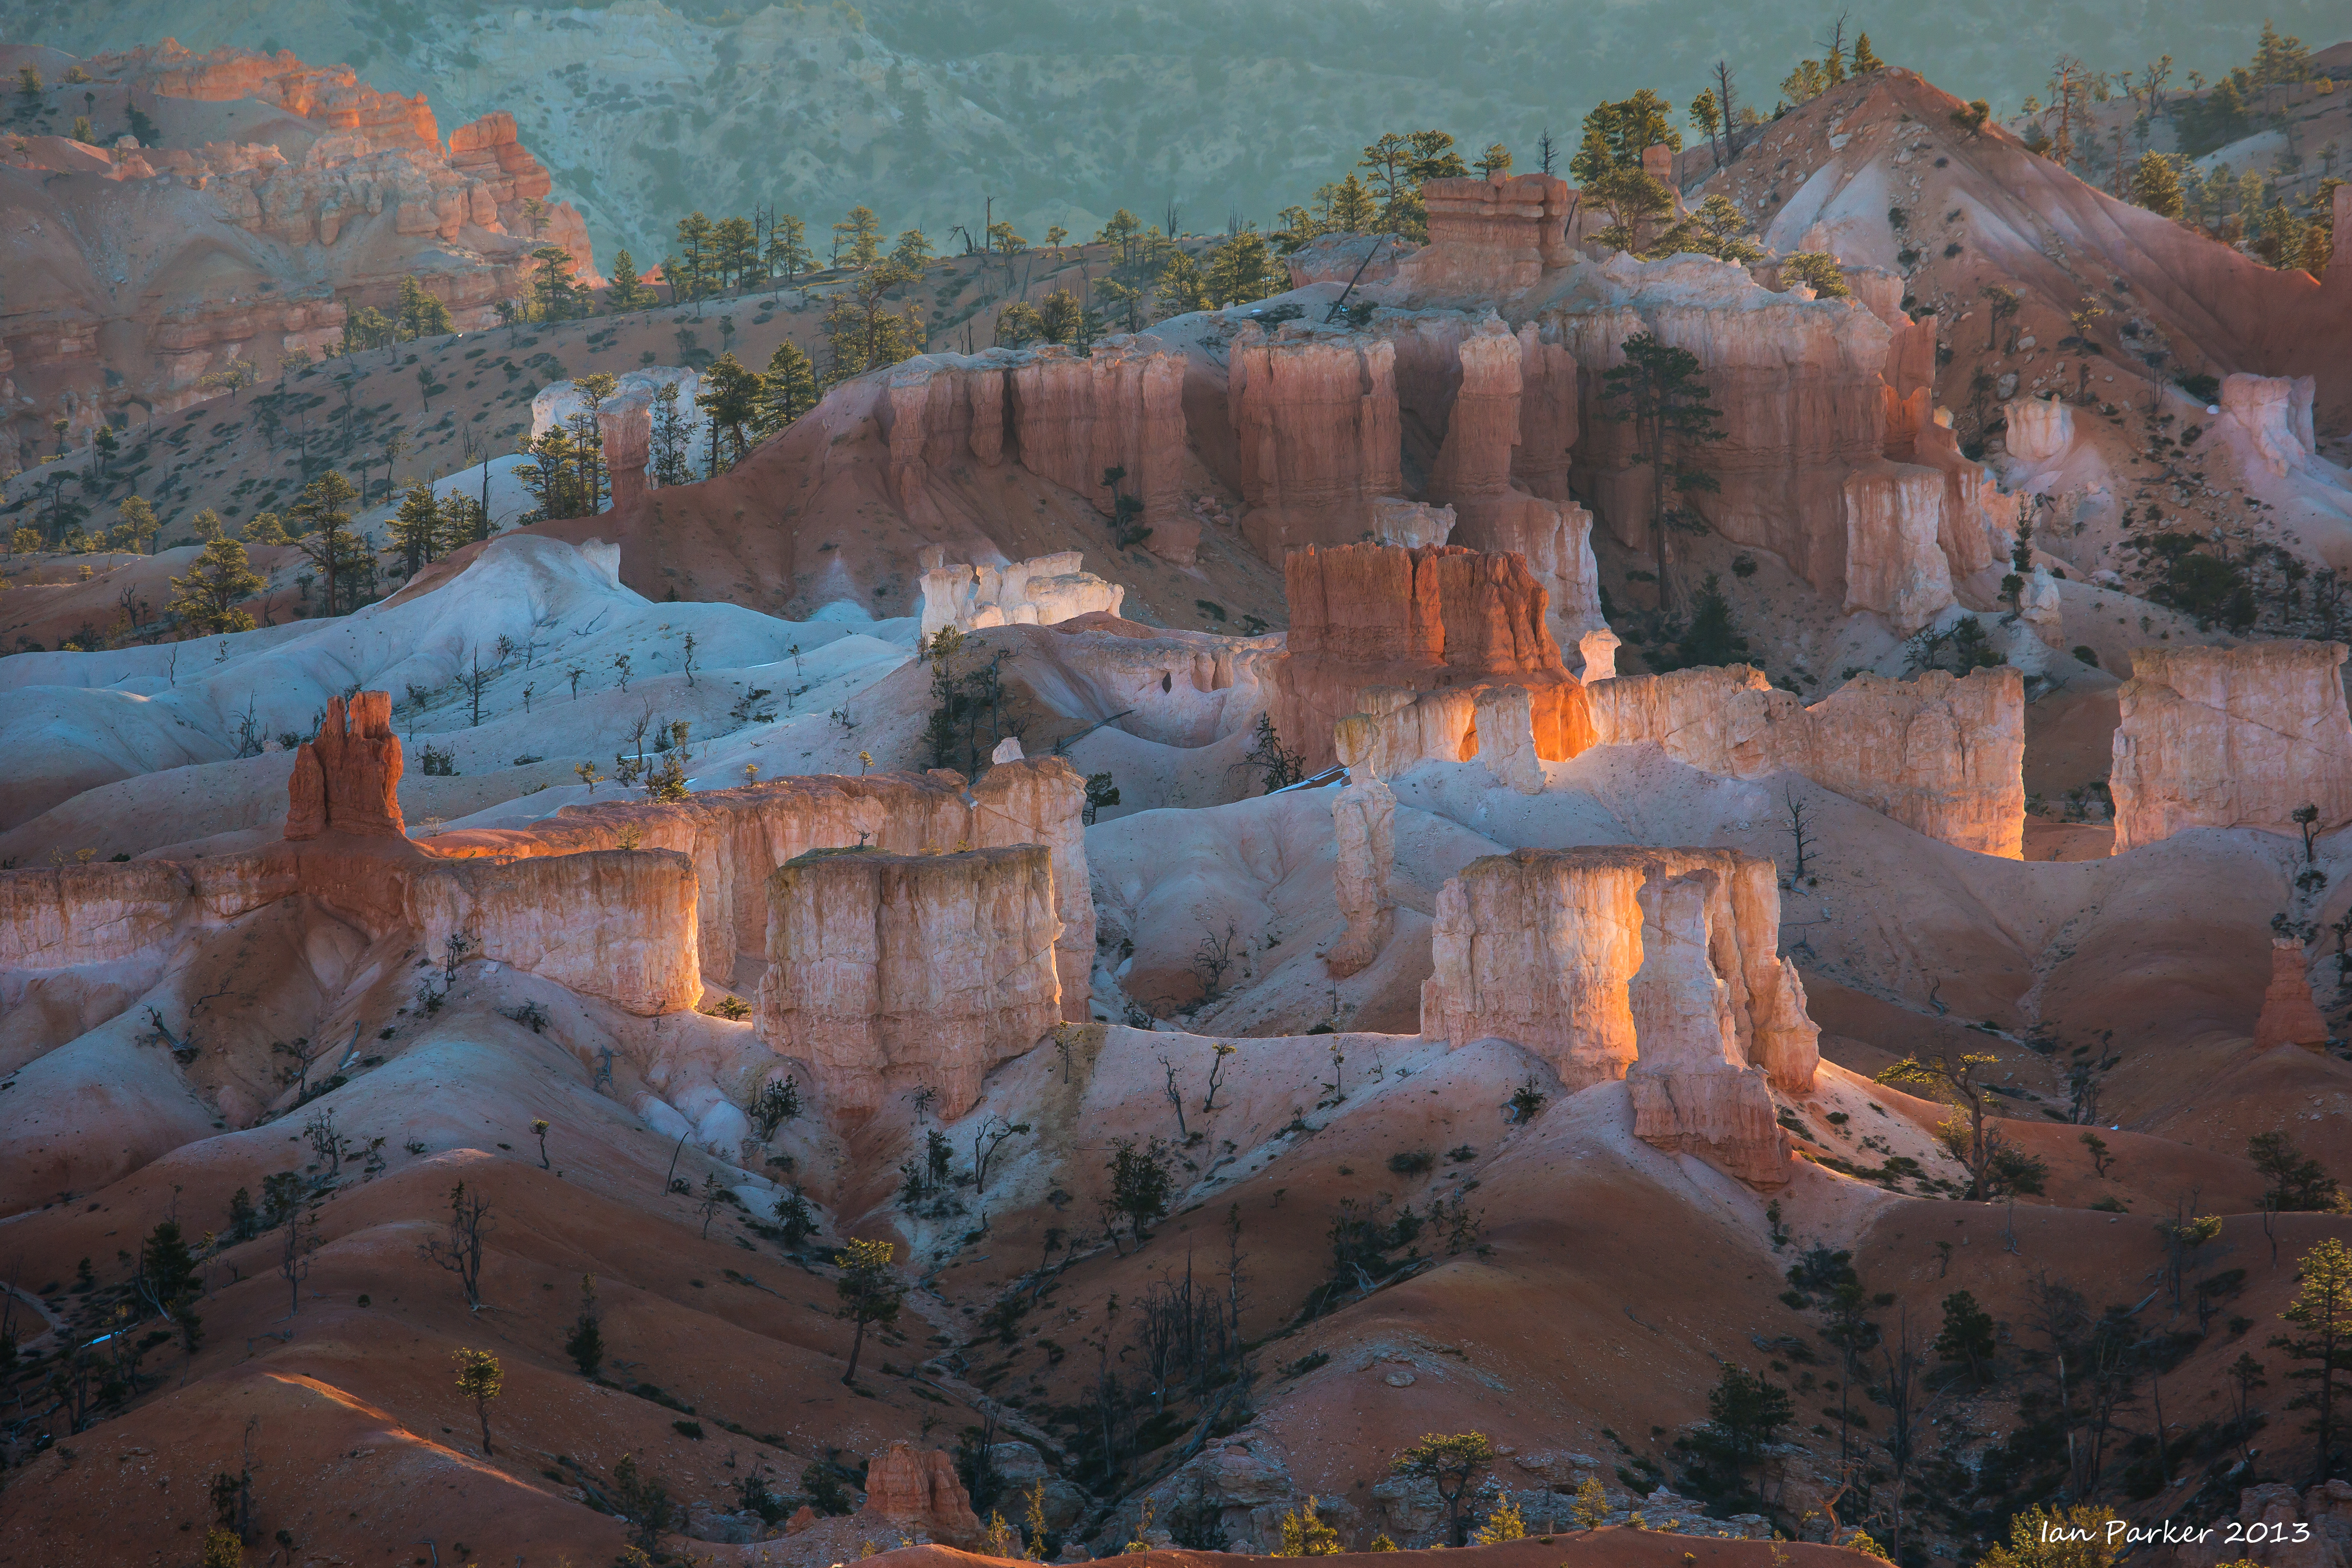


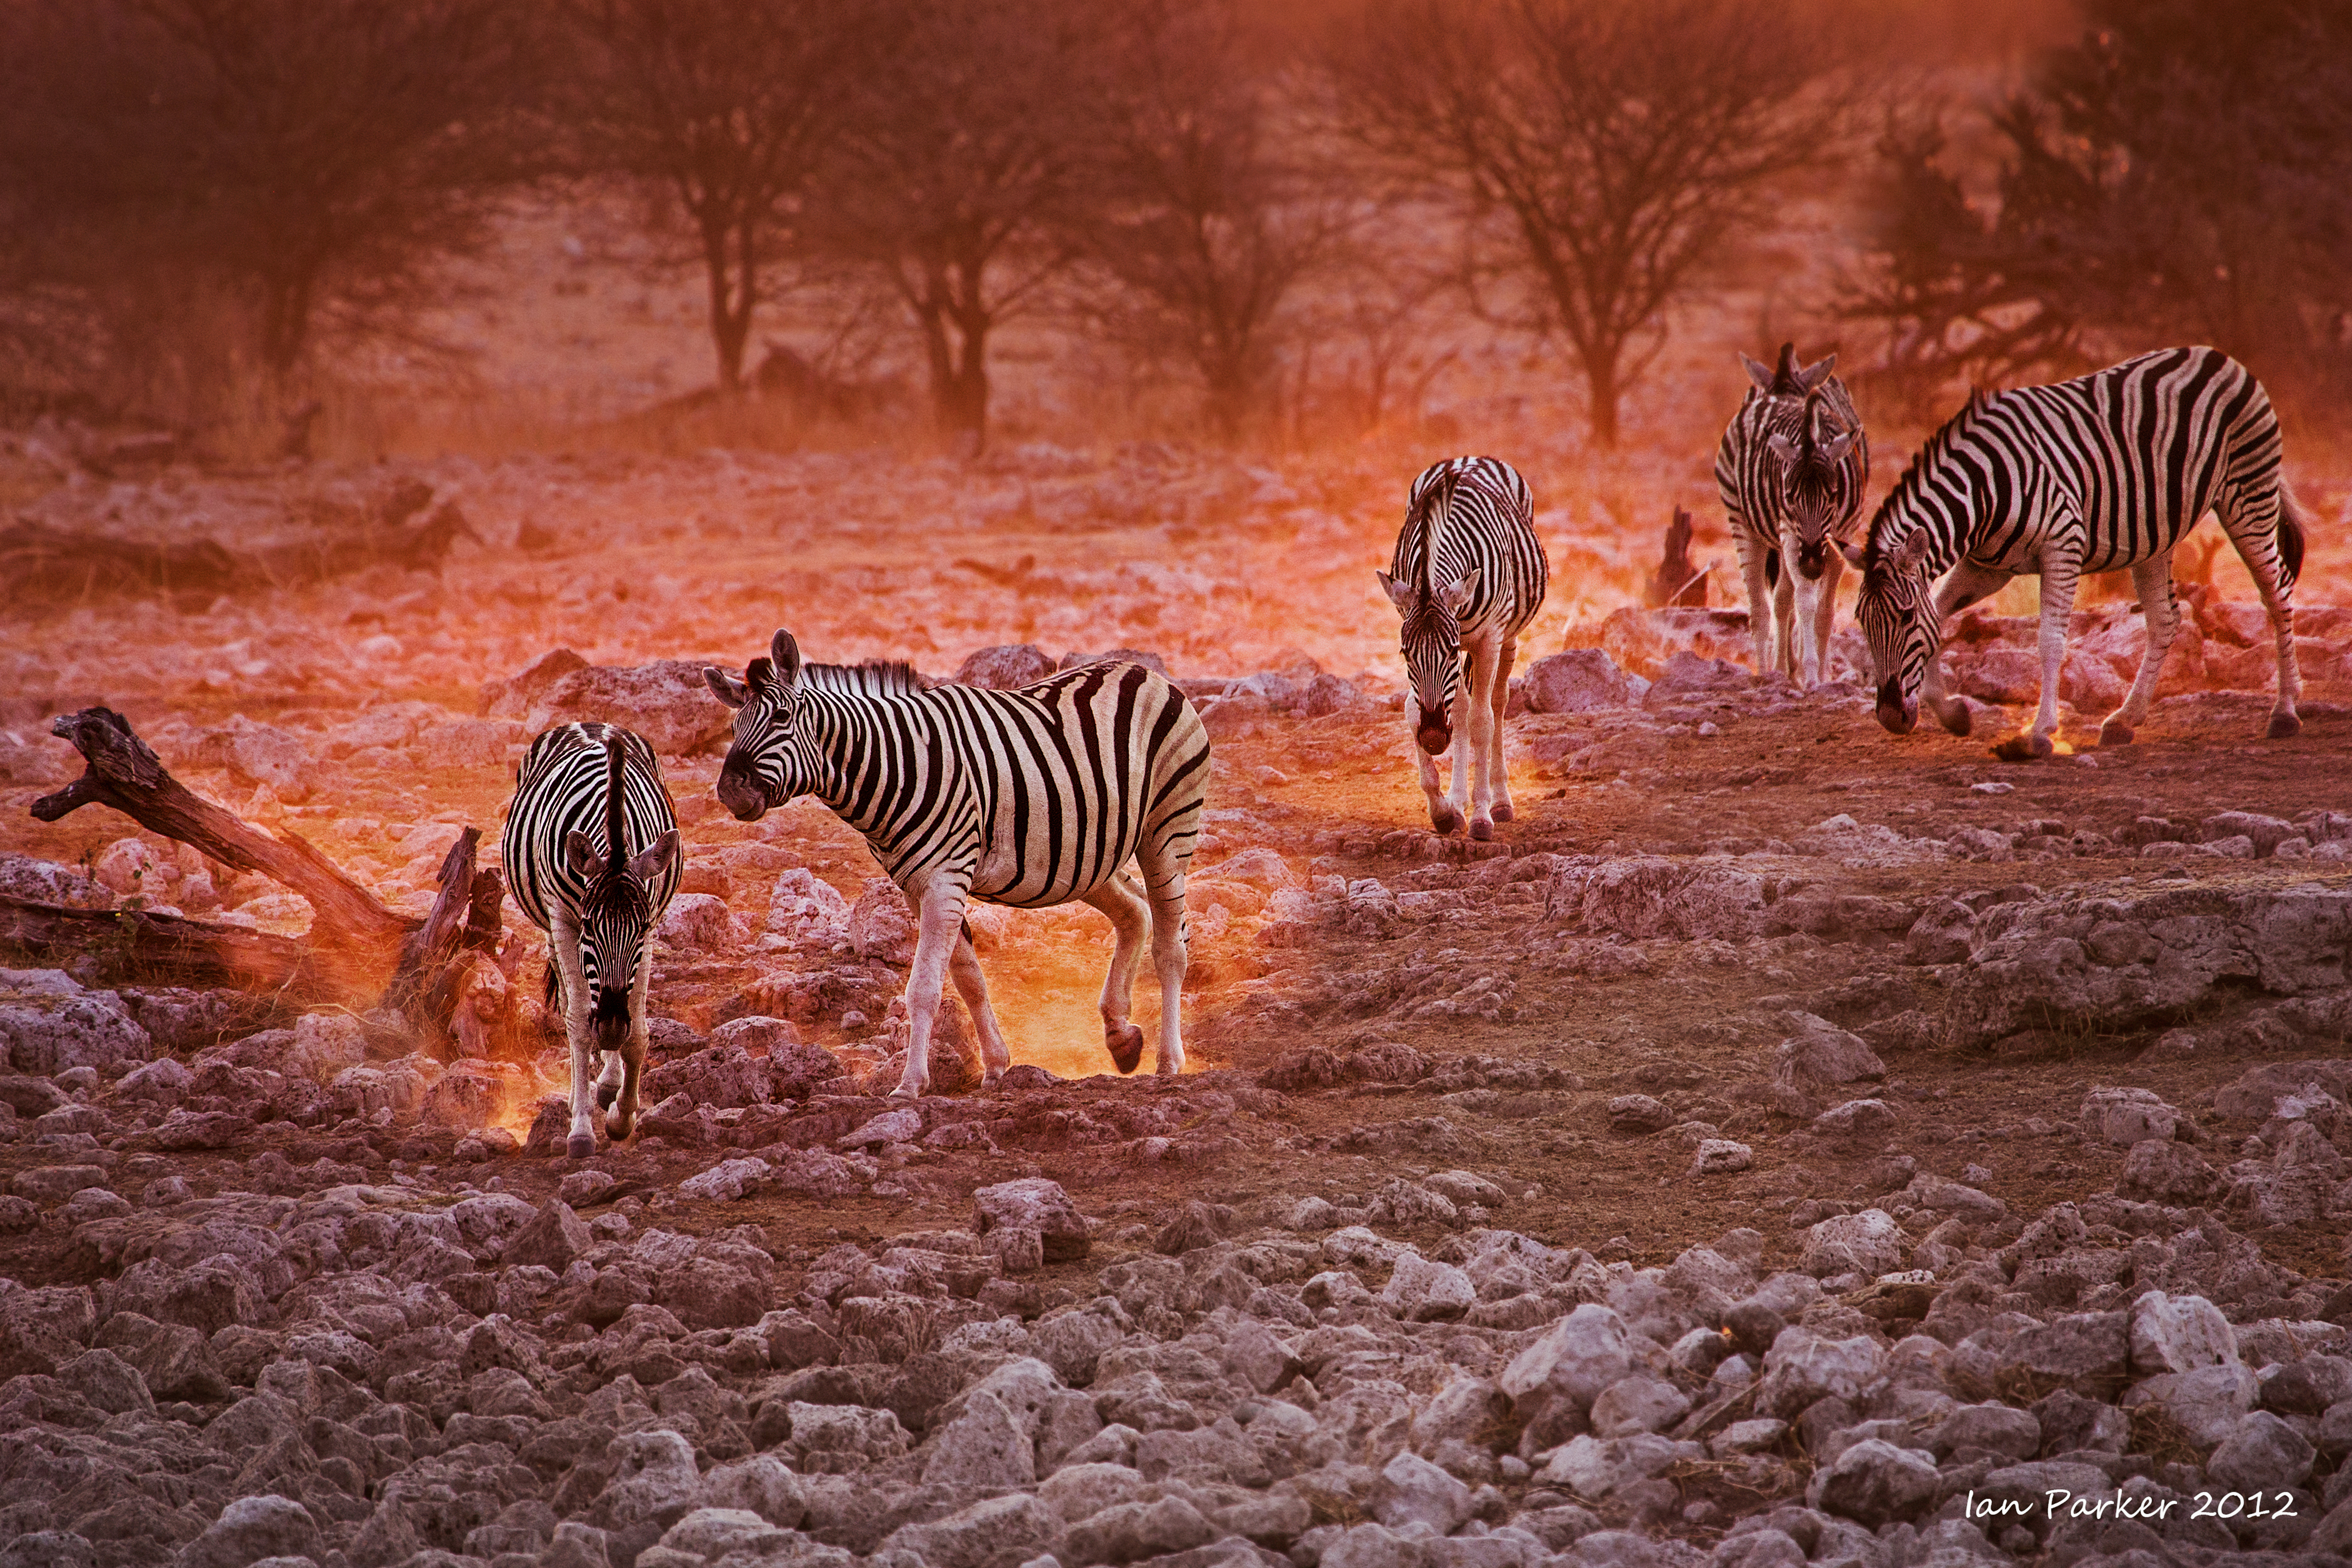

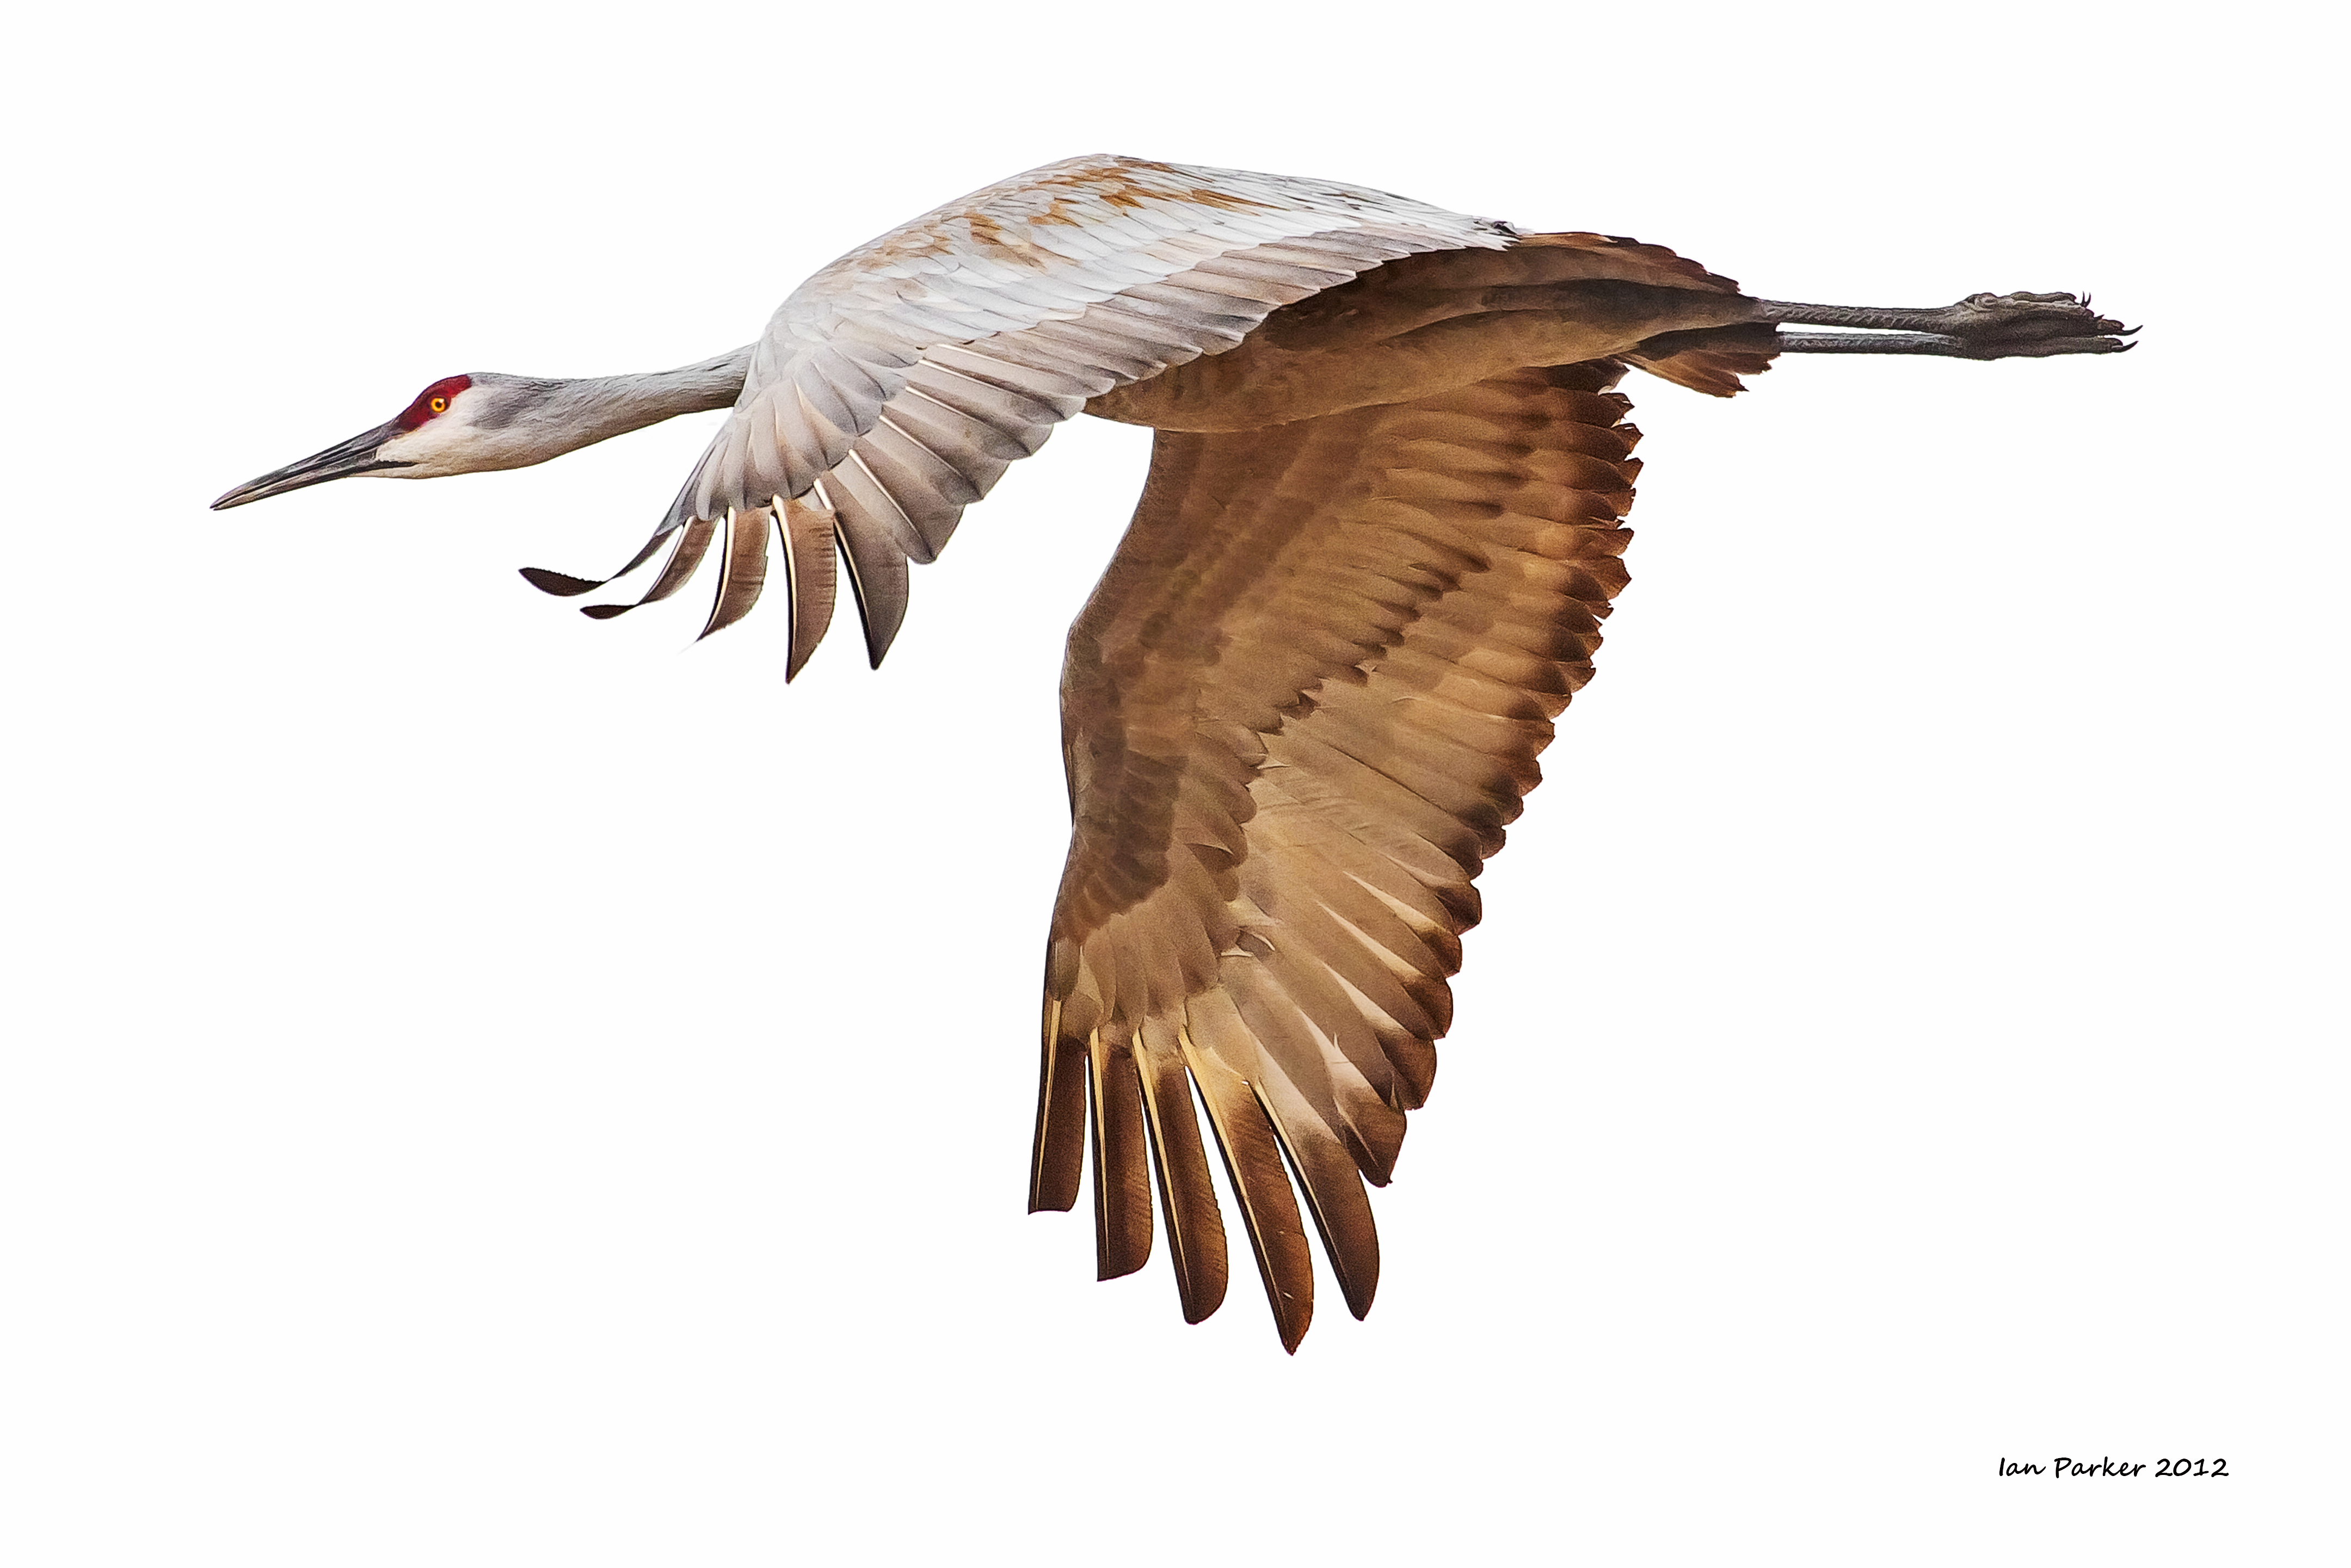

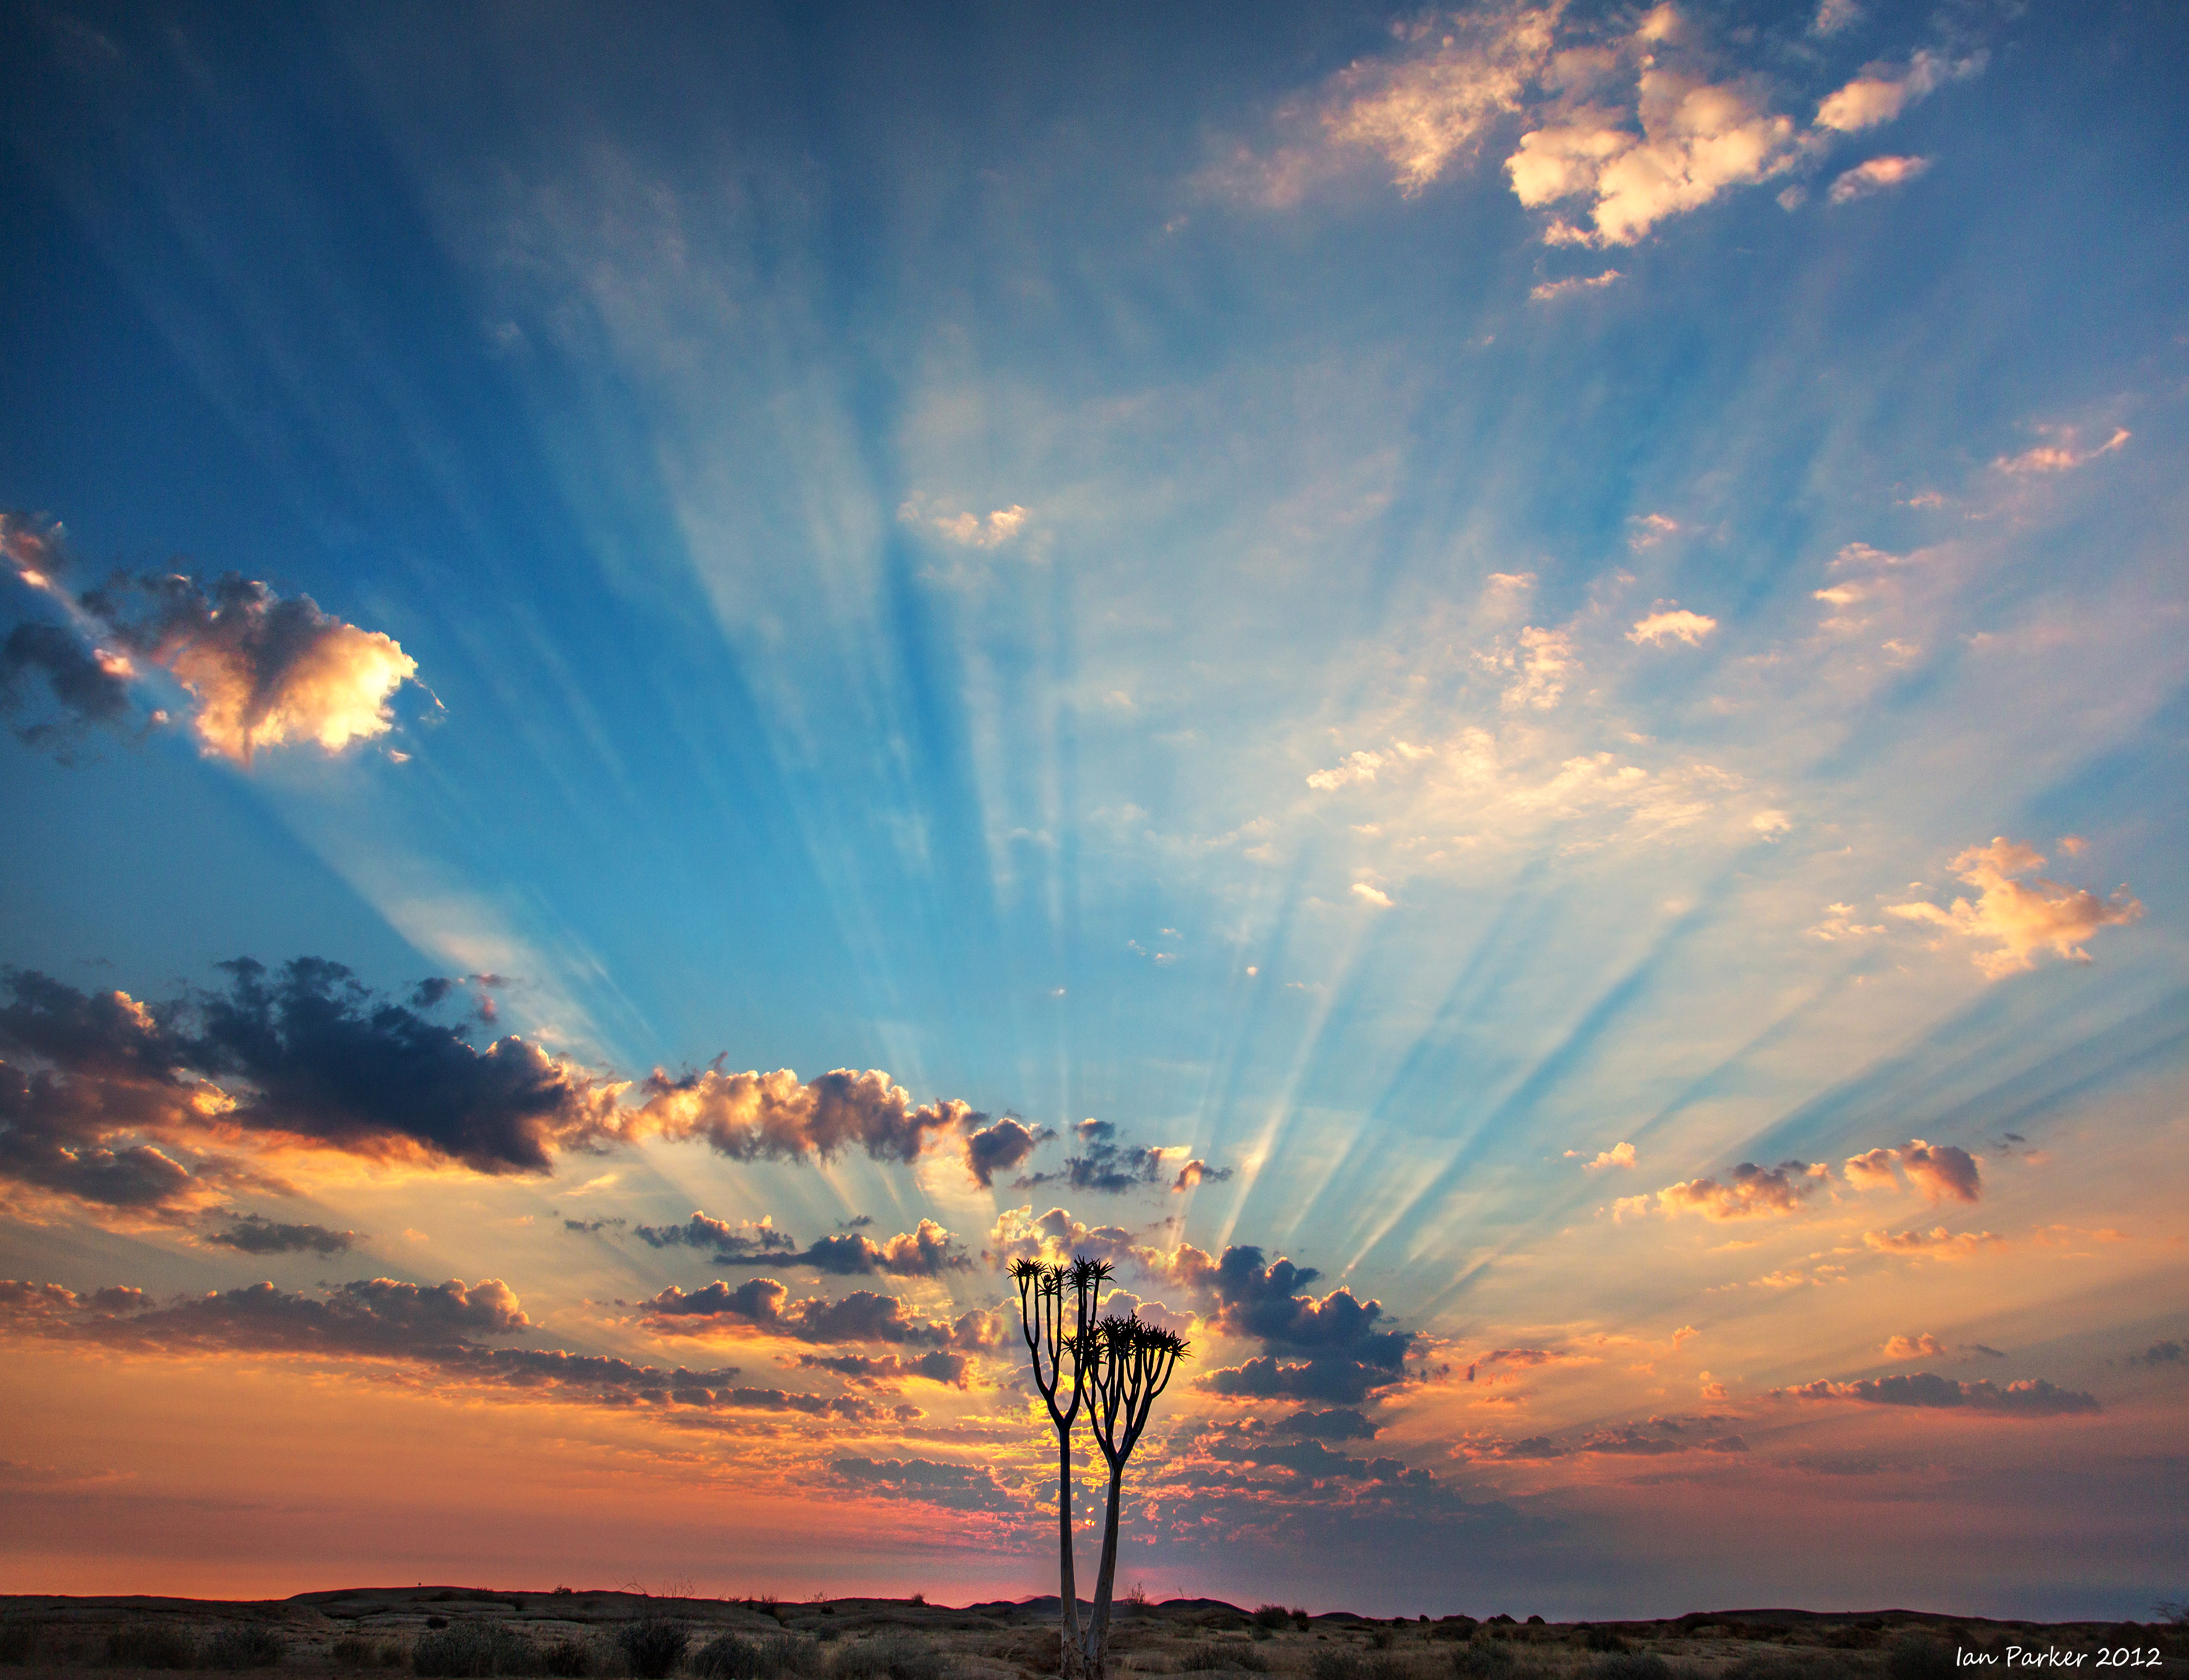


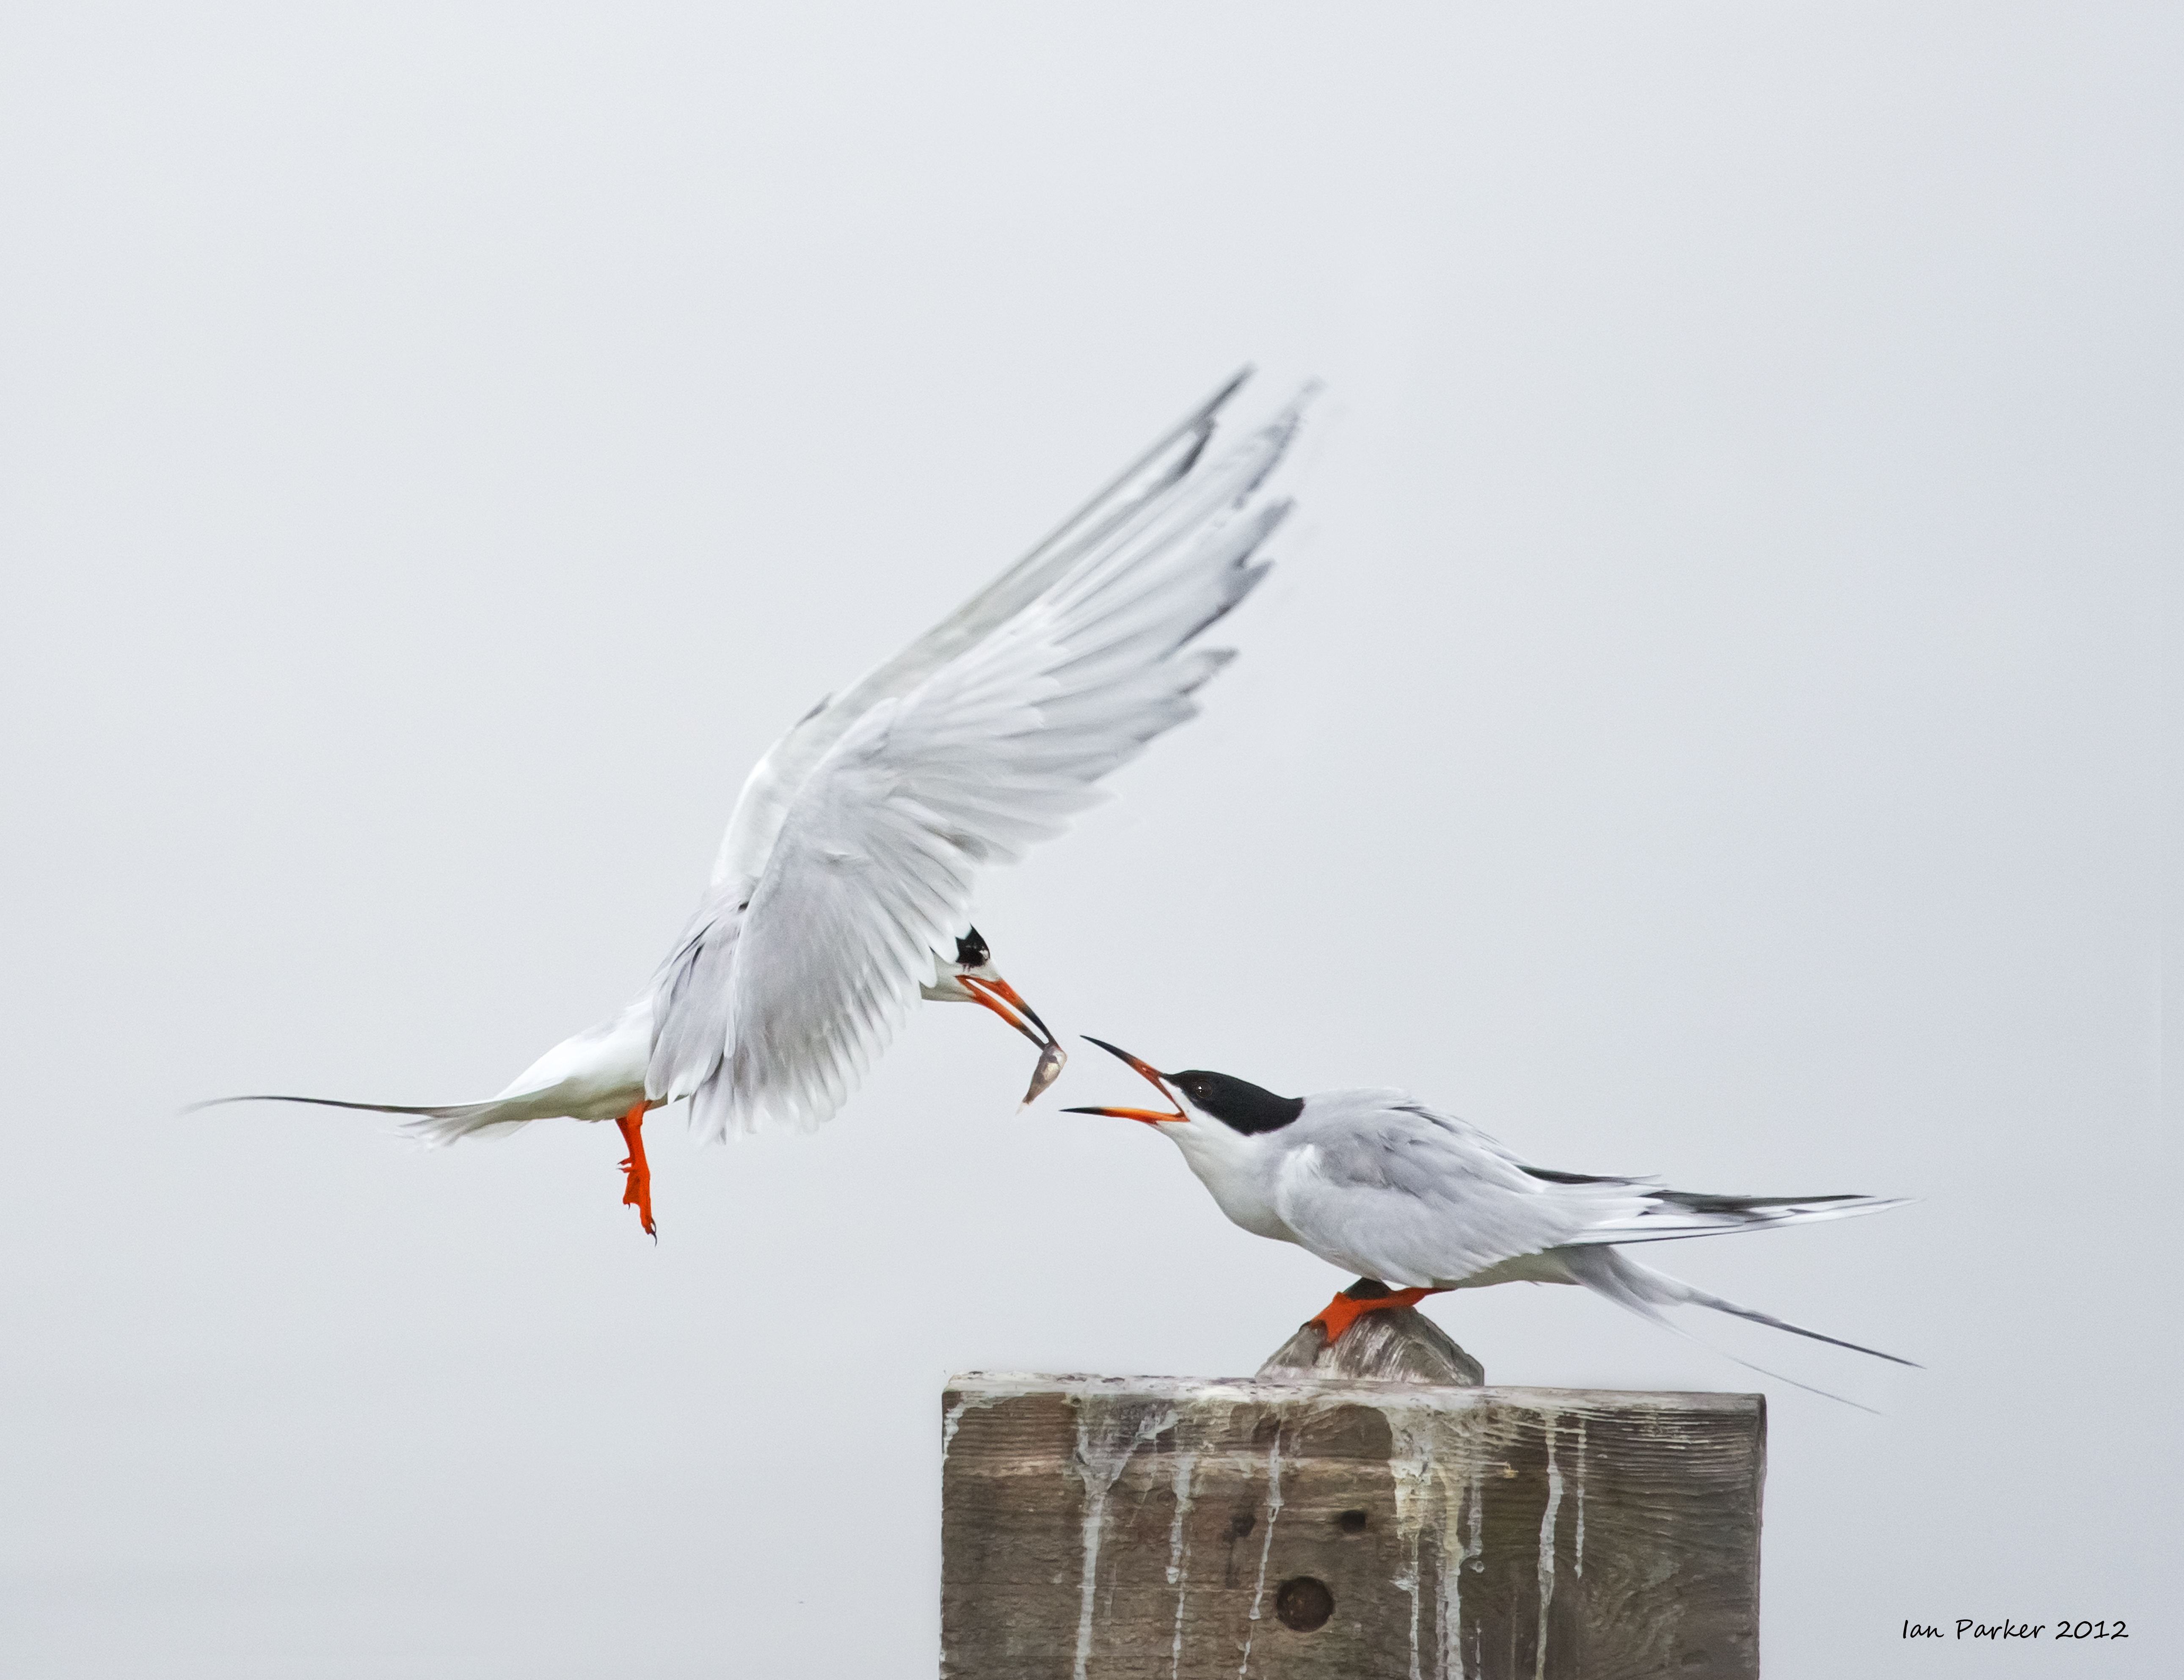
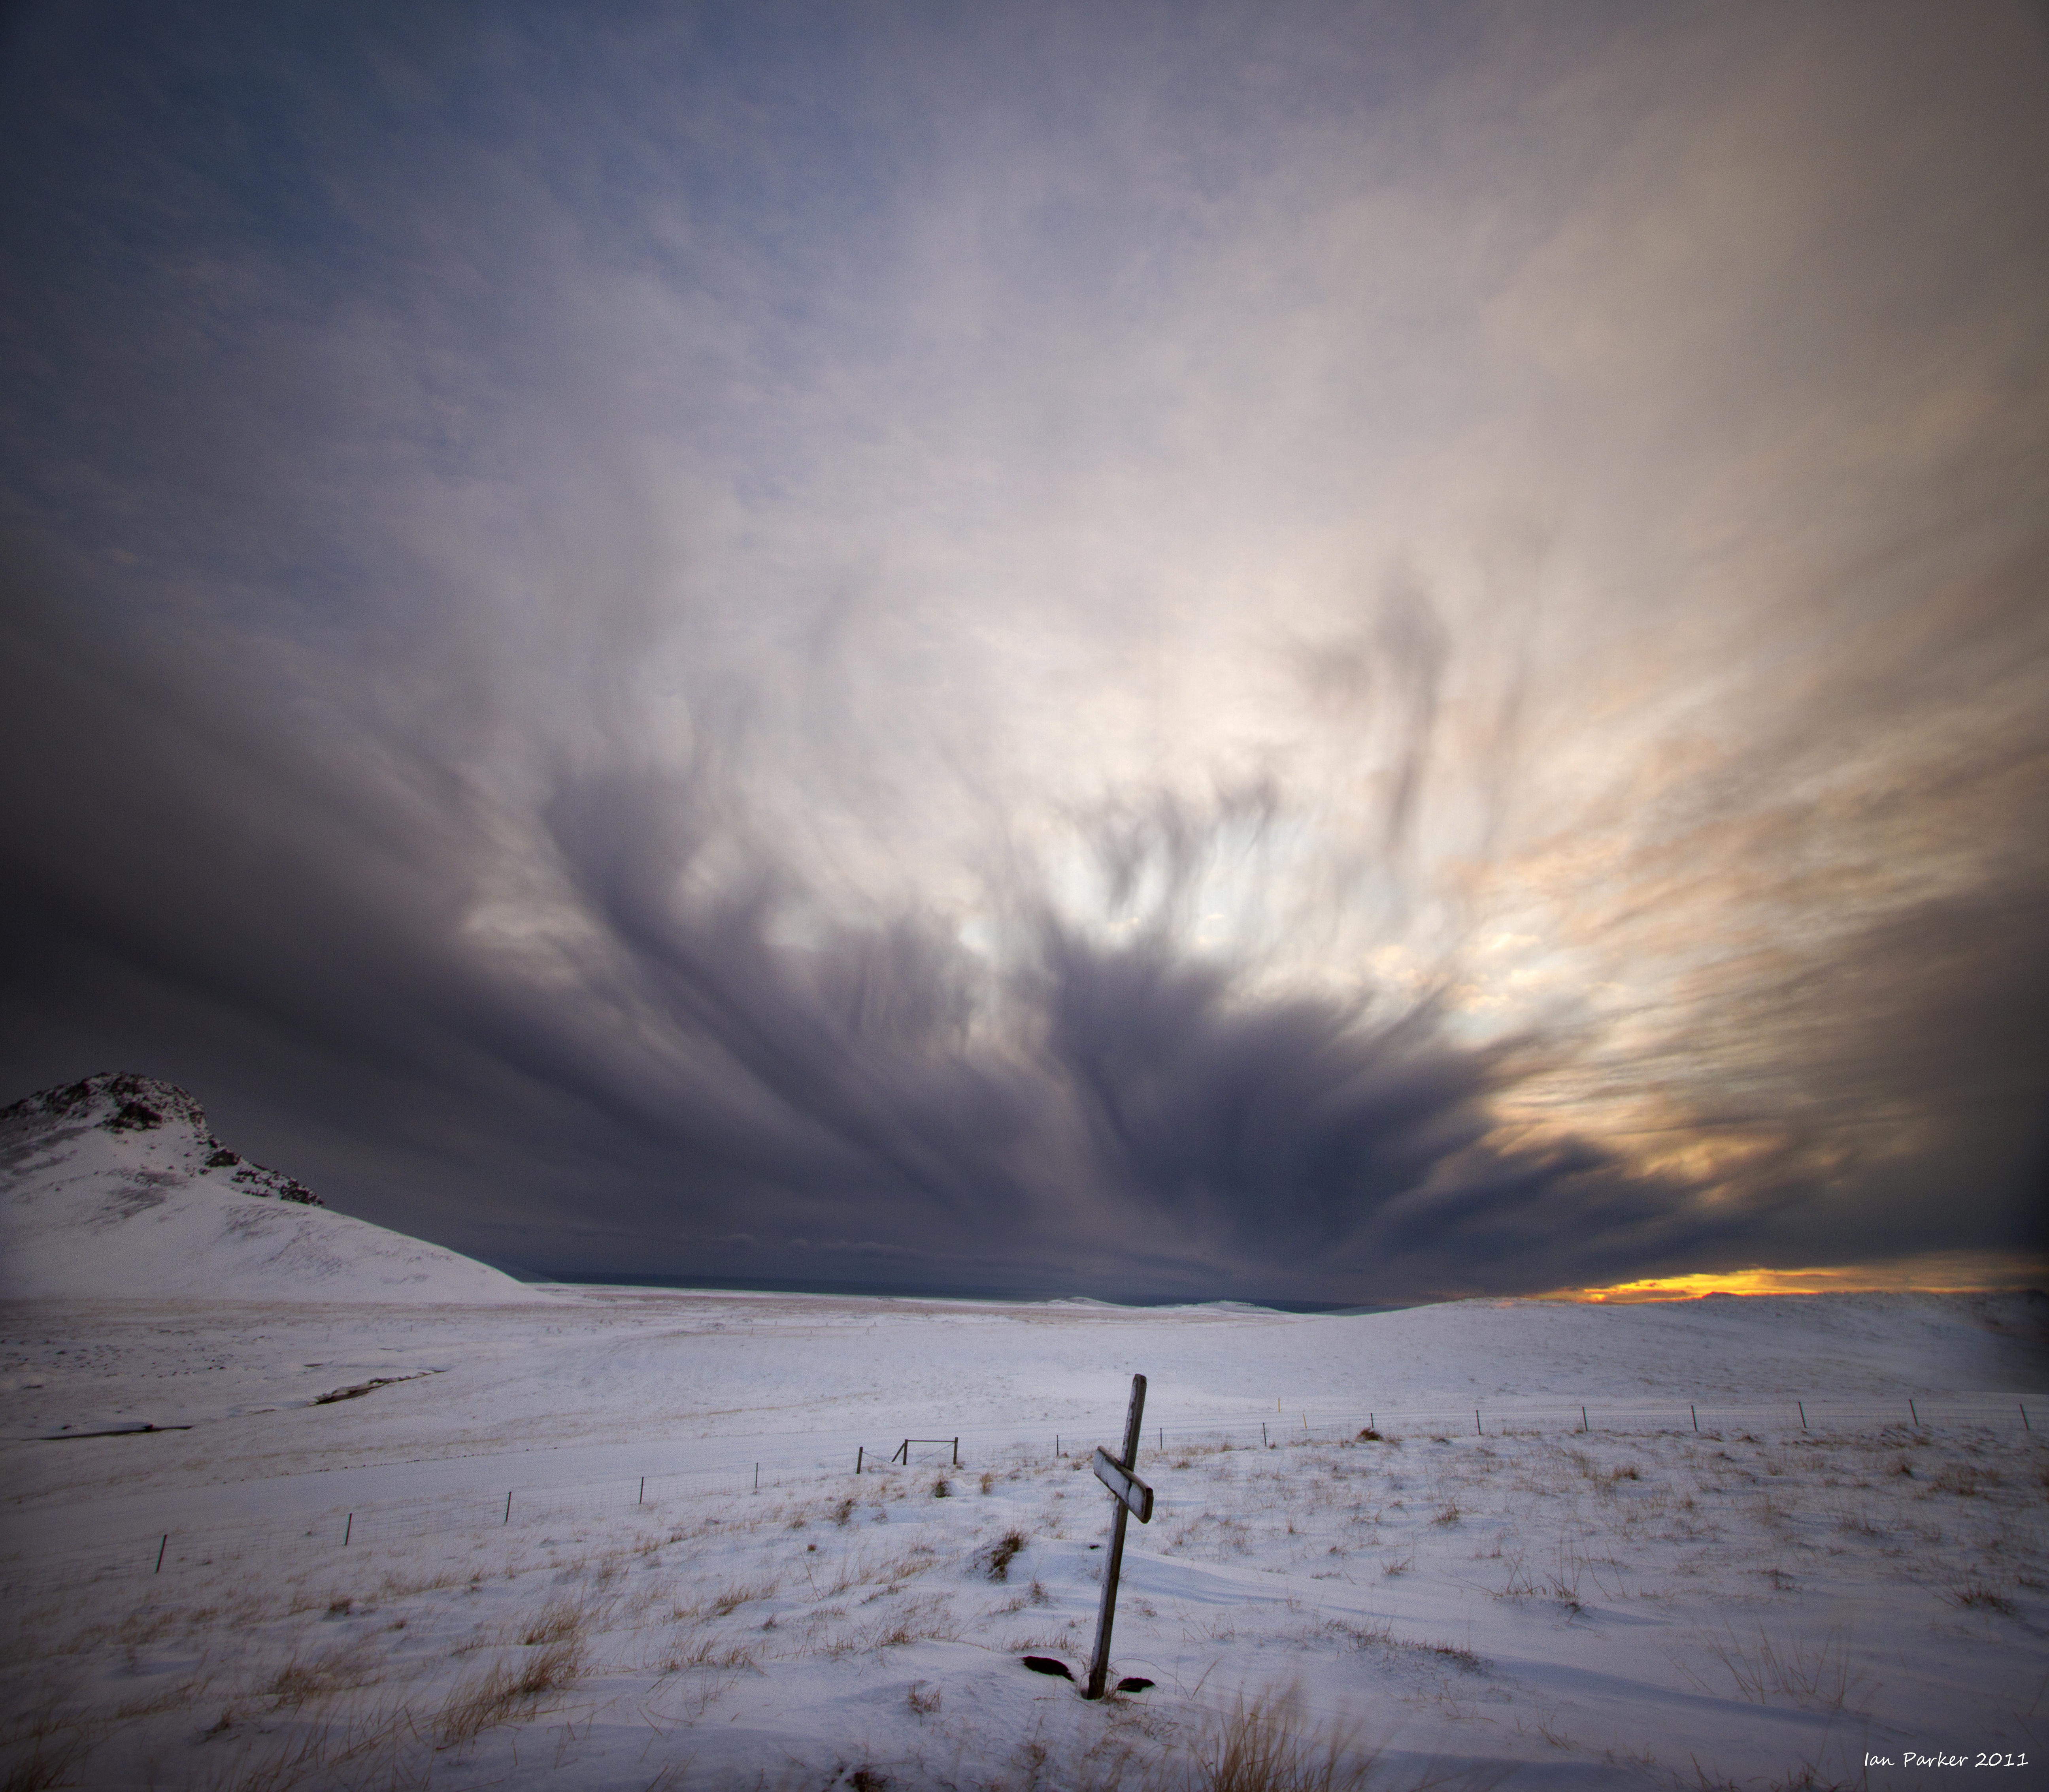
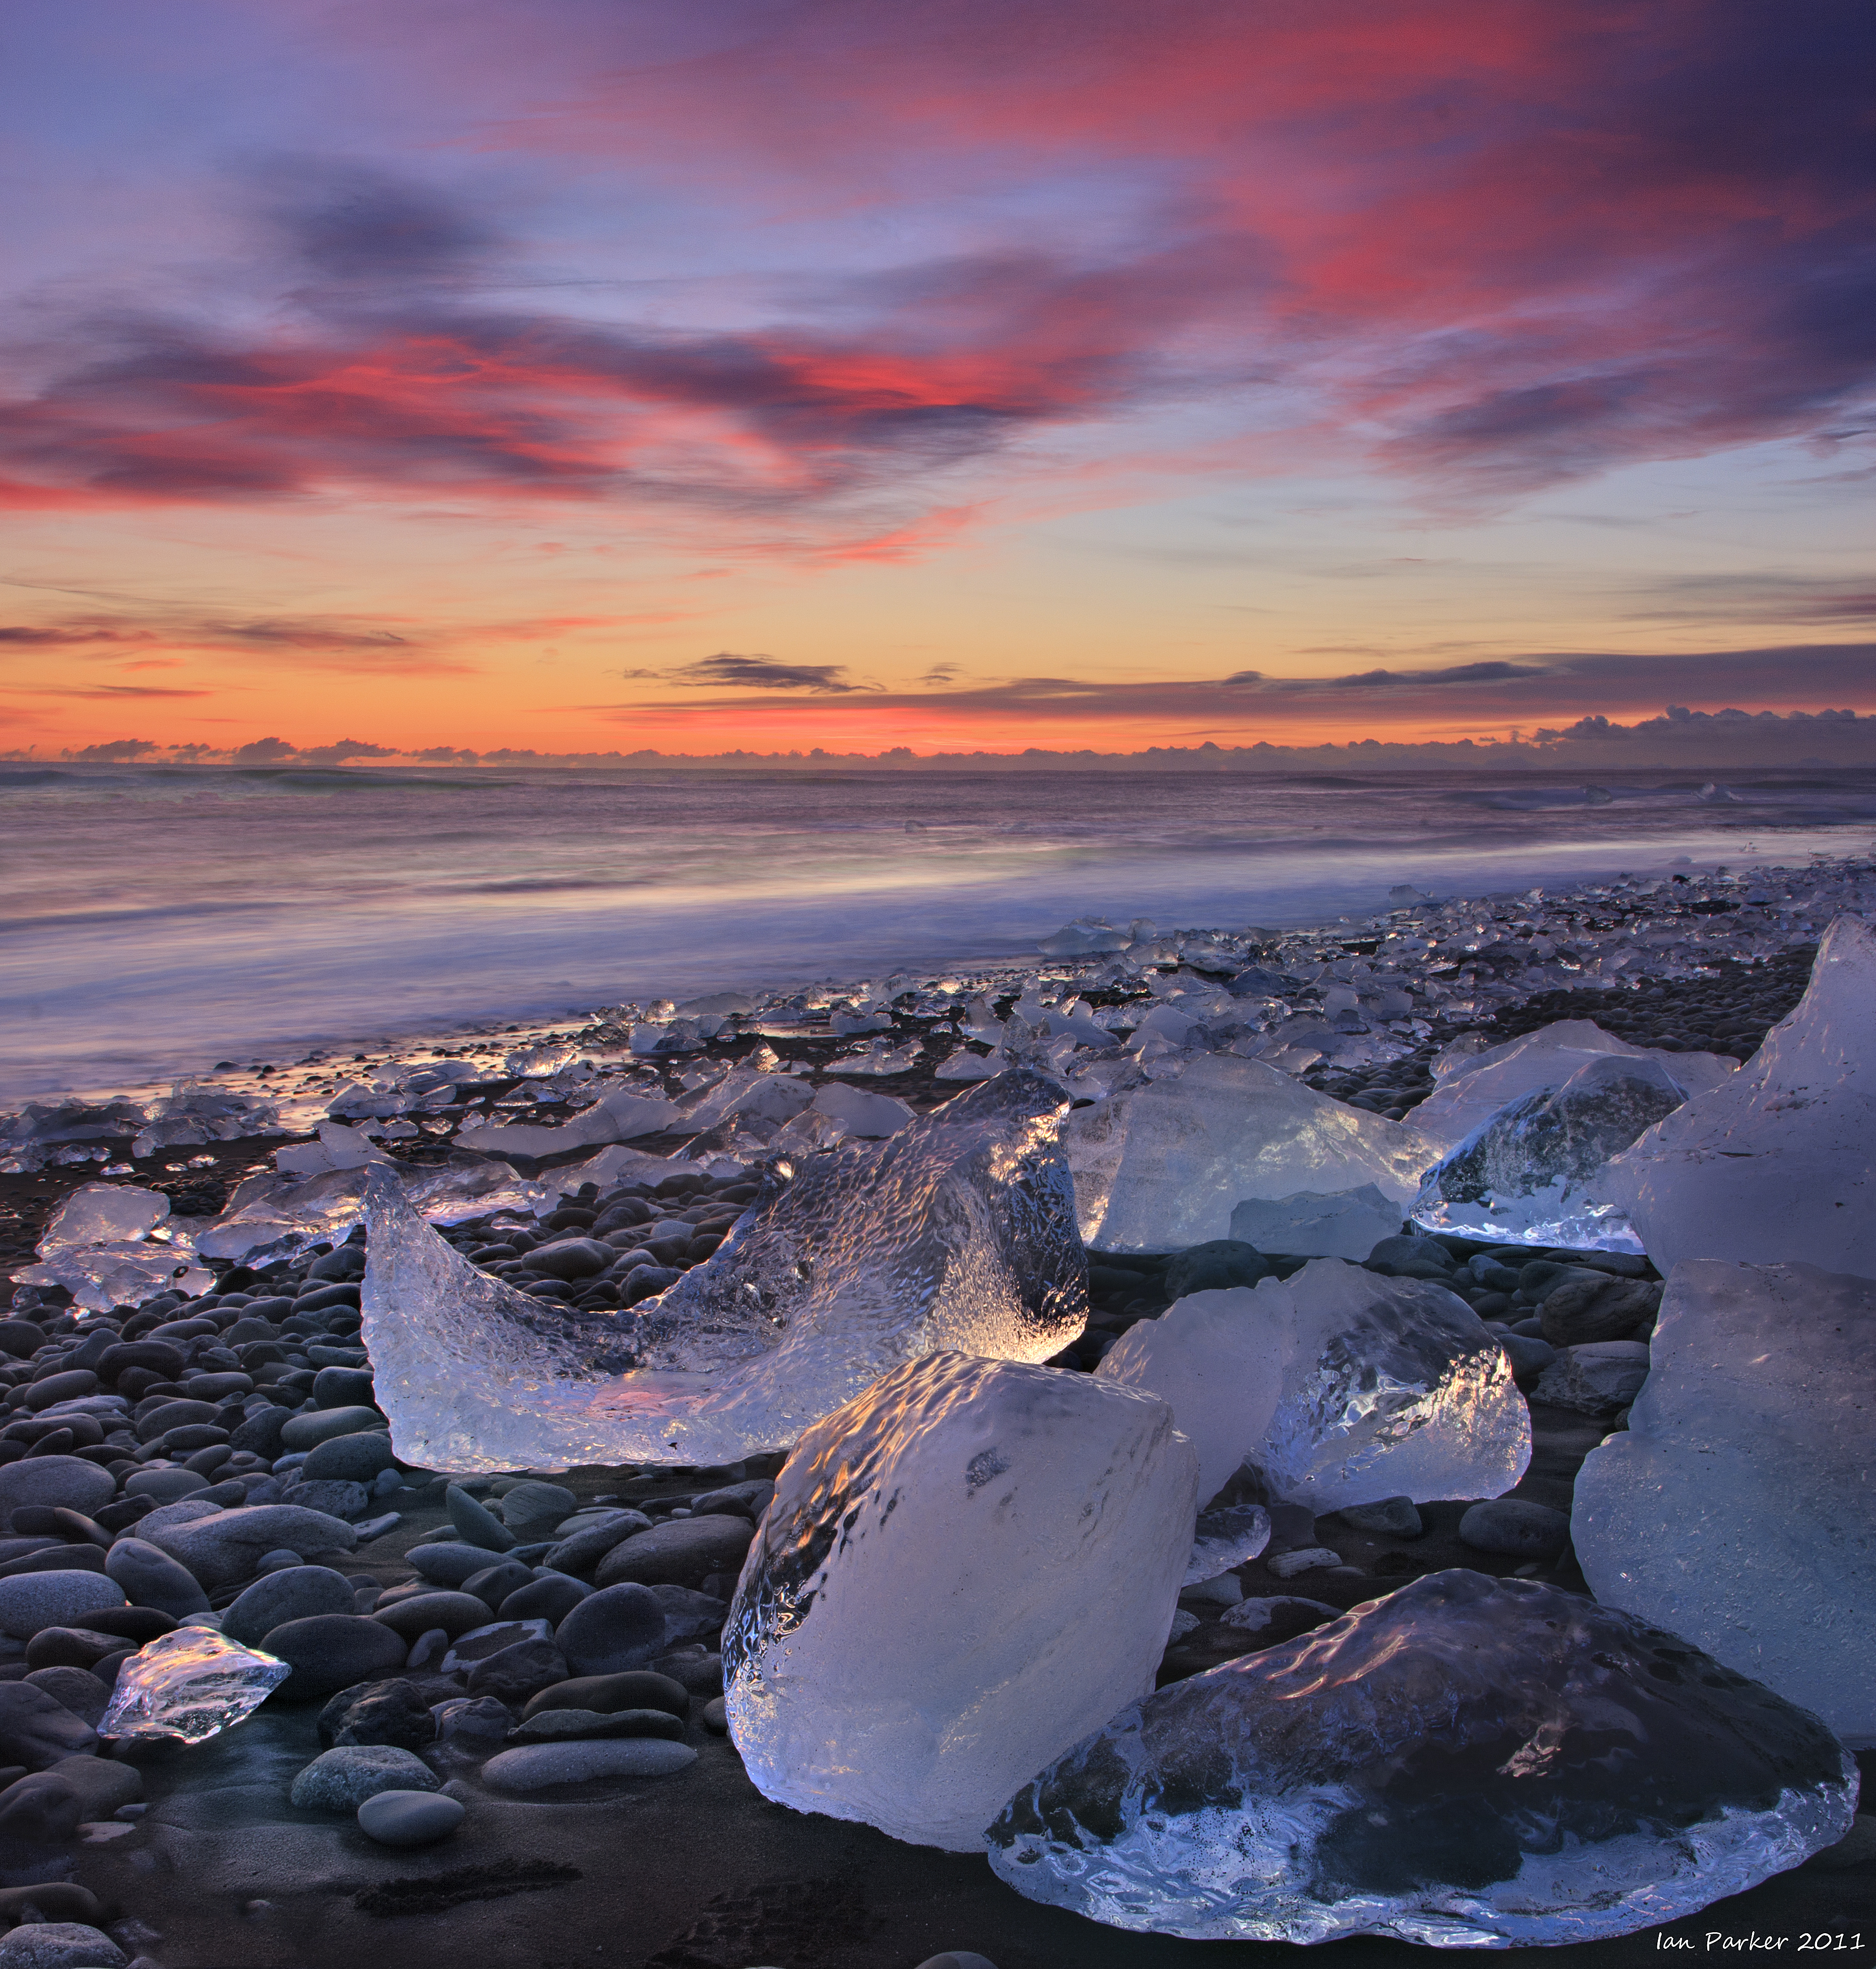

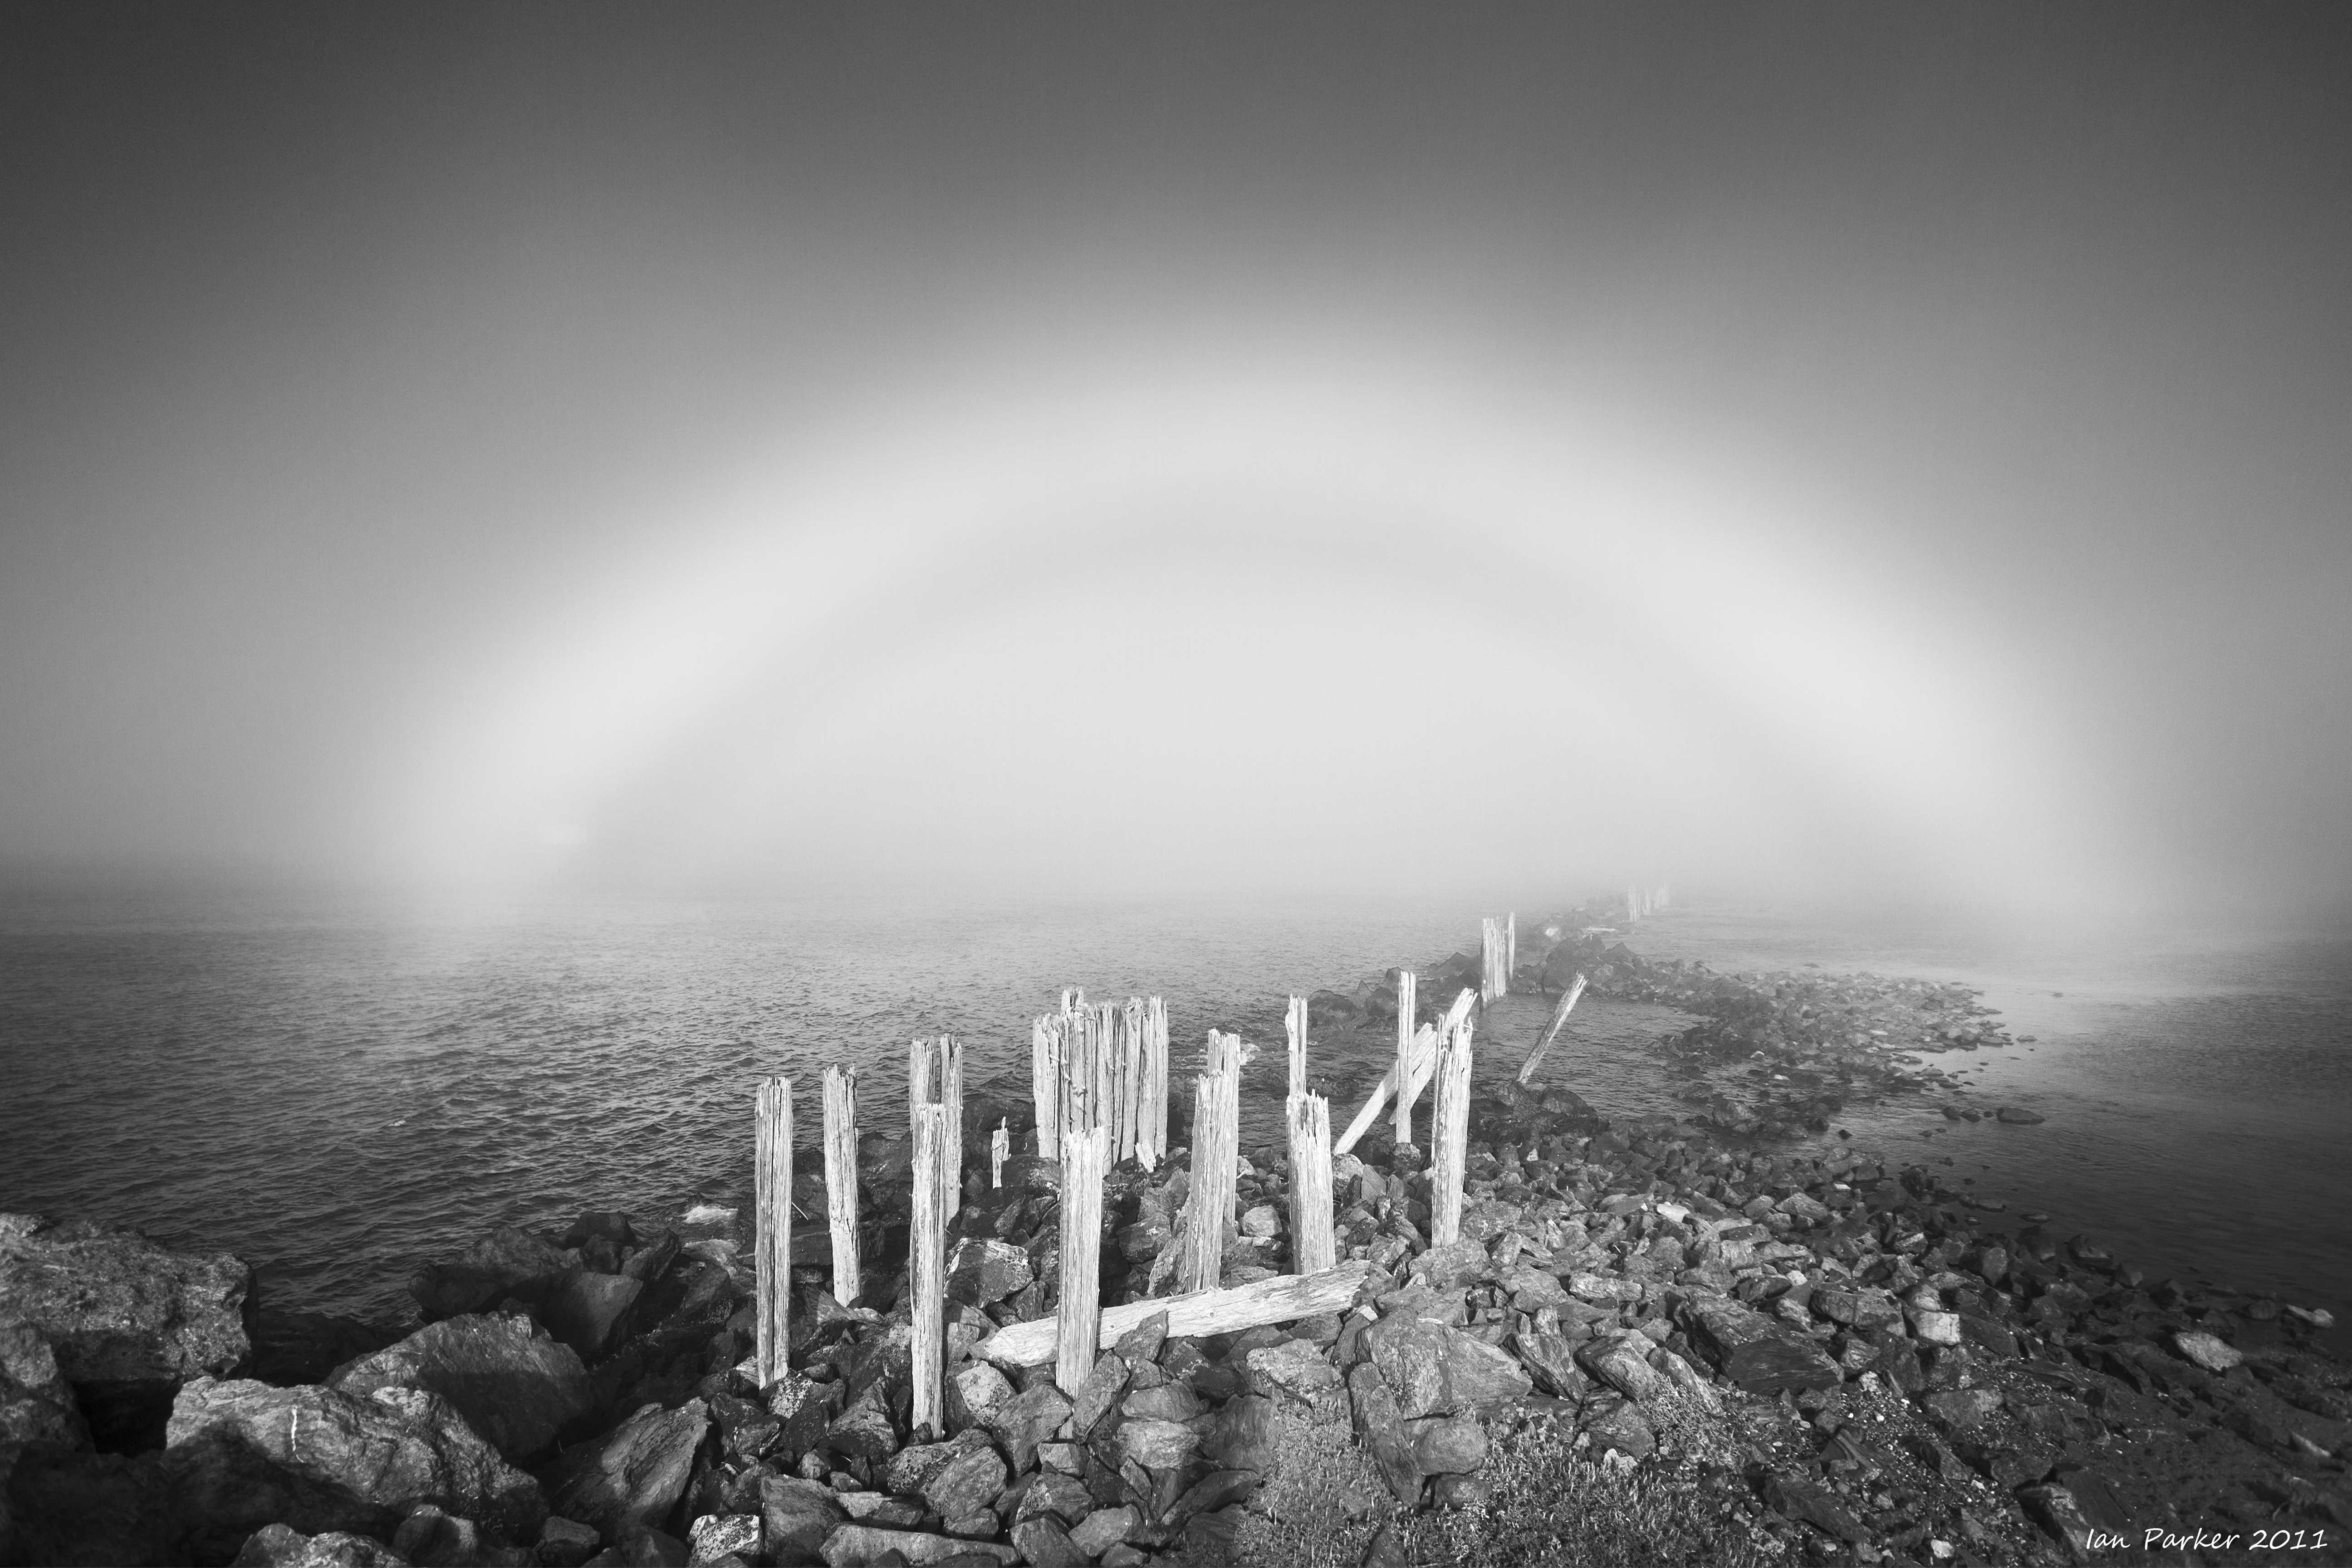
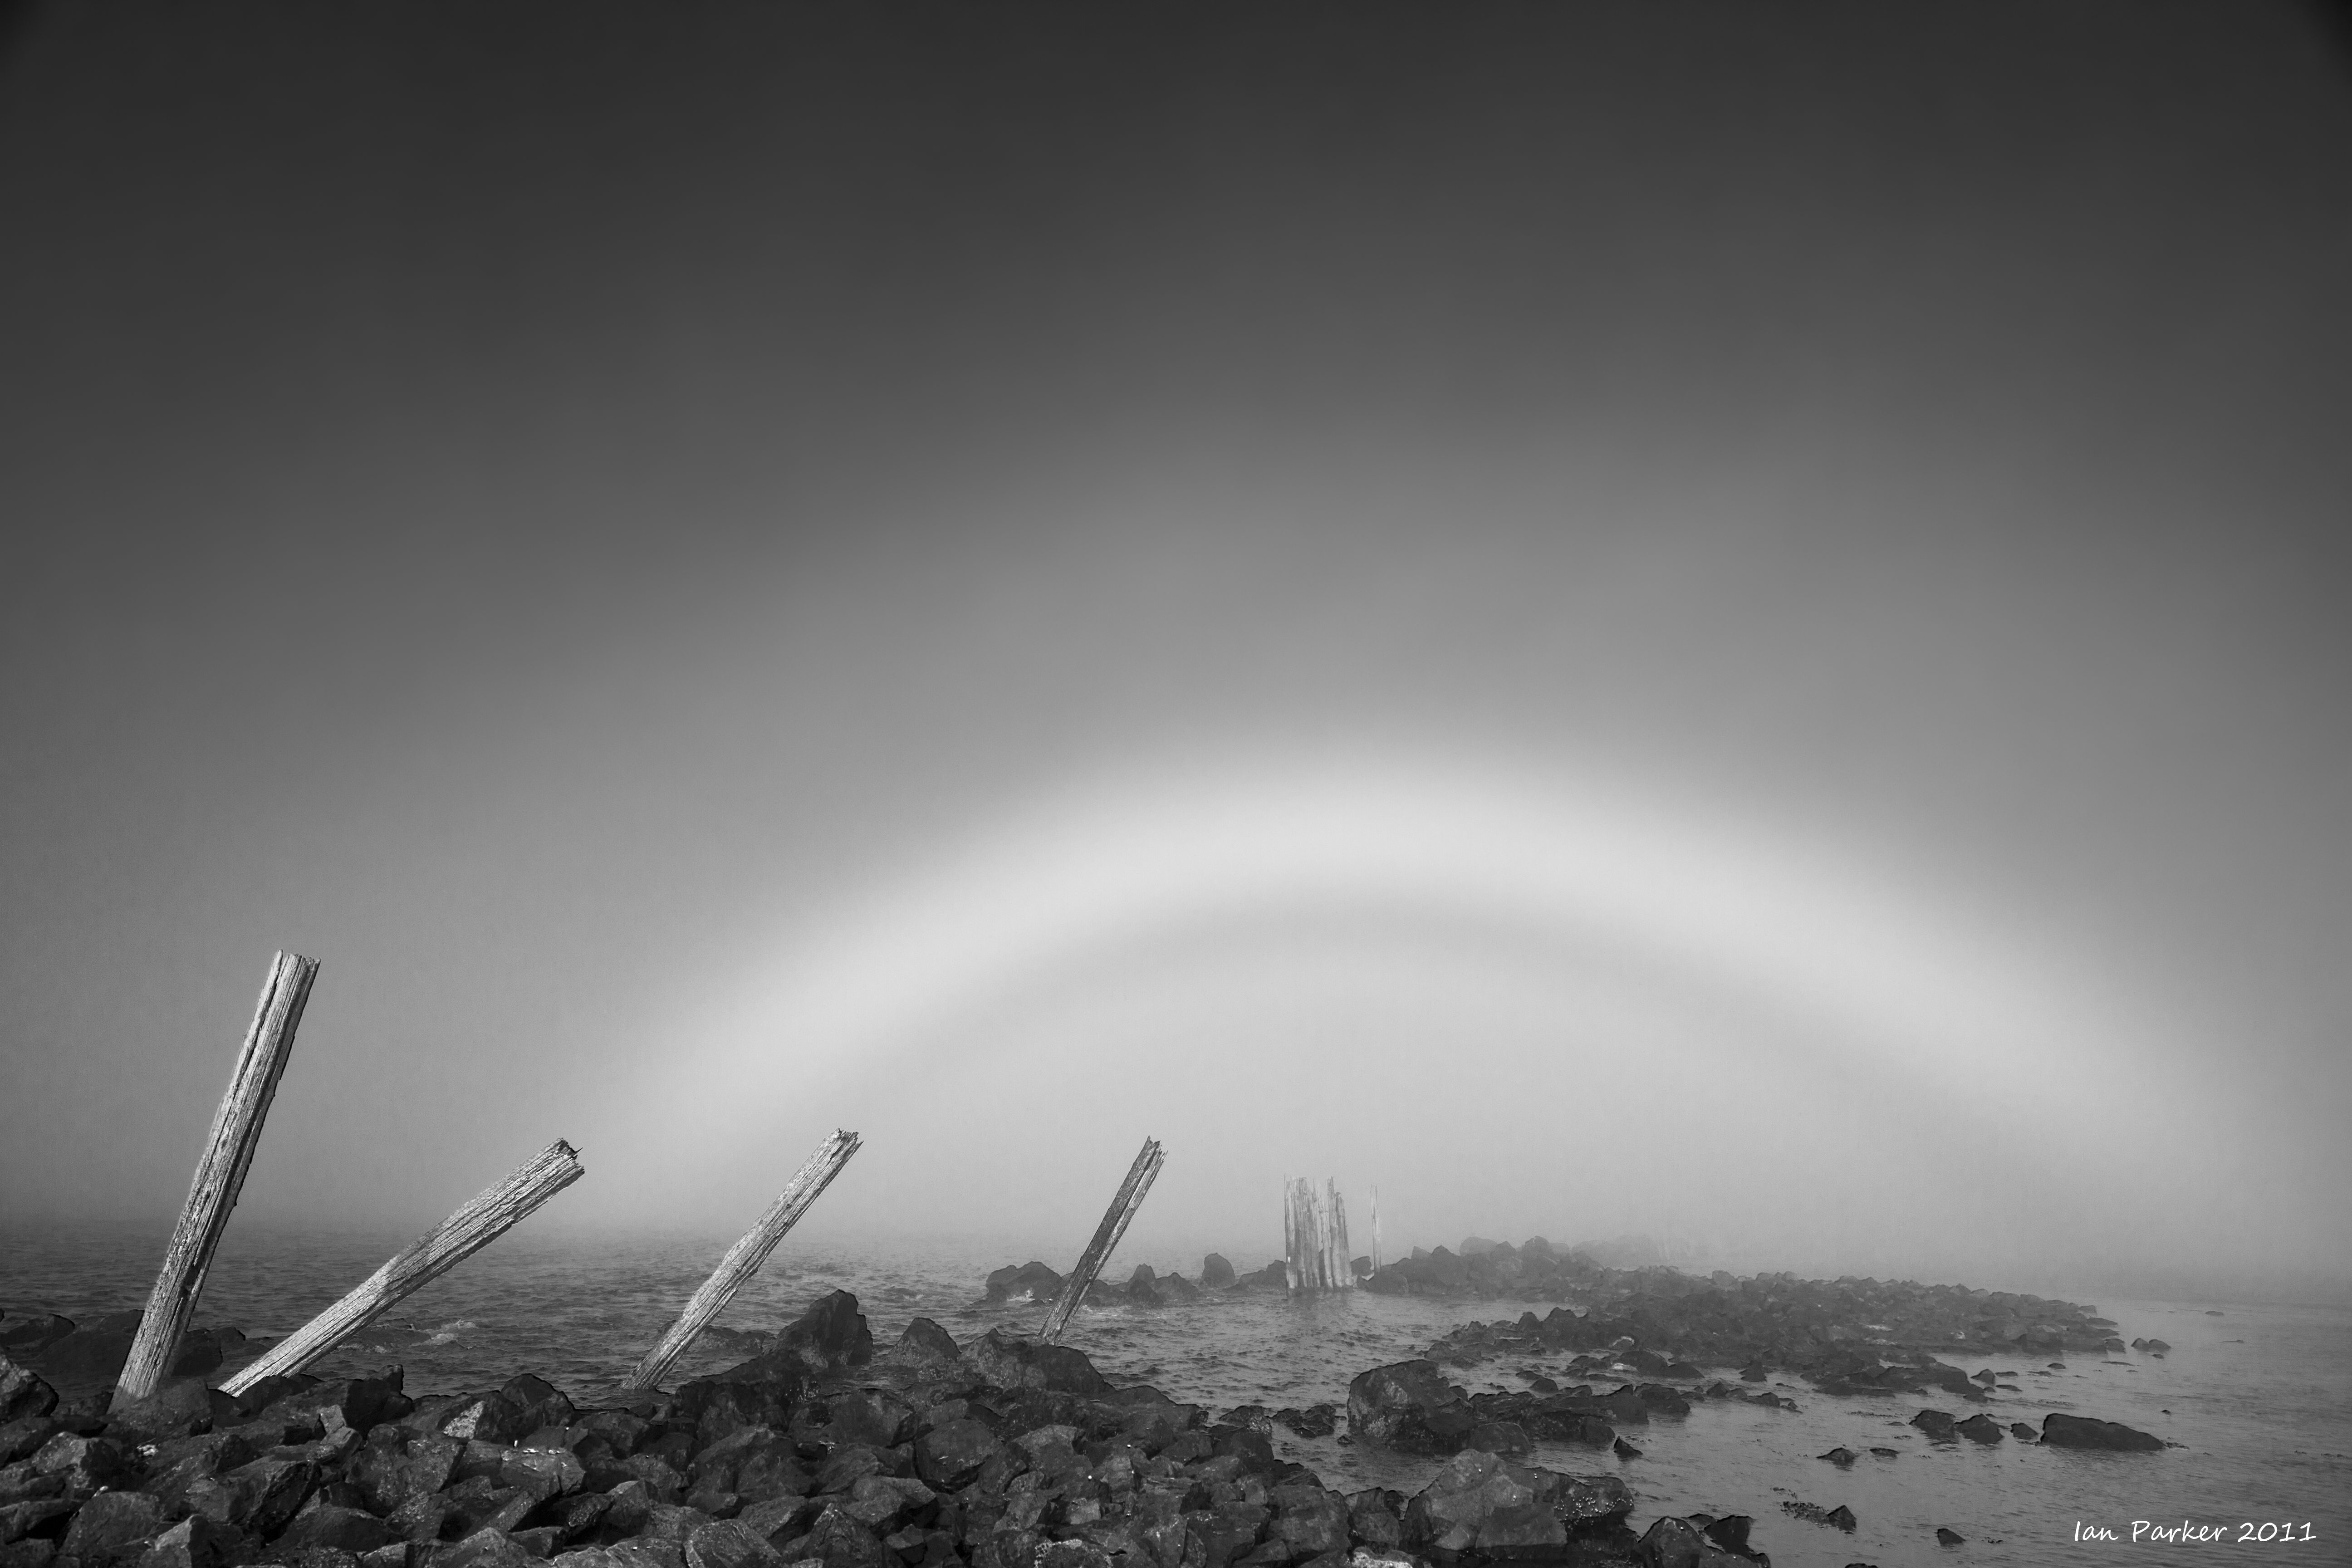
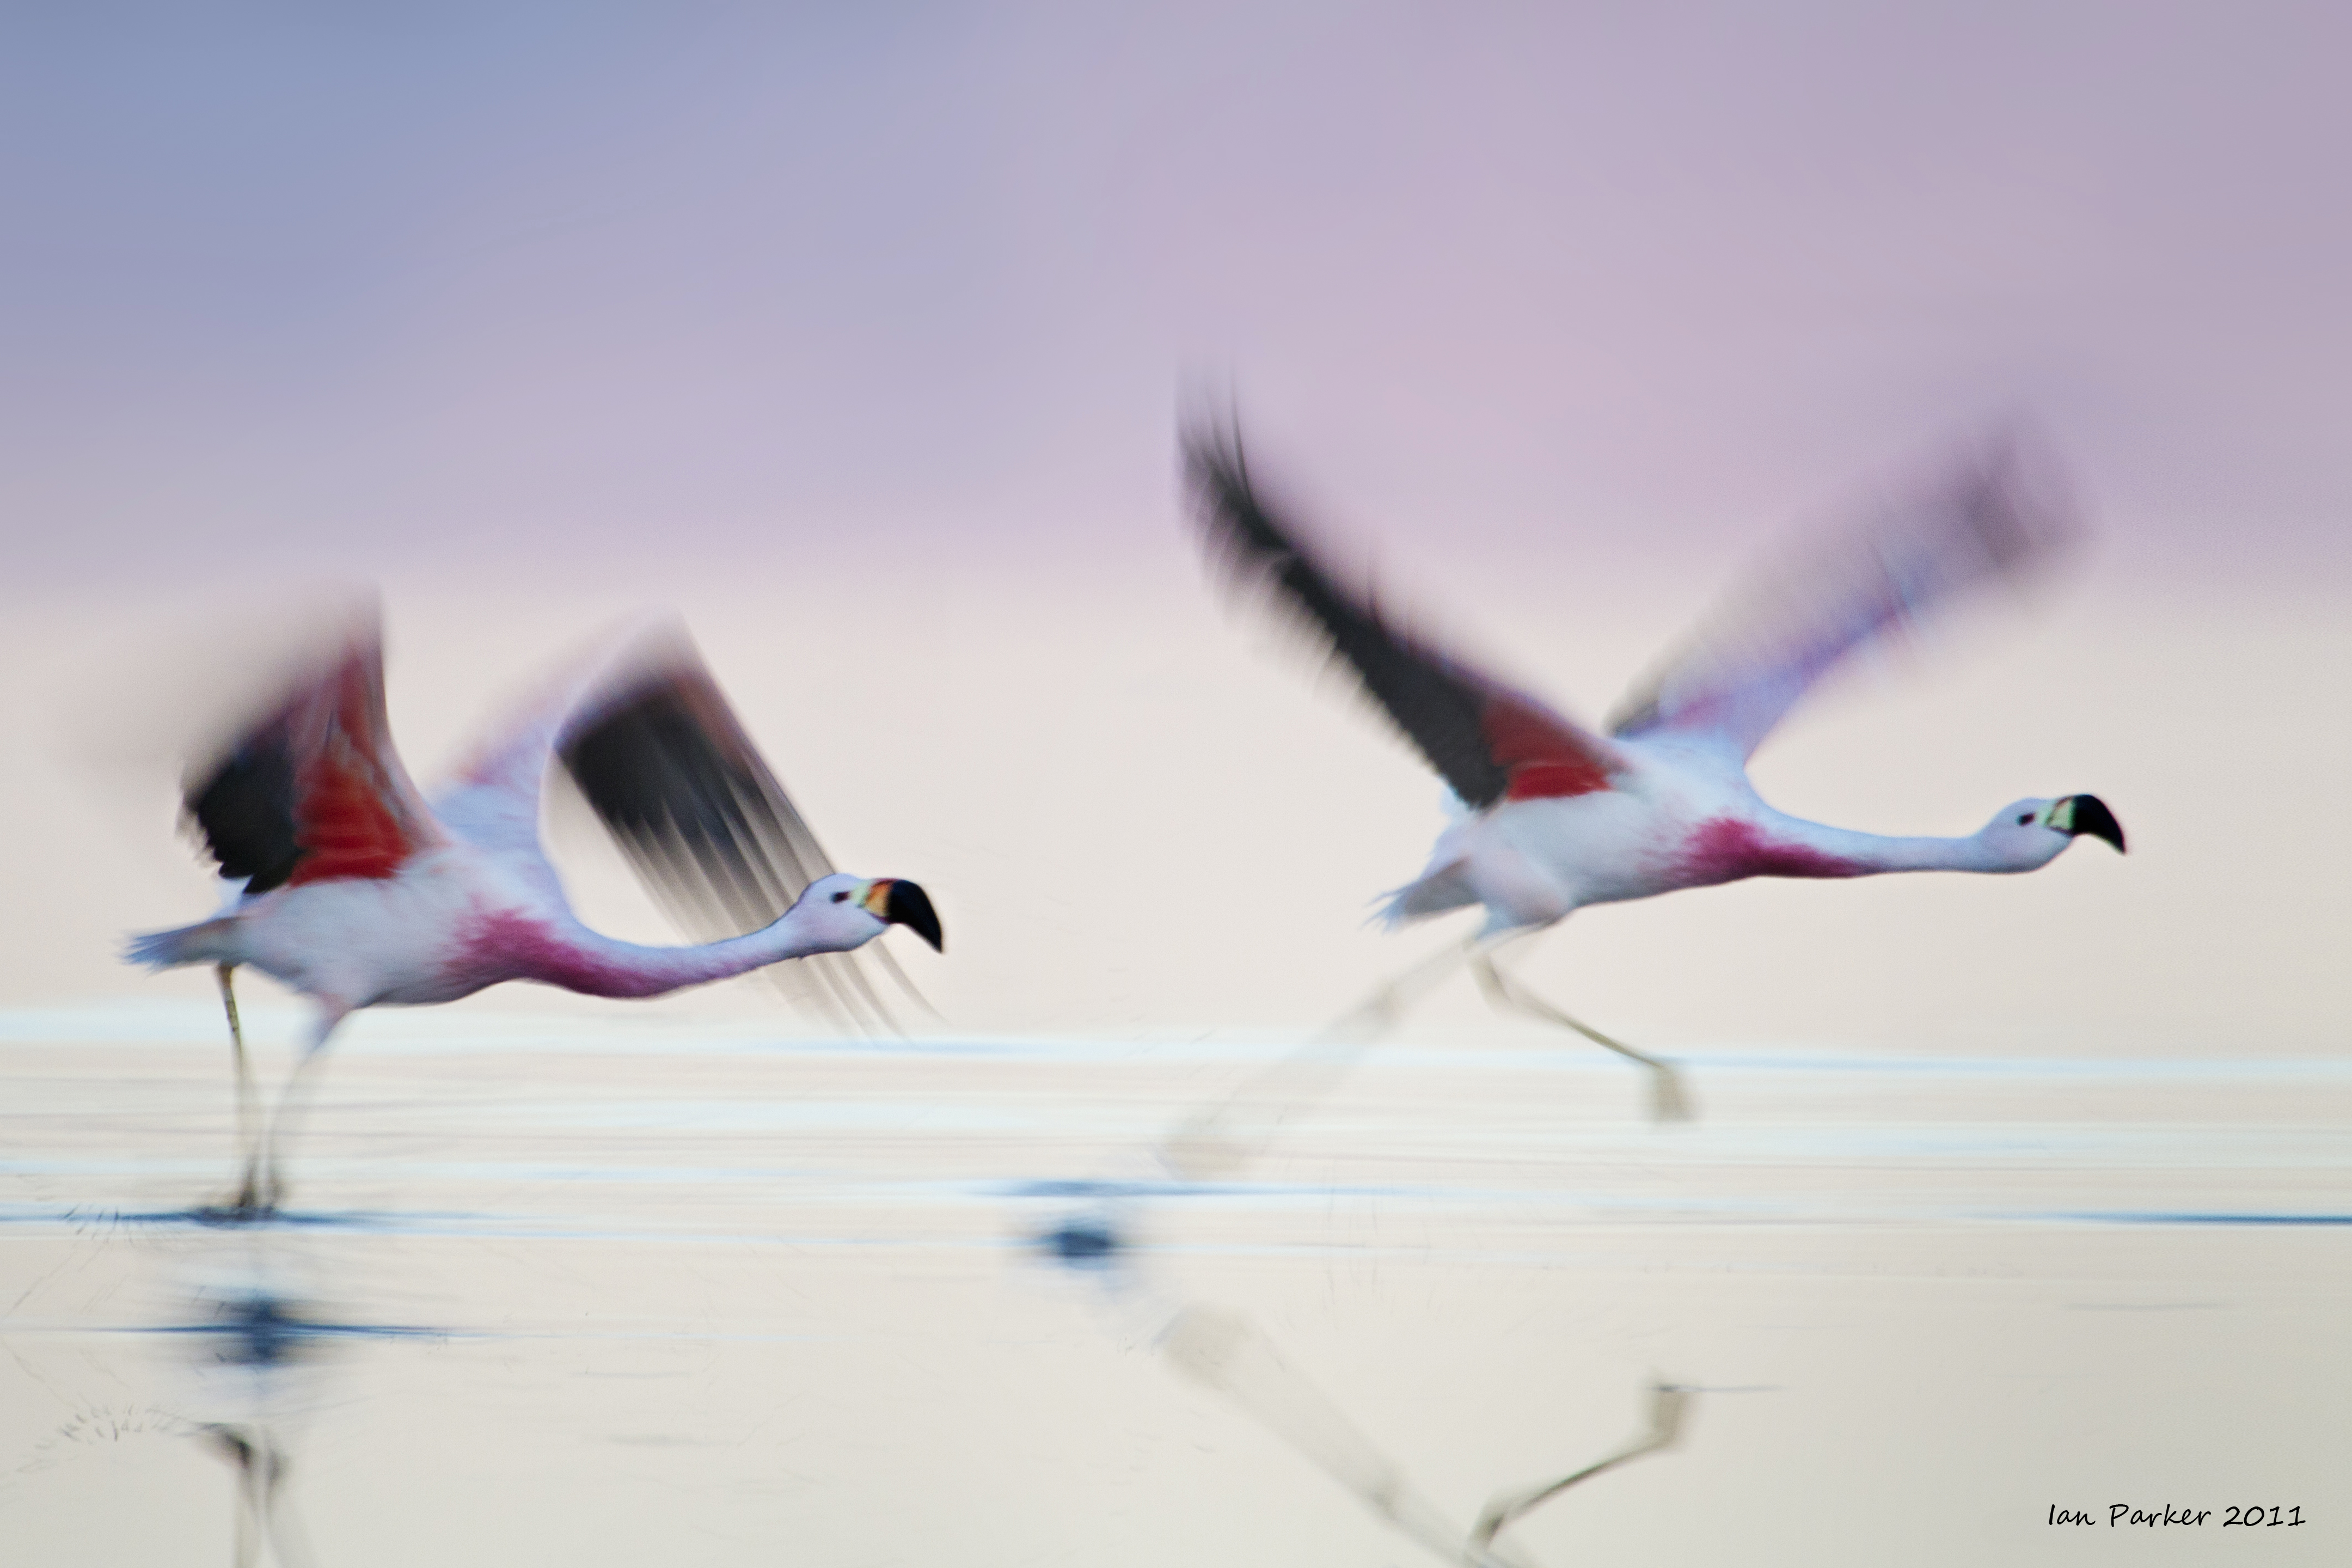
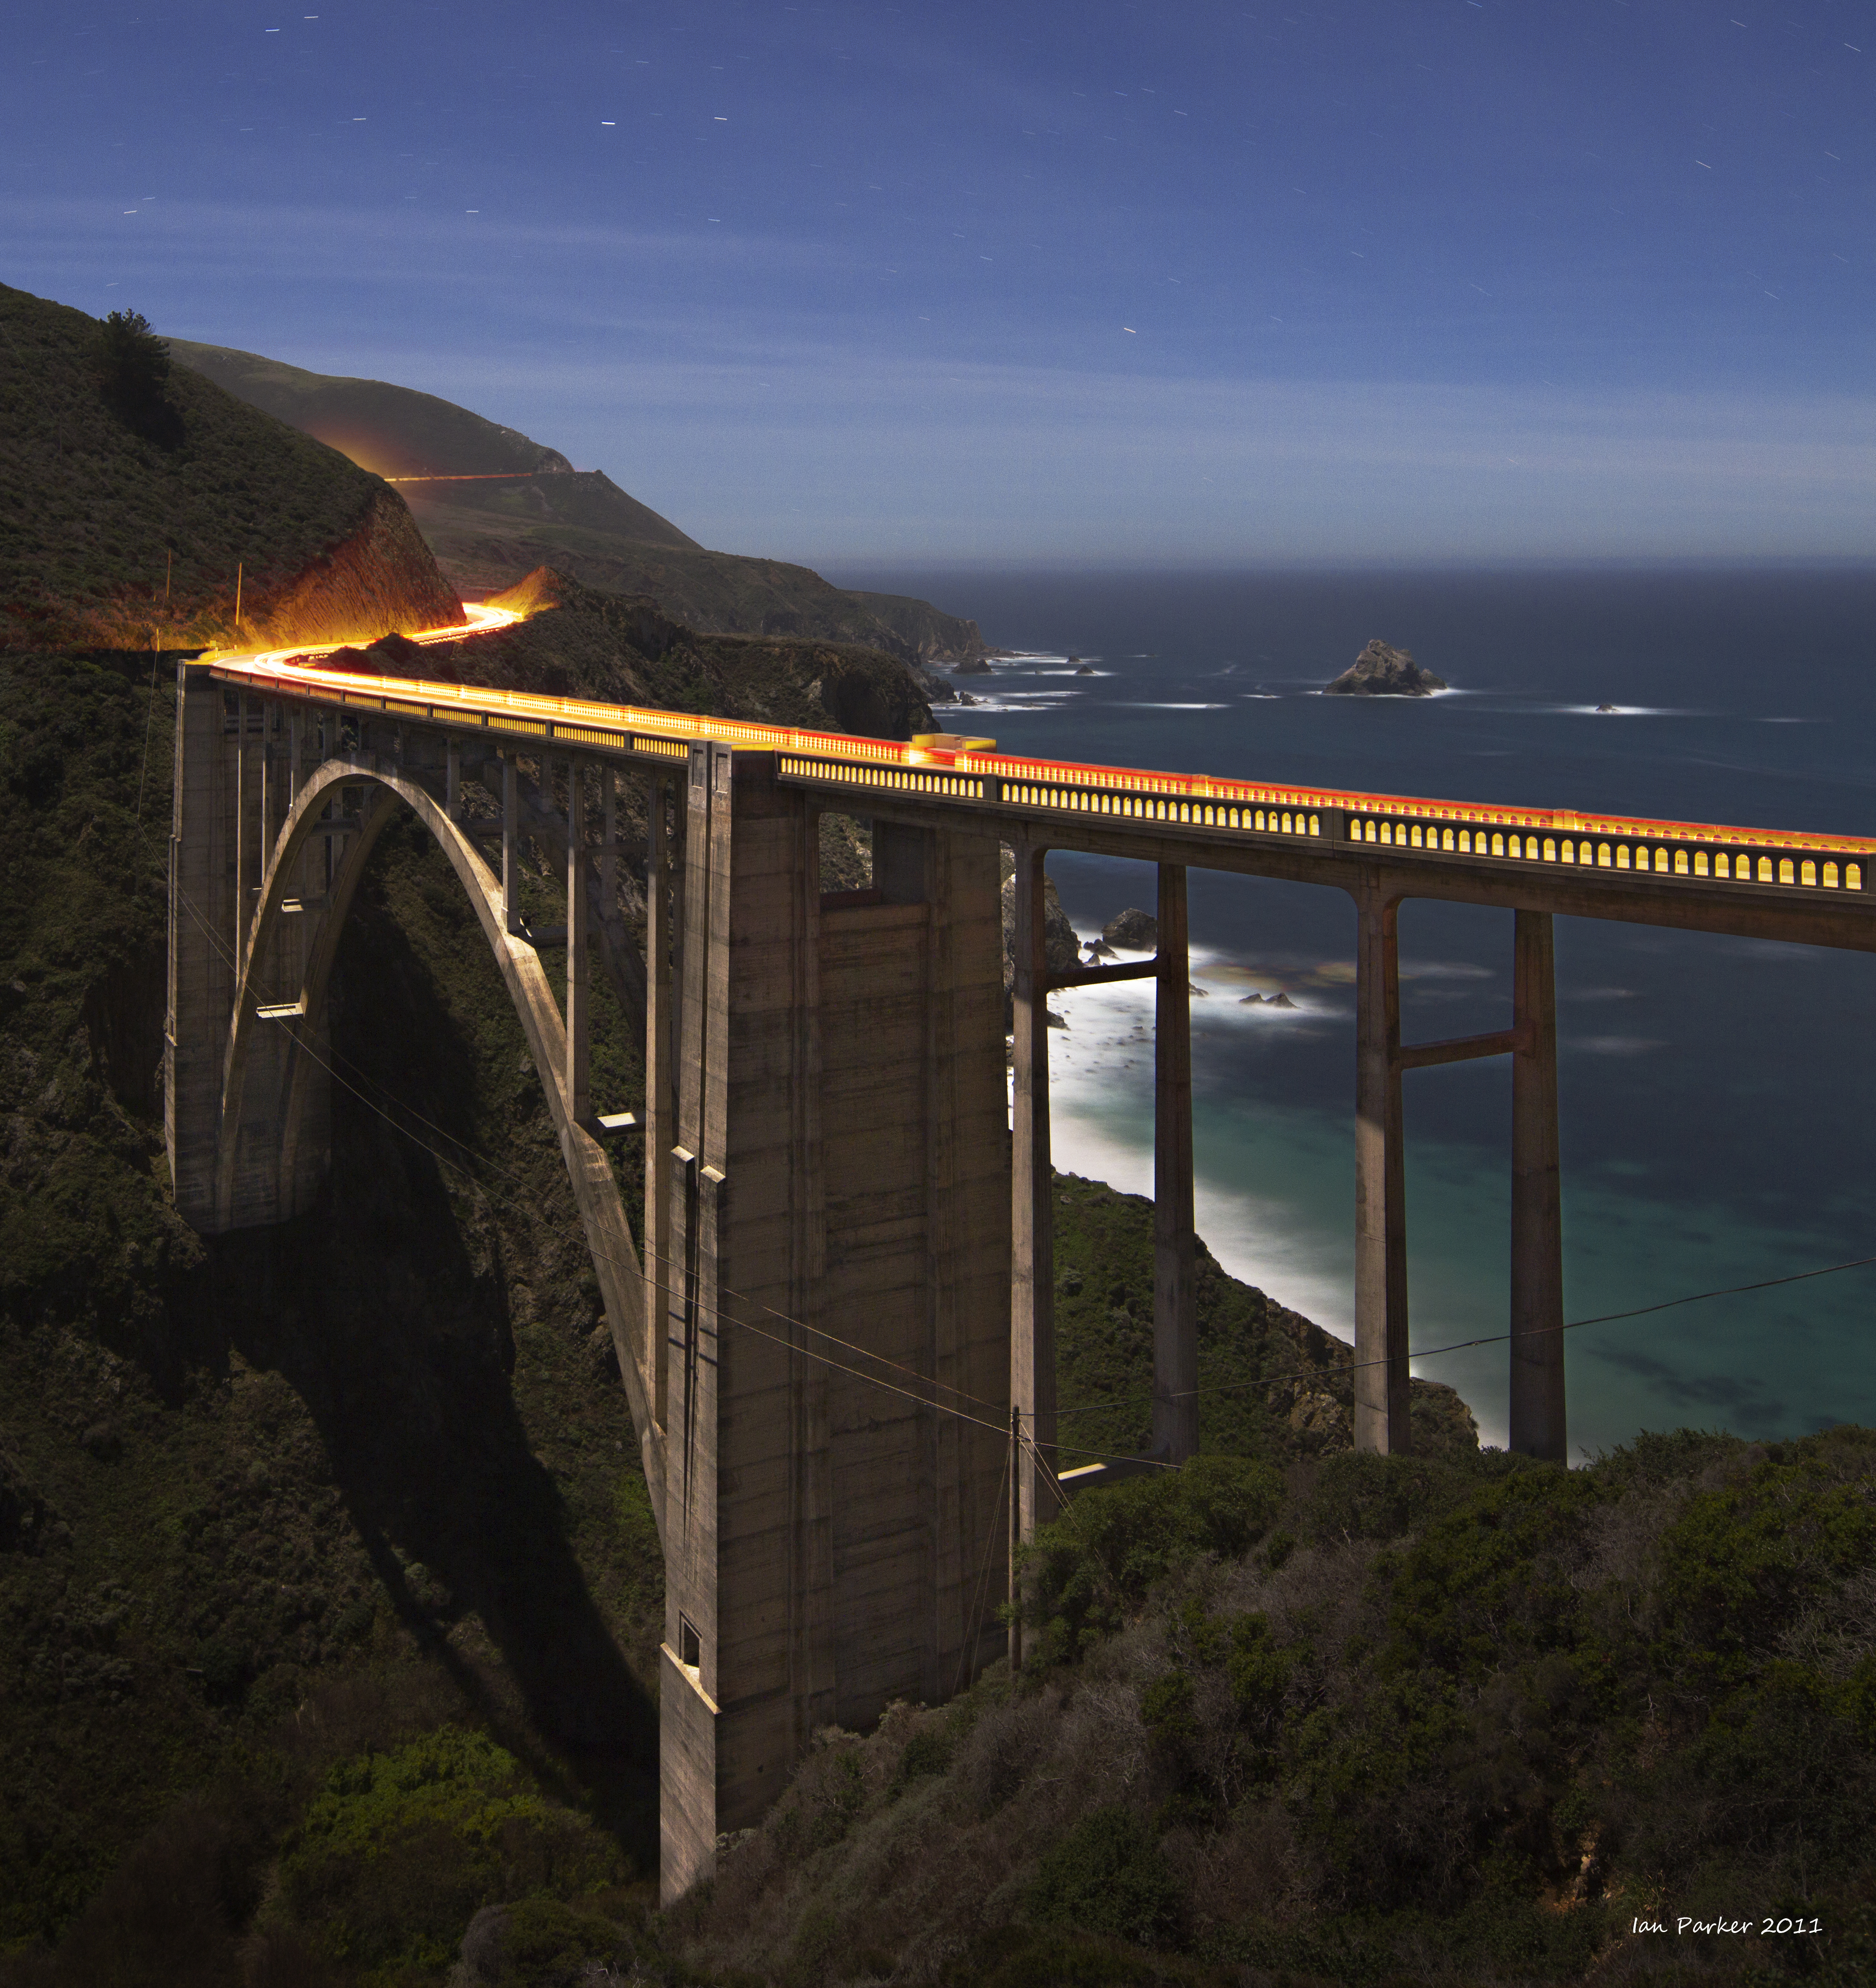
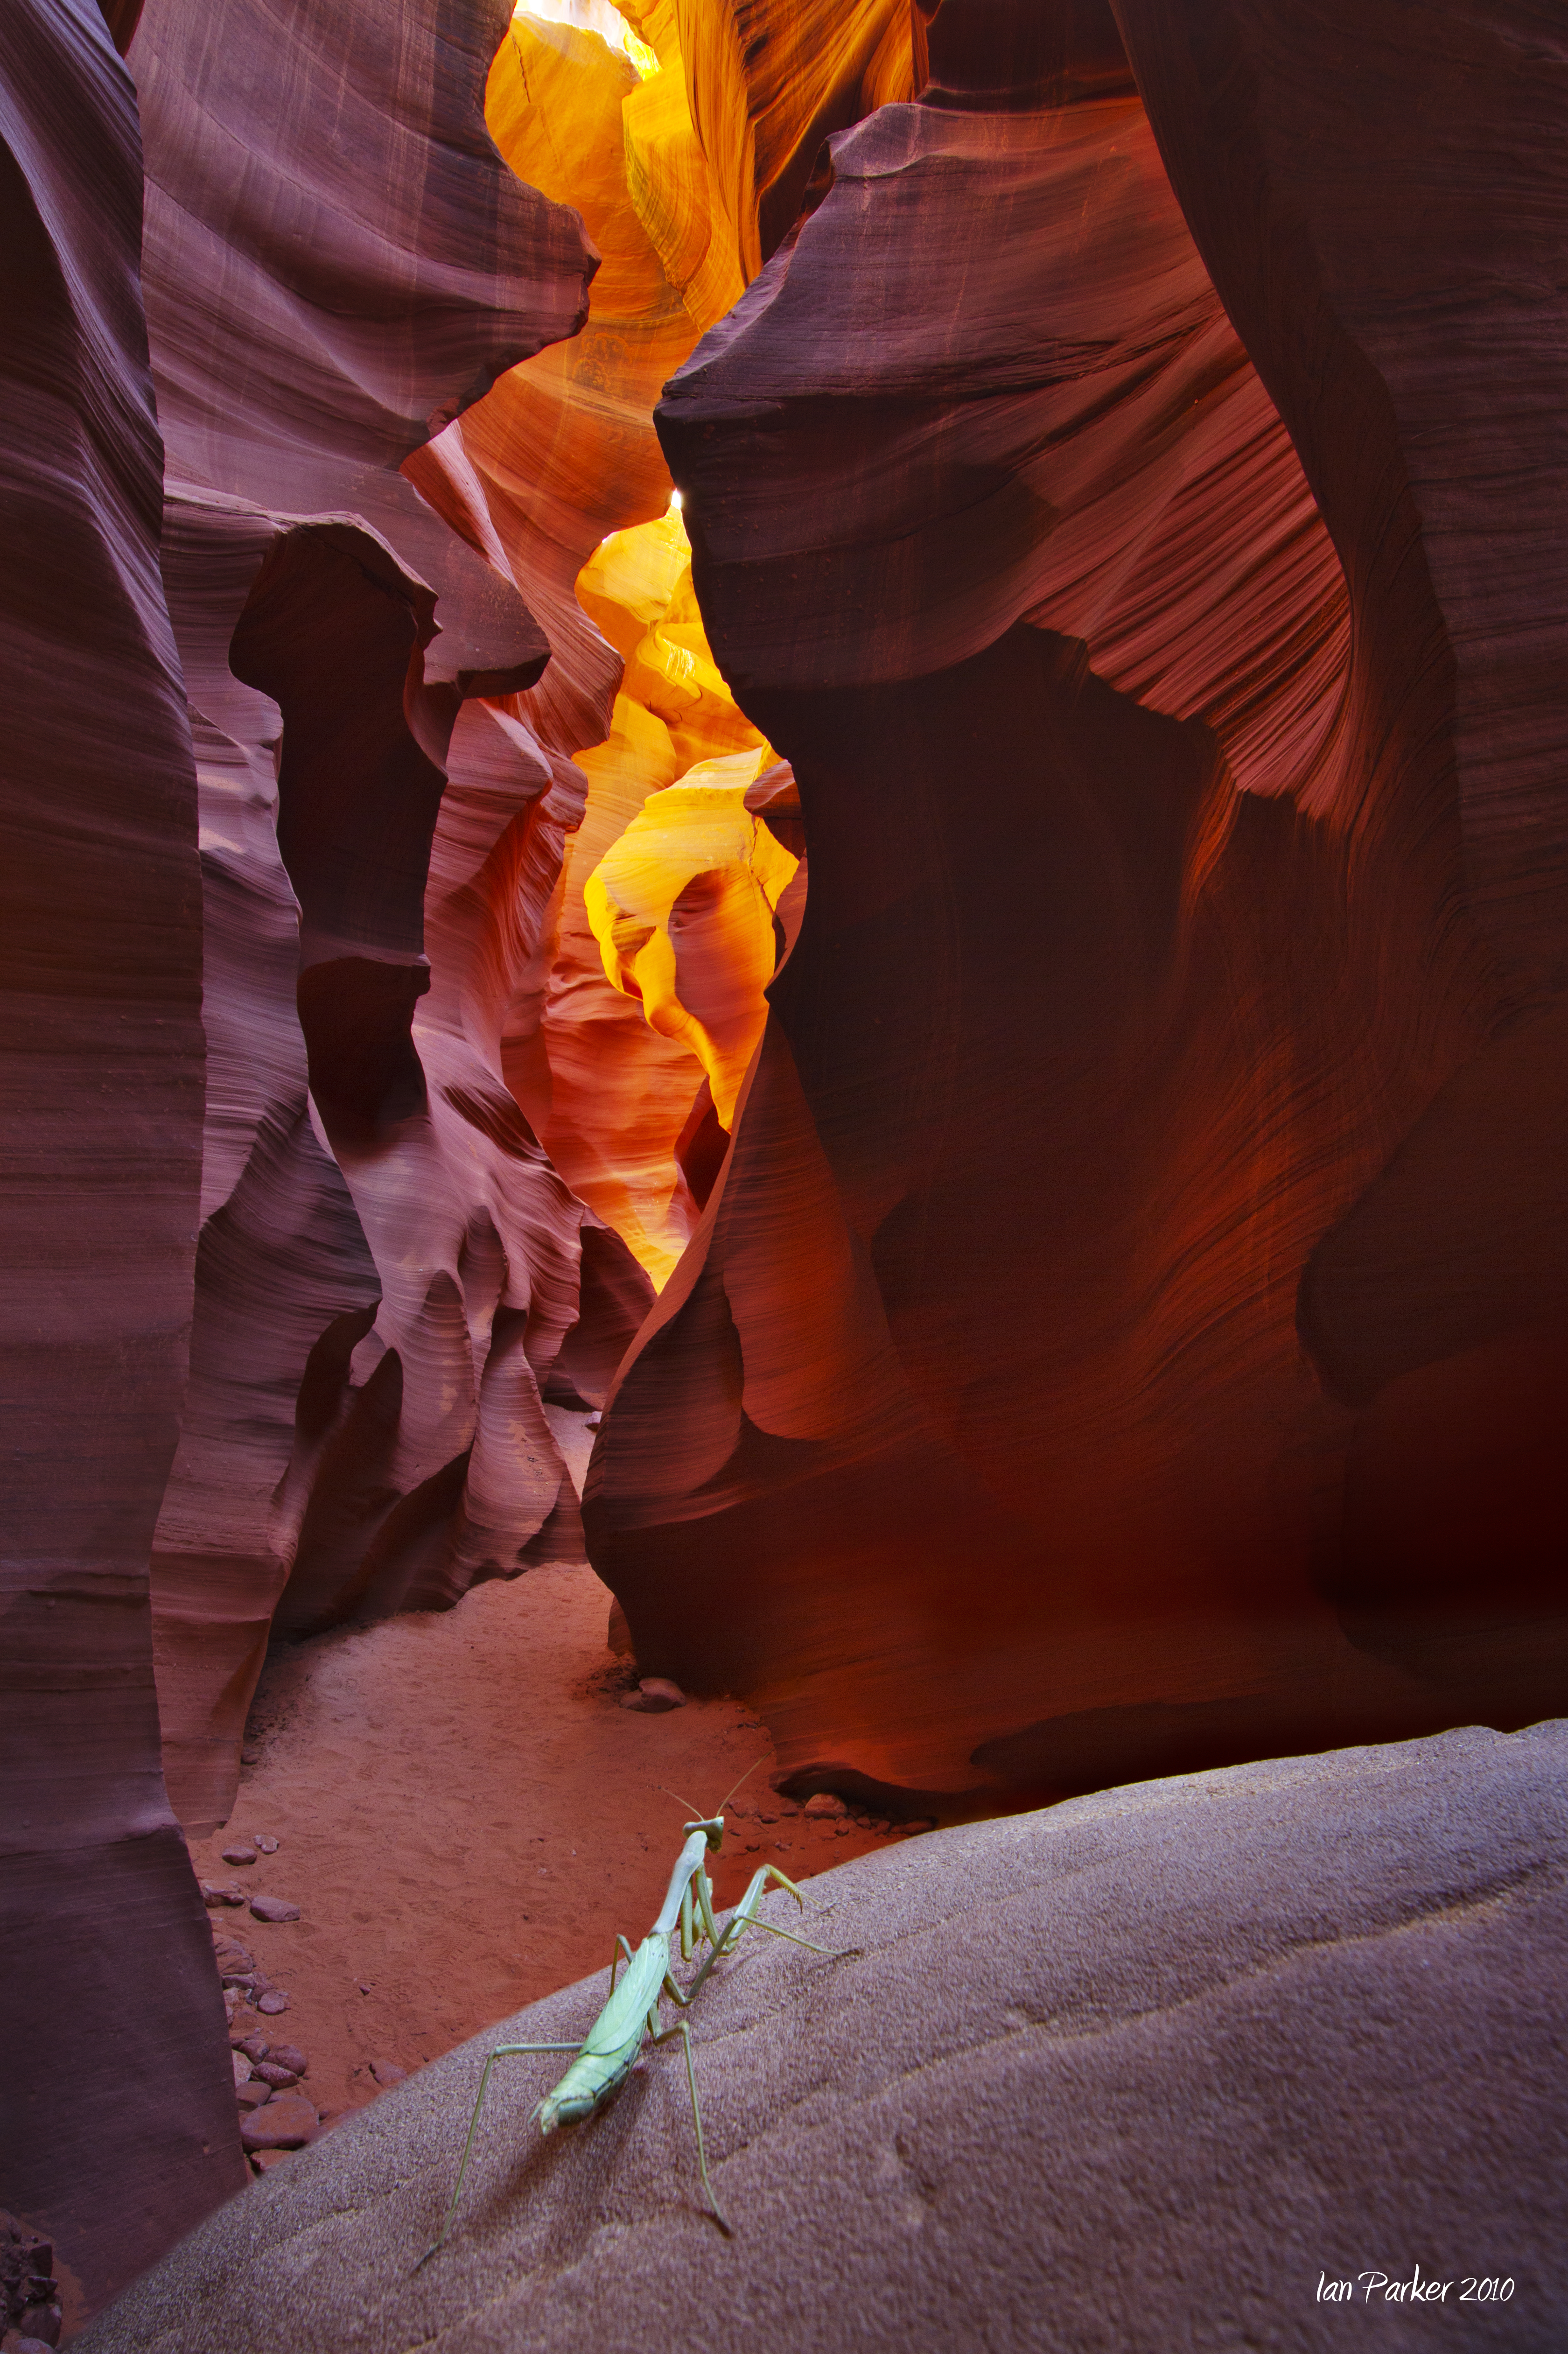
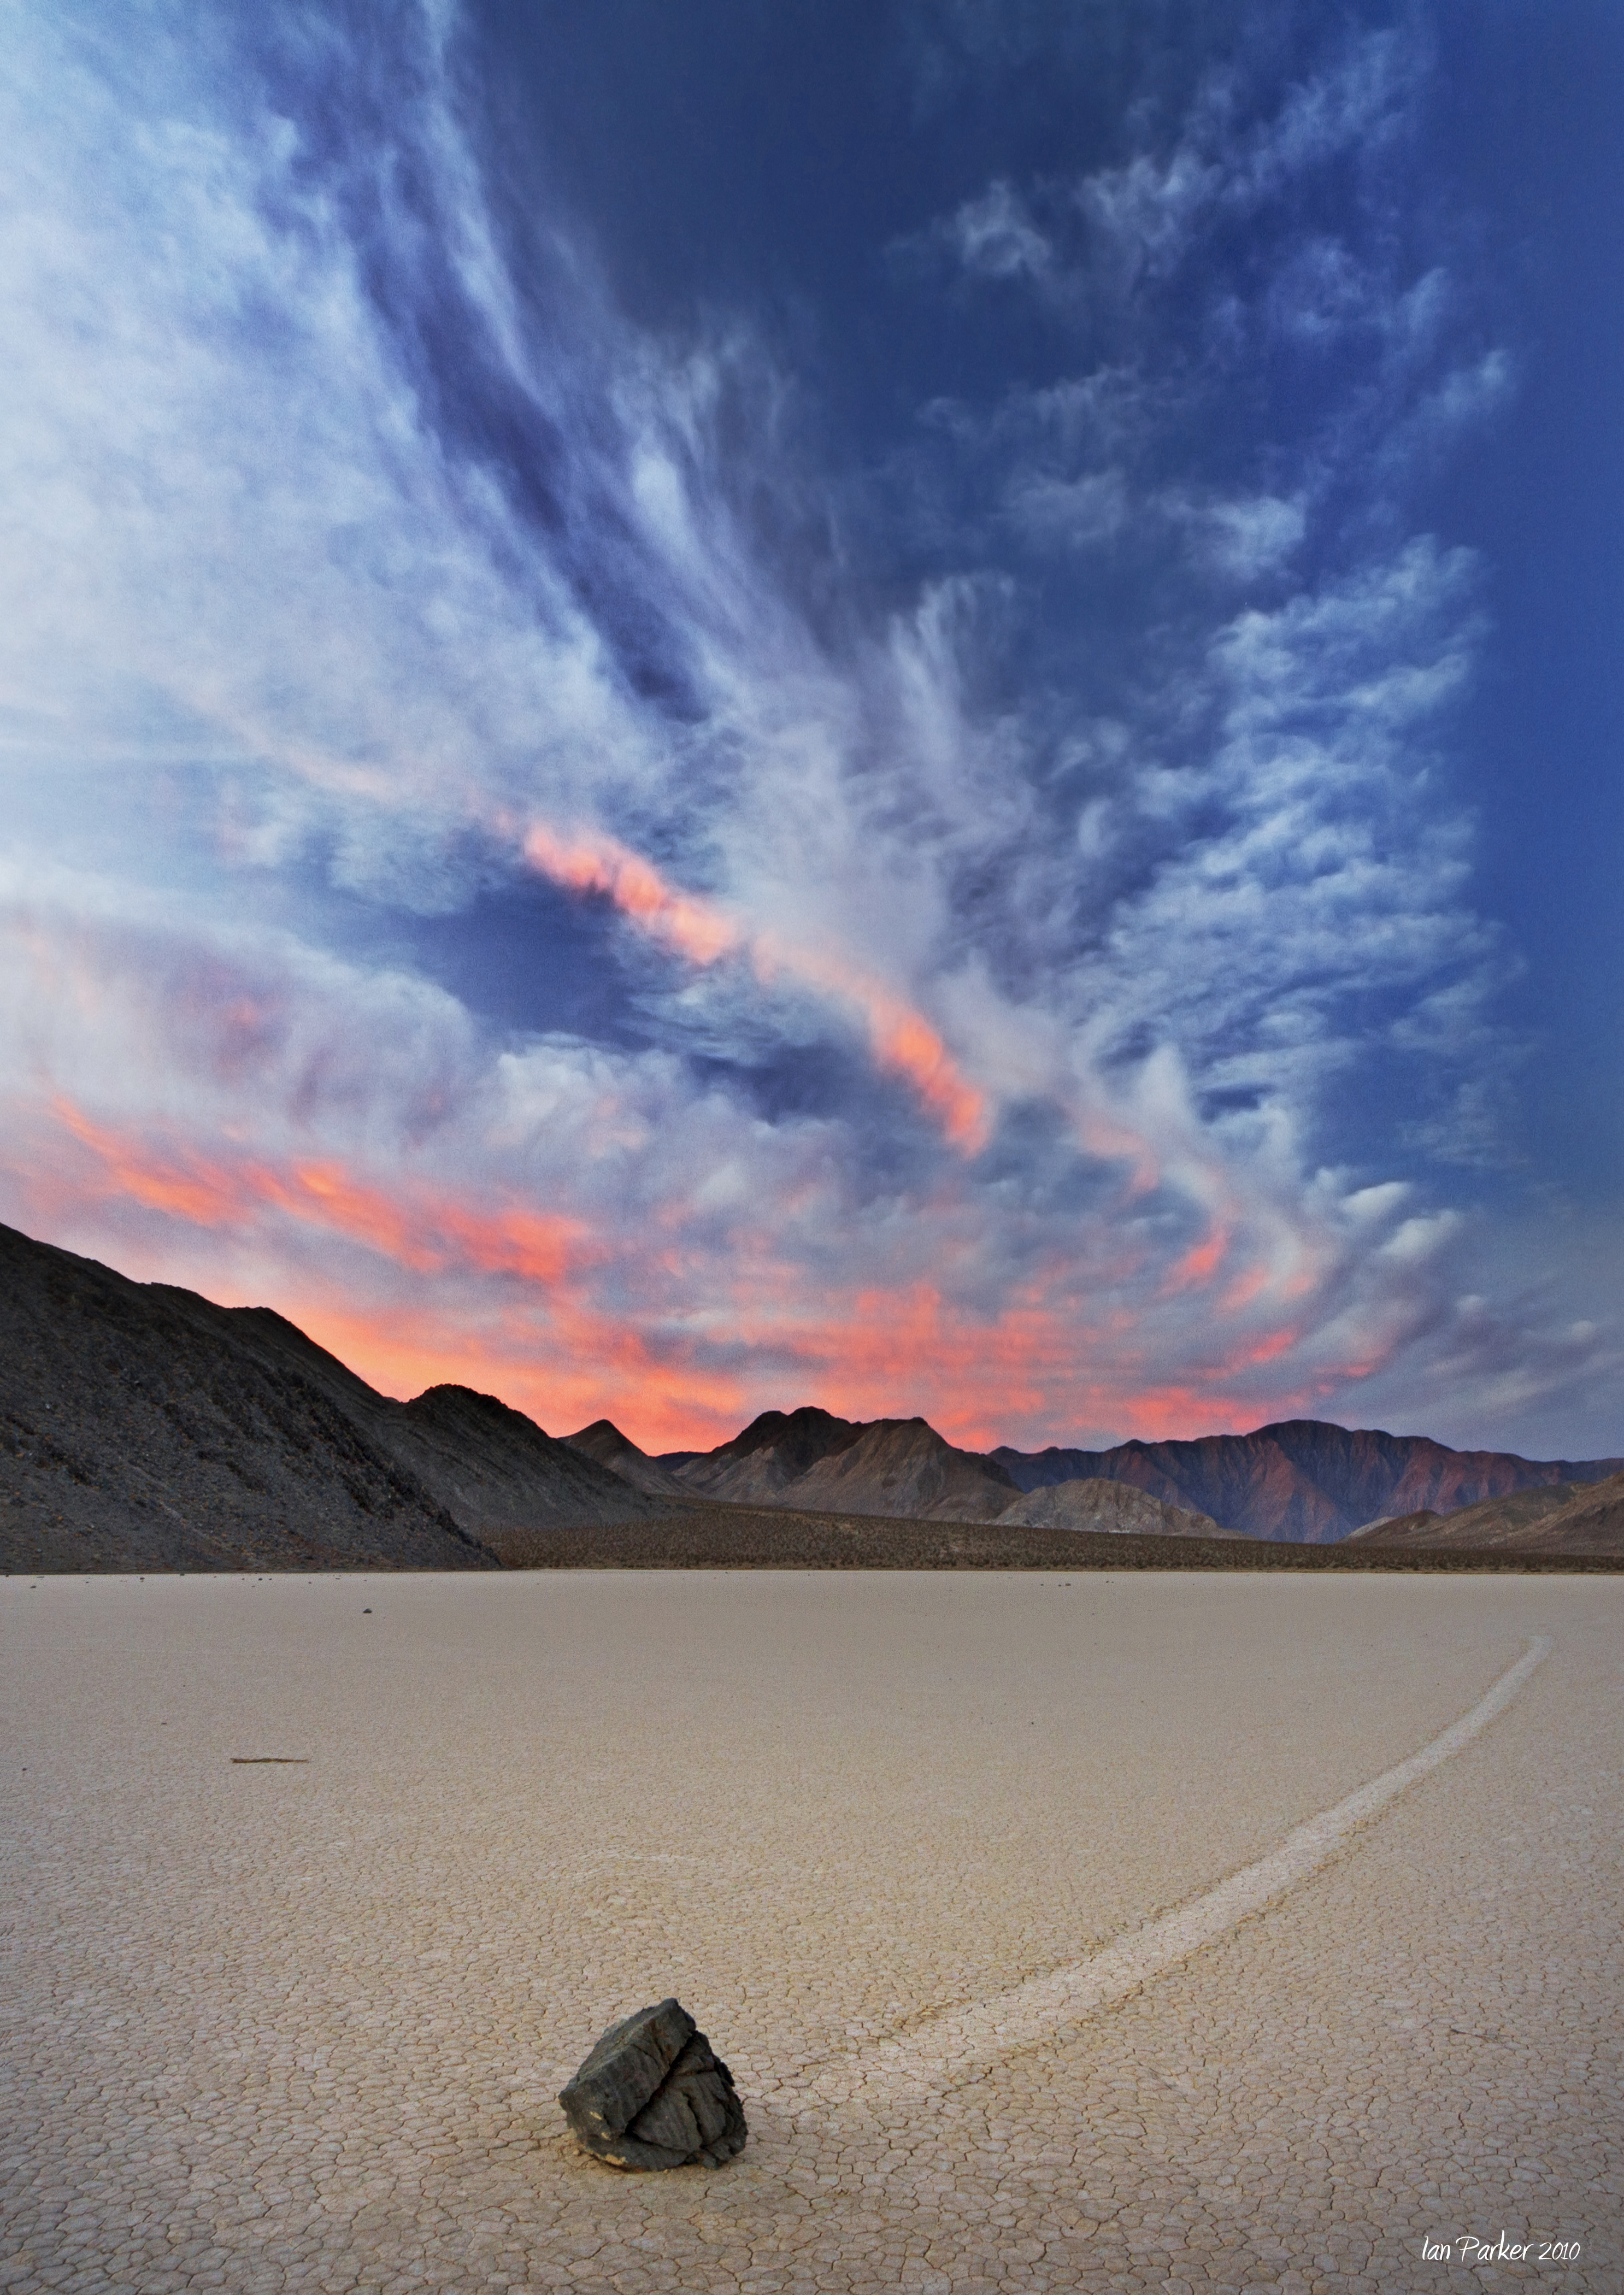

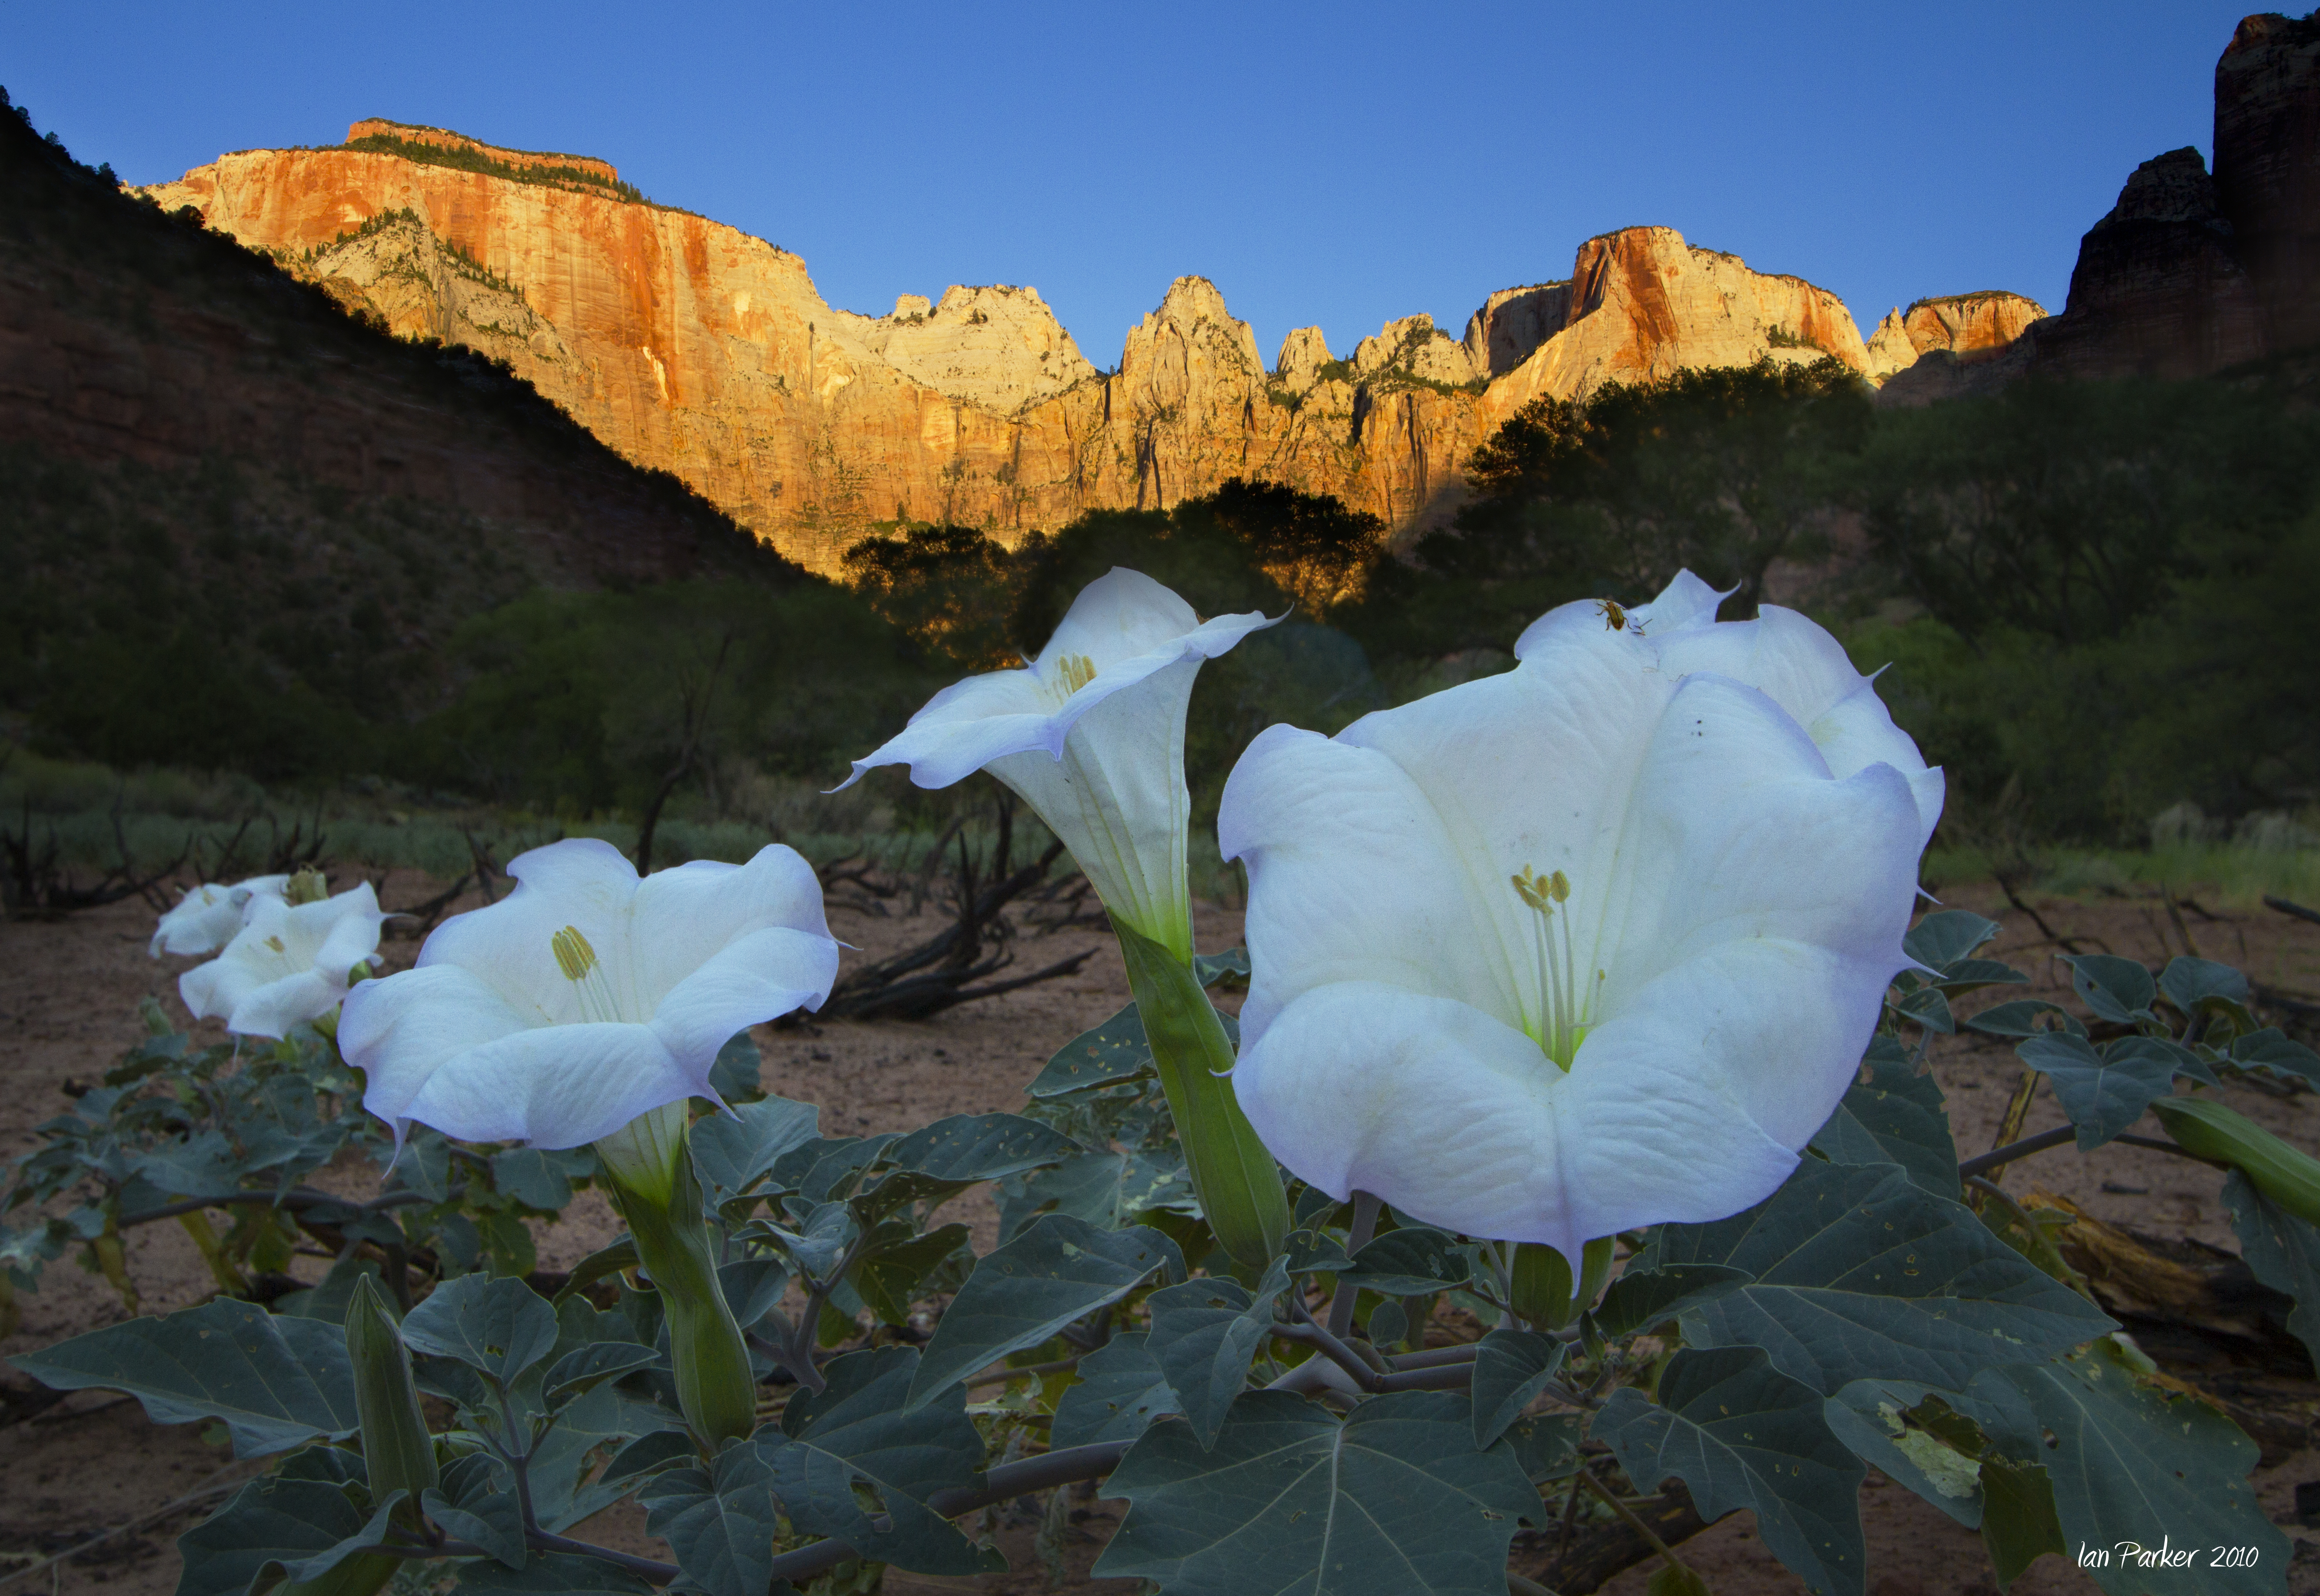


_star%20%20circles_symmetric%20crop%20tweak.jpg)